
Unit Tests
From the beginning, the Universal Windows Platform has supported Unit Testing via multiple test frameworks. Now with WinUI Desktop being generally available and given that you can’t do test-driven development without a test framework, a new way to create tests for it was required.
In this blog post, we’ll jump straight into how to create a Unit Test project for WinUI Desktop, using MSTest!
MSTest
I’m not going into the details of why you need tests in your project, since there are plenty of articles on why unit testing is a good idea, but a quick recap, for context, is always a good idea.
MSTest is the Microsoft Test Framework and it allows developers to create tests that are fully integrated with Visual Studio. MSTest v2 is a fully supported, open source, and cross-platform implementation of MSTest that supports .Net Framework, .Net Core/.NET 5, ASP.Net, UWP, and now WinUI.
Since WinUI Desktop apps are executed as MSIX packaged .NET 5 applications (more details here), creating tests for it is very similar to creating tests for .NET 5. The biggest difference is the same as the one we had for UWP apps: the UI Thread.
Given that WinUI Desktop is still very recent, we don’t yet have templates in Project Reunion to create Unit Tests based on WinUI3, so I will walk you through the steps required to make a Unit Test project based on a WinUI Desktop app. The process is similar to how to do unit tests for UWP apps. Lets get started!
File, New, Project
With the Project Reunion 0.5.7 VSIX installed, lets create a new packaged WinUI Desktop blank app:
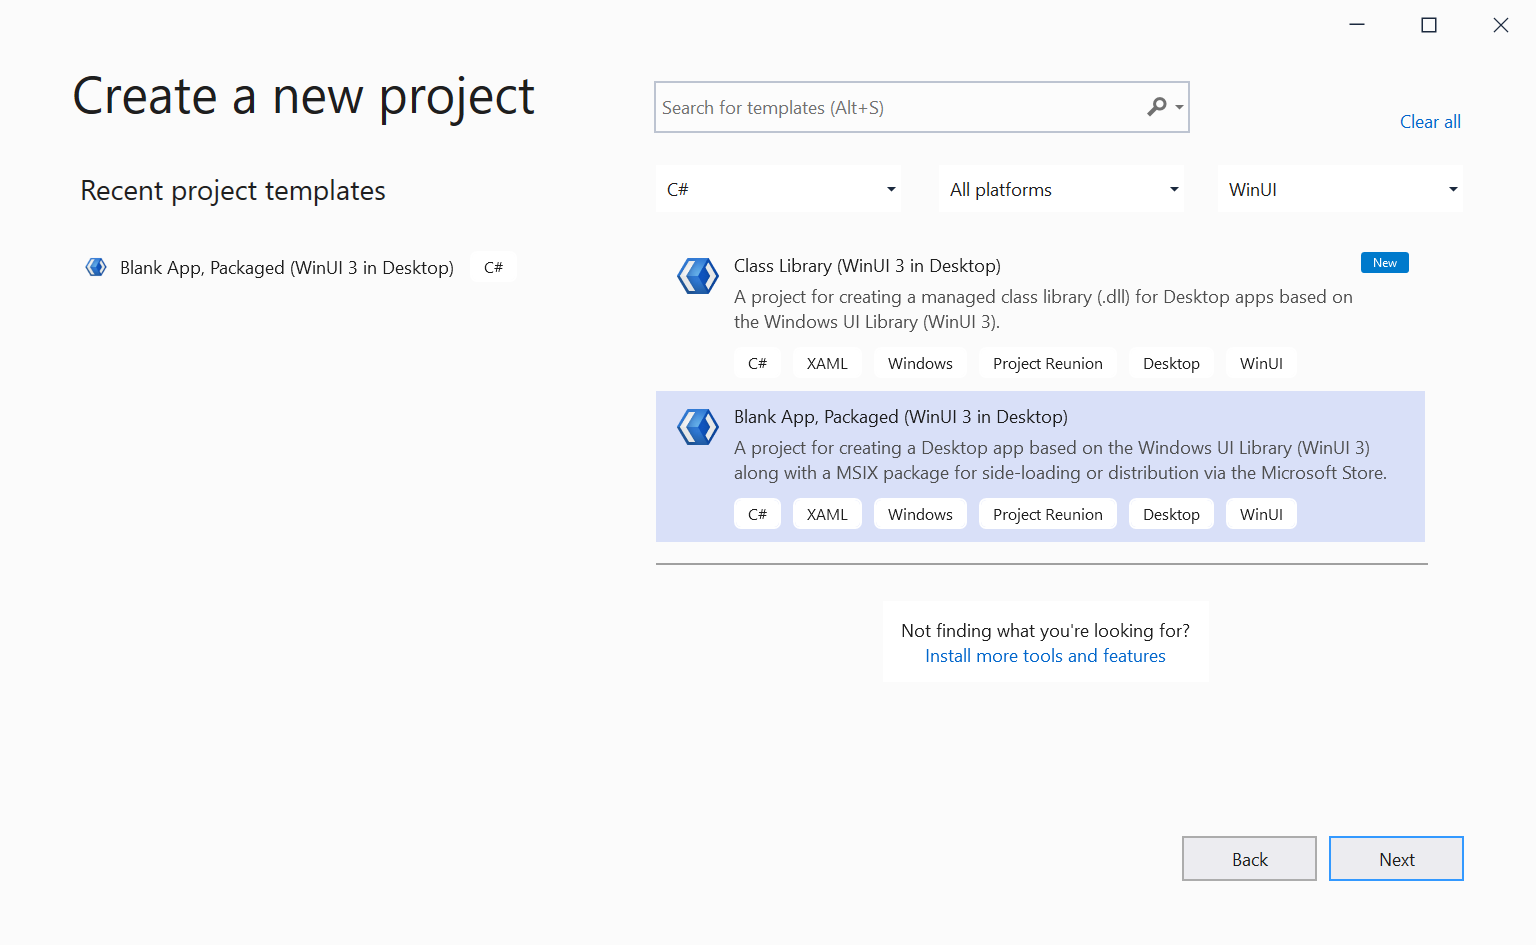
I’ve named mine as WinUIDesktopUnitTestApp1, because why not?
Remove the StackPanel and it’s content from the MainWindow.xaml file, and replace it with an empty Frame:
<Window
    x:Class="WinUIDesktopUnitTestApp1.MainWindow"
    xmlns="http://schemas.microsoft.com/winfx/2006/xaml/presentation"
    xmlns:x="http://schemas.microsoft.com/winfx/2006/xaml"
    xmlns:d="http://schemas.microsoft.com/expression/blend/2008"
    xmlns:local="using:WinUIDesktopUnitTestApp1"
    xmlns:mc="http://schemas.openxmlformats.org/markup-compatibility/2006"
    mc:Ignorable="d">

    <Frame />
</Window>
Make sure to remove the myButton_Click method from the MainWindow.xaml.cs file. Both these steps are just cleaning the default template, as we don’t need that in our unit tests.
Now to the fun part!
Preview features!
To leverage Unit Tests in WinUI Desktop, we need to enable a preview MSIX feature, which is turned on by the EnablePreviewMsixTooling MSBuild property. It will shift from having two projects (csproj+wapproj), to having only one project (a single csproj). For the time being, this feature is still under preview, so there is no template to help us use it. Nevertheless, it should not be complex to migrate an existing project to use it. Lets go through the steps.
First, lets manually edit the WinUIDesktopUnitTestApp1.csproj by double clicking on it in Solution Explorer. Inside the first PropertyGroup section, add this:
<EnablePreviewMsixTooling>true</EnablePreviewMsixTooling>We also need to move a few files around. Copy both the Images folder, as well as the Package.appxmanifest file, from the folder where the wapproj is, into the csproj‘s folder. I recommend you do that through File Explorer, so VS doesn’t try to alter your csproj file. Now, make sure your csproj references the copied files, like this:
<ItemGroup>
<AppxManifest Include="Package.appxmanifest">
<SubType>Designer</SubType>
</AppxManifest>
</ItemGroup>
<ItemGroup>
<Content Include="Images\LockScreenLogo.scale-200.png" />
<Content Include="Images\SplashScreen.scale-200.png" />
<Content Include="Images\Square150x150Logo.scale-200.png" />
<Content Include="Images\Square44x44Logo.scale-200.png" />
<Content Include="Images\Square44x44Logo.targetsize-24_altform-unplated.png" />
<Content Include="Images\StoreLogo.png" />
<Content Include="Images\Wide310x150Logo.scale-200.png" />
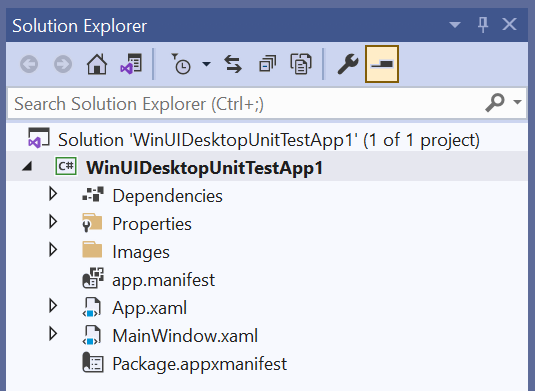
</ItemGroup>You can now completely delete the wapproj folder (WinUIDesktopUnitTestApp1 (Package)), as well as remove it from your solution. This is all that is needed to use the preview MSIX Tooling. You should have a much cleaner solution, with a single project, similar to this:
If you build and run this app as-is, it should run, but you still can’t create your tests. Lets now update this project to make it an actual test project. First, add this ItemGroup to your csproj:
<ItemGroup>
    <ProjectCapability Include="TestContainer" />
</ItemGroup>
This helps VS understand that this project is a test project. You may notice that the project icon in Solution Explorer will change when you save the csproj:

We also need the new NuGet packages that are fresh out of the oven!
<ItemGroup>
    <PackageReference Include="MSTest.TestAdapter">
        <Version>2.2.4</Version>
    </PackageReference>
    <PackageReference Include="MSTest.TestFramework">
        <Version>2.2.4</Version>
    </PackageReference>
    <PackageReference Include="Microsoft.TestPlatform.TestHost">
        <Version>16.10.0</Version>
        <ExcludeAssets>build</ExcludeAssets>
    </PackageReference>
</ItemGroup>
Notice the
<ExcludeAssets>build</ExcludeAssets>in theMicrosoft.TestPlatform.TestHostPackageReference node.
This will allow us to reference the MSTest types, and properly build and run our tests.
We now need to activate our test app, so it runs the tests we need it to run (as compared to just running the app and running all the tests, all the time). Lets edit our OnLaunched method from our App.xaml.cs file:
using Microsoft.VisualStudio.TestTools.UnitTesting.AppContainer;
...
protected override void OnLaunched(Microsoft.UI.Xaml.LaunchActivatedEventArgs args)
{
Microsoft.VisualStudio.TestPlatform.TestExecutor.UnitTestClient.CreateDefaultUI();
m_window = new MainWindow();
// Ensure the current window is active
m_window.Activate();
UITestMethodAttribute.DispatcherQueue = m_window.DispatcherQueue;
// Replace back with e.Arguments when https://github.com/microsoft/microsoft-ui-xaml/issues/3368 is fixed
Microsoft.VisualStudio.TestPlatform.TestExecutor.UnitTestClient.Run(Environment.CommandLine);
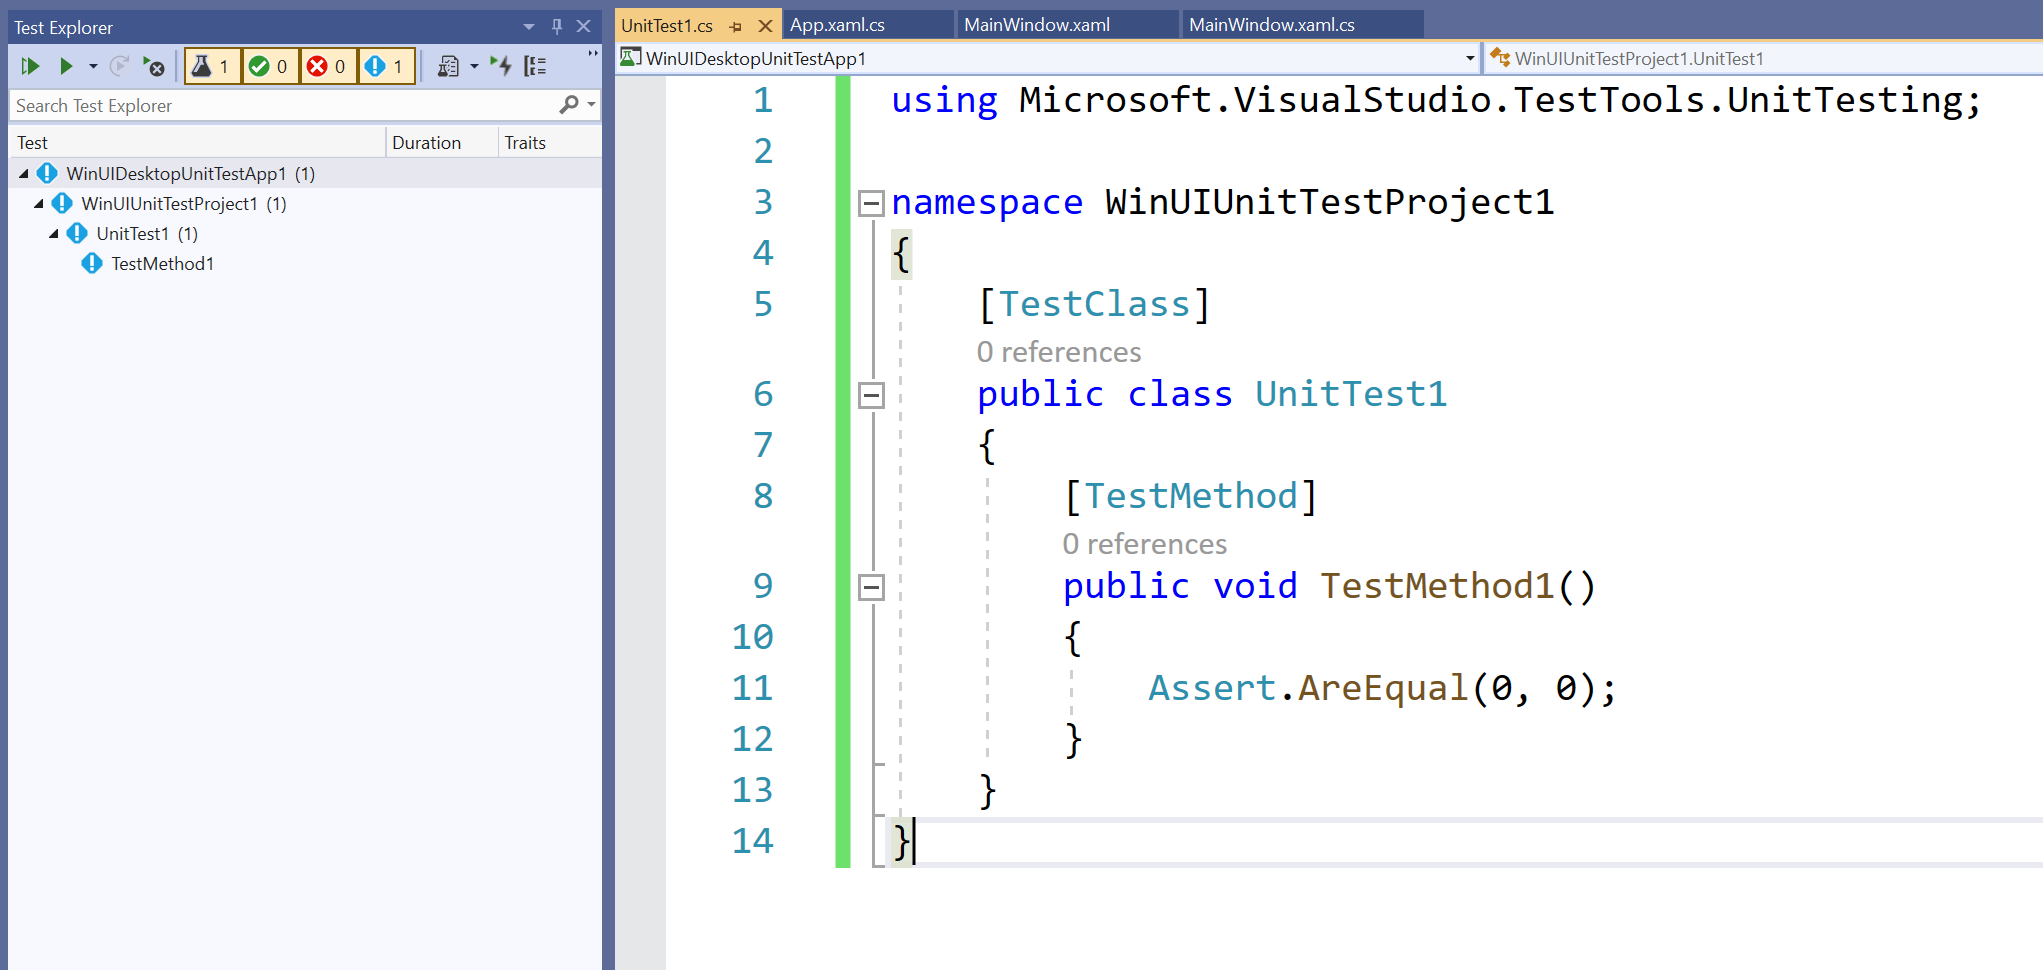
}Now the only missing piece is the actual test file, with our tests. Create a new C# file with a simple test inside it:
using Microsoft.VisualStudio.TestTools.UnitTesting;

namespace WinUIDesktopUnitTestApp1
{
    [TestClass]
    public class UnitTest1
    {
        [TestMethod]
        public void TestMethod1()
        {
            Assert.AreEqual(0, 0);
        }
    }
}
By simply saving this file, you should see that the tests are properly discovered on VS’s Test Explorer:
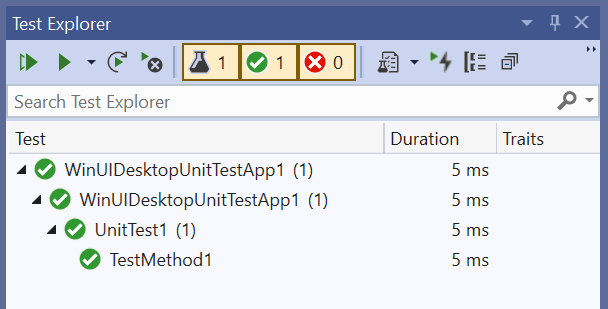
Right click on the test, and simply run it. This will build the project, deploy your MSIX package, run your tests, and update Test Explorer with the results!
Remember that this is all still under preview. Closing VS and opening it again usually helps fixing some issues, so have that in mind if something seems wonky.
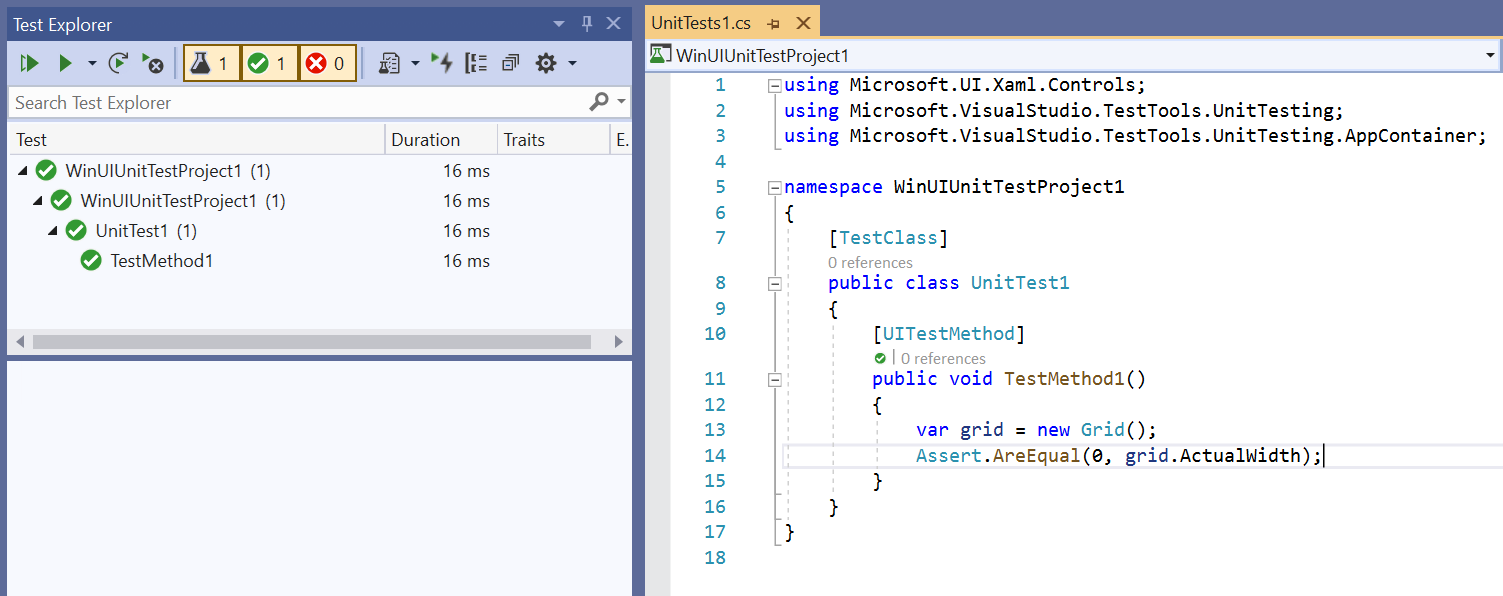
Now that the basics are working, lets create a test that uses the Microsoft.VisualStudio.TestTools.UnitTesting.AppContainer.UITestMethodAttribute. This allows you to run code directly in the UI thread of your WinUI3 Window. It is very likely that you will need to do so, given the fact that any code that creates or modifies a UI element usually needs to be executed from the UI thread. A code as simple as var grid = new Grid() will throw an exception if you try to run it from a regular TestMethod:
 TestMethod1
   Source: UnitTest1.cs line 11
   Duration: 44 ms

  Message:
    Test method WinUIDesktopUnitTestApp1.UnitTest1.TestMethod1 threw exception:
    System.Runtime.InteropServices.COMException: The application called an interface that was marshalled for a different thread. (0x8001010E (RPC_E_WRONG_THREAD)) For UWP projects, if you are using UI objects in test consider using [UITestMethod] attribute instead of [TestMethod] to execute test in UI thread.
  Stack Trace:
    ExceptionHelpers.ThrowExceptionForHR(Int32 hr)
    _IGridFactory.CreateInstance(Object baseInterface, IntPtr& innerInterface)
    Grid.ctor()
    UnitTest1.TestMethod1()
Luckily, the exception is quite clear on what we should do to fix the issue, so just replace the [TestMethod] with [UITestMethod], adding a using statement to Microsoft.VisualStudio.TestTools.UnitTesting.AppContainer, which will force this test to be executed on the UI thread.
And there you have it:
This is just the basics of what a simple test can achieve, but more complex test scenarios can be achieved by building up on this project.
Thank for reading, and see you next time!
Great post! Would you recommend adding
to the end of the OnLaunched method? Without it the empty window stays open for me after the tests are run. Or will this cause other unexpected issues?
If you build and run this app as-is, it should run
I can’t start my project because of the usual REGDB_E_CLASSNOTREG error. I guess it’s not yet ready to run without the package project.
Good stuff! Thank you. Any chance will you be able to use this with xUnit or is it strictly MSTest?
Thank you! The support for WinUI in MSTest came out paired with changes in VSTest as well, making sure they work together. There should be nothing blocking xUnit to support this as well, but they would need to provide similar capabilities for the specific .NET target frameworks that WinUI target.