Scaffolding in Visual Studio for ASP.NET Core projects has been a long-standing
feature which was added shortly after ASP.NET Core was
released. We have also had support for scaffolding from the command line
for many years. From that command line experience, we have heard
feedback from many users that we need an interactive CLI experience for
scaffolding. To that goal, we have been working on a new interactive
CLI tool, dotnet scaffold. This CLI tool has now been released as a
preview. In this post we will describe how you can acquire and use this
new command line tool. This tool is open source, you can view the code
in the scaffolding repo. That
repository contains the code for the dotnet scaffold tool as well as
other scaffolding related code.
Installing dotnet scaffold
To install this tool we will use the dotnet tool command. Execute the command below to get the latest released version installed.
dotnet tool install --global Microsoft.dotnet-scaffold
To install a specific version, visit the package on nuget.org. To install a specific version, visit the package on nuget.org. For more info on how to manage dotnet tools see the docs at .NET tools – .NET CLI | Microsoft Learn. In the command above we are installing the tool globally, but you can also install tools local to a folder. The .NET tools docs have more info on both of those approaches .NET tools – .NET CLI | Microsoft Learn.
Using dotnet scaffold
By default, dotnet scaffold is an interactive tool, meaning that you
invoke it, and it will prompt you for info as needed. For automation,
you can pass in all the parameter values, but we will discuss that in a
future post. Before running dotnet scaffold, make sure to change
directories (cd) to a folder where a .NET Core project exists. dotnet
scaffold has support for the following ASP.NET Core project types.
- Web app
- Web API
- .NET Aspire
- Blazor
In this post we will focus on the Web app option to show you around
dotnet scaffold, but all the scaffolders follow the same patterns and
prompts.
I created a new ASP.NET Core 9 web app using dotnet new with the command
dotnet new webapp -o MyWebApp. Then I used cd to change into that
directory. When you run dotnet scaffold, you’ll be prompted to select
the scaffolding category. See the screenshot below.
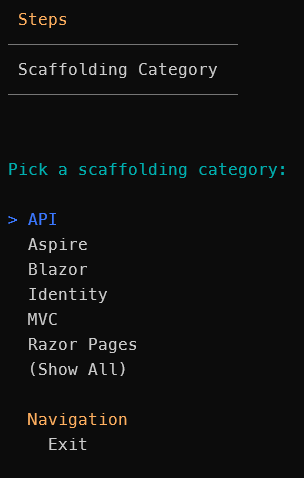
In the image above dotnet scaffold shows a list of the scaffolding
categories that are currently supported. To navigate this menu, you will
use the up and down arrow keys on your keyboard to select the desired
category. In the future as we add more scaffolders more categories may
appear. Here you’ll select the category of what you are wanting to
generate into your project. For example, let’s explore the Razor Pages
option. To select a category, navigate to it and type Return. That will
take you into the selected option. If you select an incorrect option,
you can always use Back under Navigation to go back to the previous
selection. After entering the Razor Pages option, you will see the
following options.
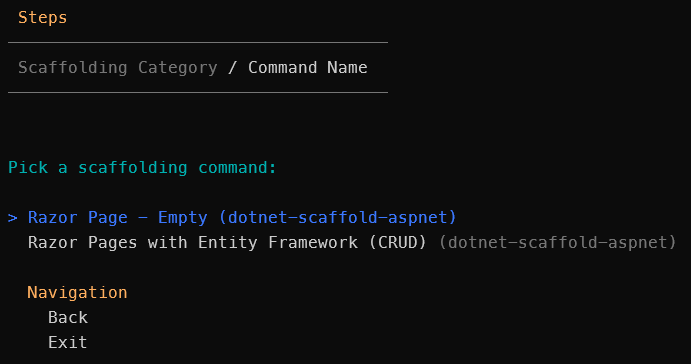
Now dotnet scaffold is prompting for the specific scaffolder which
should be invoked. In this case we see two options, the first option is
to create a new empty Razor Page. The second option will generate Razor
Pages based on a model class that is a part of the project. Values will
be persisted using Entity Framework into the selected database provider.
Let’s first run through the Empty scaffolder and then the CRUD one. The
empty scaffolder will generate a new Razor page with an associated code
file. This is equivalent to running dotnet new page. The generated files
will not have any customizations.
When you have the option Razor Page – Empty, selected hit the Return key to go into that option. After that you’ll be prompted to select the target project.
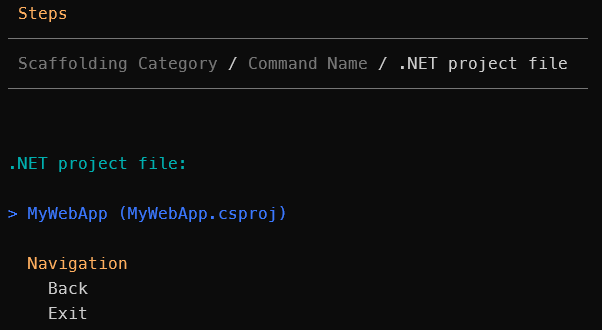
In this case we only have one, so we will select MyWebApp and hit the Return key. Then it will prompt for the name of the Razor Page to create. Give it the name About and hit the Return key. You’ll see the command working and then you should see the result below.

After this has completed you should see the files About.cshtml and About.cshtml.cs in the current working directory. When running this scaffold, it will use the current directory as the output location. Now let’s move on to see how the Razor Page EF option behaves.
Before invoking the EF scaffolders you need a model class for it to scaffold content for. I’ve created a new web app with the same command as before, dotnet new webapp -o MyWebApp and I’ve added the following class in the root of the project.
namespace MyWebApp;

public class Contact
{
    public int Id { get; set; }

    public string? Firstname { get; set; }

    public string? Lastname { get; set; }

    public string? Email { get; set; }
}
This is a very basic model class that can be used with Entity Framework.
Now we are ready to invoke dotnet scaffold. After starting it, select
the Razor Pages category and then the Razor Pages with Entity
Framework (CRUD) option. It will prompt you to select the project,
since there is only one project in this case you can hit Return because
it’s already selected. Next dotnet scaffold will prompt you to select
the model class as shown below.
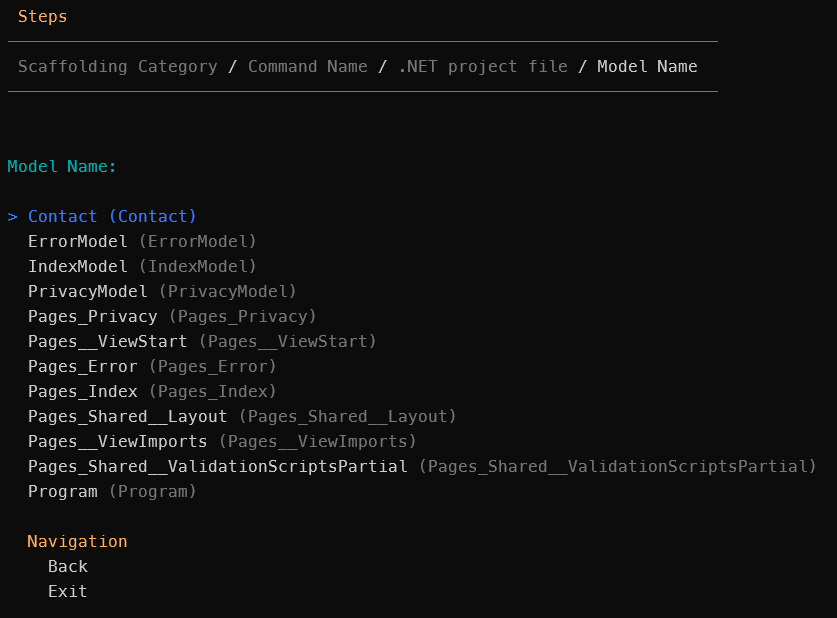
Select Contact and hit the Return key to proceed. The next screen will prompt you for the name of the database context. For this example, give it the name ContactDbContext and hit the Return key. It’s recommended for this value to end with DbContext based on convention, but that is not required. See the following image.

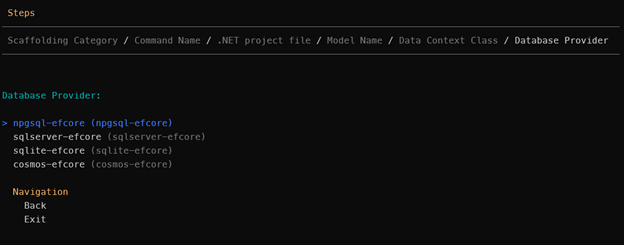
After you hit the Return key, you will be prompted to select the database provider.
The following list summarizes the options on that screen.
- npgsql-efcore = PostgreSQL
- sqlserver-efcore = SQL Server
- sqlite-efcore = SQLite
- cosmos-efcore = Cosmos DB
To keep things simple, we will select the sqlite-efcore option. SQLite is a file based database and doesn’t have any external dependencies. Select that option and hit Return. You’ll be prompted to select what operations should be scaffolded. See the next image.
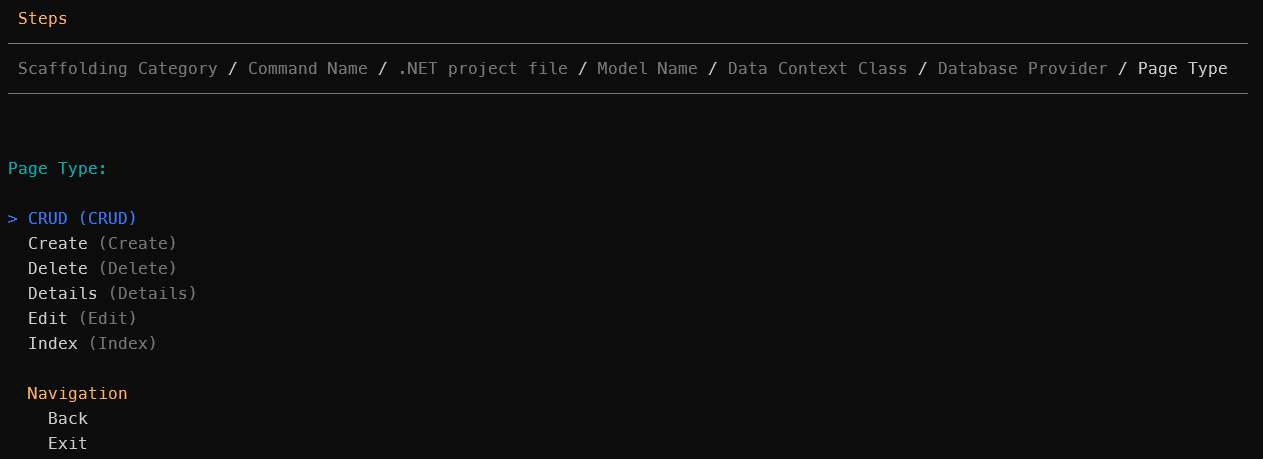
You can select an individual item to be created, or you can select the CRUD option to scaffold the full set of pages. Select the CRUD option. Next, you’ll be prompted if you want to include prerelease packages. Since we are working with .NET 9 preview, select Yes for that option and hit Return. After that the scaffolding operation will start. You’ll see a spinner showing that it is running, and it will emit messages for the operations that are taking place. When it is complete you should see a result similar to the following screenshot.

After performing this operation, the following changes will have been applied to the project.
- The project file has package references added for Entity Framework
- Program.cs has been updated to initialize the database connection
- appsettings.json has been updated with connection information
- ContactDbContext.cs has been created and added to the project root directory
- Razor Pages for CRUD operations has been added to the Pages folder
The content has been generated but the database has not yet been initialized. To prep the database, we need to create a migration and then update the database. Do that with the following commands.
- dotnet ef migrations add initialMigration
- This will add a new migration named initialMigration. You can give it whatever name you prefer here.
- dotnet ef database update
- This will apply the migrations to the database
After running those commands, you should be ready to run the app with the dotnet run command. After the app starts the URL will be shown in the terminal, open that URL in your browser with /ContactPages at the end of the URL. You should see something like the following.
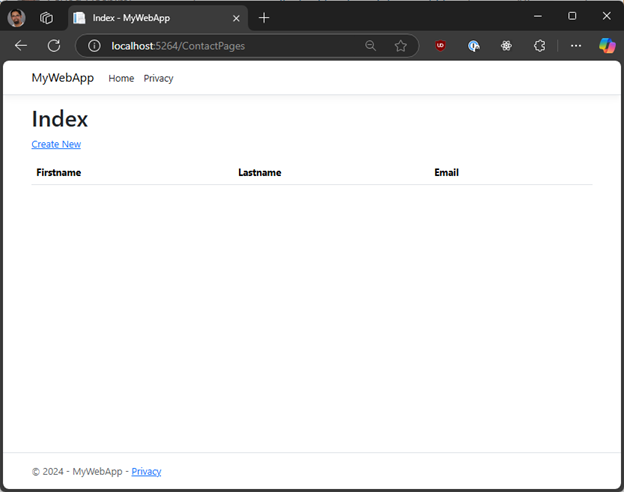
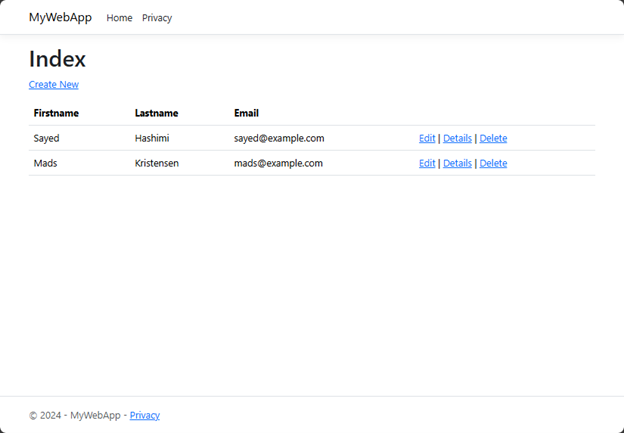
Using this page you can create new contacts and manage existing ones as well. After you add some contacts they will appear on this page as shown below.
Now you have an ASP.NET Core Razor Pages web app which can manage a
contact list. After scaffolding you will likely want to customize the
generated content to suit your needs. You can use dotnet scaffold to
scaffold other content as you develop your app.
Recap
In this post we have used dotnet scaffold to add Razor Pages to a new
ASP.NET Core .NET 9 web app. Keep an eye on this blog for more
information on changes to dotnet scaffold. We are hoping that you will
try out this new command line tool and provide us some feedback so that
we can improve this going forward. In particular, we are very interested in
feedback on the interactivity of this command line tool.
The following section has info on how you can provide feedback.
Feedback
You can share feedback with us by filing an issue in the Scaffolding repo. You can also send feedback via the Developer Community: report any bugs or issues via report a problem and share your suggestions for new features or improvements to existing ones. Let us know what you think in the comment below.


The pictures are off. The Model Name is twice and the one for Database Provider is missing. The one for the Data Context Class is one too low (due to the Model Name duplication).
Hello, my apologies, thanks for letting me know. I have fixed up the images. If you see any other issues, please let me know.
Extensibility is one of our main goals but we are currently focused on getting the interactive flow polished. We will be sharing info on how to make your own scaffolders, and how to extend existing scaffolders later.
Can it be extended with custom flows?
There’s a broken source link on/next to “The .NET tools docs has more info on both of those approaches.”
Sorry about that, I have fixed that.