
Right before the holidays we put together a new release, version 2.4.0, of the C++ REST SDK. One of the new features added in the library is support for targeting Android using the Visual Studio 2015 cross platform mobile development, as well as the x86 Android emulator. In this post I’m going to walk through showing how to create an Android Native Activity that utilizes the C++ REST SDK.
Creating a New Android Native Activity
To create a new Android application start by using the Native-Activity Application (Android) project template under Visual C++ -> Cross Platform.
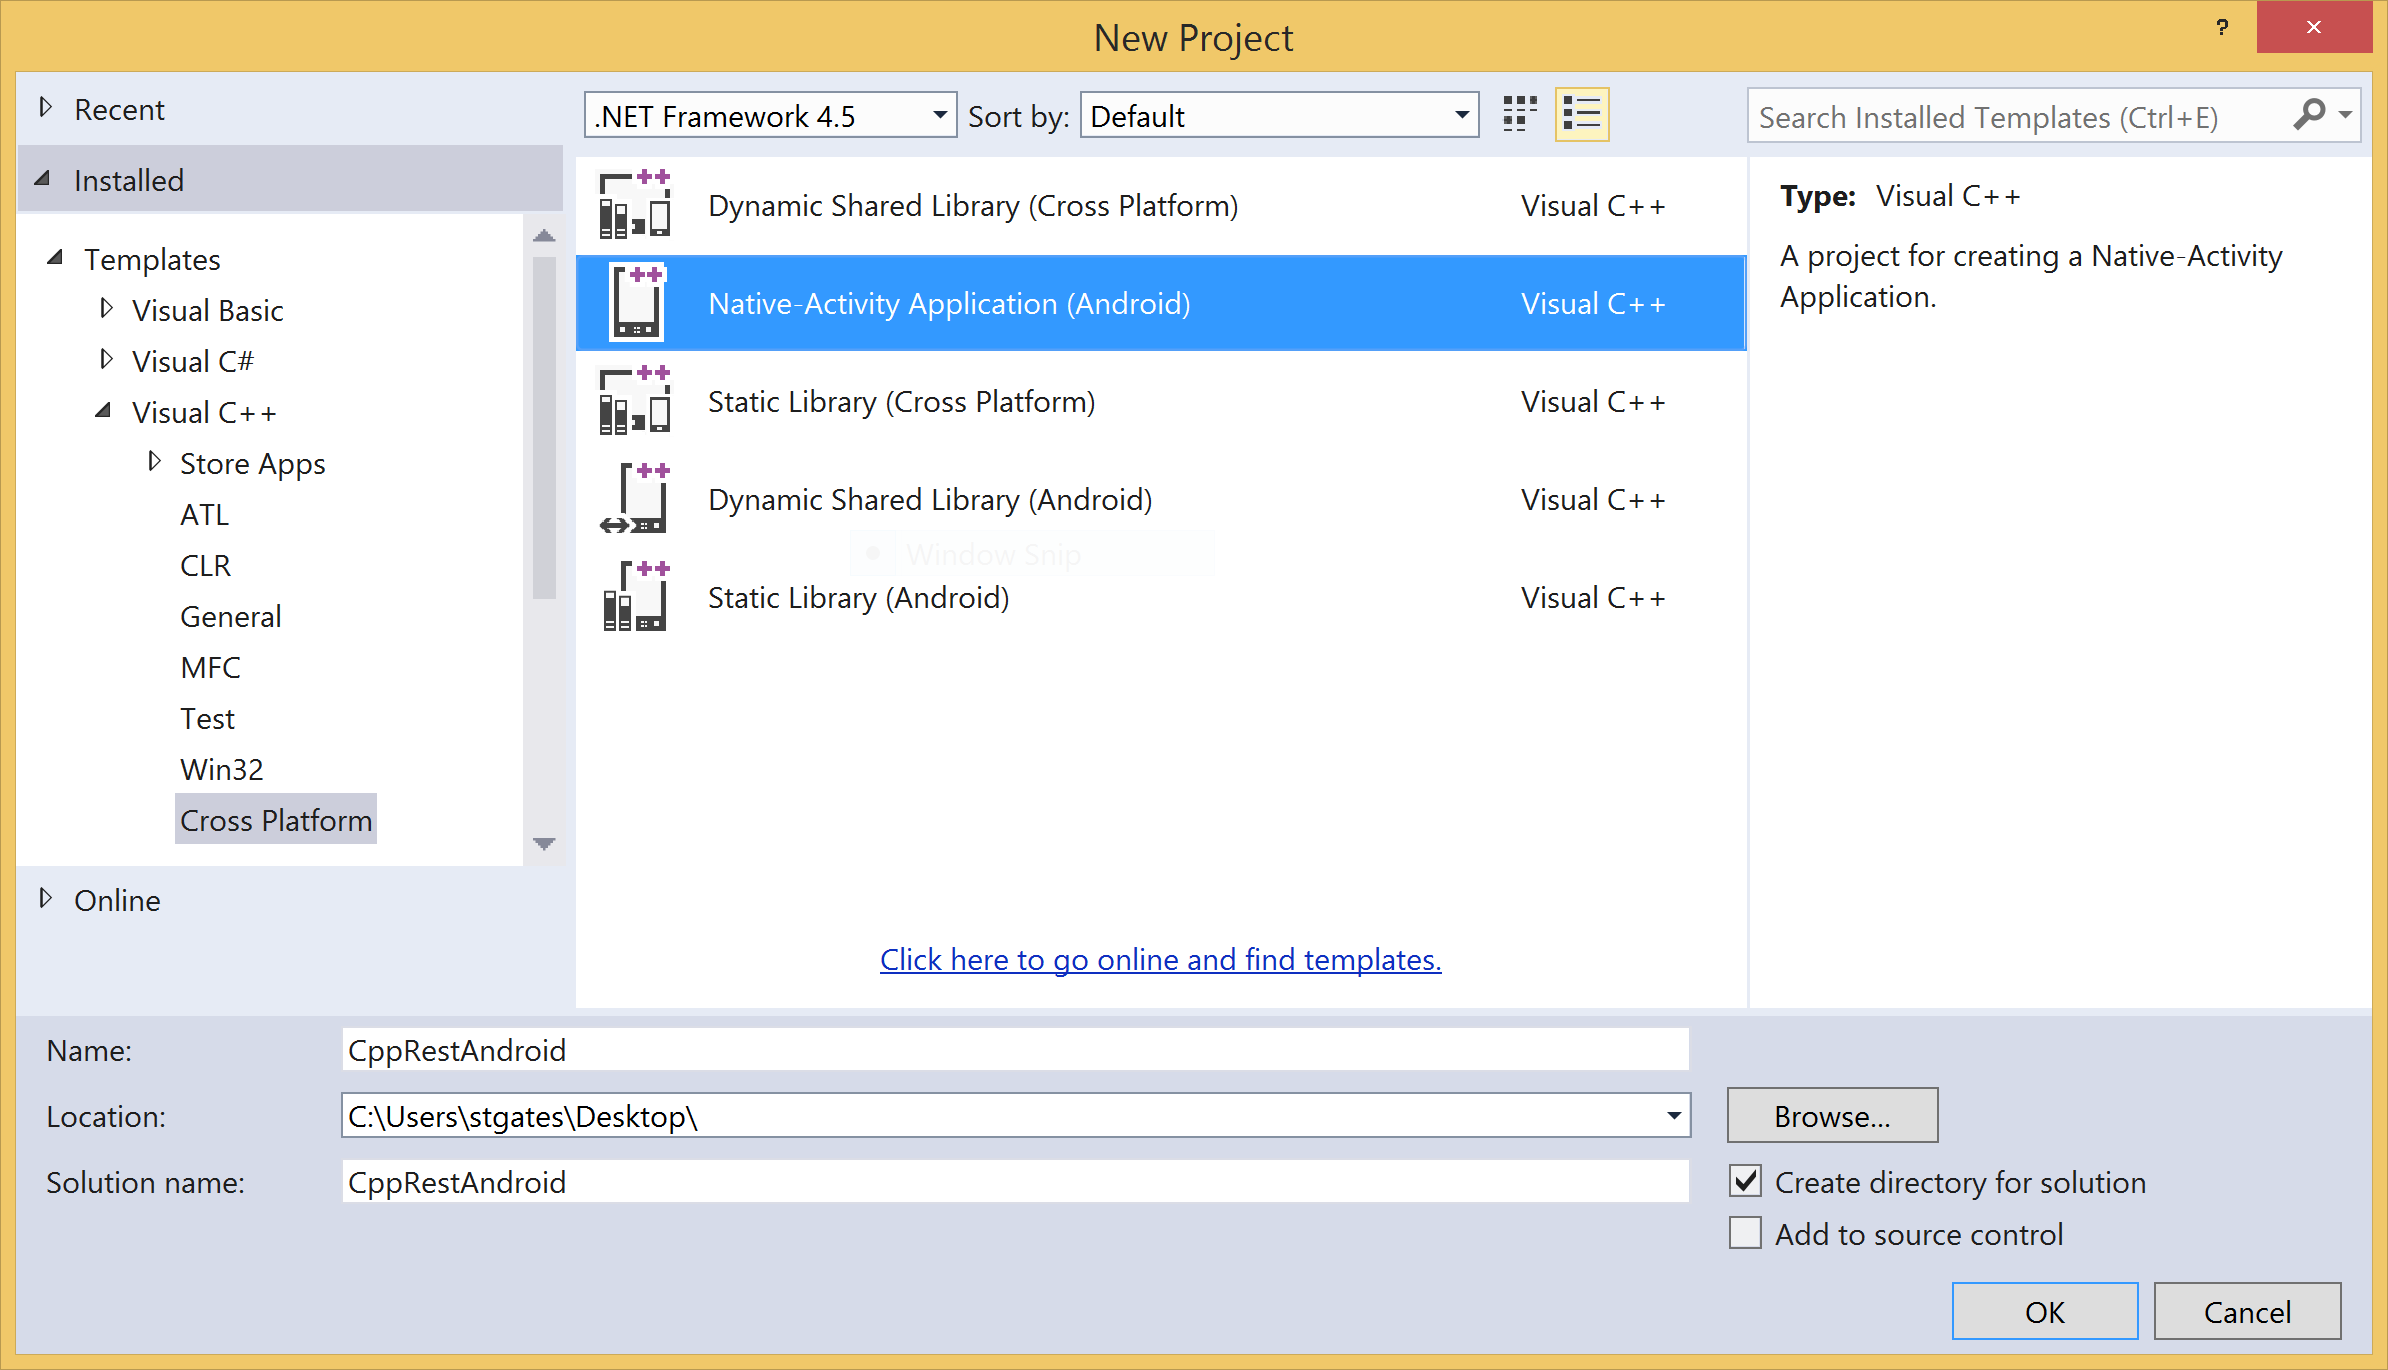
Once the template is complete you will have an Android application that when run will cycle through displaying solid colors on the screen, changing colors if the screen is touched. Next let’s setup the C++ Rest SDK to use with the application.
Adding the C++ REST SDK NuGet Package
To help make targeting Android an easy experience we’ve released a NuGet package of the C++ REST SDK for Android. The package includes binaries for targeting both ARM devices and the x86 emulator. You can add a reference to the NuGet package by right clicking on the Native Activity project and clicking “Manage NuGet Packages…”. Once the dialog is up search for the C++ REST SDK and select the Android package:

After you click ‘Install’ Visual Studio will take care of downloading the C++ Rest SDK package, its dependencies, setting up the include paths, and linking with the correct libraries. Next you will need to make a few changes to the C++ properties for your project in order to utilize the C++ REST SDK. The default Android templates don’t enable all the C++ features the C++ REST SDK needs. Bring up the Configuration Properties for the project you added the NuGet package to and make the following changes:
- Update to C++11 support: C++ -> Language -> C++ Language Standard = C++11
- Turn on C++ exceptions: C++ -> Code Generation -> Enable C++ Exceptions = Yes
- Change to use the GNU standard library: General -> Use of STL = gnustl_static
- Turn on RTTI: C++ -> Language -> Enable Run-Time Type Information = Yes
The C++ REST SDK is about connecting to services so in order for our Android application to be able to access the Internet, permissions need to be added to the manifest. Open the AndroidManifest.xml file and insert a uses-permission tag:
 ...
 <!-- This is the platform API where NativeActivity was introduced. -->
 <uses-sdk android:minSdkVersion="9" android:targetSdkVersion="19"/>

 <!-- Internet permissions -->
 <uses-permission android:name="android.permission.INTERNET" />

 <!-- This .apk has no Java code itself, so set hasCode to false. -->
 <application android:label="@string/app_name" android:hasCode="false" android:debuggable="true">
 ...
The last change that needs to be made is to initialize the C++ REST SDK with the Java Virtual Machine (JVM), before calling any of the APIs in the library. This is done by calling the cpprest_init function. For a Native Activity it is easiest to add the cpprest_init call in the android_main entry point function. You can access the JVM from the android_app structure. Add the following function call to your android_main:
/**
 * This is the main entry point of a native application that is using
 * android_native_app_glue. It runs in its own thread, with its own
 * event loop for receiving input events and doing other things.
 */
 void android_main(struct android_app* state) {

     cpprest_init(state->activity->vm);

     struct engine engine;
 ...
If you were creating a shared library instead of a Native Activity you simply could call cpprest_init(…) in your JNI_OnLoad function. Now the application is all set to start using the C++ Rest SDK.
Walkthrough Making a Request with the C++ REST SDK
For this simple walkthrough we will modify the application to make an HTTP request to a server when the screen it touched. To do this we will use the http_client, so at the top of main.cpp add the following include and using namespace statements:
 #include <cpprest/http_client.h>

 using namespace web::http;
 using namespace web::http::client;
We will use a boolean variable to track if a HTTP request has failed or not. Locate the struct saved_state declaration at the top of the file and add a new Boolean field call requestFailed:
 /**
 * Our saved state data.
 */
 struct saved_state {
    float angle;
    int32_t x;
    int32_t y;
    bool requestFailed;
 };
Now if the HTTP request fails, instead of continuing to cycle through and display different colors on the screen, we will make the whole screen turn red. Locate the engine_draw_frame function and examine the saved state in the engine. If a request has failed call glClearColor to set the color to red. The engine_draw_frame function should look something like the following:
/**
* Just the current frame in the display.
*/
static void engine_draw_frame(struct engine* engine) {
    if (engine->display == NULL) {
        // No display.
        return;
    }

    if (engine->state.requestFailed)
    {
        // Fill screen with RED color.
        glClearColor(1, 0, 0, 1);
    }
    else
    {
        // Just fill the screen with a color.
        glClearColor(((float) engine->state.x) / engine->width, engine->state.angle,
((float) engine->state.y) / engine->height, 1);
    }

    glClear(GL_COLOR_BUFFER_BIT);
    eglSwapBuffers(engine->display, engine->surface);
}
Next add the code to actually make the HTTP request. Find the engine_handle_input function and send and HTTP request to http://www.bing.com, if a motion pressing down event occurs. Here is what it should look like:
/**
* Process the next input event.
*/
static int32_t engine_handle_input(struct android_app* app, AInputEvent* event) {
    struct engine* engine = (struct engine*)app->userData;
    if (AInputEvent_getType(event) == AINPUT_EVENT_TYPE_MOTION) {
        engine->state.x = AMotionEvent_getX(event, 0);
        engine->state.y = AMotionEvent_getY(event, 0);

        // Only make an HTTP request if the motion even is a press down
        // and a prior request hasn't failed.
        if (!engine->state.requestFailed && AMotionEvent_getAction(event) == AMOTION_EVENT_ACTION_DOWN)
        {
            try
            {
                http_client client("http://www.bing.com");

                // Wait for response headers and check status code.
                http_response response = client.request(methods::GET).get();
                if (response.status_code() != status_codes::OK)
                {
                    engine->state.requestFailed = true;
                    LOGW("Received HTTP status code other than 200.");
                }

                // Wait for entire response body.
                response.content_ready().wait();
            }
            catch (const http_exception &e)
            {
                engine->state.requestFailed = true;
                LOGW(e.what());
            }
        }

        return 1;
    }
    return 0;
}
Note in this example we are performing a blocking wait synchronously on the HTTP request made in the event handler. In a real application the calls to get() and wait() probably shouldn’t be made and instead asynchronously handled with a task continuation.
Finally in engine_init_display make sure to initialize the requestFailed variable to false:
 ...
 engine->display = display;
 engine->context = context;
 engine->surface = surface;
 engine->width = w;
 engine->height = h;
 engine->state.angle = 0;
 engine->state.requestFailed = false;
 ...
Now make sure the current configuration and architecture for the solution is Debug and x86 and build the application, making sure there are no compilation errors.
Debugging in the x86 Emulator
With the application building you can run it in the x86 emulator. Add a breakpoint where the HTTP request is being made, in the engine_handle_input function around line 169. Make sure the VS Emulator Android Phone is selected and start debugging.

Once the emulator has launched and the application is started click on the phone emulator in the application to simulate a touch event. The debugger should stop at your breakpoint and you can step through making the HTTP request.

In addition to debugging in the x86 emulator, if an Android device is connected you can deploy to the device as well. For the instructions covered in this post and more information about how to use the C++ REST SDK on Android take a look at the documentation on CodePlex. Included with this blog post is a zip file with a Visual Studio solution containing the complete projects.
Additional Android NuGet Packages
As part of our work to create a NuGet package for the C++ REST SDK targeting Android we also created NuGet packages for all of its dependencies. There are now NuGet packages for use with Android for Boost.Atomic, Boost.Chrono, Boost.Date_time, Boost.Filesystem, Boost.Locale, Boost.Random, Boost.System, Boost.Thread, Libiconv, and OpenSSL. Even if you aren’t using the C++ REST SDK you can easily use these libraries in your Android applications.
0 comments