Overview
Visual Studio 2015 preview (download here) introduces the ability for developers to create Android Native Activity application as a part of the cross-platform mobile development. Android platform with Android Native Activity (API Level 9) introduced the capability to create pure C/C++ applications. While there is some hidden Java JNI code in the background the idea is to abstract this detail away from the developer. Native Activity applications are popular for gaming (e.g. Unreal 4) and graphic intensive (OpenGL) applications. This post will guide you through the
experience of creating a Native Activity application and walking through the developer lifecycle of editing, building and debugging Native Activity code. As you walk over this experience in Visual Studio we welcome your thoughts and any feedback that you might have.
Getting Started
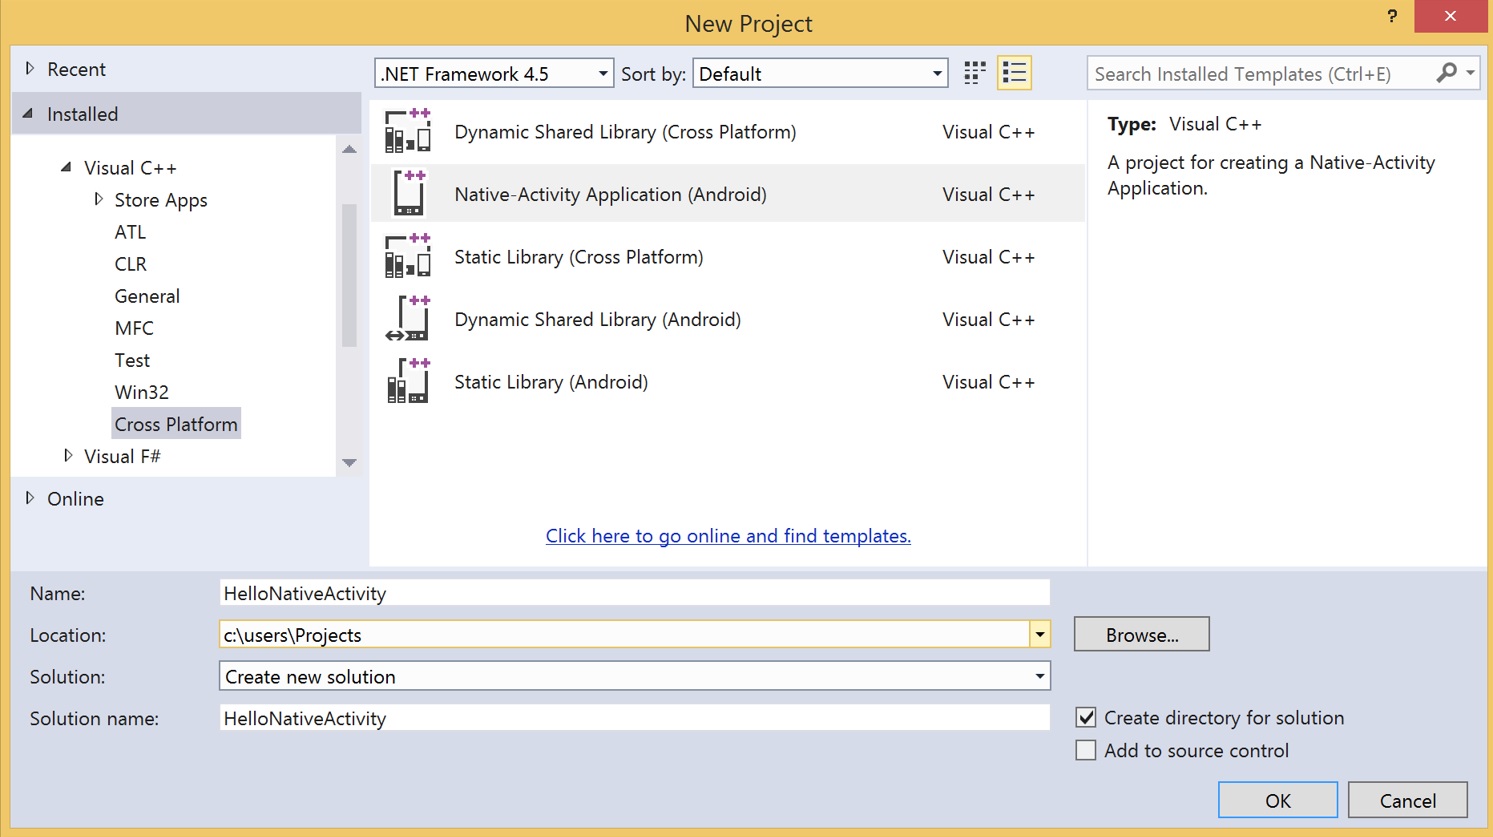
In order to get started with creating Native Activity Applications please grab the cross-platform mobile tools required which enable this experience. If you haven’t done so already please refer to this post which walks you over the acquisition experience. Once the tools have been acquired let us start with creating the OOTB Native-Activity Application, for doing so choose the Native Activity Application template available under the ‘Visual C++ – Cross Platform’ node.
The Native-Activity Solution
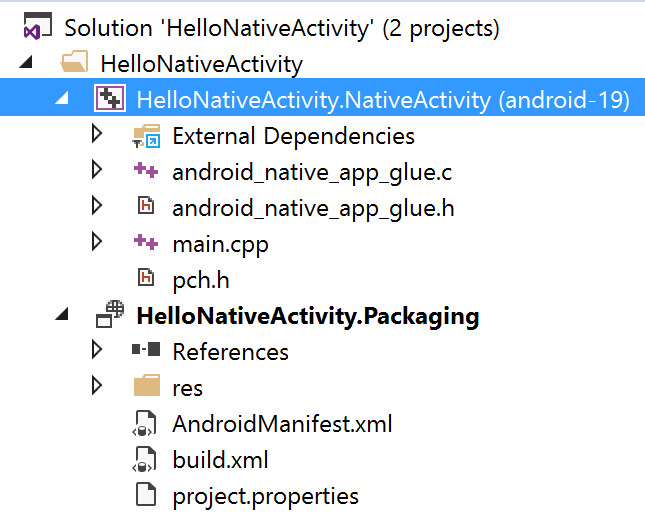
Let’s explore the template created starting with the solution architecture. The ‘HelloNativeActivity’ solution has two projects the ‘HelloNativeActivity.NativeActivity’ and ‘HelloNativeActivity.Packaging’ project as shown in the figure below. The NativeActivity project is used to encapsulate all the C/C++ code specific for this application.

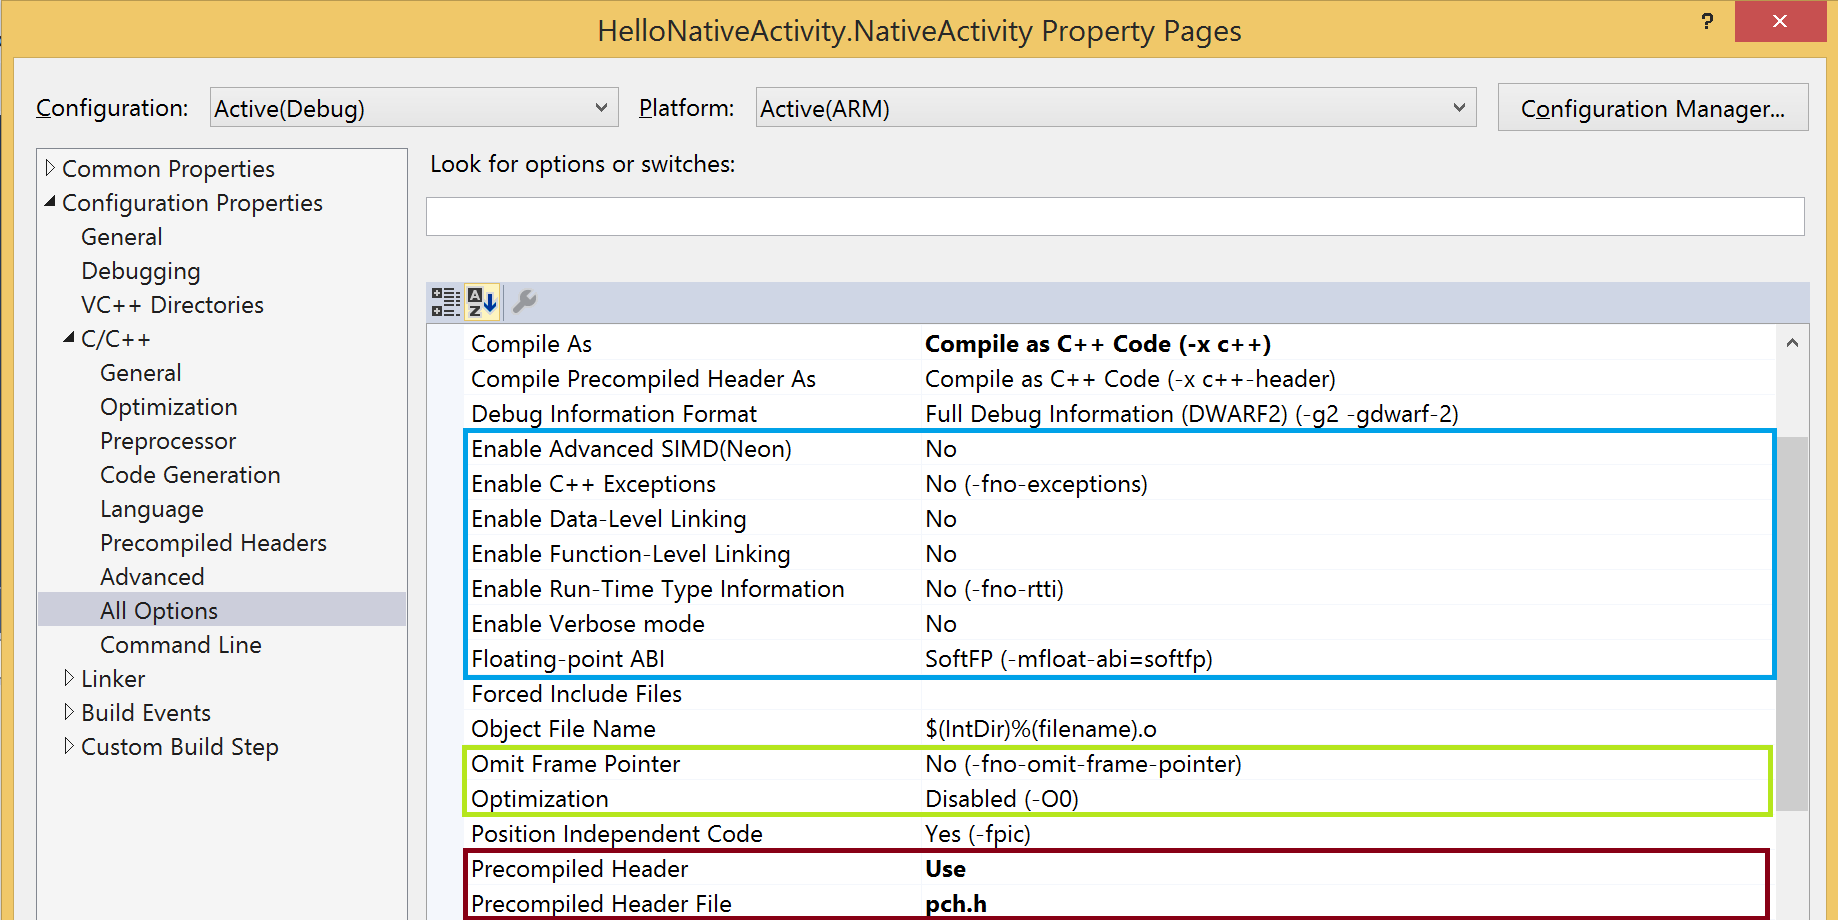
Exploring the property pages for the NativeActivity project users can set project properties such as the target Android API Level, Name of the library and the platform toolset. Notice as a part of our cross-platform mobile enablement we have added support for the CLANG toolchain (made available from the Native Development Kit (NDK)) when targeting the Android platform. This includes adding support in the property pages for easily providing compiler build flags for ‘Code Generation’, ‘Optimization’ and even the use of ‘Precompiled Headers’.
Moving over the NativeActivity.Packaging project, the second project in the HelloNativeActivity solution is used to bundle up the Dynamic Shared Library and create a complete Android Application (.apk) by invoking the Ant Build System. Because this is a NativeActivity solution this project doesn’t contain any Java code but this project can very well be used to compile Java code as well, as a part of the Ant build invocation. Also notice all other packaging details such as the Android Manifest file (AndroidManifest.xml), the Ant Build (build.xml) are found in this project as well.
Edit->Build->Debug cycle
The cross-platform mobile experience is designed for a fast edit-build-debug cycle. As a part of this experience full intellisense support has been introduced for Clang toolchain when targeting the Android platform. This is in addition to other common code authoring features such as refactoring, quick navigation and others. The figure below depicts these various features in play.
Next let us explore the source for our NativeActivity application. Let’s start with main.cpp source file, ‘android_main’ function is the entry point function for any native-activity application and is running the event loop for receiving input events and doing other things. Let’s edit the source to log the number of sensors available on a particular debug target (emulator/device) by adding the following code section and build. You can add this code segment before the ‘if (state->savedState != NULL)’ conditional block start.
ASensorList sensorList;
int counter = 0;
int numSensorsDiscovered = ASensorManager_getSensorList(engine.sensorManager, &sensorList);
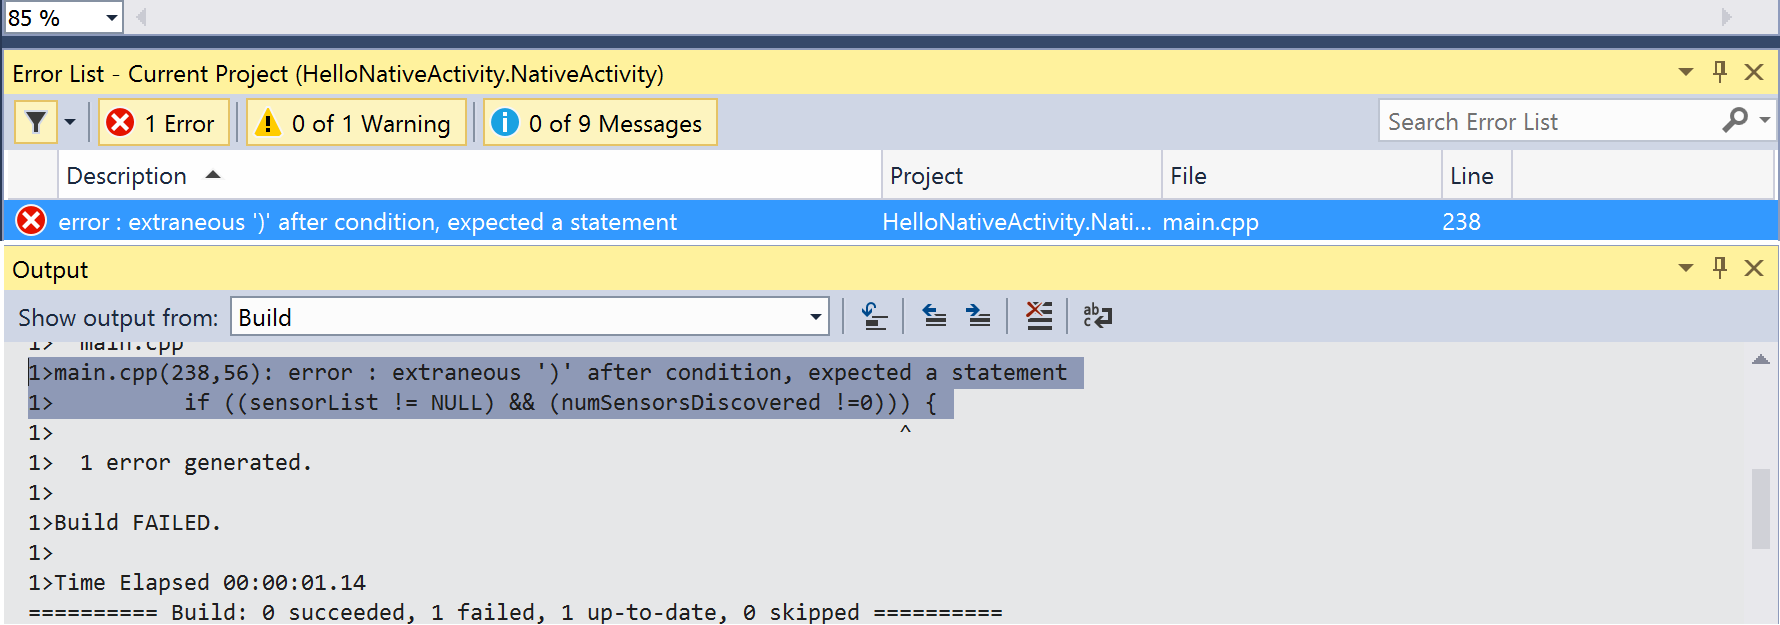
if ((sensorList != NULL) && (numSensorsDiscovered !=0))) {
LOGI(“%d sensors were discovered on this device“, numSensorsDiscovered);
}
This code section has a bug to demonstrate the work that has been done to provide diagnostic support with Clang’s well known features such as Fix-It and others at play (shown below). In this particular case the code section we added had an extra parenthesis on the line highlighted above and once it’s edited out the application builds correctly.
Lastly, let us now try to debug this application by setting a breakpoint in this newly added code section. Since the fast x86 based Microsoft emulator is already up and running the debug target is already configured to start debugging. On hitting F5, you can see the debugger break point is hit and debugger features such as the Autos window, Locals window and other features such as the watch window, expression evaluation, and traversing source under debug mode with step-in, step-out all work correctly as well as illustrated in the figure below.
Wrap Up
This blog should give you working knowledge on how to use Visual Studio for creating Android Native-Activity applications. In addition to this the blog should help you understand the various features we have added for a lean-mean edit-build-debug cycle. We will follow up this blog post with additional posts diving deeper into key features. This is a preview release and as with any preview release, the goal for us is to collect feedback and learn from you. We are considering future support for other platforms too and your feedback is critical in shaping the direction of our product.
Sharing feedback is easy! Make feature suggestions on UserVoice, log bugs you find on our Connect site and send us a smile or frown from inside the IDE. You can also leave comments below. In addition to this if you are looking to have a directed conversation with our product team on this topic, please reach out to us through email (aasthan@microsoft.com). We would love to know more and connect with you.


0 comments