

How have major cities like London and New York been affected by Covid-19 and how can we use historical data to explore how these effects might impact us in a post-Covid world? This was the question posed at a Microsoft Data + AI Hackathon held in partnership with the University of Oxford and Observable HQ at the New York City Reactor Meetup space this July.

Attendees were encouraged to develop new insights based on the following criteria:
- Is data retrieved from an Azure data storage service? (Azure Cosmos DB, Azure Storage)
- Is data processed using an Azure data analysis service? (Azure Data Factory, Azure Synapse)
- Is data visualized using an Azure data visualization service? (Power BI)

These guidelines provided an opportunity to work with Microsoft data and AI services to develop strategies that involve using a combination of cloud services to ultimately tackle the problem statement. There are certainly multiple ways to achieve this, but we had a particular interest in looking at solutions involving Azure Cosmos DB. Specifically for the ability of Azure Cosmos DB to scale to handle billions of data points, ability to integrate with existing database APIs (MongoDB, Cassandra, and Gremlin), geo-replication capabilities, and integrations with other Microsoft services (Power BI being of particular interest).
The remainder of this article will look at how were able to load Covid-19 case count data for New York City into Azure Cosmos DB from Azure Blob Storage using Azure Data Factory, then visualize that data using the Integrated Power BI Experience enabled by the Azure Synapse Link for Azure Cosmos DB.
Load CSV formatted Covid Case Count data into Azure Cosmos DB with Azure Blob Storage and Azure Data Factory
To begin, we will obtain the dataset of interest. For the hackathon, we used the COVID-19 Daily Counts of Cases, Hospitalizations, and Deaths CSV available in the United States Government open data store. Additional datasets for other locales in the United States and worldwide can be obtained from sites like the Center for Disease Control and Prevention Data Tracker and the World Health Organization.
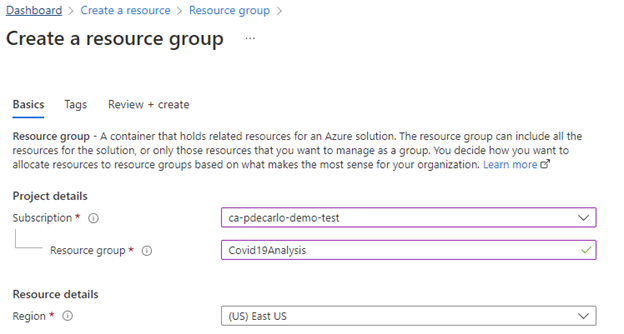
We are now ready to begin creating services in Microsoft Azure to facilitate storing and loading our dataset into Azure Cosmos DB. We will first create a Resource Group to serve as a container for storing the related services that will make up our solution. This can be accomplished by selecting the “Create a Resource” option from the left menu in the Azure Portal, then searching for “Resource Group” and choose the “Resource group” result and select “Create”. You will want to give your Resource Group a descriptive name like “Covid19Analysis” as depicted below. Choose an appropriate region then proceed with the steps to create the Resource Group.
Next, we will create an Azure Storage Account where we use Blob Storage to upload and store our dataset. We will again select the “Create a Resource” option from the left menu in the Azure Portal, then search for and select “Storage Account”. Select “Create” and you will be presented with a screen requesting additional details as shown below:
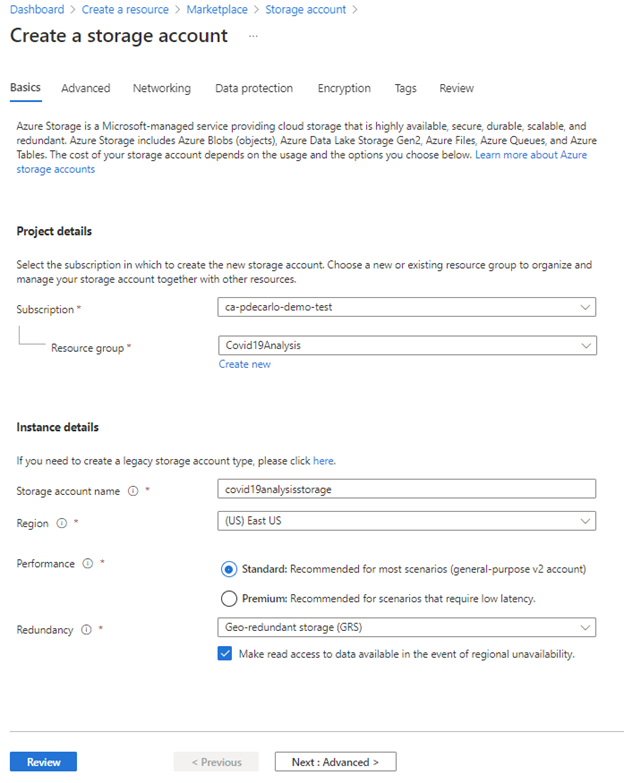
You will want to ensure that you select the Resource Group that was created previously, choose a unique Storage account name (consisting of a combination of 3-24 lowercase characters and numbers), and deploy into the appropriate region. All other default settings can be left alone, proceed by selecting “Review” then “Create” to create the Azure Storage Account.
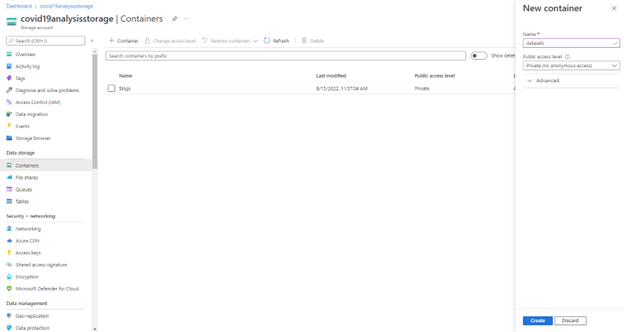
Navigate to the newly deployed resource, then underneath the “Data storage” section, select “Containers” => “+ Container” then give the container a descriptive name like “datasets” and select “Create” as shown below:
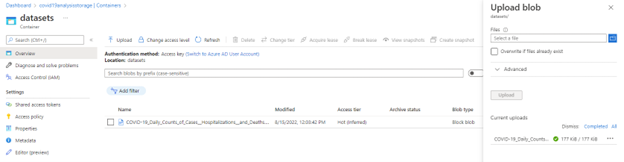
Select the newly created container, then choose “Upload” and provide the path to the downloaded COVID-19 case count dataset as shown, and select “Upload” as shown:
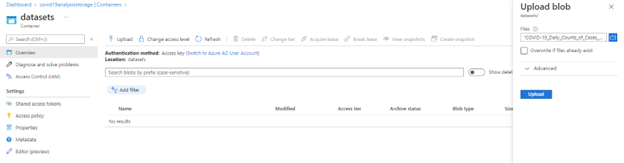
The COVID-19 case count data is now available in Azure Blob Storage:
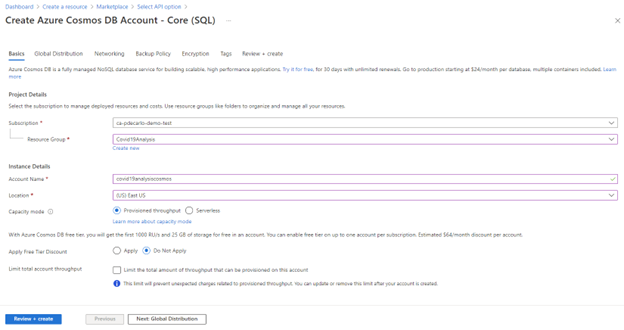
Now we are ready to create the Azure Cosmos DB instance where we will import this dataset. Begin by selecting the “Create a Resource” option from the left menu in the Azure Portal, then search for “Azure Cosmos DB”, choose the “Azure Cosmos DB” result and select “Create”. You will be presented with a prompt to select an API option. We will select the “Create” within the “Core (SQL) – Recommended” option, however, it is important to note the variety of options that are available. In the resulting screen, select the Resource Group which was created earlier, then name your instance (using a combination of 3-44 letters, numbers, and –‘s) and select the appropriate value for “Location.” The remaining options can be left at default or modified depending on your preference. When you are ready select “Review + create” as shown:
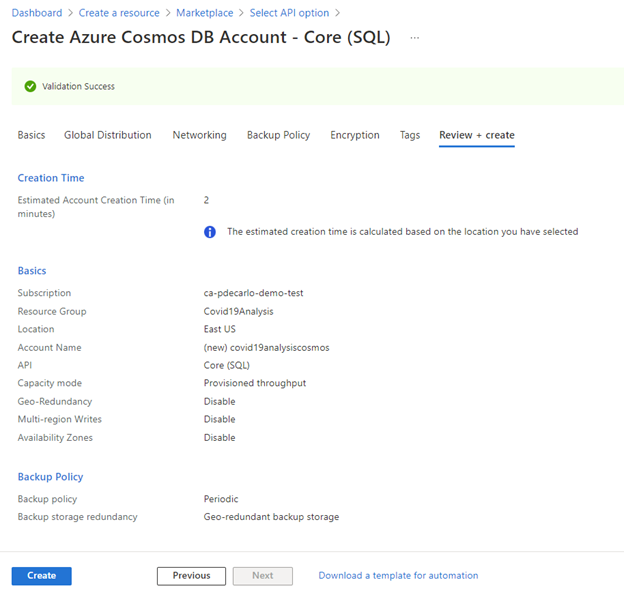
Once you have successfully validated your settings, you are now able to create the Azure Cosmos DB instance by selecting “Create”:
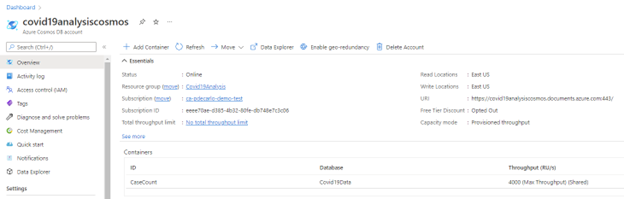
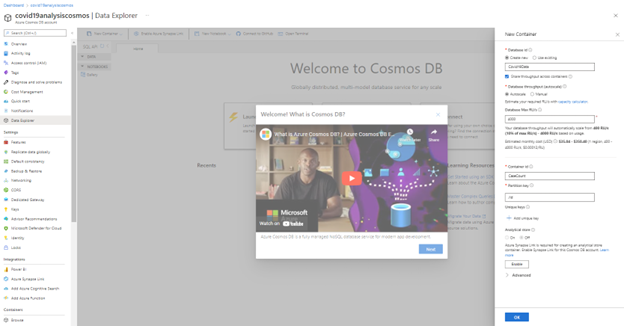
Navigate to the newly deployed Azure Cosmos DB instance and select “Overview”, then choose “+ Add Container”.
In the resulting pane, select “Create new” and name your database “Covid19Data”, leave all options below at their default value, then provide a value of “CaseCount” in the Container id field, and supply “/id” for the value in the Partition key field. When you are finished, select “OK” to create the container.
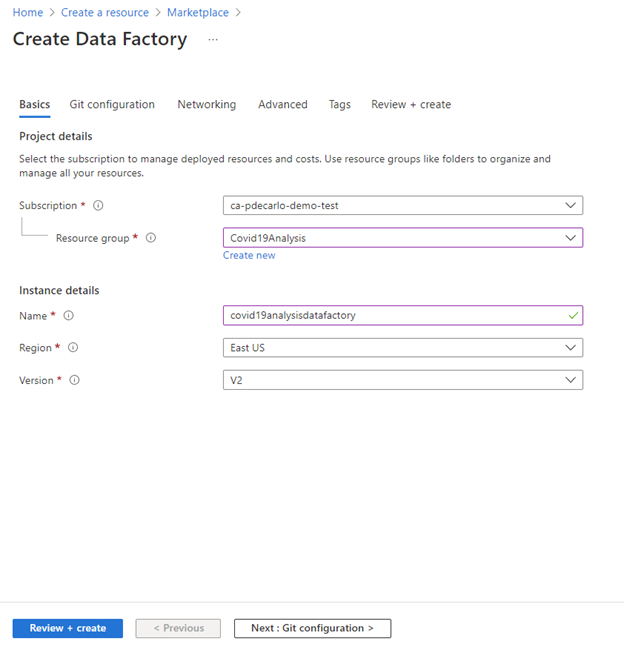
We are now ready to begin the process of importing our Covid-19 dataset from Azure Storage into Azure Cosmos DB. To accomplish this, we will use Azure Data Factory. Start by selecting the “Create a Resource” option from the left menu in the Azure Portal, then search for “Data Factory”, choose the “Data Factory” result and then select “Create”. In the resulting prompt, provide the name of the Resource group that was crated earlier, name the instance, and provide an appropriate value for the Region field.
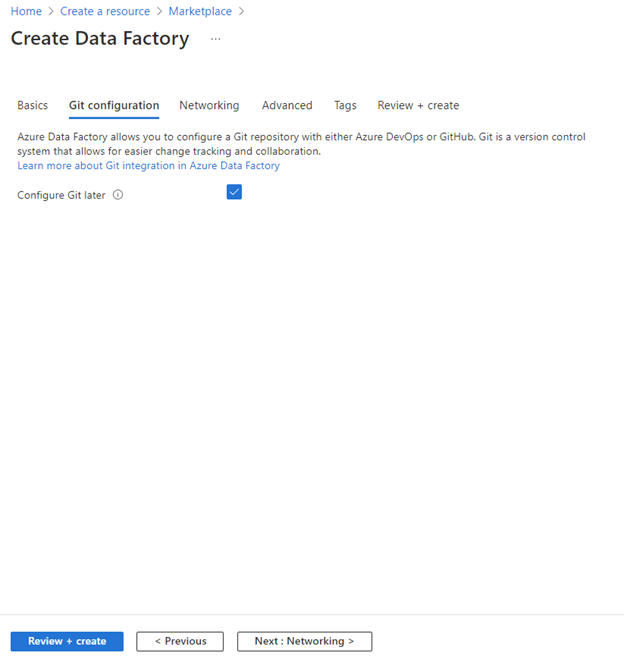
Select the “Git Configuration” tab and check the box next to “Configure Git later”. We are now ready to validate the deployment by selecting “Review + Create”.
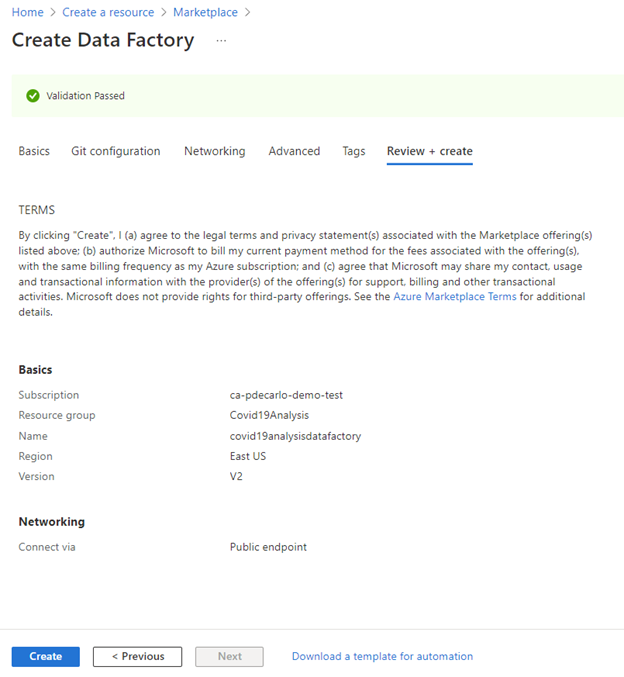
Once you have successfully validated your settings, you are now able to create the Azure Data Factory instance by selecting “Create”:
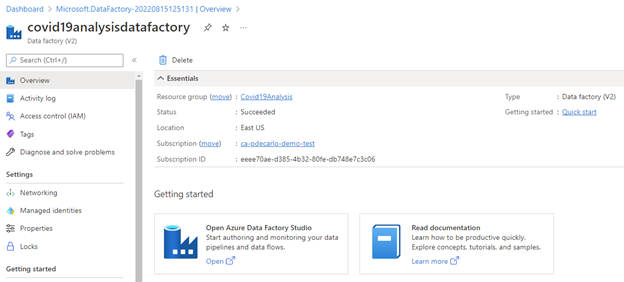
Navigate to the newly deployed Azure Data Factory resource and select “Open Azure Data Factory Studio”.
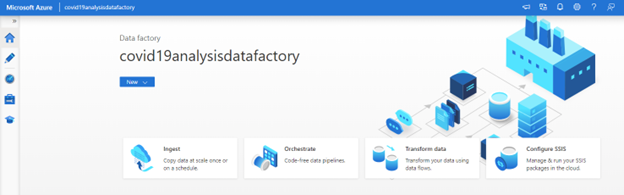
In the resulting window, select “Ingest” to begin the process of importing our data from Azure Blob Storage into Azure Cosmos DB.
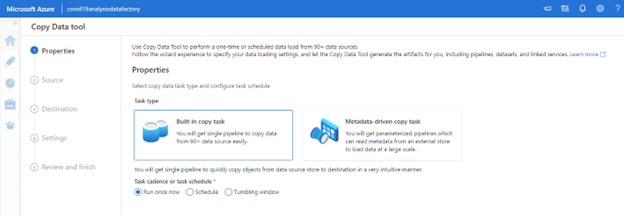
Select “Built-in copy task” for Task Type and select “Run once now” for Task cadence or task schedule, then select “Next”.
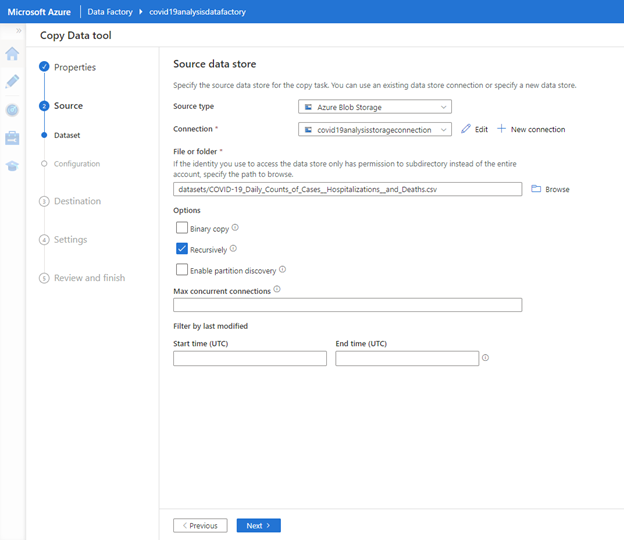
In the Source data store prompt, select “Azure Blob Storage” for Source type then select “+ New Connection”. In the resulting pane, supply a value for Name, then for Authentication type choose “Account key” / “Connection string”. For Account selection method choose “From Azure subscription”, then choose the appropriate value for “Azure subscription” and select the name of the storage account created in previous steps for “Storage account name”. In the Test connection area, choose “To linked service” then select “Test Connection” to validate that the Connection is successful. When you are ready, select “Create” to proceed.

A new set of options will appear in the original prompt. Select “Browse” and navigate to the uploaded COVID-19 case count dataset, ensure that “Recursively” is the only box checked under Options, then select “Next”.
In the resulting prompt, leave settings as default as shown below and select “Next”.

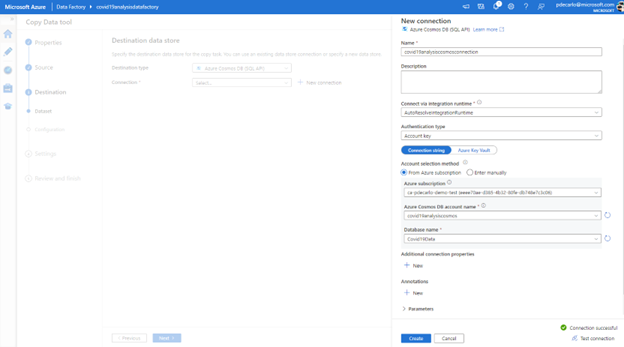
In the Destination data store window, select “Azure Cosmos DB (SQL API)” for Destination type, then select “+ New Connection”. In the resulting pane, supply a value for Name, then for Authentication type choose “Account key” / “Connection string”. For Account selection method choose “From Azure subscription”, then choose the appropriate value for “Azure subscription” and select the name of the Azure Cosmos DB account name created in previous steps (covid19analysiscosmos) then select the Database name that was created earlier (Covid19Data). In the Test connection area, choose “To linked service” then select “Test Connection” to validate that the Connection is successful. When you are ready, select “Create” to proceed.
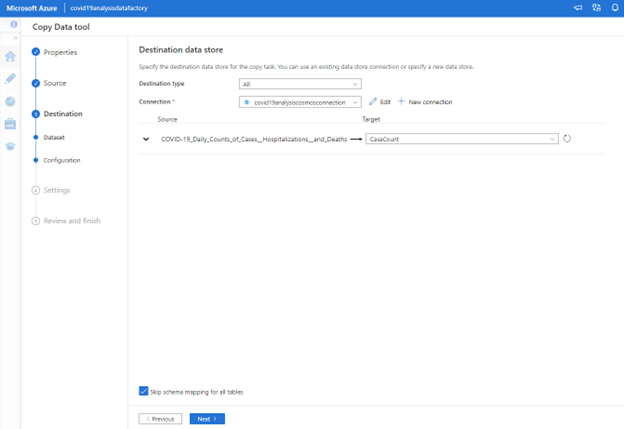
A new set of options will appear in the original prompt. In the “Target” field, select “Case Count” to target the container of that name as the destination for the Covid case count CSV data. At the bottom of the prompt, ensure that “Skip schema mapping for all tables” is checked. When you are ready to proceed, select “Next”.
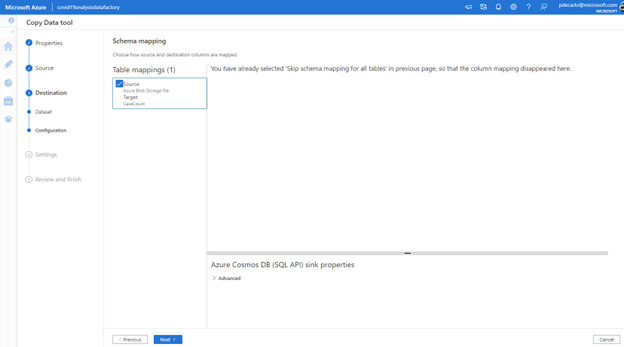
In the Schema mapping configuration pane, we can proceed directly by selecting “Next”.
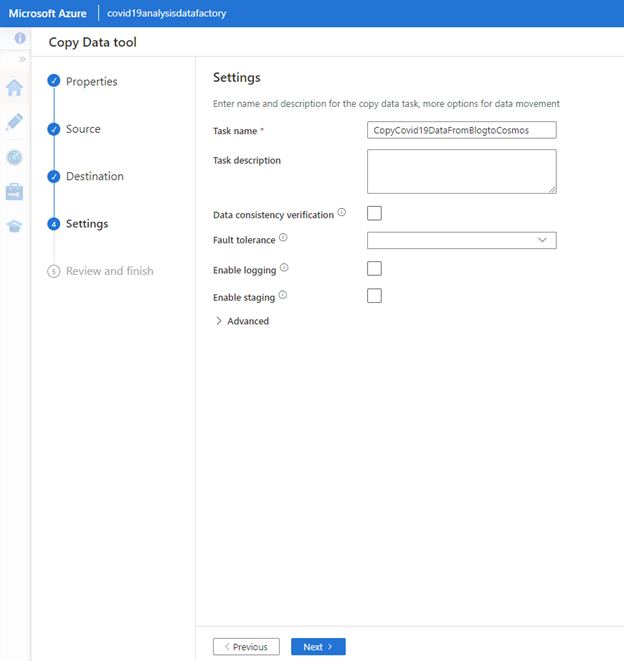
In the resulting window, provide a value of “CopyCovid19DataFromBlogtoCosmos” in the “Task name” field, then select “Next”.
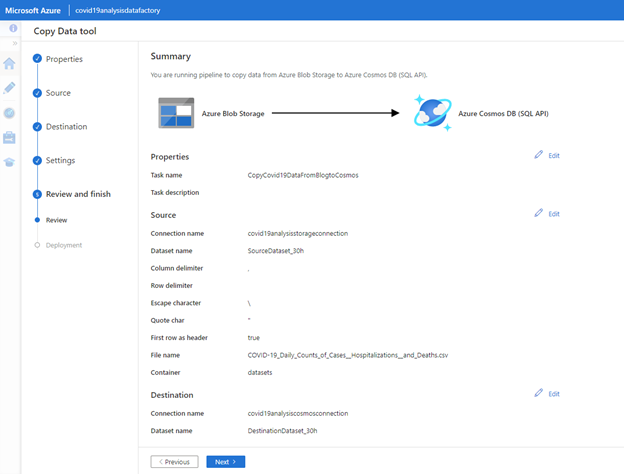
In the resulting Summary window, ensure that your pipeline to copy data from Azure Blob Storage to Azure Cosmos DB (SQL API) is valid, then select “Next”.
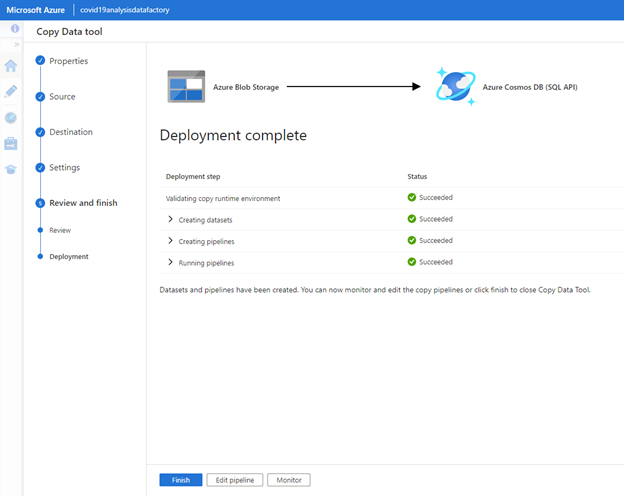
The Deployment process will begin. After a short period of time, you see a “Succeeded” status appear for each “Deployment step”. When you have validated the deployment as successful, select “Finish”.
Visualize Covid Case Count data into Azure Cosmos DB with Azure Synapse Link and the Integrated Power BI Experience
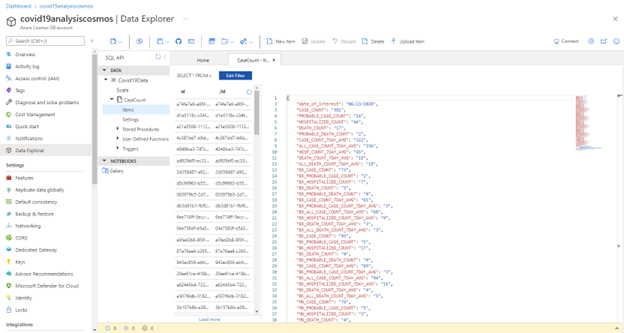
Now that the Azure Data Factory deployment process has been completed, we will verify that our data has been imported from Azure Blob Storage into Azure Cosmos DB. Navigate to the Cosmos DB resource and select “Data Explorer”. In the resulting window, look for the tree view and expand the database node (Covid19Data), underneath this node expand the container node (CaseCount), and finally select the “Items” node. The screen will populate with “id” results, select one of these entries to view the data for that entry. You should see a result similar to the screenshot below.
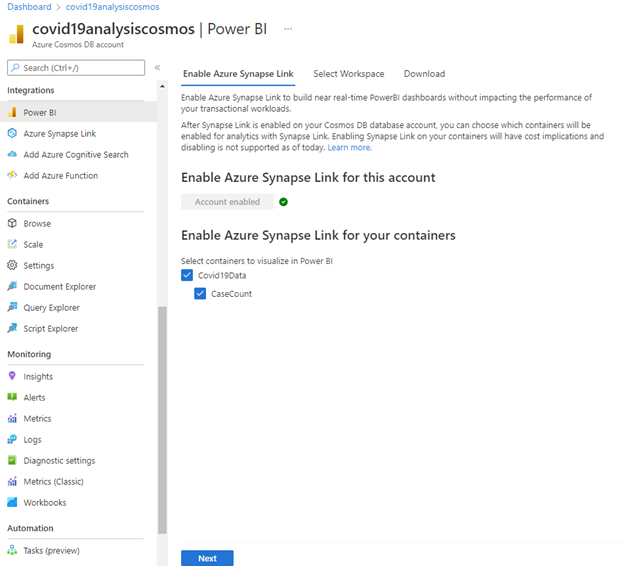
Now that we have verified our data was successfully imported into Azure Cosmos DB, we are ready to prepare our data for visualization in Power BI. On the left-hand side, scroll down to “Integrations” and select “Power BI”. A prompt will appear asking to “Enable Azure Synapse Link for this account”. Select “Enable” to proceed.
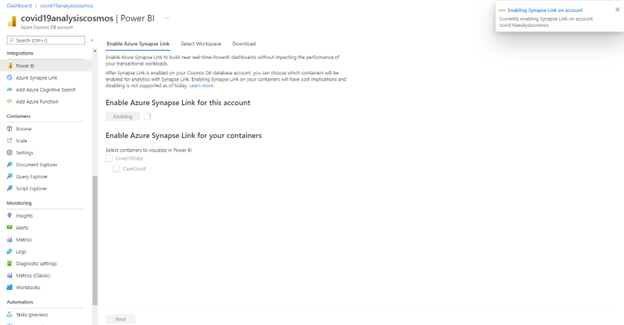
When the “Enabling” task has completed, check the Covid19Data and CaseCount checkboxes to enable Azure Synapse Link for this container. Select “Next” to proceed.
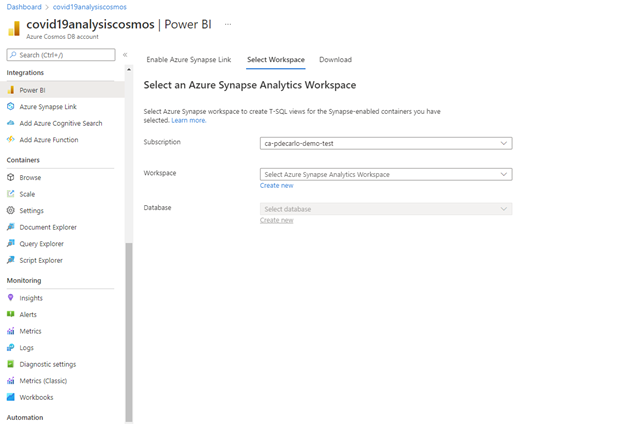
In the “Select Azure Synapse Analytics Workspace” prompts, choose the appropriate value for your Azure subscription, then select “Create new” in the “Workspace” section.
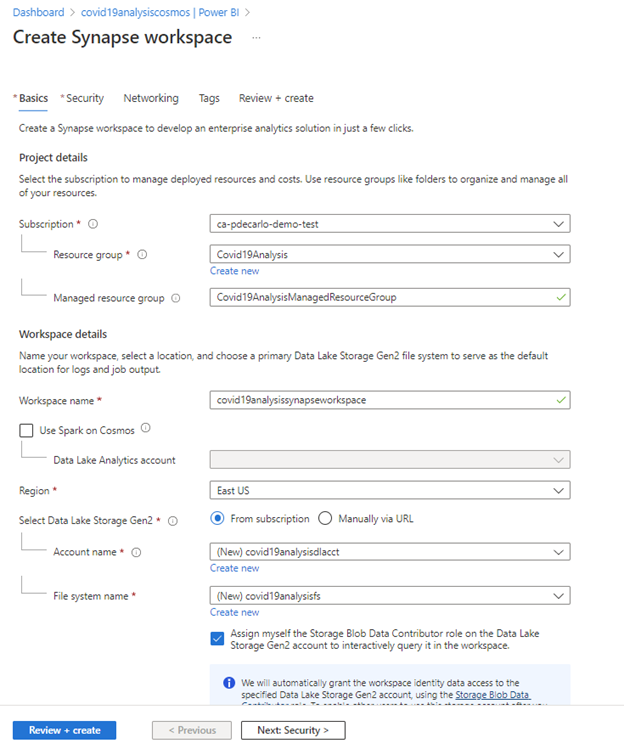
In the “Create Synapse workspace” prompt, select the appropriate “Subscription” and “Resource group”. Optionally, you can name the “Managed resource group” something descriptive as shown. Select the appropriate value for “Region”. Next, provide a descriptive “Workspace name” and ensure that the “From subscription” option is checked. In the “Account name” field, select “Create new” and provide a name as shown and repeat the process for the “File system name field”. When you have completed these steps, select the “Security” tab.
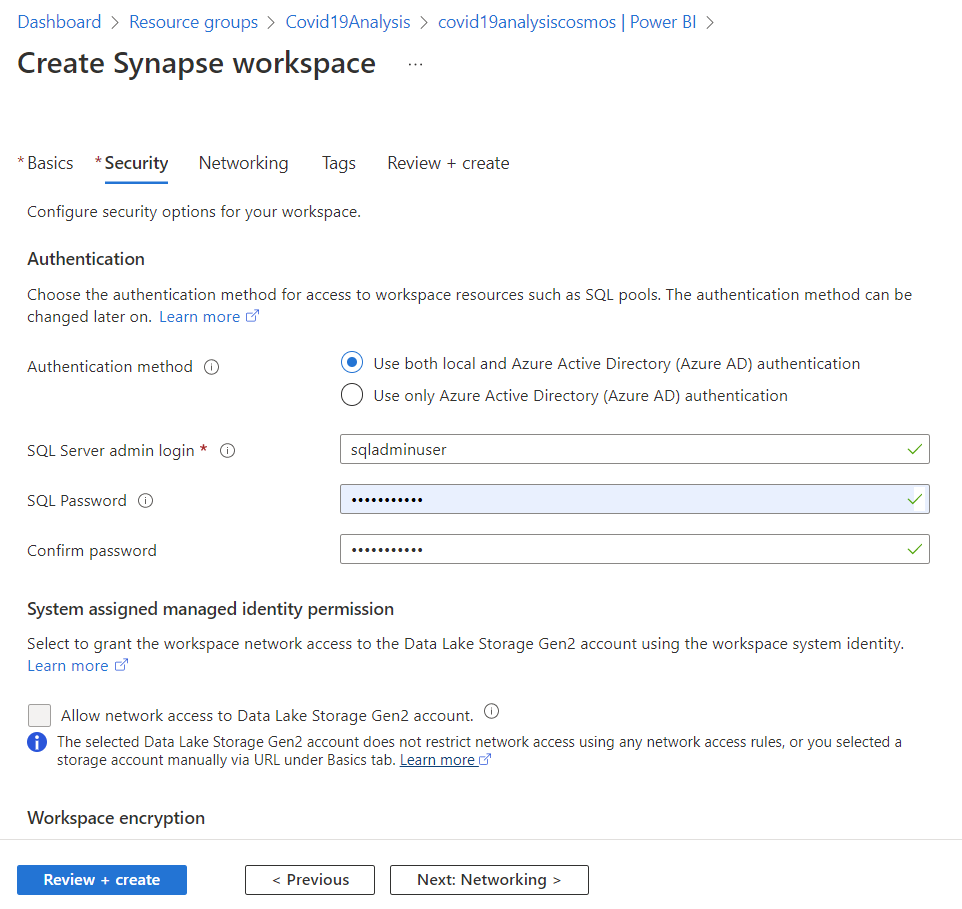
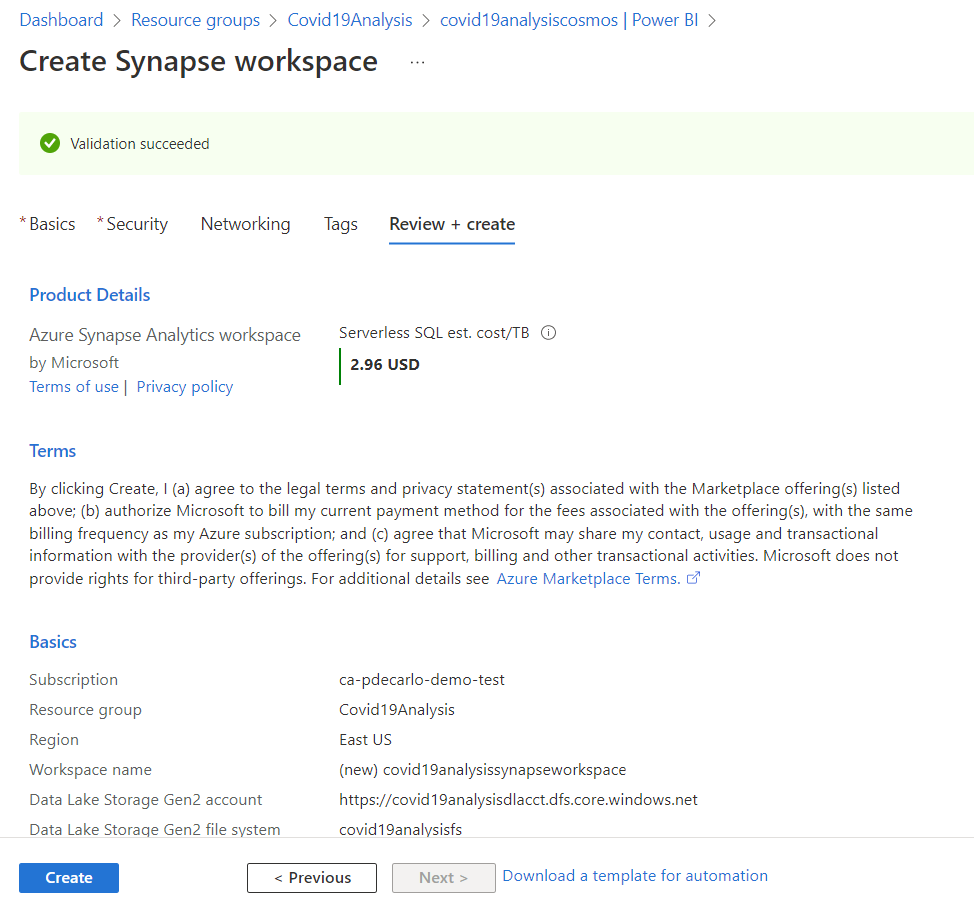
Check the option for “Use both local an Azure Active Dreictory (Azure AD) authentication”, then provide a “SQL Server admin login” and “SQL Password” . When you are ready to proceed, select “Review + Create”.
Next, the deployment options will be validated. Once you have confirmed that the validation has succeeded, select “Create” to deploy the Azure Synapse workspace.
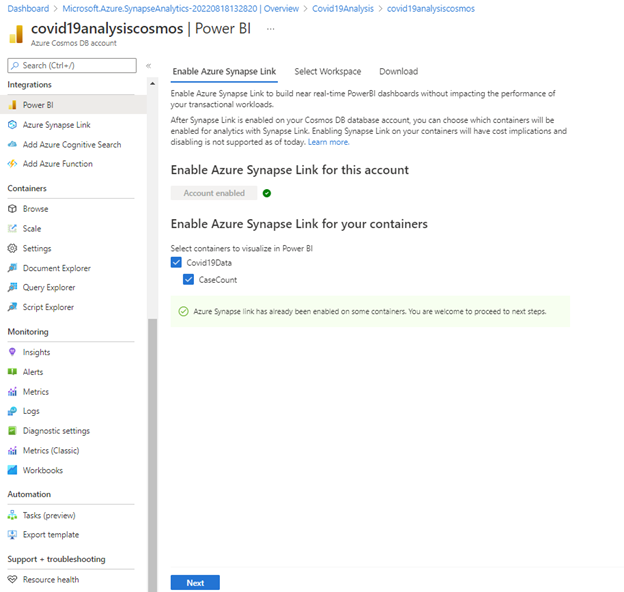
Once the deployment has completed successfully, we will navigate back to our Azure Cosmos DB resource. On the left-hand side, scroll down to “Integrations” and select “Power BI”. A prompt will appear asking to “Enable Azure Synapse Link for this account” and should show as “Account enabled”. Select “Next” to proceed.
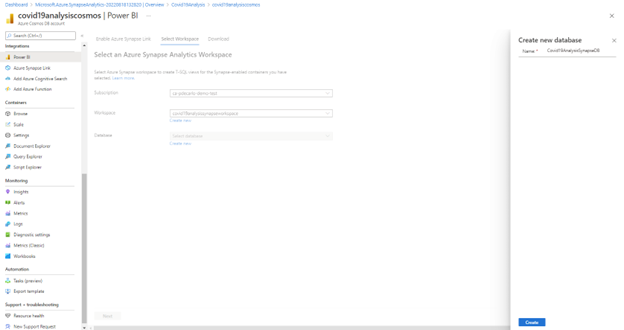
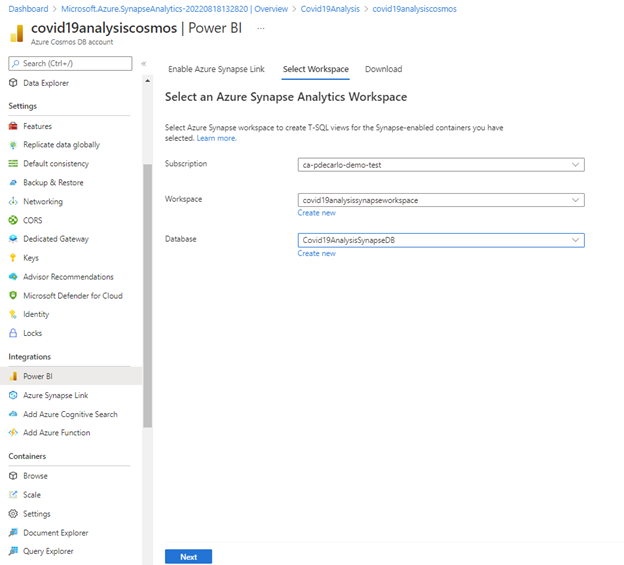
In the “Select Azure Synapse Analytics Workspace” prompt, choose the appropriate value for your Azure subscription, then select the newly created workspace in the “Workspace” area. In the “Database” area, select “Create new” and supply a name for the new Azure Synapse Database then select “Create”.
Select the newly created database in the “Database” area, then select “Next”.
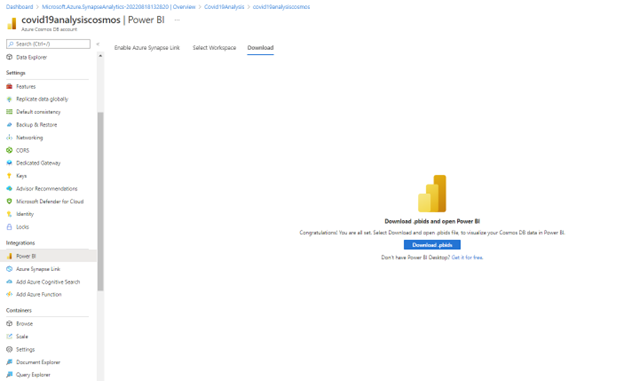
Next, you will be prompted to download a .pbids file that is ready to connect to your Azure Cosmos DB instance. Select “Download.pbids” and open the file in Power BI Desktop.
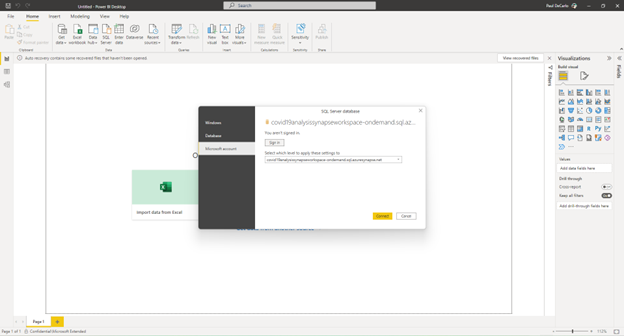
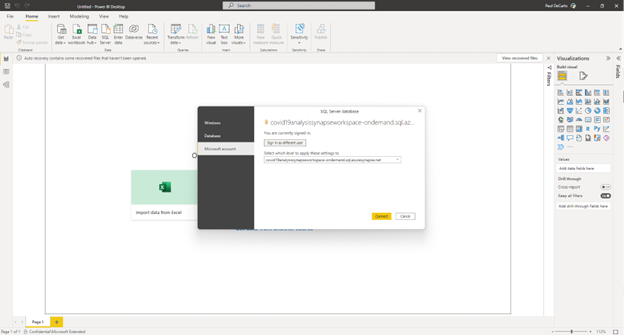
The file should open successfully, and you will be asked to securely authenticate the database connection. In the resulting prompt, select “Microsoft account” for authentication then select “Sign in” and sign in with the credentials used to access your Azure subscription.
Once you have successfully signed in, select “Connect”
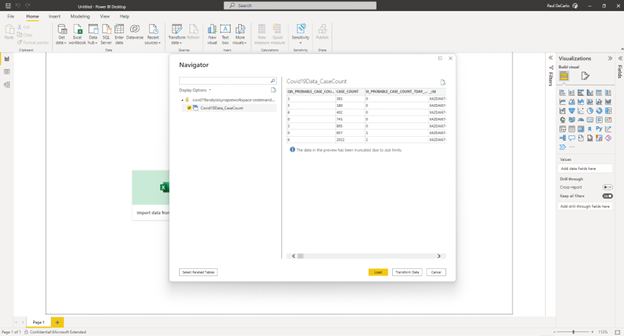
In the resulting Navigator window, select the “Covid19Data_CaseCount” entry, then select “Load”.
Once the dataset has successfully loaded into Power BI, select the “CASE_COUNT” column in the “Fields” tab on the right-hand side of the screen.
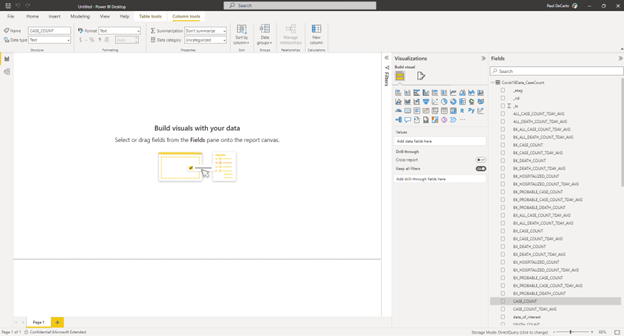
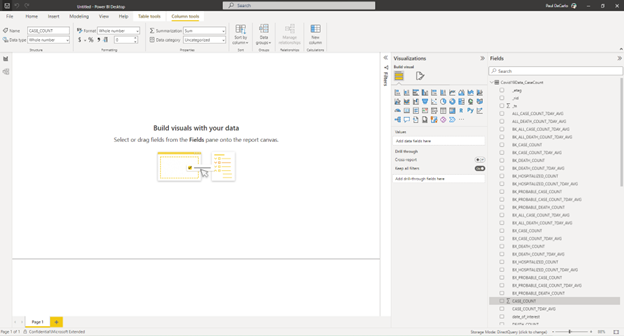
All of our columns are currently being treated as Data type of “Text”, we will change the CASE_COUNT to be of Data type “Whole number” by selecting the Data type field in the upper-left corner of the screen and selecting “Whole number” in the dropdown list. You will be prompted to verify this change. Once it has been applied successfully, you should see the Data type has changed to “Whole Number” for this column.
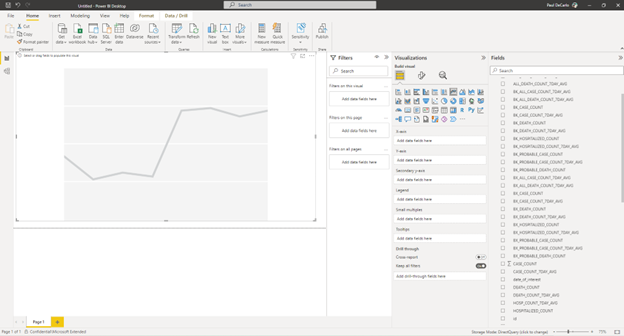
Next, we will select the “data_of_interest” column located in the “Fields” tab. We will change the Data type of this entity to “Data/time”. Selecting appropriate Data types for our columns will allow them to render appropriately when plotting as time series data. To begin plotting our data, we will select the “Line chart” item under the “Visualizations” area. Expand the visualization as needed and you should see a result similar to the screenshot below.
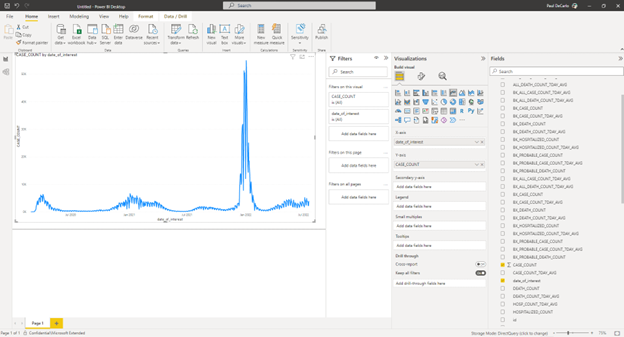
Now select the “date_of_interest” column in the “Fields” section and drag and drop it to the “X-axis” section under visualizations. Similarly, drag and drop the “CASE_COUNT” column into the “Y-axis” section. The data should plot as shown below, depicting the infamous Covid case spike that occurred in December / January 2022.
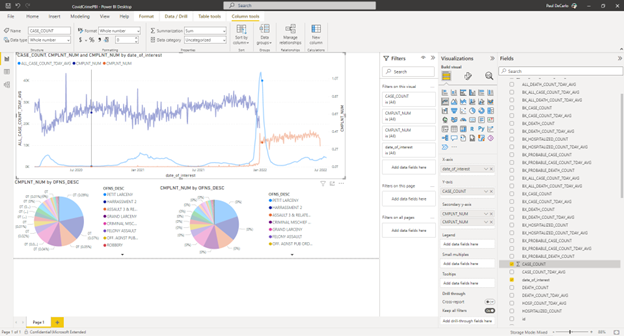
Congratulations! At this point you have successfully plotted the Covid case count data and are well on your way to developing your own analyses using data sources loaded from Azure Cosmos DB. Below we show an example using additional data from NYPD Complaint Data from the NYC Open Data store to correlate crime statistics with COVID-19 case counts.
Conclusion
In this article we have demonstrated how to successfully perform Extract, Transform, and Load (ETL) operations by extracting and loading data from Azure Blob Storage into Azure Cosmos DB using Azure Data Factory. We then Transformed and reloaded that data for visualization suing the Integrated Power BI Experience enabled by the Azure Synapse Link for Azure Cosmos DB. These steps will enable you to go forth to develop your own unique analyses against the COVID-19 Daily Counts of Cases, Hospitalizations, and Deaths dataset.
If you are interested in learning more about some of the analyses that were developed during the Hackathon, check out the following resources:
- Using Azure Machine Learning in winning the Microsoft & Oxford’s Tale of Two Cities Hackathon – Microsoft Tech Community
- Microsoft Reactor Hackathon / Observable / Observable (observablehq.com)
For additional tutorials that make use of the services used in this article, take a look at this handy collection of materials from Microsoft Learn.
- Explore Azure Blob storage – Learn | Microsoft Docs
- Get started with Azure Cosmos DB SQL API – Learn | Microsoft Docs
- Plan and implement Azure Cosmos DB SQL API – Learn | Microsoft Docs
- Introduction to Azure Data Factory – Learn | Microsoft Docs
- Implement Azure Synapse Link with Azure Cosmos DB – Learn | Microsoft Docs
- Get started building with Power BI – Learn | Microsoft Docs
Until next time, Happy Hacking!
-Paul DeCarlo
Thanks for sharing