

Recently, the Azure Pipelines team introduced the support for Federated Identity Credentials (FIC) through Service Connections. This feature uses an industry-standard technology, Open ID Connect (OIDC), to simplify the authentication between Azure Pipelines and Azure services. Before this new feature, users needed to store and regularly rotate secrets or certificates. With this feature, not only is authenticating to Azure services easier, but it’s also more secure, as no persistent secret is involved. The tasks running in pipeline jobs can’t leak or exfiltrate secrets that have access to the production environments.
To support FIC in Azure Pipelines (part of Azure DevOps), the Azure Identity libraries for .NET, C++, Go, Java, JavaScript, and Python introduced a new credential called AzurePipelinesCredential.
Before the existence of this credential, Azure Identity library consumers needed to build their own custom credential to support the OIDC token request API callback for Azure Pipelines using ClientAssertionCredential. For example:
function pipelinesServiceConnectionAssertion(
  serviceConnectionId: string
): () => Promise<string> {
  return async () => {
    const oidcRequestUrl = `${process.env.SYSTEM_OIDCTOKENURI}?api-version=7.1&serviceConnectionId=${serviceConnectionId}`;
    const systemAccessToken = `${process.env.SYSTEM_ACCESSTOKEN}`;
    const oidcToken = await requestOidcToken(oidcRequestUrl, systemAccessToken);
    return oidcToken;
  };
}

async function requestOidcToken(
  oidcRequestUrl: string,
  systemAccessToken: string
): Promise<string> {
  // code for sending request using this REST API https://learn.microsoft.com/rest/api/azure/devops/distributedtask/oidctoken/create?view=azure-devops-rest-7.1
  // extract and return "oidcToken" from the response from above request
}
const credential = new ClientAssertionCredential(
  "<tenantId>",
  "<clientId>",
  pipelinesServiceConnectionAssertion("<serviceConnectionId>"),
  options
);
Credential design
Users can now use the AzurePipelinesCredential by setting the following values in its constructor, eliminating the need for a two-step process or a custom callback:
clientId: Client ID from your user-assigned managed identity OR Application (client) ID from your app registration.tenantId: Tenant ID from your user-assigned managed identity OR Directory (tenant) ID from your app registration.serviceConnectionId: The service connection ID is the GUID representing your service connection and can be obtained by looking at the browser’s address bar when you navigate to a service connection in Azure Pipelines. It’s theresourceId, as found in the URL’s querystring.
systemAccessToken: See how to configure the predefined system-level variable $System.AccessToken for the Azure Pipelines task. Pass this field into the credential’s constructor.
/**
 * Authenticate with Azure Pipelines federated identity.
 */
function withAzurePipelinesCredential() {
  const clientId = "<YOUR_CLIENT_ID>";
  const tenantId = "<YOUR_TENANT_ID>";
  const serviceConnectionId = "<YOUR_SERVICE_CONNECTION_ID>";
  const systemAccessToken = "<SYSTEM_ACCESSTOKEN>";
  const credential = new AzurePipelinesCredential(
    tenantId,
    clientId,
    serviceConnectionId,
    systemAccessToken
  );

  const client = new SecretClient(
    "https://key-vault-name.vault.azure.net",
    credential
  );
}
Package versions
The following table provides the minimum stable or beta library versions required to use AzurePipelinesCredential.
| Language | Library version |
|---|---|
| .NET | 1.12.0 |
| C++ | 1.9.0-beta.1 |
| Go | 1.7.0 |
| Java | 1.13.0 |
| JavaScript | 4.3.0 |
| Python | 1.17.0 |
Set up FIC in Azure Pipelines
To use FIC in Azure Pipelines, configure the Azure Resource Manager service connection in one of two ways:
- As an automatic recommended approach
- Create it manually either using a user-assigned managed identity as FIC or using an App Registration as FIC
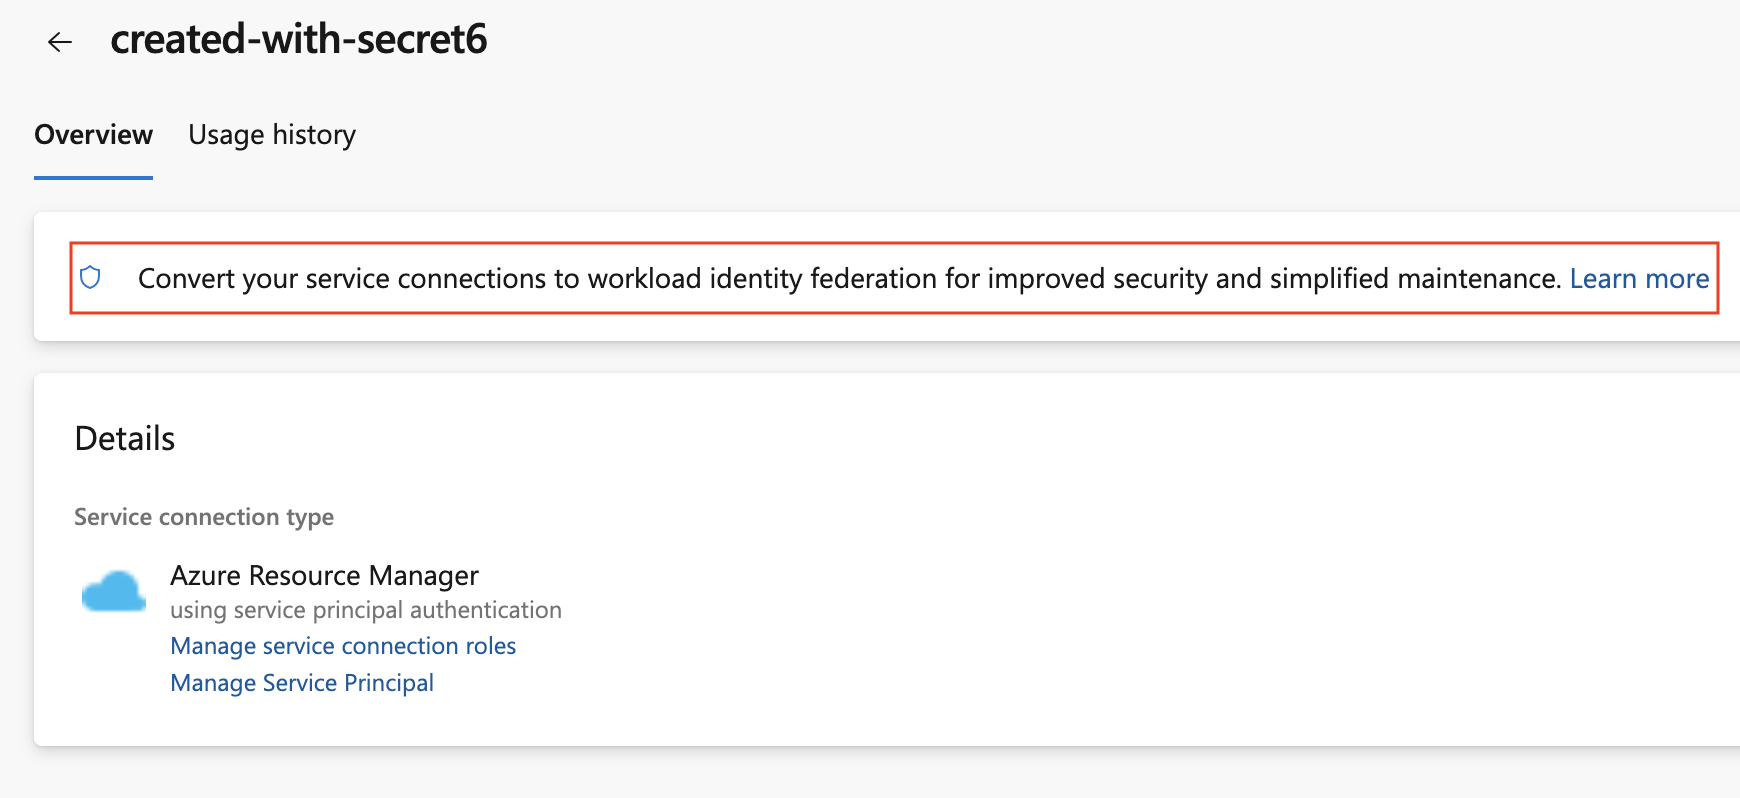
Create a service connection or convert an existing one to use FIC
- Convert your existing Azure service connections based on secrets to the new scheme. You can perform this conversion one connection at a time. Best of all, you don’t have to modify any of the pipelines that use those service connections. They automatically apply the new scheme once you complete the conversion.
- Create a new Azure service connection using federated identity by selecting workload identity federation (automatic) in the Azure service connection creation experience. Follow the steps:
- In Azure DevOps, go to Project Settings and then Service connections.
- Select New service connection.
- Select Azure Resource Manager and select Next.
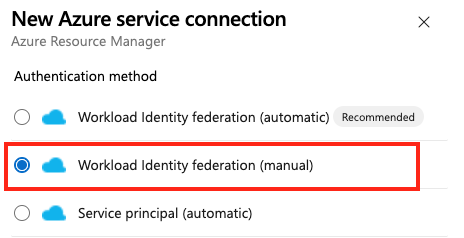
- Select Workload identity federation (automatic) and select Next.
- Enter a unique value for Service connection name and select Next.
Note
To enable every pipeline in your project to use the service connection, check the Grant access permission to all pipelines box.
You can also create the workload identity federation manually in step 3 above by selecting Workload identity federation (manual) with either a user-assigned managed identity as an FIC or an app registration as an FIC.
User-assigned managed identity as an FIC
- First, you need a user-assigned managed identity.
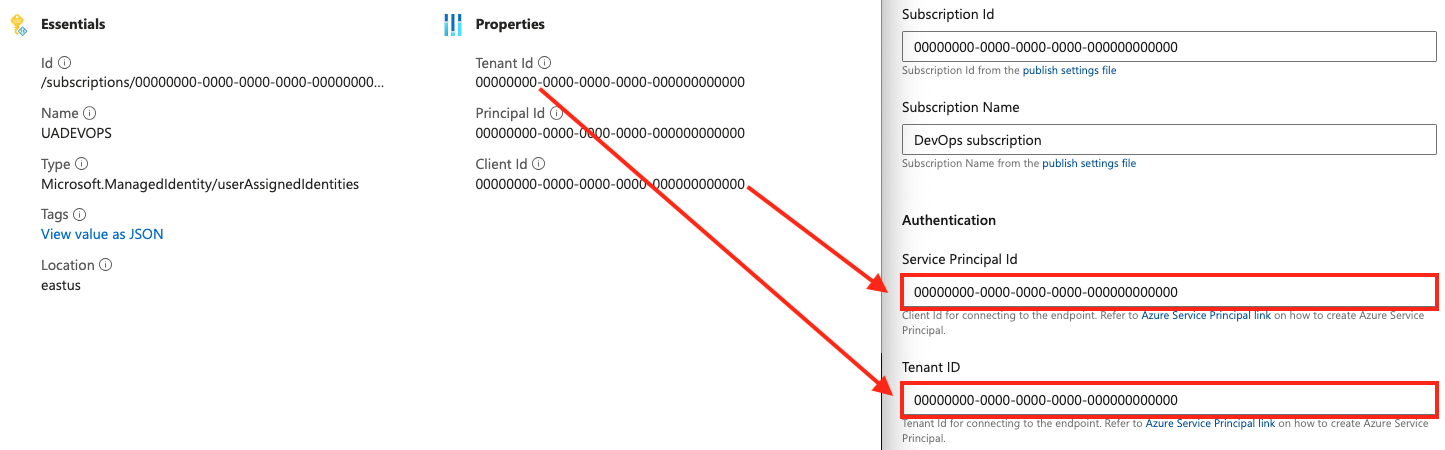
- Copy the Subscription ID and Client ID values for your managed identity to use later.
- Go to Settings > Properties.
- Copy the Tenant Id value to use later.
- Go to Settings > Federated credentials.
- Select Add credentials.
- Select the Other issuer scenario.
- Enter values for Issuer and Subject identifier. You’ll replace these values later.
Field Description Issuer Enter https://app.vstoken.visualstudio.com/<unique-identifier>.Subject identifier Specify sc://<Azure DevOps organization>/<project name>/<service connection name>. The service connection doesn’t need to be already created. - Select Save.
- Keep this window open. Later in the process, you return to the window and update your app registration federated credentials.
- Grant permissions to managed identity with the Azure portal:
- In the Azure portal, go to the Azure resource that you want to grant permissions for (for example, a resource group).
- Select Access control (IAM).
- Select Add role assignment. Assign the required role to your managed identity (for example, Contributor).
- Select Review and assign.
Read the detailed instructions on setting up a user-assigned managed identity as an FIC service connection.
App registration as an FIC
- In the Microsoft Entra ID section of the Azure portal, go to App registrations.
- Select New registration.
- In the Name textbox, enter a name for your app registration. Then select the appropriate radio button in the Who can use this application or access this API section.
- Copy the values for Application (client) ID and Directory (tenant) ID from your app registration to use later.
- Go to Manage > Certificates & secrets.
- Select Federated credentials.
- Select Add credentials.
- Select the Other issuer scenario. Enter values for Issuer and Subject identifier. You’ll replace these values later.
Field Description Issuer Enter https://app.vstoken.visualstudio.com/. Subject identifier Specify sc://<Azure DevOps organization>/<project name>/<service connection name>. The service connection doesn’t need to be already created. - Select Save.
- Keep this window open. Later in the process, you return to the window and update your app registration federated credentials.
- Grant permissions to the app registration:
- In the Azure portal, go to the Azure resource that you want to grant permissions for (for example, a resource group).
- Select Access control (IAM).
- Select Add role assignment. Assign the required role to the app registration (for example, Contributor).
- Select Review and assign.
Read the detailed instructions on setting up an app registration as an FIC service connection.
Create service connection for either MI as FIC or app registration as FIC
- In Azure DevOps, open your project and go to > Pipelines > Service connections.
- Select New service connection.
- Select Azure Resource Manager, and then select Next.
- Select Workload Identity federation (manual), and then select Next.
- For Service connection name, enter the value that you used for Subject identifier when you created your federated credentials (either MI or App Registration).
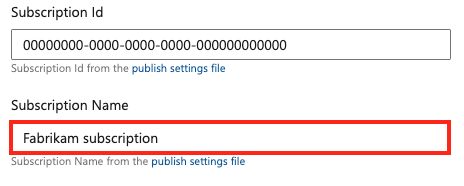
- For Subscription Id and Subscription Name, enter the values for the subscription in your Azure portal account.
- In the Authentication section:
- For Service Principal Id, enter the value of Client Id from either your managed identity or app registration.
- For Tenant ID, enter the value of Tenant Id from your managed identity or app registration.
- In Azure DevOps, copy the generated values for Issuer and Subject identifier.
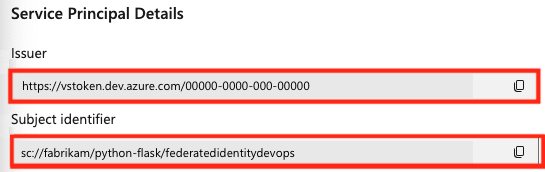
- In the Azure portal, return to your managed identity or app registration federated credentials.
- Paste the values for Issuer and Subject identifier that you copied from your Azure DevOps project into your federated credentials in the Azure portal.

- In the Azure portal, select Update to save the updated credentials.
- In Azure DevOps, select Verify and save.
Example of using the Azure Pipelines task
To use the federated identity through service connections feature in Azure Pipelines, use one of the recommended tasks.
The following YAML script is an example of running the AzureCLI@2 task for using service connections federated identity with @azure/identity.
In the Azure Pipelines task, make sure to configure the predefined system variable System.AccessToken.
trigger:
  - main

pool:
  vmImage: ubuntu-latest

steps:
  - script: |
      npm install @azure/identity
      npm install @azure/keyvault-secrets
    displayName: "Install the latest version of Azure Identity"

  - task: AzureCLI@2
    displayName: "Azure CLI Task"
    env:
      SYSTEM_ACCESSTOKEN: $(System.AccessToken)
    inputs:
      azureSubscription: "<Name_of_AZURE_SERVICE_CONNECTION>"
      scriptType: bash
      scriptLocation: "inlineScript"
      inlineScript: |
        node <path-to-the-javascript-code>
Troubleshooting
Select one of the following links to see language-specific troubleshooting guidance for AzurePipelinesCredential:
I cannot get this to work.
I am running an integration test in a Ubuntu DevOps pipeline `DotNetCoreCLI@2` task with `command: test` and `env: SYSTEM_ACCESSTOKEN: $(System.AccessToken)`
The test uses Azure.Identity v1.12.0, creating and attempting to use an `AzurePipelinesCredential` object to retrieve a token:
```
var systemAccessToken =
Environment.GetEnvironmentVariable("SYSTEM_ACCESSTOKEN")
var pipelinesCredential =
new AzurePipelinesCredential(
tenantId, clientId, serviceConnectionId, systemAccessToken, ...);
var tokenRequestContext =
new TokenRequestContext(["https://REDACTED/.default"]);
var token =
await pipelinesCredential.GetTokenAsync(
tokenRequestContext, default);
```
I have carefully copied the GUIDs into the string variables `tenantId`, `clientId`...
Also Arne, you can take a look at this sample as well –
https://github.com/Azure/azure-sdk-for-js/blob/main/sdk/identity/identity/samples/AzureIdentityExamples.md#example-of-using-an-azure-pipelines-task
Hi Karishma,
I couldn’t get the AzureCLI approach to work, because that requires me to install Azure CLI on the self hosted agent, which requires installing pip & Python, which does not seem possible on self hosted agents (unless you have admin rights and machine access).
It would be useful if one could use the DotNetCoreCLI task out of the box for AzurePipelinesCredentials.
Arne,
Eric and I were chatting about this DotNetCoreCLI task today. To determine the best solution, can you please help us better understand your scenario? For example, are you running a `dotnet test` command that relies on the presence of certain Azure resources?
Hi Arne, this is how authentication works in Azure Pipeline. Credentials (in this case federated credentials) are passed via a service connection property at task level. The Azure service connection is intended for Azure access and the AzureCLI@2 & AzurePowerShell@5 tasks should enable any scripted scenario.
I see.
The AzureCLI and AzurePowerShell tasks seem to require admin installed software that is not currently on the self hosted agent in question.
Also, it would be useful if one could use the DotNetCoreCLI task out of the box for AzurePipelinesCredentials.
Hi Arne –
Could you try to reproduce this using the AzurePowerShell@5 task? When using that task, there are additional environment variables automatically set by the pipeline for AZURESUBSCRIPTION_CLIENT_ID, AZURESUBSCRIPTION_SERVICE_CONNECTION_ID, and AZURESUBSCRIPTION_TENANT_ID. Does using those values produce the same error?
Hi Christopher,
that seems to work.
A pity, though, that we cannot directly use the DotNetCoreCLI task. The AzurePowerShell task requires installing the Az module on the self hosted agent, adding yet a step.