


Think back to the first code that you ever wrote. For a significant majority of developers that first code was probably a “hello, world” program written in your language of choice.
After that there is a pretty good chance that you modified that same program to prompt for a name and change the message to “hello, {world}”. For me my very next program was a number guessing game where I guessed a number between 1 and 100. Simple programs that teach some input concepts around input, output, variables, and data types.
The tools that you would have used for these relatively simple programs included some kind of text editor, a compiler or interpreter, and a terminal emulator.
If not terminal emulator, why not terminal emulator shaped?
Despite the general utility of terminal emulators, Aspire itself was not capable of rendering the output of programs in a fully featured terminal emulation experience. The console logs view would allow you to see standard error and standard output streams from your terminal program and provided some limited inline coloring.
That isn’t to say that the console logs view in the Aspire dashboard isn’t useful. It is – if you just need to throw some text on the screen, it’s probably the best option. However, if you need more complete escape sequence processing, or your program needs an interactive terminal, then the new terminal features in Aspire are for you!
Introducing WithTerminal/withTerminal
With the release of Aspire 13.5, we introduced a new API that allows developers to attach a terminal emulator to their resources. The usage pattern is very simple:
Experimental
The terminal APIs andaspire terminal commands described in this post are experimental. Their APIs and behavior may change in a future release.// TypeScript
var repl = await builder.addExecutable("noderepl", "node", ".", [])
.withTerminal();A terminal emulator can be attached to projects, executables, and containers. When the WithTerminal(...)/withTerminal() extension method is applied, a special annotation is added to the resource in the app model, telling DCP to launch that program with a pseudo-terminal.
In the dashboard, if you navigate to where you would normally find console logs, you will find that the view is now an interactive terminal experience by default.
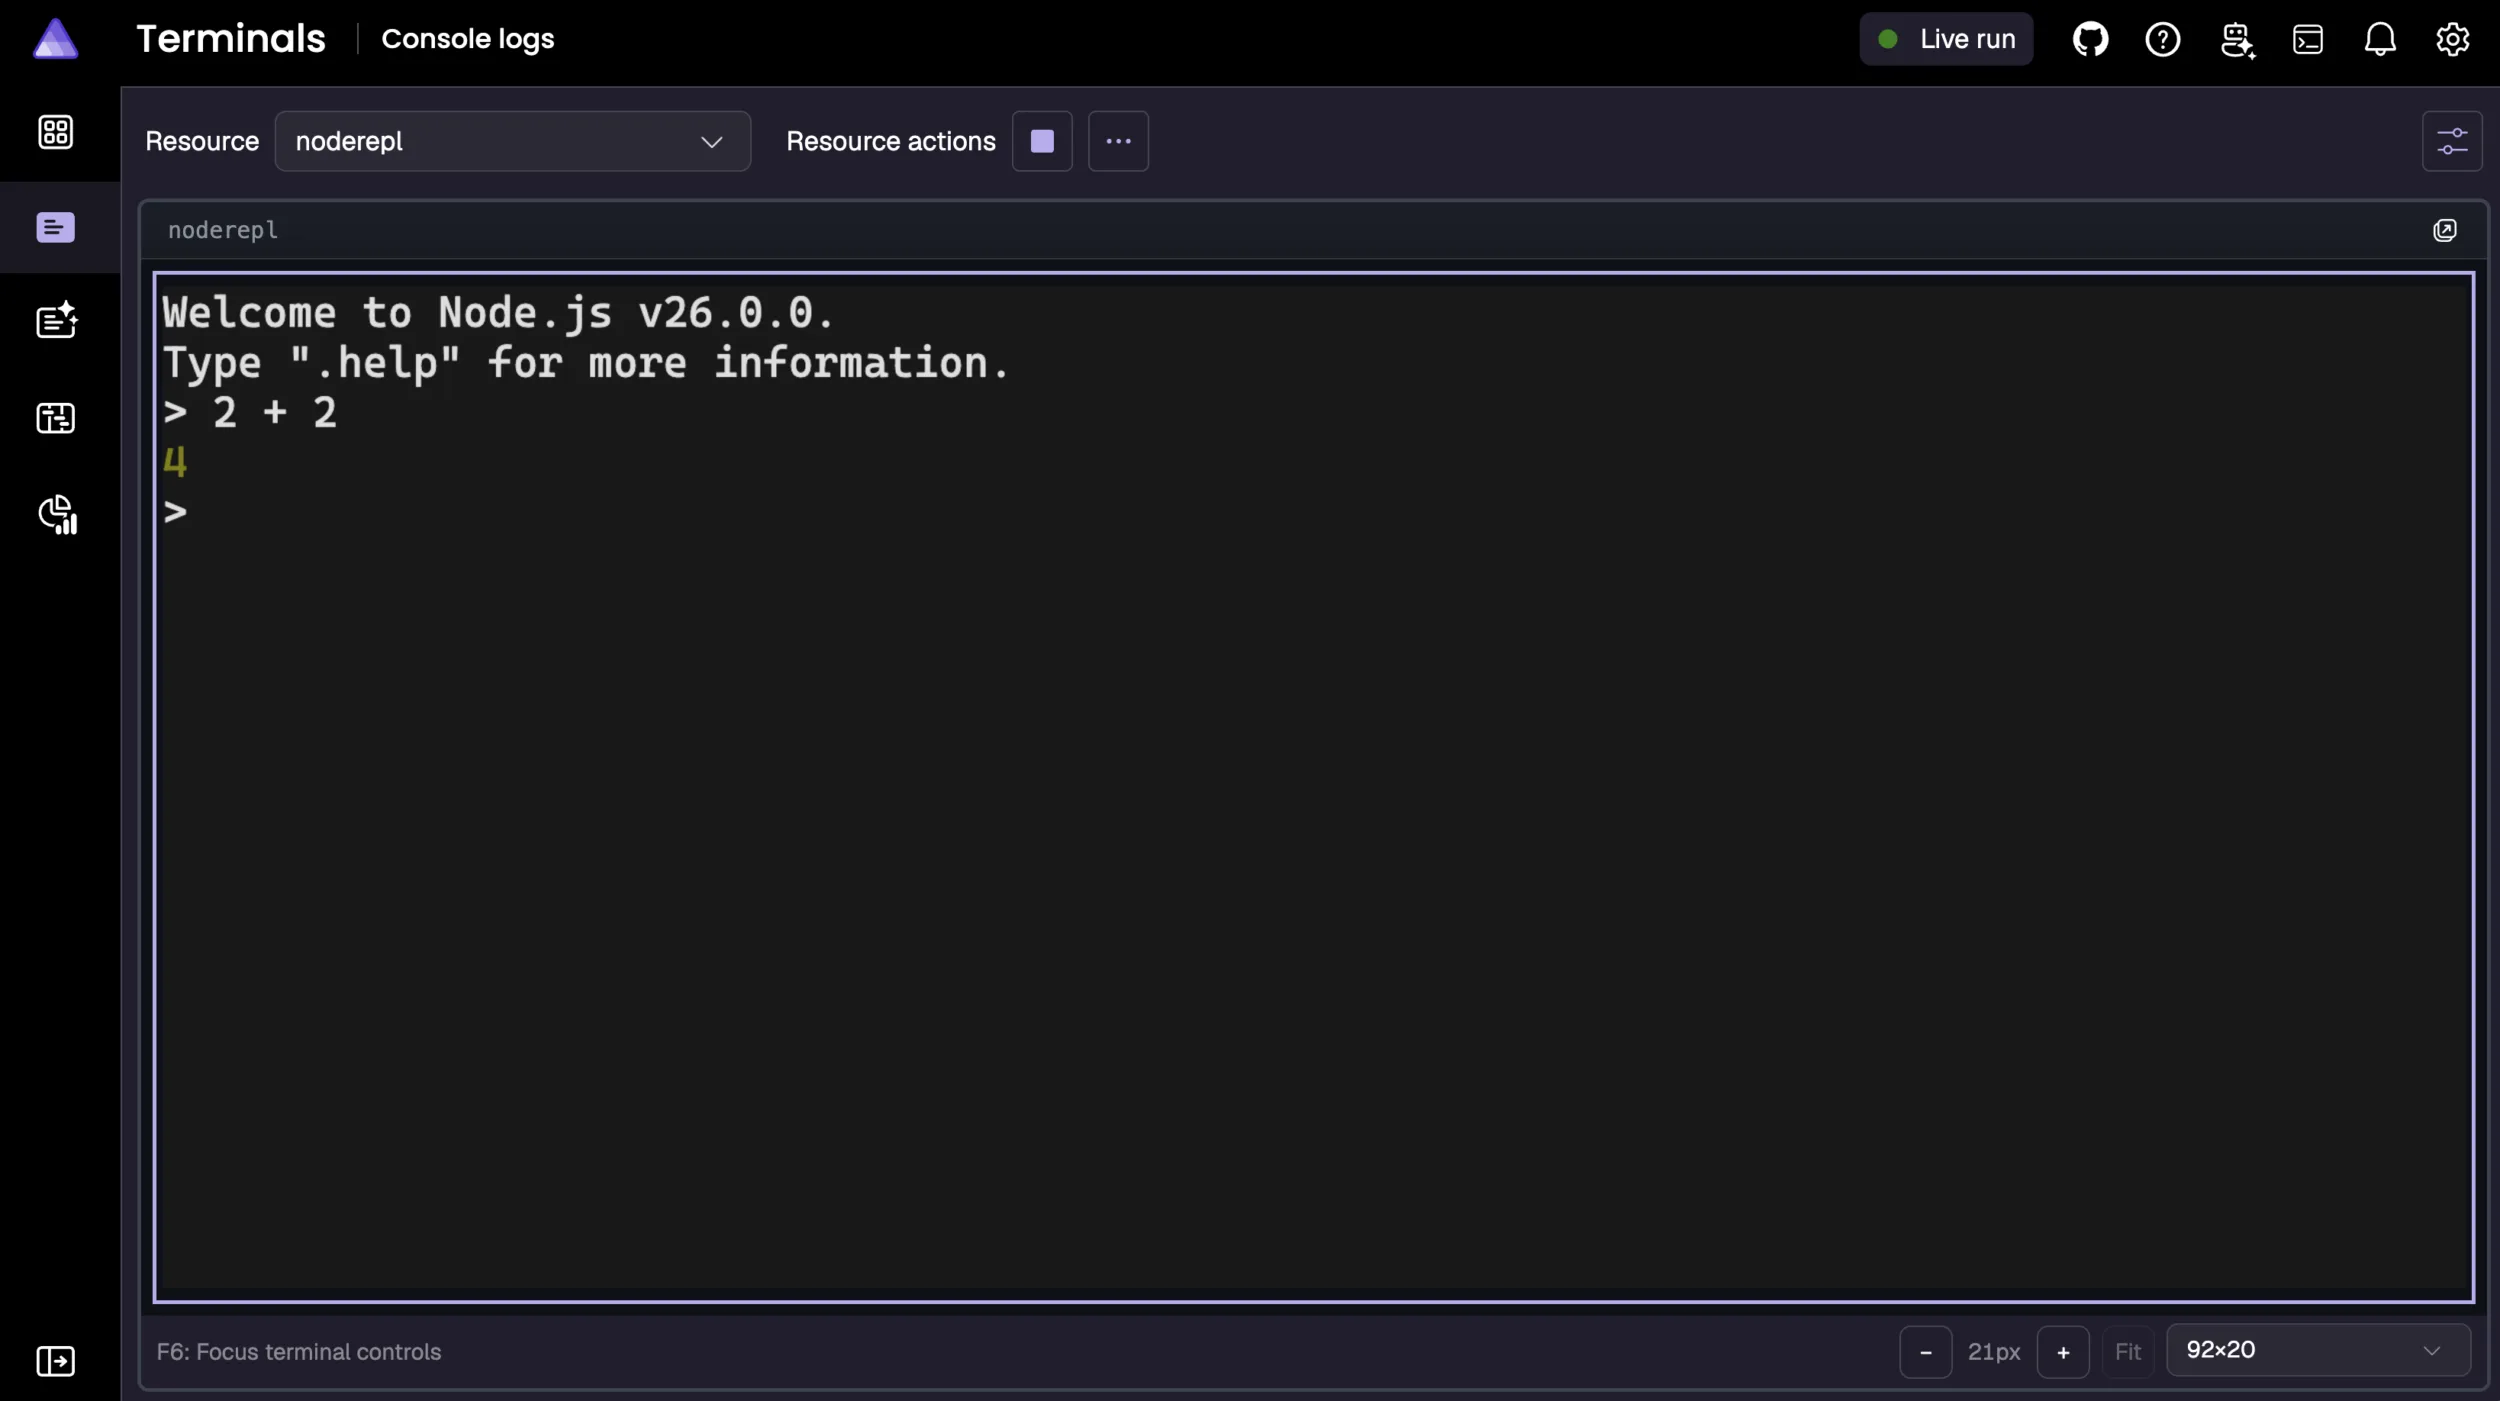
The emulator has the typical options you would find along the bottom of the screen, including font sizing and dimensions, along with a button to snap the dimensions to fit the current window size. We also have the ability to detach the terminal from the dashboard, which can be useful when you want to navigate around the rest of the dashboard while still being able to interact with the terminal.
One of the interesting things that Aspire supports for these resource-bound terminal experiences is the ability to have two or more views pointed to the same PTY, both interactable and kept in sync.
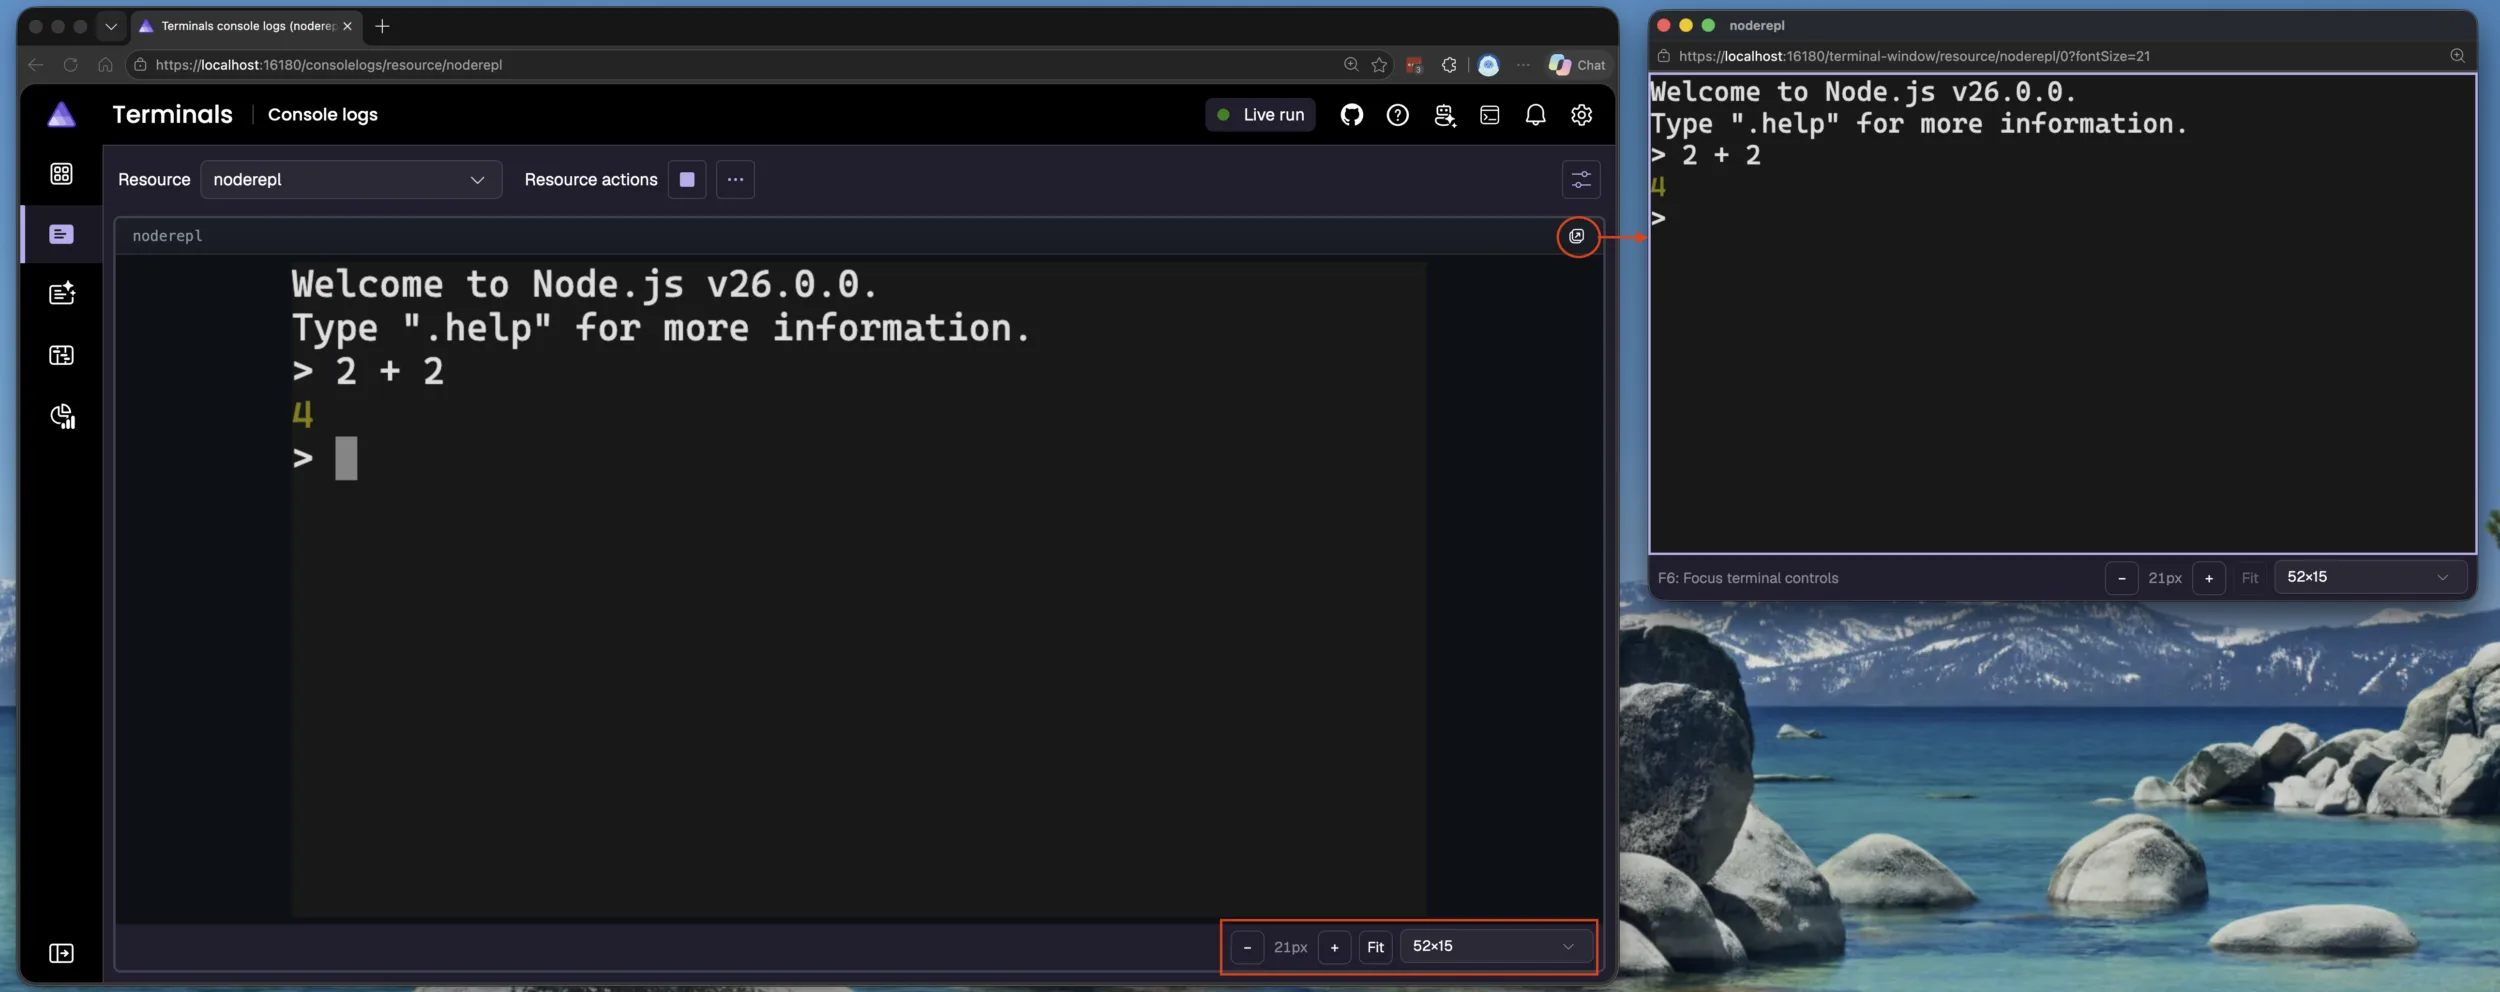
This can be useful if you have a multi-workspace environment and you switch between workspaces but want to be able to have the terminal visible on all of them. One of the consequences of this capability is that if I open a detached window and resize it the terminal embedded in the dashboard will resize to match although the size of the font will scale to make maximum use of the vertical or horizontal space available.
We have tried to make the terminal experience as capable as possible. You should be able to run some of the more exotic terminal programs within the Aspire terminal if you choose to. For example, it should have no problem with tmux or any number of the terminal-based coding agents (useful if, as part of your product, you ship skills and want to test their behavior).
In fact – the Aspire terminal has support for the Kitty Graphics Protocol and Sixels. Here are a few cute little examples:
Show me the REPLs
Beyond attaching a terminal to resources in your app model, Aspire 13.6 adds the ability to dock a terminal at the bottom of the dashboard. This is ideal for REPL-like experiences. For a number of our integrations in Aspire, we have added the ability to enable a REPL command that opens a terminal-based REPL experience. The resources that support this so far are Redis, Mongo, SQL Server, Postgres, Valkey, and MySQL. The code is very straightforward:
var cache = await builder.addRedis("cache")
                         .withRepl();
Once you launch the AppHost, you will see a REPL command on the Redis resource. Here is a simple example:
We have exposed this as an API that you can use on your own custom resources as well. Here is an example of some C# code that uses the new TerminalService API to create a terminal:
var myapp = builder.AddExecutable("myapp", "myapp", ".")
                   .WithCommand("myapp-repl", async context => {

                        // Step 1: Get the terminal service.
                        var ts = context.Services.GetRequiredService<TerminalService>();

                        // Step 2: Create and start the terminal.
                        var terminal = ts.CreateTerminal(new ()
                        {
                            Title = "myapp-repl",
                            Executable = "myapp",
                            Arguments = ["repl"]
                        });
                        terminal.Start();

                        // Show it in the dock.
                        terminal.Show();
                   });
Accessing the terminal from … the terminal?
When using WithTerminal()/withTerminal() you are attaching a terminal to a resource but sometimes you already have your own terminal open and you just want to interact with that program in your usual terminal experience. Aspire helps you do this! Assuming you have a resource in your app model that has a terminal exposed you can use the aspire terminal attach command to attach to it directly.
Automating the terminal
Another capability that Aspire provides around its terminal experience is the ability to write automation scripts. Here is an example of automating a shell prompt
Assuming the running shell is a resource named shell with .WithTerminal(), its first-replica terminal has the stable ID resource:shell:0. The automation waits for Vim’s welcome banner instead of relying on a fixed delay, then sends the i key and the text:
#pragma warning disable ASPIRETERMINAL001
var terminals = commandContext.Services.GetRequiredService<TerminalService>();
const string terminalId = "resource:shell:0";

if (!terminals.TryGetTerminal(terminalId, out var terminal))
{
    return CommandResults.Failure($"No terminal found: {terminalId}");
}

try
{
    await terminal.SendTextAsync("vi\r", commandContext.CancellationToken);
    await terminal.WaitForTextAsync(
        "VIM - Vi IMproved",
        TimeSpan.FromSeconds(10),
        commandContext.CancellationToken);
    await terminal.SendKeyAsync(AspireTerminalKey.I, commandContext.CancellationToken);
    await terminal.SendTextAsync(
        "Help, I'm stuck in vi and I can't escape!",
        commandContext.CancellationToken);

    return CommandResults.Success();
}
catch (Exception ex) when (ex is TimeoutException or InvalidOperationException)
{
    return CommandResults.Failure(ex.Message);
}
#pragma warning restore ASPIRETERMINAL001
Automating with Tape files
For a longer or reusable sequence, you can put the same interactions in a .tape file. Tape files come from Charmbracelet VHS, a tool for scripting terminal sessions and turning them into recordings. They are plain-text scripts: commands such as Type enter text, Enter presses a key, and Wait+Screen waits until a regular expression matches what is visible on the terminal screen.
Aspire’s aspire terminal tape play command reuses that familiar format to automate a resource terminal; it does not render a video. The command connects to a terminal that is already running, plays the tape, and prints the final screen. For example, save this as vi.tape:
Type "vi"
Enter
Wait+Screen /VIM - Vi IMproved/
Type "i"
Type "Help, I'm stuck in vi and I can't escape!"
With a running AppHost that has a shell resource configured with .WithTerminal(), play it like this:
aspire terminal tape play shell --tape-file vi.tapeThe command writes the final terminal screen to standard output after playback completes. It does not create .txt or .cast recording files; those are separate capture formats supported by the underlying Hex1b tape APIs.
Note
See the VHS tape guide for the broader format, and the Aspire CLI implementation for the playback command and options.Aspire 13.6 terminal enhancements
Aspire 13.6 builds on the terminal support introduced in 13.5 with richer terminal emulation and the ability to dock terminals at the bottom of the dashboard. These enhancements include:
- Iconography improvements
- Support for shell integration escape sequences (progress, title, path)
- Support for bookmark escape sequences.
- Support for independent dark/light mode palette selection.
Here is a short video showing a preview of some of these features being exercised.
Try it
If you have an Aspire app with any kind of interactive console resource, add one line to your AppHost, upgrade to 13.5 or later, and see what the terminal surface feels like in context. The feedback from early testing shaped a lot of the design here, and we want to hear what scenarios you run into that the current feature does not cover.
.WithTerminal()That is all it takes to start.
For the full feature documentation, see the Aspire terminal support docs at aspire.dev.


Azure SaaS Container Blob Haltbarkeitsdatum.
Contoso DEM
Microsoft Provider
Is this terminal powered by an existing open source library/libraries, eg. Sharing some lineage with VS Code or Windows Terminal, or all from scratch?
The terminal is powered by Hex1b (https://hex1b.dev). It’s open source at https://github.com/mitchdenny/hex1b
It’s a little different from other emulation efforts in that it’s designed to be a composable stack that you can use for a variety of scenarios from headless testing to experiences like you see here in Aspire.
It also has a TUI framework (which is actually how it started out but evolved from there).