


As GitHub announced metered billing, anyone with an active Azure subscription can now self-provision a paid GitHub Enterprise Cloud account, with Advanced Security and GitHub Copilot Business/Enterprise. This post is a screenshot-based step-by-step guide on how you can do so.
Pre-requisites
Before we get started, ensure that you have the following:
- An active Microsoft Azure Subscription, which is used for billing
- An existing Microsoft Entra ID tenant
We will also need the users with the following roles:
- A user with Owner rights to the Azure subscription
- A user with Cloud Application Administrator or Global Administrator rights to the Entra ID tenant that the Azure subscription is associated with
- A user with Cloud Application Administrator or Global Administrator rights to the Entra ID tenant that the users (mostly developers) will authenticate with
About Your Entra ID Tenant
While it is common to use the same Microsoft Entra ID tenant for both billing and identity configuration, it is not a requirement. Billing and IdP configurations are managed through separate Microsoft Entra ID Enterprise Applications.Step-by-Step Guide
Step 1: Create a GitHub Enterprise Trial Account

- Go to https://github.com/enterprise and click “Start a free trial” (Note: This link will require you to log in with your GitHub personal account first. If you’re creating a GHEC EMU account, your personal account will not be needed later).
- Choose between “Enterprise with personal accounts” (also called Non-EMU) or “Enterprise with managed users” (also called EMU). (Tip: Most organizations with an existing identity provider like Microsoft Entra ID will choose “Enterprise with managed users”. See here to learn more.)
- Go through the trial creation process and fill in the required information. Some fields need to be globally unique (e.g., the screenshot shows that
raztypeis already taken). - Click Create your enterprise.
- Set the initial root admin password.
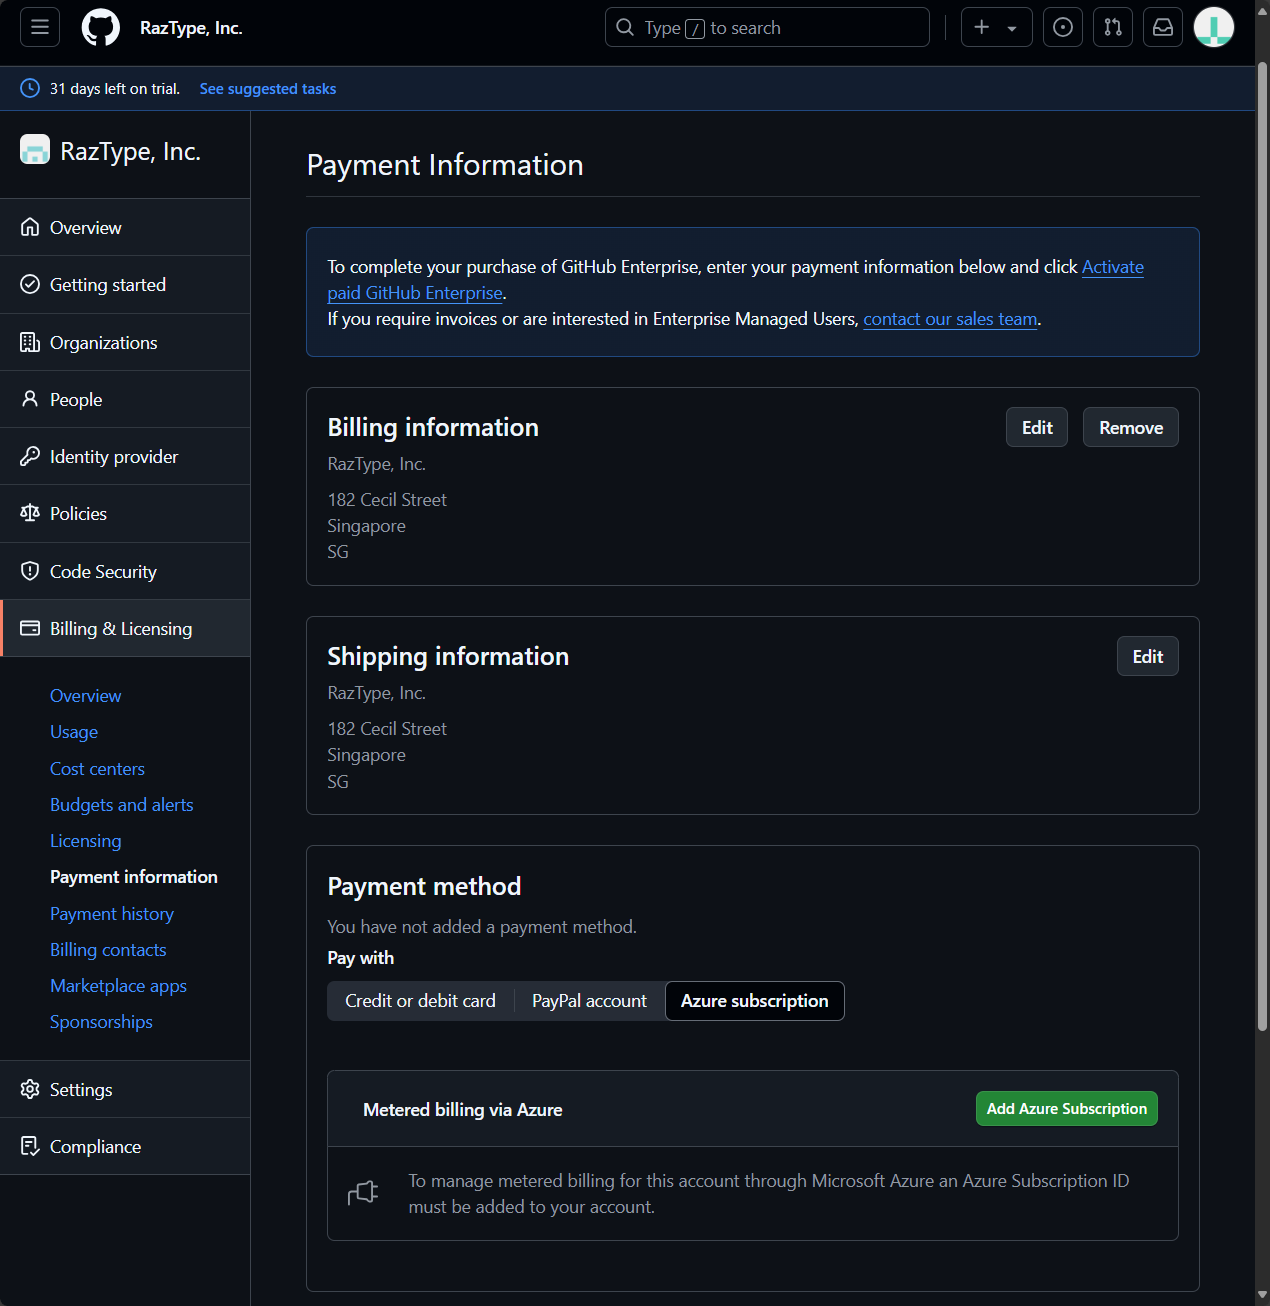
Step 2: Add an Azure Subscription
- Go to
https://github.com/enterprises/{enterprise-slug}, where{enterprise-slug}is the unique name you chose during the trial creation. - On the left, go to Billing & Licensing → Payment information
- Complete the Billing information and Shipping information forms.
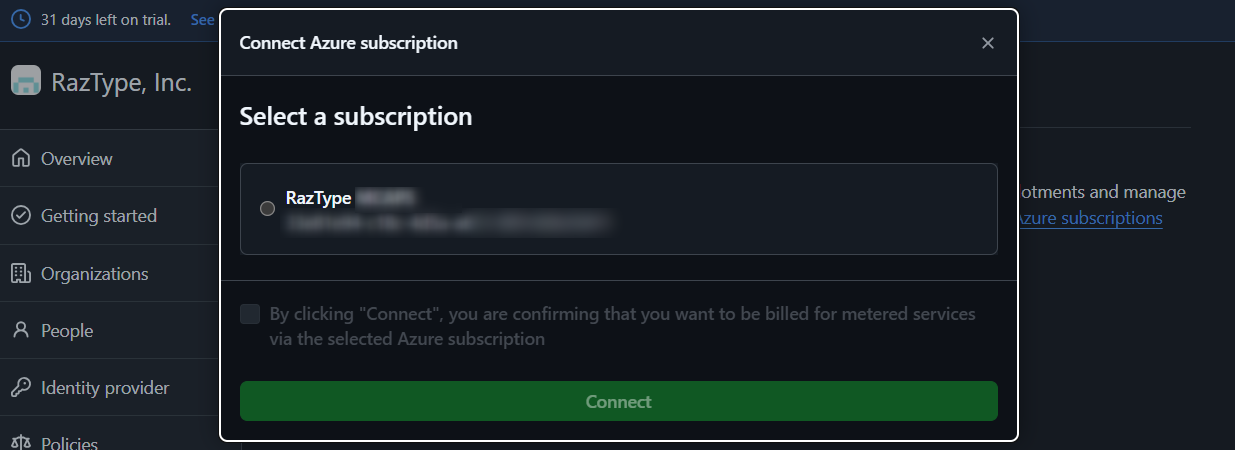
- Under Payment method, select Azure subscription and click the Add Azure Subscription button.

- Sign in with your Microsoft Entra ID Cloud Application Administrator account.
- Select the Azure subscription you want to associate with this GitHub Enterprise account and click Connect.

- Activate the GitHub Enterprise account.

Step 3: [For EMU accounts only] Configure Entra ID as the GitHub Identity Provider (IdP)
If you chose “Enterprise with managed users” in step 1.2, you will need to integrate your GitHub Enterprise account with your identity provider. GitHub supports a number of identity providers including Microsoft Entra ID. With Microsoft Entra ID, we can choose to integrate by SAML or OIDC. The process for these are well documented in the following:
- SAML Integration: SSO tutorial (part 1) and SCIM automated user provisioning tutorial (part 2)
- OIDC Integration: SSO and SCIM automated provisioning tutorial
Should you use SAML or OIDC?
One of the practical advantages of OIDC is that it allows you to use Entra ID’s Conditional Access Policies (CAP) for blocking GitHub access using SSH keys or Personal Access Tokens (PAT). Many organizations prefer to use OIDC because of this additional capability. However, if you are planning to have multiple GitHub Enterprise accounts in the future (including GitHub Copilot Business for Non-GHE), do choose wisely as there is a current limitation where an Entra ID tenant can only connect to 1 GitHub Enterprise via OIDC.In this step, we recommend creating at adding at least two Entra ID groups:
- An Entra ID group for your GitHub Admins (role = Enterprise Owner).
- One or more Entra ID groups for your developers (role = User).
Step 4: Create Organizations and Repositories
At this point, you are now able to use GitHub Enterprise (repos, actions, etc.). This allows you to create multiple organizations, where each organization can contain multiple repositories. Each organization and repository will have assigned owners (admins) and members (not to mention other roles and permissions).
Creating Organizations
- Go to
https://github.com/enterprises/{enterprise-slug} - On the left, go to Organizations and click New Organization (Note: the new organization URL will be
https://github.com/{organization-name}and needs to be globally unique.) - Add other owners/admins as needed.
- Repeat steps to add more organizations.

Creating Repositories
- Go to
https://github.com/{organization-name} - On top, click on Repositories and click New Respository (or simply click New in the Overview tab)
- Input the name and other information as needed.
- Start pushing your code in this git repository!
- Repeat steps for other repositories
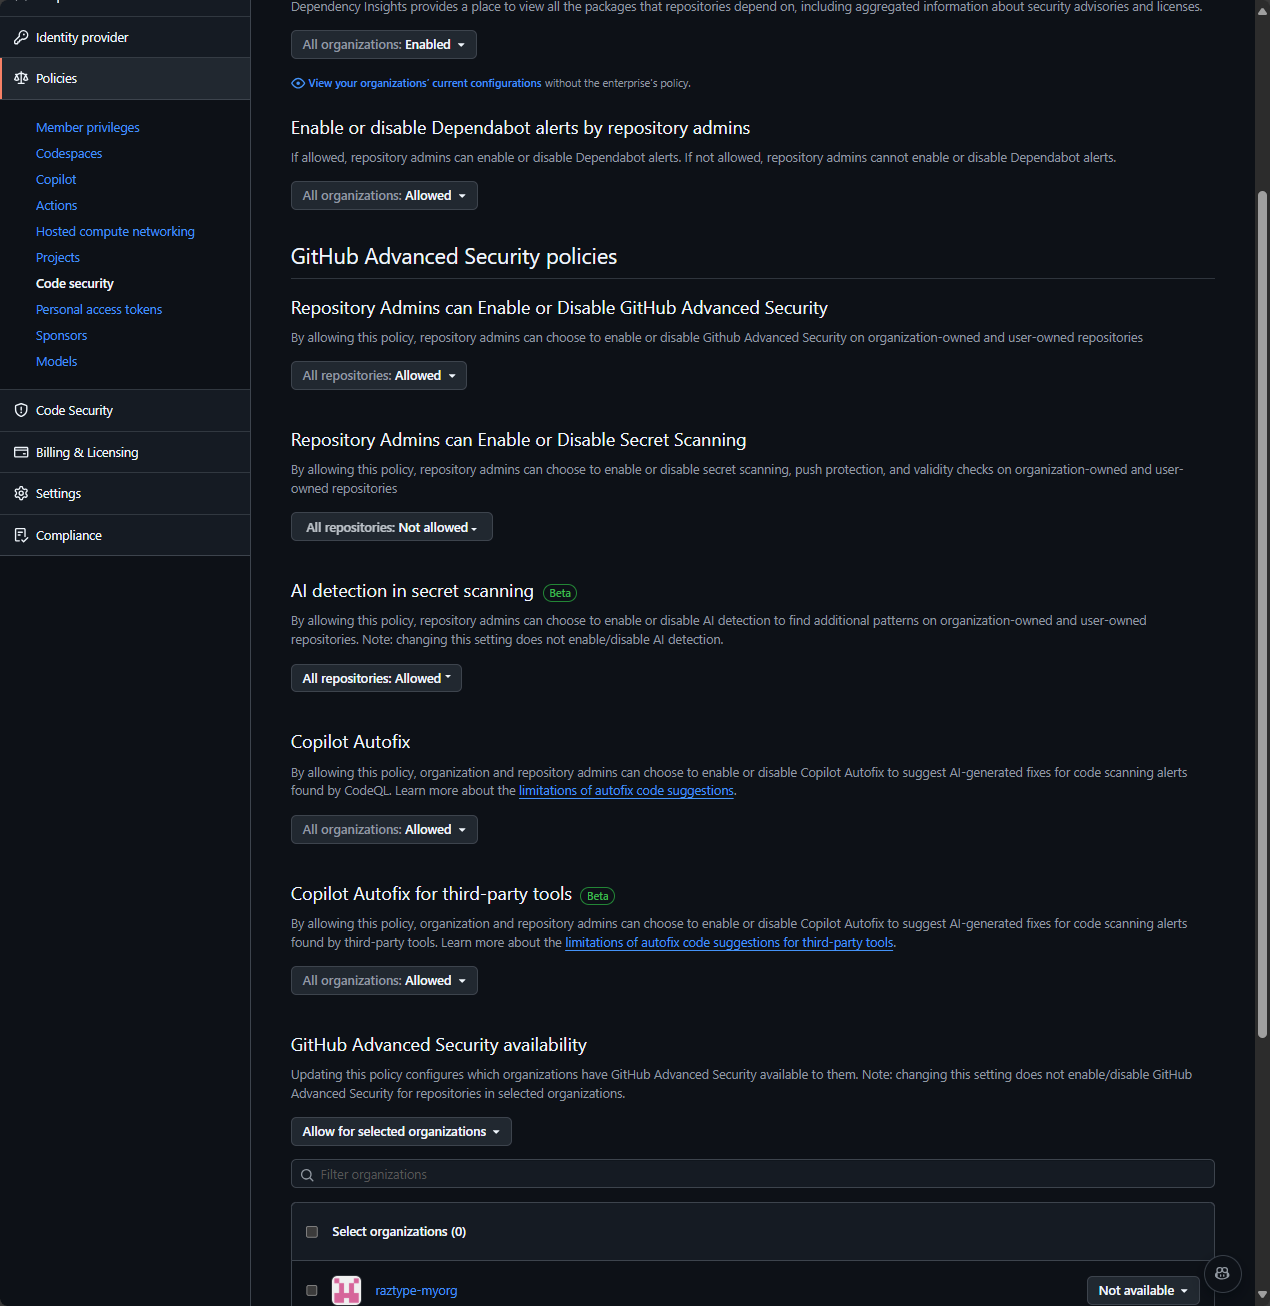
Step 5: Enable GitHub Advanced Security (GHAS) for your Organizations and Repositories
GitHub Advanced Security (GHAS) is available by default, but admins can control if this can be enabled by the GitHub organization and GitHub repository admins. This is set in the GitHub enterprise policies:
- Go to
https://github.com/enterprises/{enterprise-slug} - On the left, go to Policies → Code security
- Configure policies to for organizations/repositories
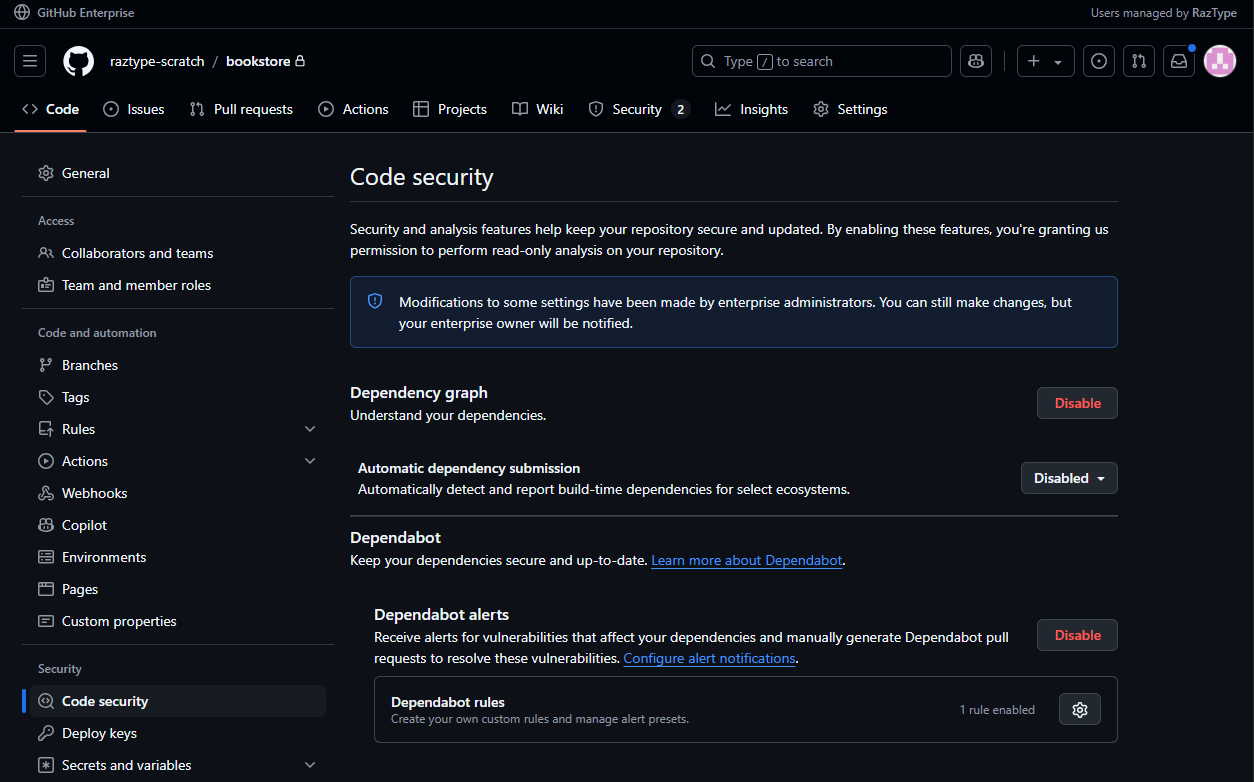
Once allowed by the enterprise, a repository owner/admin can:
- Go to
https://github.com/orgs/{organization-name}/{repository-name}/settings - On the left, click on Code security and start enabling Dependabot, Code Scanning and Secret Scanning
- On the top nav bar, click on Security and start seeing the vulnerability alerts (you may have to wait for a few minutes for the scans to finish).
- Repeat steps for other organizations/repositories.
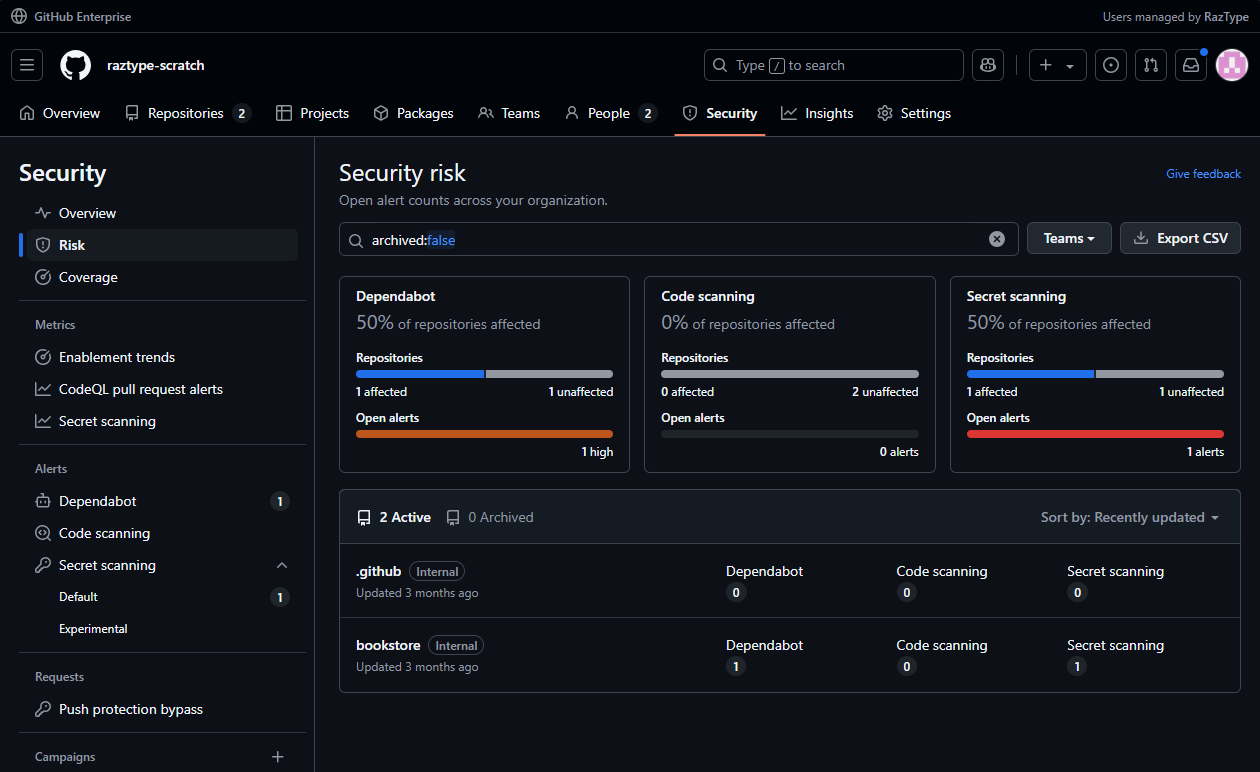
GitHub Advanced Security Billing
When GitHub Advanced Security is enabled in a repository, charges will begin based on all active committers in that repository. To know more about how this is computed, see About billing for GitHub Advanced Security.Step 6: Enable GitHub Copilot for your Organizations
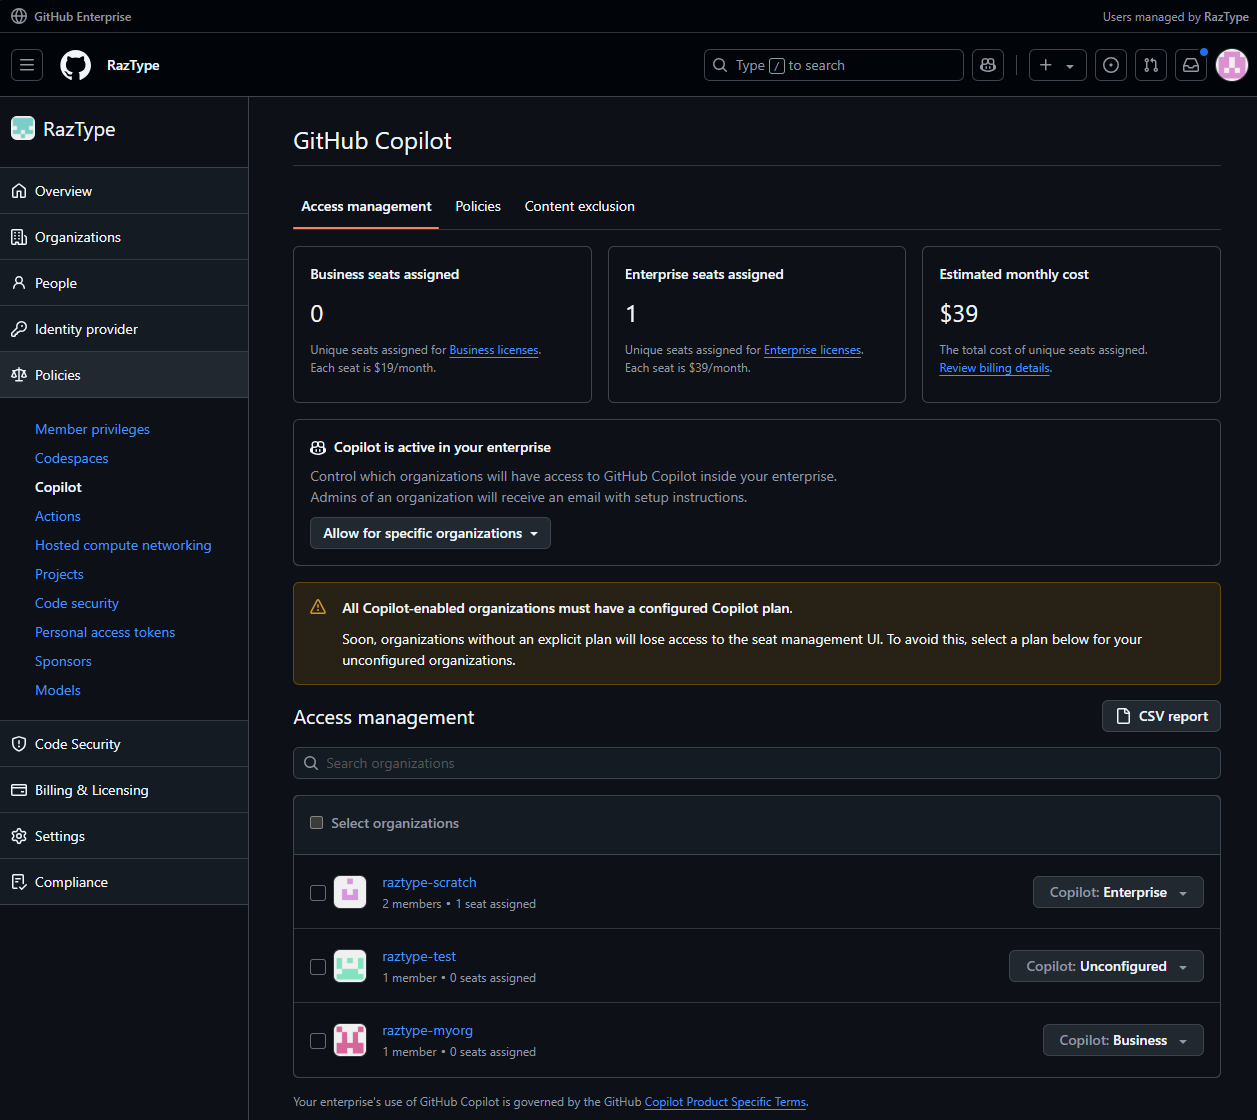
Similar to GHAS, GitHub Copilot is available by default, but admins control which organizations will have either GitHub Copilot Business, Enterprise, or none at all.
- Go to
https://github.com/enterprises/{enterprise-slug} - On the left, go to Policies → Copilot
- Under Access management, choose if GitHub Copilot allowed for All organizations or Specific organizations. Also select what Copilot tier (business or enterprise) is applied to each organization
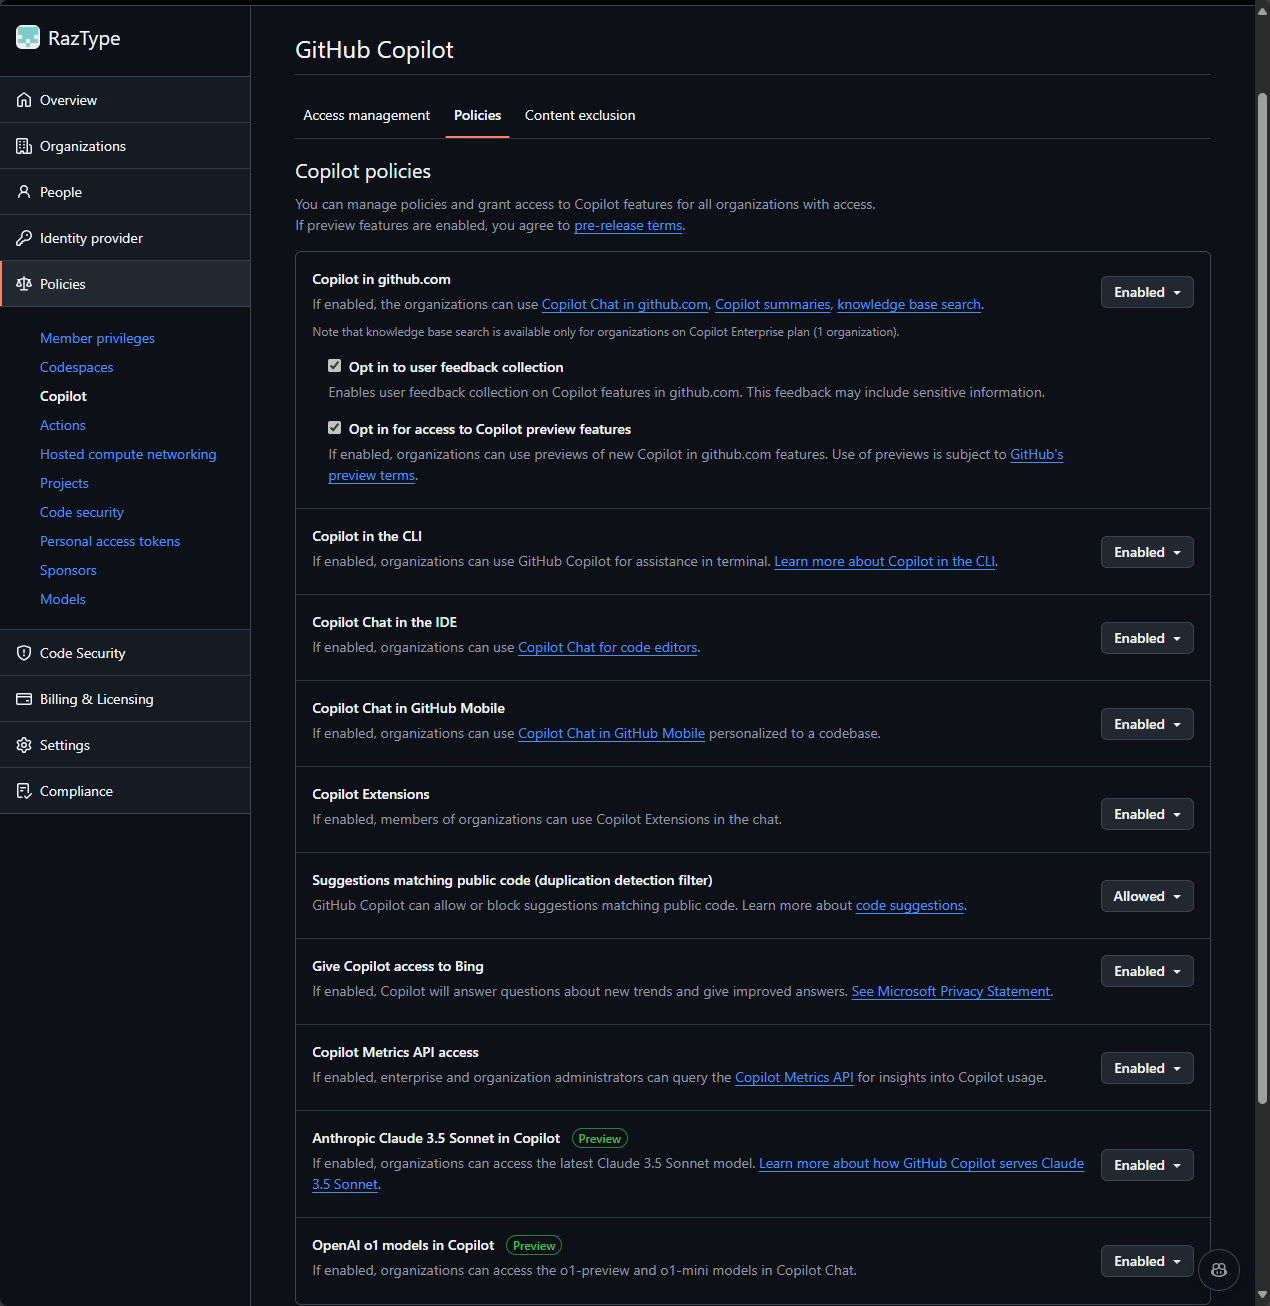
- Under Policies, choose the GitHub Copilot features that you want enabled (i.e. GitHub Copiot Chat, CLI, Bing Search, etc.)
- Under Content exclusion, set files, folder paths and repos that you want excluded by GitHub Copilot (learn more about it here)
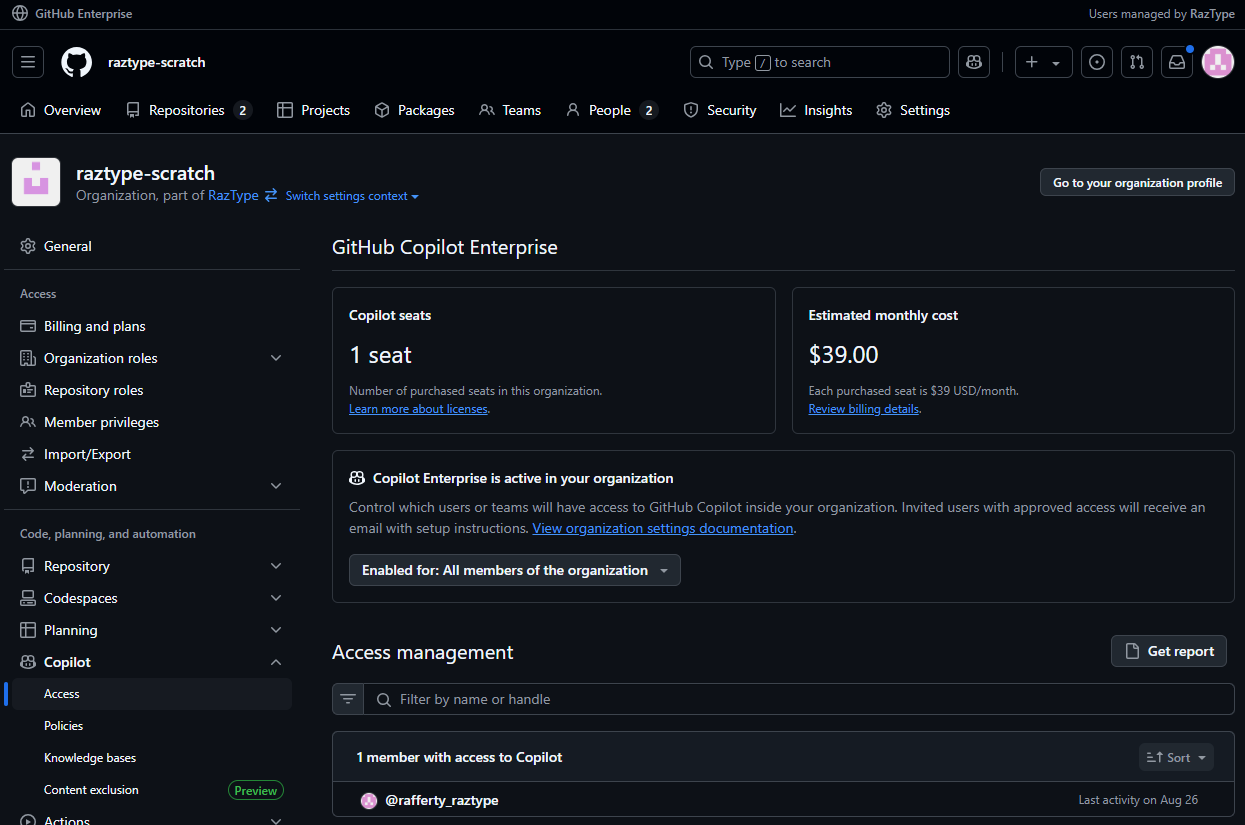
Once enterprise admins are done with the configuration, the organization owners/admins can now start giving their organization members GitHub Copilot licenses.
- Go to
https://github.com/{organization-name} - On top, click Settings → Copilot → Access and start assigning GitHub Copilot licenses to “all members in the organization” or “selected members”
- Go through the other Settings → Copilot → Policies/Content exclusion/etc. and configure settings allowed by your enterprise owners
- Repeat steps for members of other organizations.
Start Coding
That’s it! At this point, you will have GitHub Enterprise, Advanced Security, and Copilot Business/Enterprise activated. Share the news with your developers and happy coding!
0 comments
Be the first to start the discussion.