
This is a guest post from Sophie Tagar, a customer support engineer at Applitools. Previously, Sophie was a software developer at Matrix Israel where, among other things, she did full stack development using JavaScript and .NET. She is a veteran of the Israeli air force but unfortunately, they only let her touch Oracle ERP and not an F-35 joystick. In her spare time, she enjoys basketball — both playing (shooting guard) and watching (go Dubs!).
Visual UI Tests using Xamarin and Appium
In this tutorial, you will learn how to integrate automated visual user interface tests into a development toolchain that includes Xcode iOS simulator using Xamarin, Appium, Applitools, and MacOS (formerly OSX).
We’ll cover the following:
- A brief introduction to Visual UI Testing
- Preparing your test automation environment
- Writing your test script
- Running your first mobile visual UI test
What is Visual User Interface Testing
If you’re not yet familiar with automated visual UI testing, more broadly called Application Visual Management (or AVM for short).
Look at this example of a Hello World application available on the Applitool’s website:

How would you test this application? You could verify that a button exists and that the button’s text is “CLICK ME!”. What about the “HELLO WORLD!” title? Again, you can verify the text, but what about the colors? What about the positions of the title element? Of the button? What about the rest of the elements?
Without mobile visual testing, you will need to write a lot of validations (also called assertions or checkpoints), one for every property you want to test (content, position, color, etc.). Even then you cannot be sure the final result is displayed properly to the user.
Using Visual Testing
Visual testing solves this problem easily. With a single “check” command, you verify all these properties for the entire content of the application. So your advantage is double:
- You don’t need to write a separate assert statement for each element.
- You get full coverage, not just coverage for specific elements.
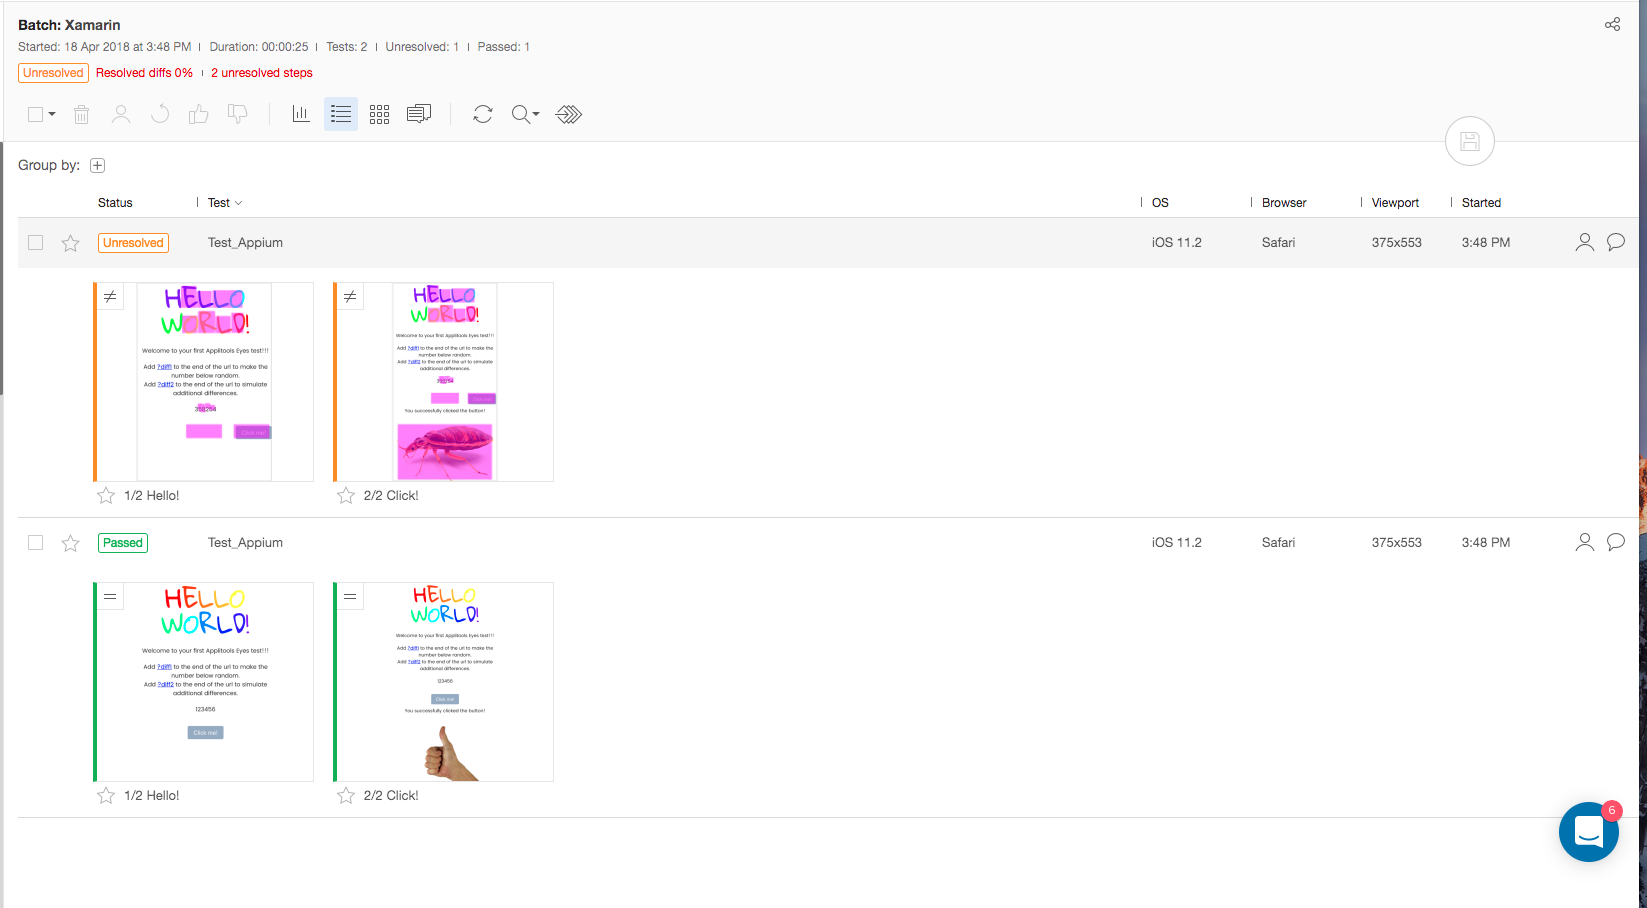
The result of visual testing this application using Applitools are shown below; visual differences are highlighted in magenta:

And here are the raw results:
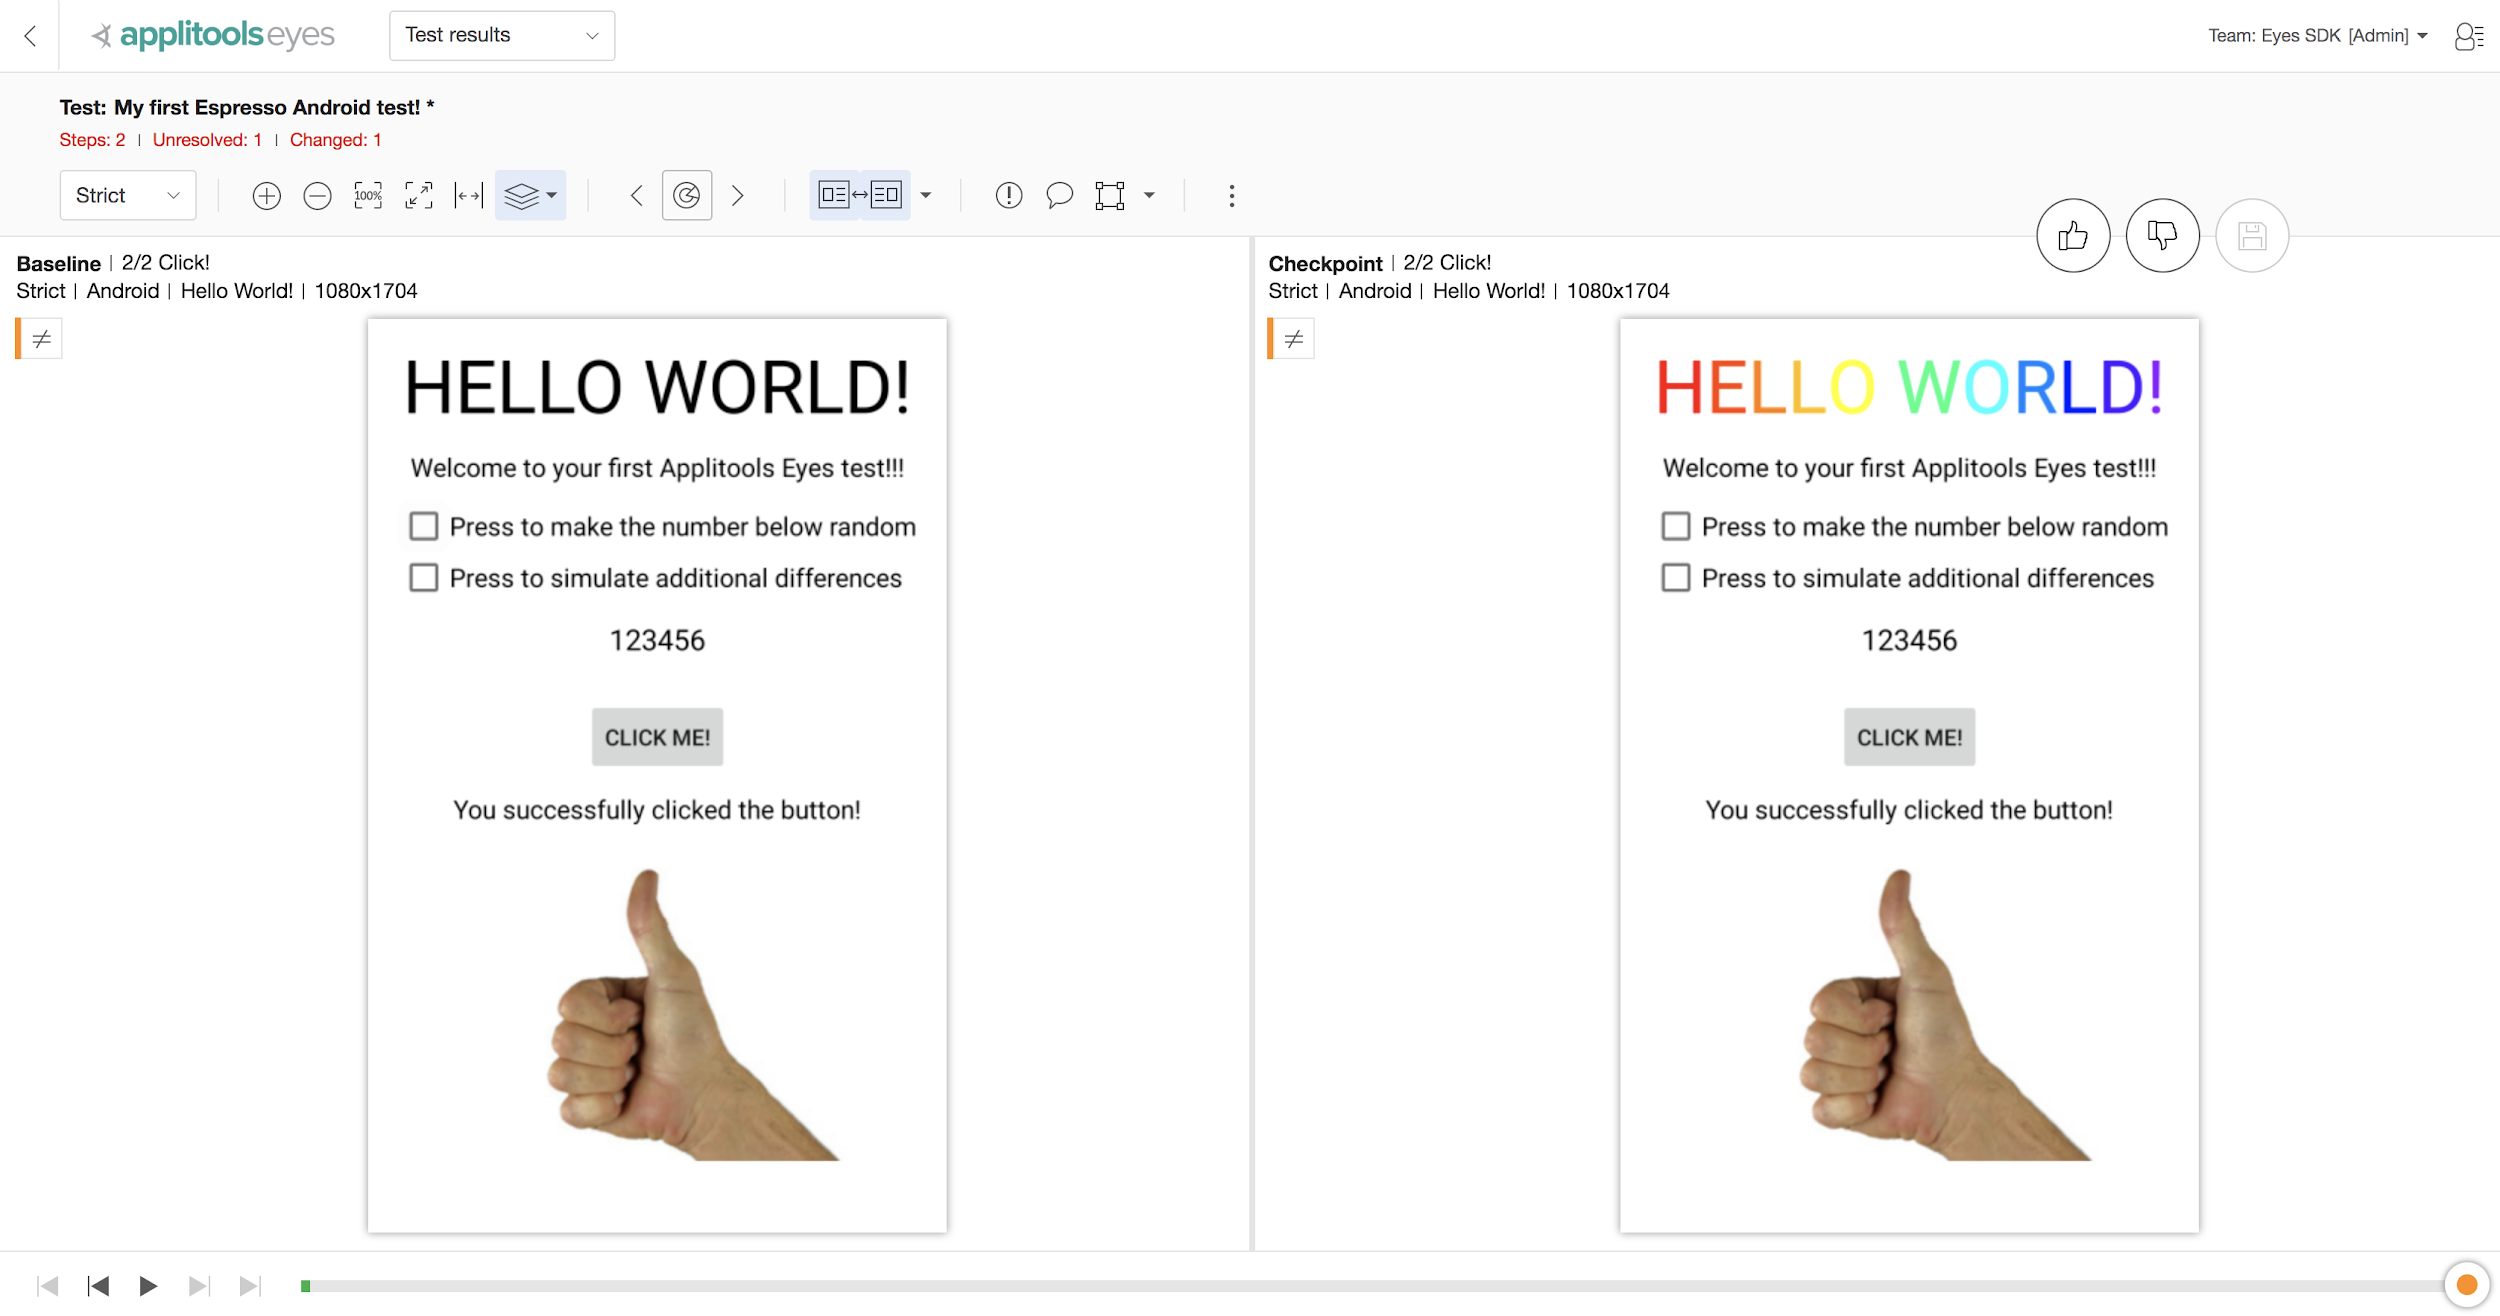
What you see in the images above is an actual fix of a bug in the “HELLO WORLD!” title. The coloring method we used for the “HELLO WORLD!” text did not work for Android 6.0. We identified the bug when we ran visual tests on the demo application, fixed it, then ran our visual tests again to make sure the problem is fixed. This is something we could not have identified any other way.
Tthe screens above are just two examples of Applitools’ visual tests Results view. The Applitools Test Manager includes plenty of other options for analysis and maintenance of visual tests.
Even though we only fixed the title, we didn’t have to add new tests or change existing ones. Since visual tests capture the entire screen, not just what’s in the viewport, but also content that the user needs to scroll in order to view. We have validated the entire application when we ran the tests, the exact same tests as we had before when setting up our baselines.
Here’s what the command which validates the entire screens looks like:
eyes.checkWindow("Hello World screen");
Applying Application Visual Management (AVM)
What happens when the application has a lot of screens? What about different devices? This is where Application Visual Management (AVM) comes into the picture. Applitools automatically creates baselines for each environment in which your tests run. When viewing multiple tests, you can group shared differences, making it easy to accept/reject changes all at once. You can also review baseline history, perform cross-environment tests and more. With Applitools, you can continuously and easily manage your visual baselines. You can read more Visual UI Testing and how do it right on the Applitools website.
Prepare Your Test Environment
Here are the tools you’ll need to run your automated mobile UI tests.
Time: about 45 minutes
Software tools to install on your Mac:
- Homebrew
- Appium (This article assumes you’re installing via brew and npm.)
- Visual Studio for Mac
- Xcode
- XCUITest
Create an Applitools Account
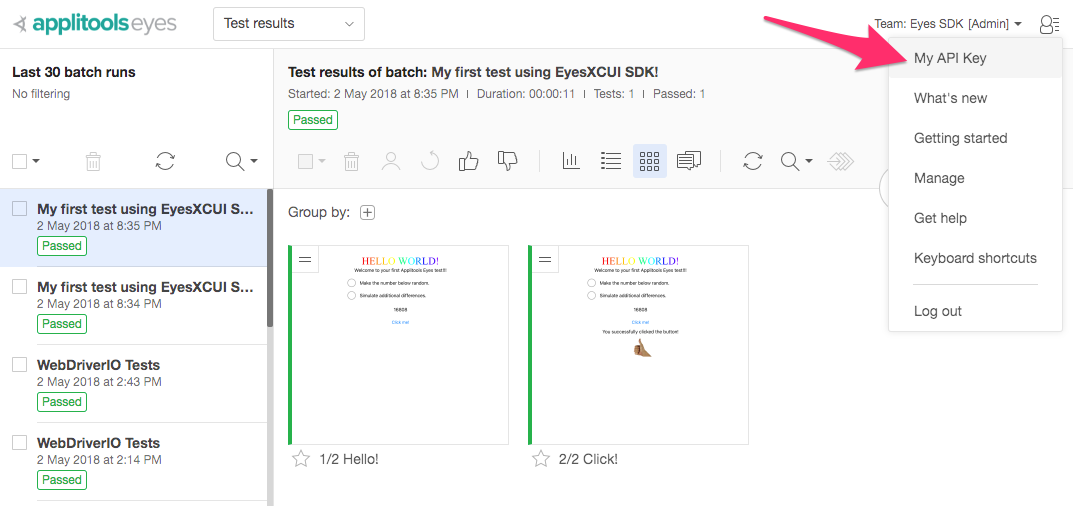
To perform visual UI tests, sign up for an Applitools account on the Applitools website. After you registered with Applitools, you get an API KEY for running visual tests. You can find it on the menu in the top right corner of the Applitools Test Manager:
Write Your Test Script
In Visual Studio for Mac:
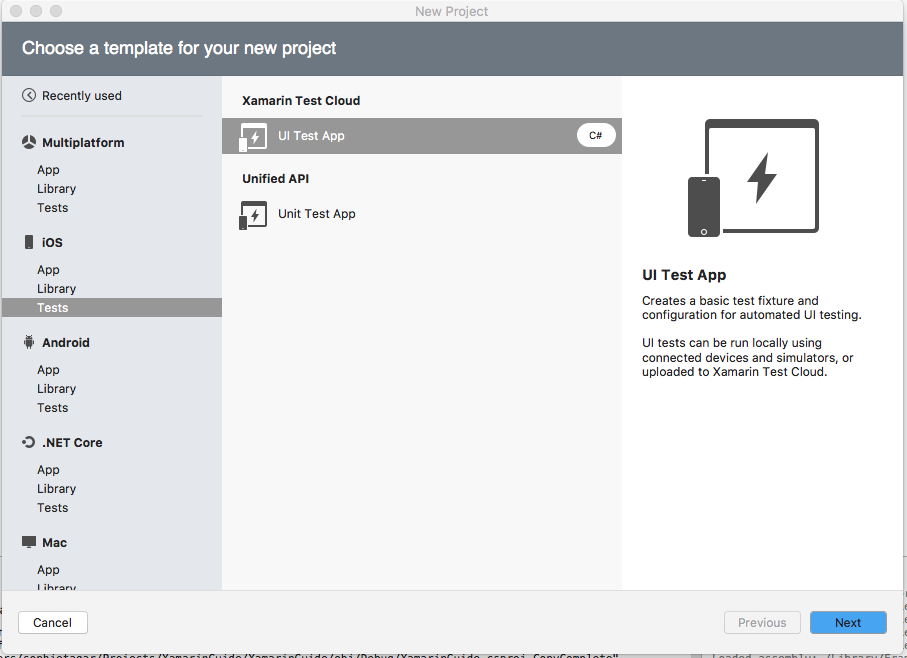
- Create a new solution: File → new Solution → iOS → Tests → Xamarin Test Cloud → UI Test App:
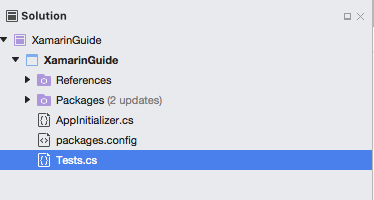
- Open the
Tests.csfile: - Add the Eyes package in the following way on the Solution Explorer – Right click on Packages → click add packages → search for Eyes → select Eyes.Selenium → click Add Package.
- Create a file TestXamarinAppium.cs in the project we just created using the code below. You can also find this C# code sample on GitHub. This code uses Selenium WebDriver, NUnit test framework, and the Applitools Eyes .NET SDK to drive our automated visual UI tests.
// dependency required for URI and Exception objects
using System;
// dependency required for Eyes object
using Applitools.Selenium;
// dependency required for FixedCutProvider object
using Applitools.Cropping;
// dependency required for NUnit
using NUnit.Framework;
// dependency required for By object
using OpenQA.Selenium;
// dependency required for RemoteWebDriver object
using OpenQA.Selenium.Remote;
// dependency required for BatchInfo object
using Applitools;

namespace TestXamarinAppium
{
    [TestFixture]
    public class Tests
    {
	//Declaring the Eyes object
        Eyes eyes;
	//Declaring the RemoteWebDriver object
        RemoteWebDriver driver;
	//Creating a BatchInfo object to group all the tests together under the same batch
        BatchInfo mybatch = new BatchInfo("Xamarin");
//Using the same test name to create a bug in the TestWithDiff method (normally                              //different tests will be given different test name)
        string TestName = "Test_Appium";
//Declaring the DesiredCapabilities object
DesiredCapabilities dc;

[TestFixtureSetUp]
public void BeforeAllTests()
{

   // Initialize the eyes SDK and set your private API key.
   eyes = new Eyes();
   eyes.ApiKey = Environment.GetEnvironmentVariable("APPLITOOLS_API_KEY");

   //Hides the scroll bar
   eyes.HideScrollbars = true;
   //Take fullpage screenshot
   eyes.ForceFullPageScreenshot = true;
   //when taking a full page screenshot use css stitching to handle fixed positoin
  //elements like headers/floating bars

  eyes.StitchMode = StitchModes.CSS;

 //Create a batch to group all the tests together
 eyes.Batch = mybatch;

//using OpenQA.Selenium.Remote
//Setup appium - Ensure the capabilities meets your environment.
dc = new DesiredCapabilities();
dc.SetCapability("platformName", "iOS");
dc.SetCapability("platformVersion", "11.2");
dc.SetCapability("browserName", "safari");
dc.SetCapability("deviceName", "iPhone 7");

     }

     [SetUp]
     public void BeforeEachTest()
     {
            try
            {
                //creating the driver with the appium server url
                driver = new RemoteWebDriver(new Uri("http://127.0.0.1:4723/wd/hub"), dc);

            }
            catch(Exception e)
            {
                Console.WriteLine(e.Message);
            }

        }

        [TearDown]
        public void Cleanup()
        {
            // End the test.
            driver.Quit();
            eyes.Close();

        }


        [Test]
        public void RunTest()
        {
                // Start the test
                eyes.Open(driver, "Xamarin", TestName);

                // Navigate the browser to the "hello world!" website.
                driver.Url = "https://applitools.com/helloworld";

                // Visual checkpoint #1
                eyes.Check("Hello!", Applitools.Selenium.Target.Window());

                // Click the "Click me!" button.
                driver.FindElement(By.TagName("button")).Click();

                // Visual checkpoint #2
                eyes.Check("Click!", Applitools.Selenium.Target.Window());

            }
        }

        [Test]
        public void TestWithDiff()
        {

                // Start the test
                eyes.Open(driver, "Xamarin", TestName);

                // Navigate the browser to the "hello world!" web-site.
                driver.Url = "https://applitools.com/helloworld";

                //Generate diffs
                driver.FindElement(By.CssSelector("body > div > div:nth-child(2) > p:nth-child(3) > a")).Click();

                // Visual checkpoint #1
                eyes.Check("Hello!", Applitools.Selenium.Target.Window());

                // Click the "Click me!" button.
                driver.FindElement(By.TagName("button")).Click();

                // Visual checkpoint #2
                eyes.Check("Click!", Applitools.Selenium.Target.Window());

       }

    }
}
Run Your First Visual UI Test
In MacOS Terminal:
- After you have installed Appium using brew and npm, start Appium by typing “appium” into the Terminal.
- Run the project by clicking on the play button:
- The Xcode iOS simulator should run and navigate to the URL in the script.
- To terminate appium, hit ctrl-c.

Troubleshooting tip: If you get an error in your MacOS Terminal:
“-bash: appium: command not found”:By default, appium is installed in the path (/usr/local/bin) when using Homebrew. Ensure that /usr/local/bin is in your $PATH. Here’s more on how to do that.
Review Your Test Results
In the browser:
Go to https://eyes.applitools.com to see the results. At this point, you should be all set for visual testing using an iOS app simulator using Xamarin and Appium on MacOS.
Troubleshooting tips:
Potential Issue #1:
If you get the following error in Visual Studio when running your script:
“Could not resolve type with token...”.
- Right-click on Packages
- Update
- Wait for the update to finish
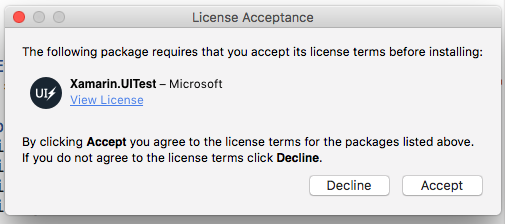
- Then a screen with license terms will appear
- Click Accept
- Wait for the update to finish
- Try running the project again.
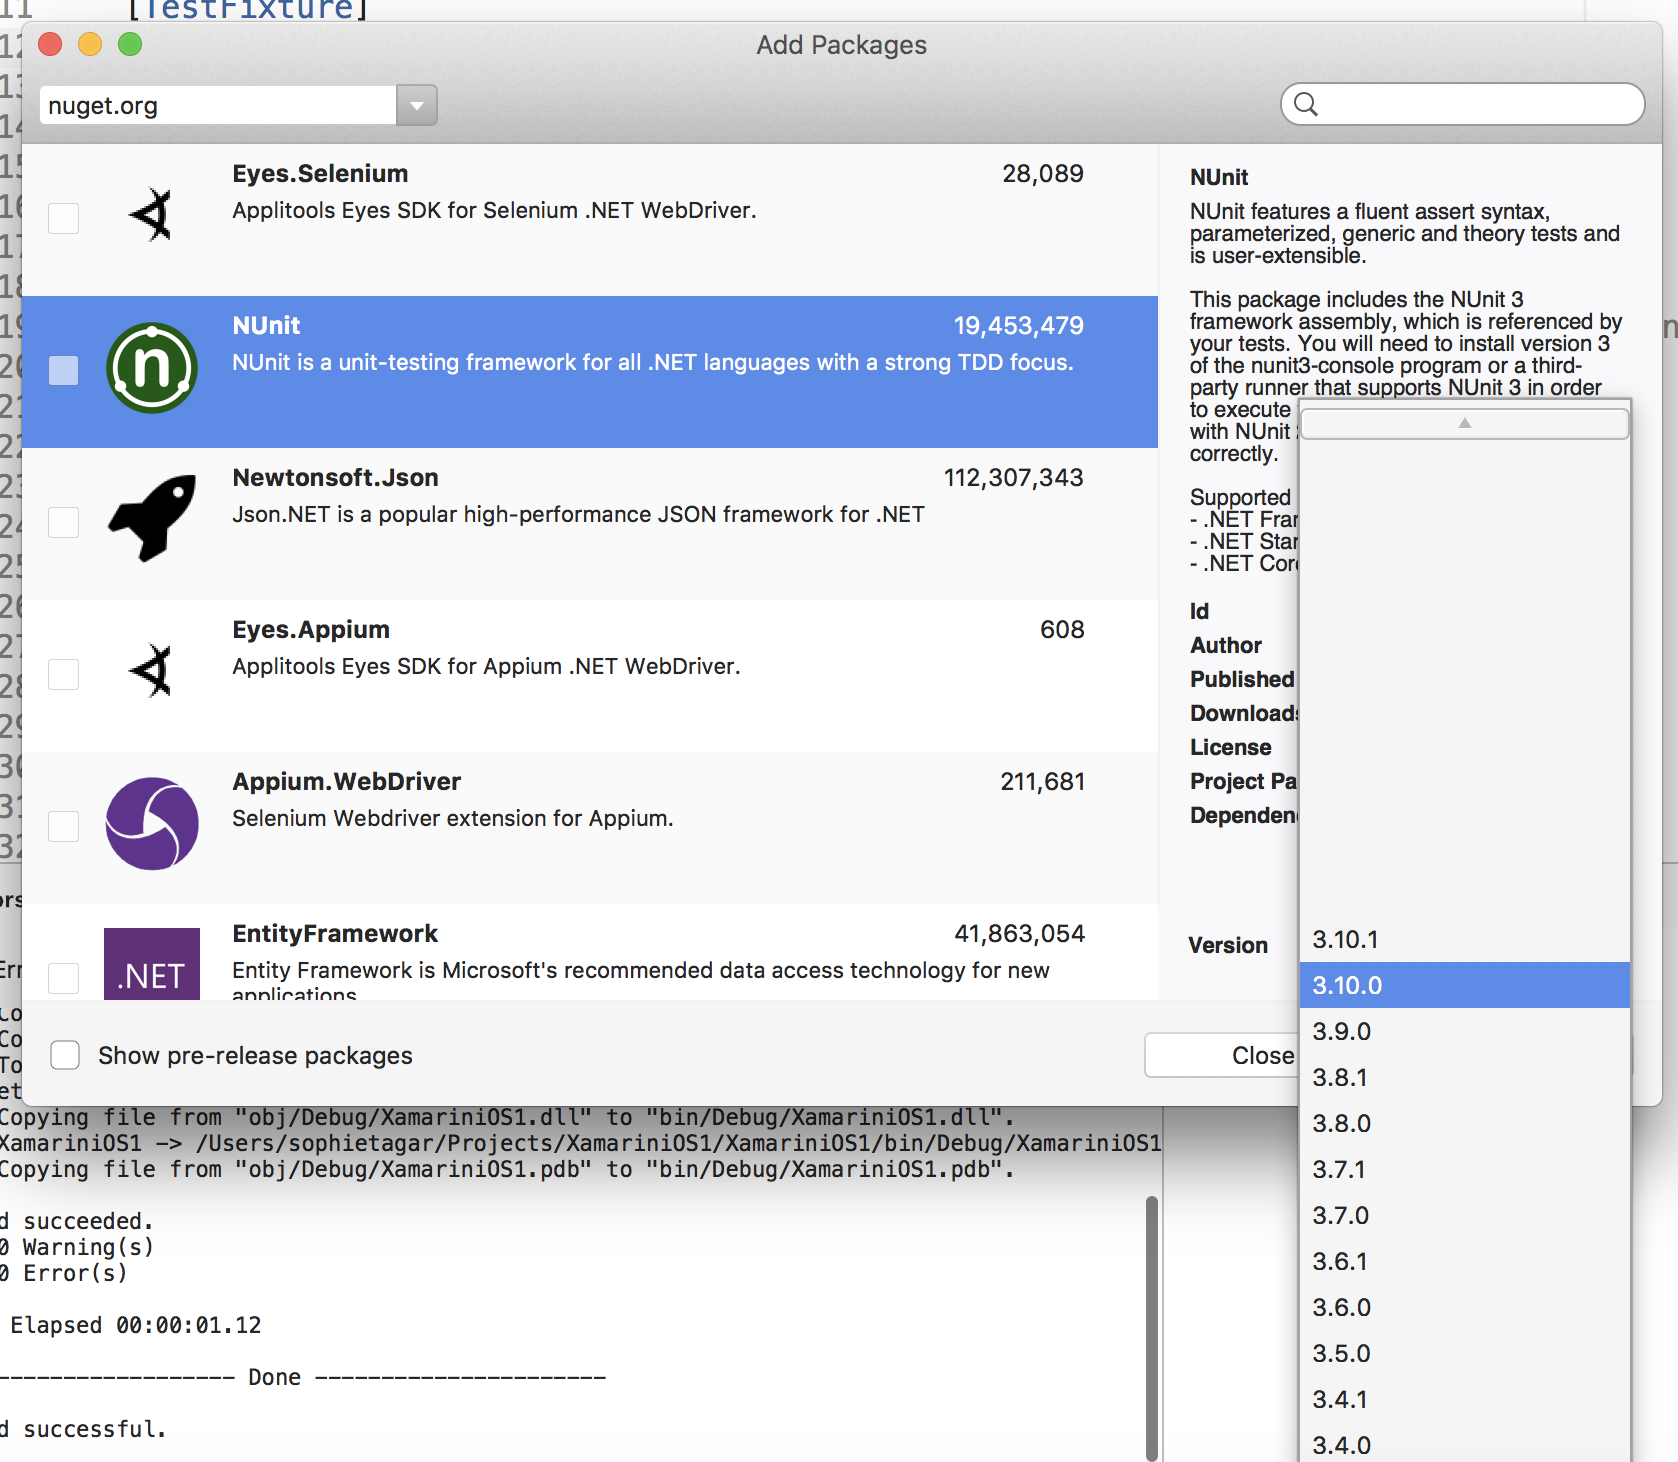
Potential Issue #2: If you get the following error in Visual Studio when running your script:
ERROR: NUnit.Core.UnsupportedFrameworkException: Skipped loading assembly because it references an unsupported version of the nunit.framework, 3.10.1.0
- Right-click on Packages in the Xamarin project
- Search for NUnit
- Downgrade to NUnit version 3.10.0
- Run again.
Wrapping up
At this point, you should have everything you need to support visual UI testing on using Xamarin, Appium, Applitools, and MacOS in your automated testing lab, test cloud, or device farm. To learn more:
- Contact Applitools for a demonstration of Visual Testing for your own apps.
- Dive into Applitools documentation.