
One of my favorite features of the iPhone is Touch ID, introduced by Apple with the release of the iPhone 5s a couple of years ago. ![]() Touch ID adds biometric authentication to your device so users can touch the home button to unlock their device instead of using a pin code.
Touch ID adds biometric authentication to your device so users can touch the home button to unlock their device instead of using a pin code.
Since its initial release, Apple has added a few new ways to use Touch ID, including integrating it as an essential part of Apple Pay and adding an API for developers to use Touch ID in their apps. In this blog post we’re going to discuss how you can leverage Touch ID to create secure user authentication. We’ll include a fallback to store the password in Keychain and authenticate our users against that in cases where the device doesn’t support Touch ID.
Supporting Older Devices
Sign Up
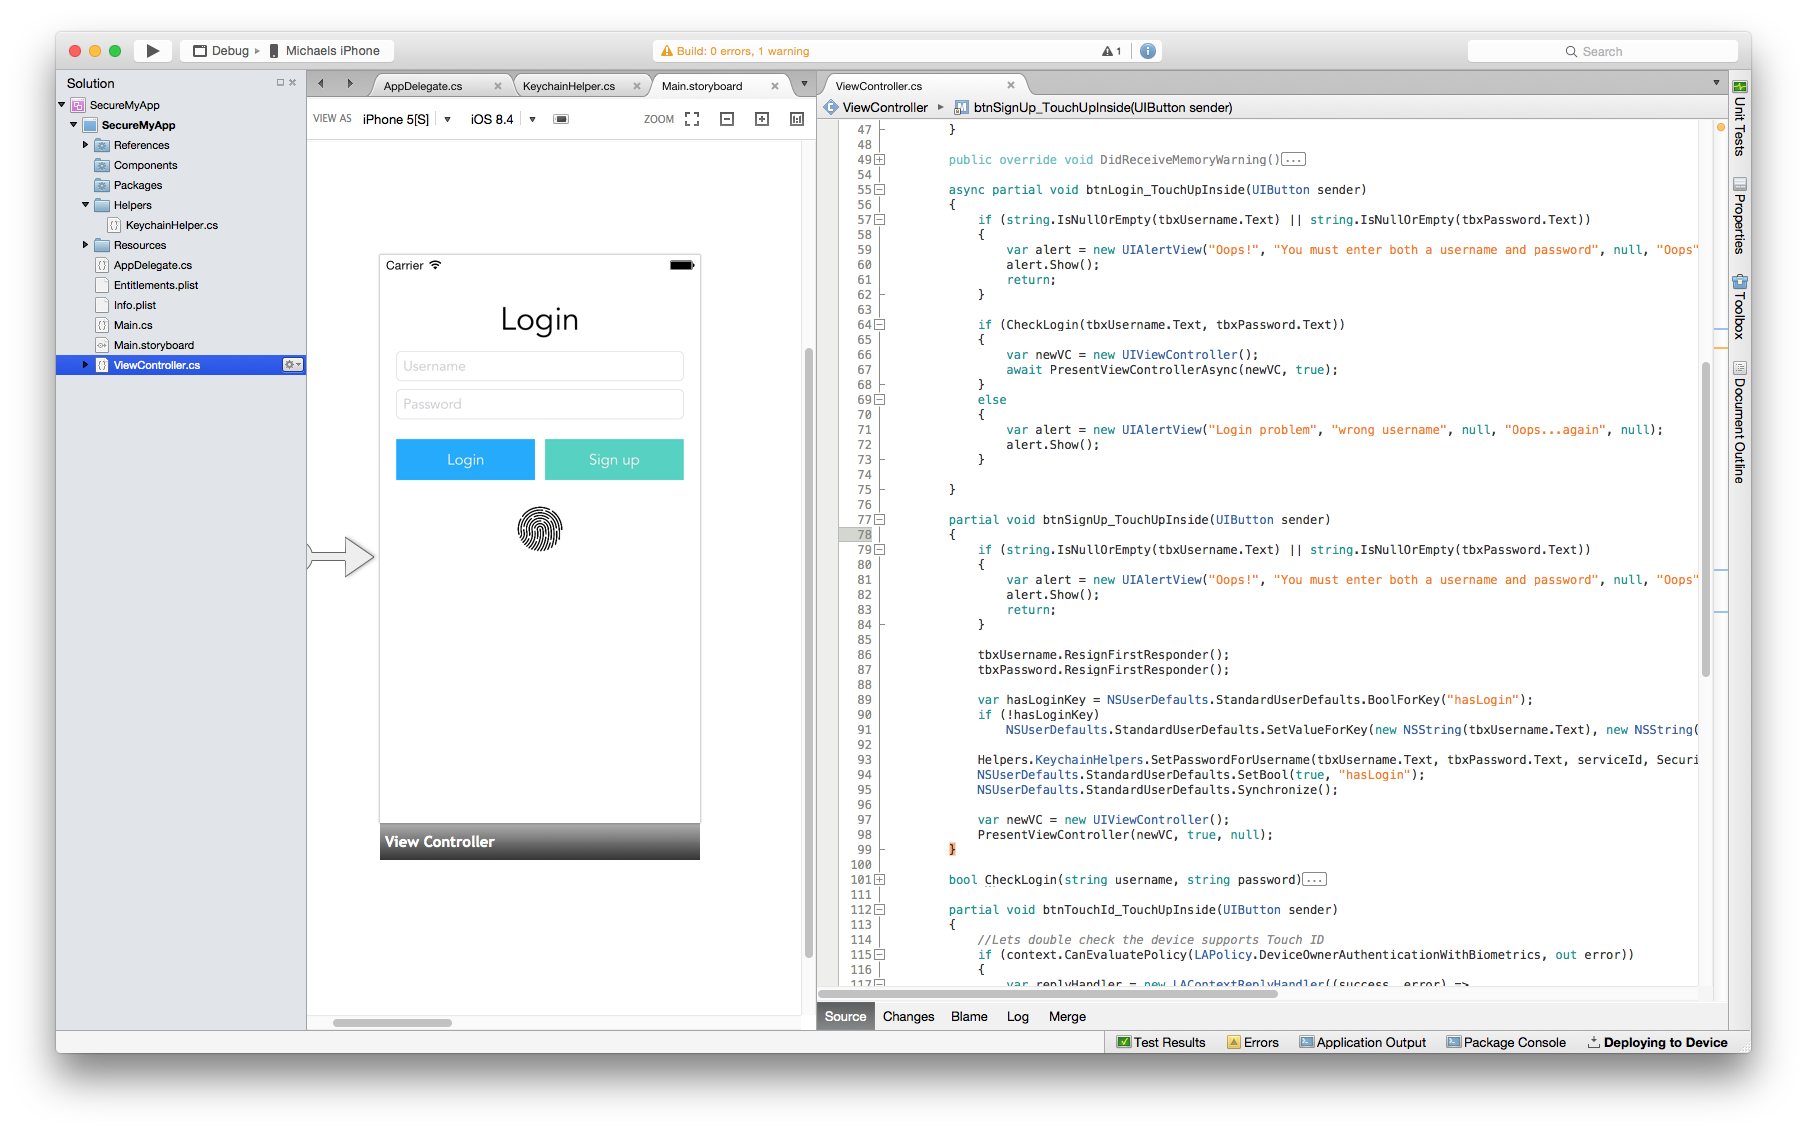
If the device has Touch ID, we won’t need to sign the user up since the device can authenticate them for us. But to ensure we support devices such as iPhone 4, 4S, and the iPhone 5, we’ll want to ensure we’ve got a fallback in place. To do this, we’ll use Keychain to store and validate the user credentials.
I like to use UserDefaults for storing usernames to read back information when the app launches and populate the username UITextField for the user. It’s small touches like this that make an app feel more polished and help achieve higher ratings on the app store.
var hasLoginKey = NSUserDefaults.StandardUserDefaults.BoolForKey("hasLogin");

if (!hasLoginKey)

    NSUserDefaults.StandardUserDefaults.SetValueForKey(new NSString(tbxUsername.Text), new NSString("username"));
Saving the Password
It’s important to note that we don’t want to use UserDefaults here since it’s not a secure approach to saving your data. Instead, we’ll use Keychain, which is iOS’s built-in secure storage service that allows us to store passwords, keys, certificates, and more. My colleague René Ruppert has developed a helpful wrapper for storing passwords on iOS with Keychain that you can grab here and is what I’ll be using.
To save the password, we simply call ‘SetPasswordForUsername’. In this case, I have my serviceId set to ‘MySecureApp’.
Helpers.KeychainHelpers.SetPasswordForUsername(tbxUsername.Text, tbxPassword.Text, serviceId, Security.SecAccessible.Always, true);
Once we’ve done that, it’s time to set ‘hasLogin’ to true and synchronize the UserDefaults.
NSUserDefaults.StandardUserDefaults.SetBool(true, "hasLogin");

NSUserDefaults.StandardUserDefaults.Synchronize();
Validating the User Credentials
We’re now ready to validate the credentials provided by the user. To do this, we get the password from the Keychain and check that it matches the password provided. We then repeat the process with the username. If CheckLogin returns true, then we can continue loading new views.
static bool CheckLogin(string username, string password)
{
    if (password == Helpers.KeychainHelpers.GetPasswordForUsername(username, serviceId, true) &&
        username == NSUserDefaults.StandardUserDefaults.ValueForKey(new NSString("username")).ToString())
    {
        return true;
    }

    return false;
}
Adding Touch ID
Implementing user authentication with Touch ID is painless and only involves a tiny amount of code since iOS does most of the heavy lifting for us. Below is all the code required to get started.
//Lets double check the device supports Touch ID
if (context.CanEvaluatePolicy(LAPolicy.DeviceOwnerAuthenticationWithBiometrics, out error))
{
    var replyHandler = new LAContextReplyHandler((success, error) =>
        {
            InvokeOnMainThread(() =>
                {
                    if (success)
                    {
                        var newVC = new UIViewController();
                        PresentViewController(newVC, true, null);
                    }
                    else
                    {
                        var alert = new UIAlertView("OOPS!", "Something went wrong.", null, "Oops", null);
                        alert.Show();
                    }
                });
        });
    context.EvaluatePolicy(LAPolicy.DeviceOwnerAuthenticationWithBiometrics, "Logging in with Touch ID", replyHandler);
}
else
{
    var alert = new UIAlertView("Error", "TouchID not available", null, "BOOO!", null);
    alert.Show();
}
Wrapping Up
Not all apps require a backend service for user authentication, and iOS provides lots of options for authenticating locally. If you wanted to take this one step further you could look at integrating 1Password authentication into your app. I’ve created a completed version of the demo project on GitHub, to which I’ll be adding 1Password support to in a separate branch that you can find here. Additionally, be sure to read through our full documentation on integrating Touch ID.