
This is a guest blog by Timothé Larivière. Timothé is the maintainer of Fabulous and a Microsoft MVP. You can find him on Twitter @Tim_Lariviere.
Fabulous App Development
Fabulous is an open-source framework for building mobile & desktop apps using functional programming (FP) with F#, a .NET functional-first programming language. It is available on GitHub at https://github.com/fsprojects/Fabulous.
Applications built with Fabulous use the MVU design pattern (Model-View-Update, also known from the origin The Elm Architecture). These app also use declarative views written directly in F#.
This may already feel familiar to you if you have played with frameworks like React-Redux, Flutter, or SwiftUI.
Object-oriented programming (OOP) is widely used today. However, in this post, we will elaborate on how FP can also be an awesome tool for building apps.
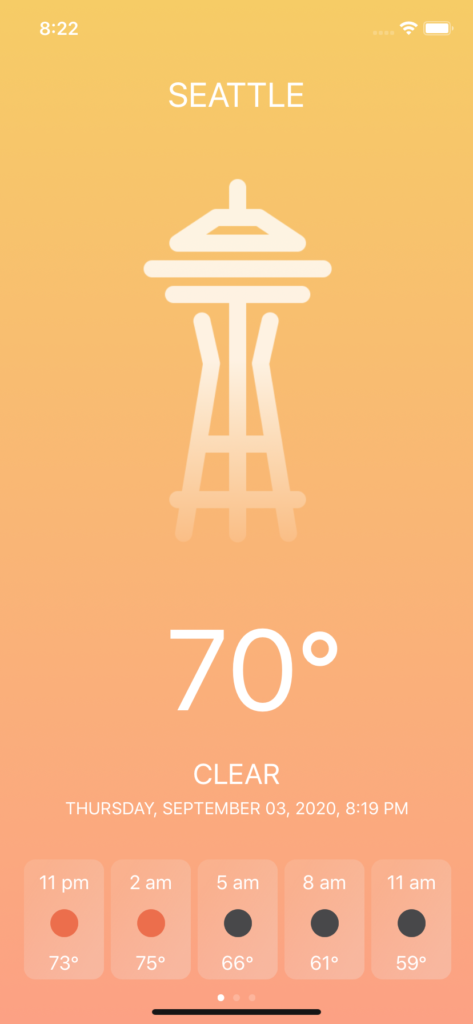
A few apps made with Fabulous for Xamarin.Forms, from left to right: FabulousWeather, FabulousContacts and FabulousPlanets

Fundamentals of MVU
Note: We will see MVU as defined by Elm, which is the definition used by many F# libraries.
The upcoming MAUI will integrate a different variant of it.
Before diving in, let’s expand on what the MVU pattern is and how it differs from more traditional MVVM apps.

Credits: Beginning Elm (https://elmprogramming.com)
The idea is to have a state (also called Model) that is immutable and can only be changed through messages (Msg) that are processed by the update function. Those messages are then sent when users interact with the application or when external factors happen. Such as async request completes, push notifications, and switching between dark and light modes. Each time the state is updated, Fabulous will ask for the matching UI state and will transition between them transparently.
MVU provides several advantages over MVVM:
- Immutable state
In MVVM, the ViewModel (which holds the state) is mutable and is usually changed in multiple methods in reaction to what happens. When the app grows bigger, make extra effort and be careful when adding new changes to not break existing behaviors unknowingly. In MVU, the immutability of the app state ensures that it won’t ever be changed outside of the dedicated update function, without a dedicated message. This makes it very simple to add new features without worrying about breaking something.
-
Centralization & explicitness
The structure of MVU is really simple and enforces explicitness.
The state can only be initialized in theinitfunction and changed in theupdatefunction only for declaredMsgs, the UI can only be declared in theviewfunction.
This makes it really easy to welcome new developers to the codebase and makes debugging a lot easier.
If it breaks, there’s only one place. -
No concurrency issues
The user navigates, data gets loaded, animations end, … Reacting to one event is easy, but when you need to handle multiple events at the same time, it becomes tricky.
This can lead to obscur errors, very hard to understand and sometimes impossible to reproduce.
Fabulous helps you avoid this kind of problem by applying concurrent messages one after the other.
Also, Fabulous lets you monitor its MVU loop so you can know what happened in which order.
Easy to replay that one corner case! -
Ease of testing
A best practice in FP is to write functions that only depend on their parameters and not on the global context, much like static methods.
Those functions are called pure and are really easy to test, for the same parameters you’ll always get the exact same output.
With MVU, theinit,updateandviewfunctions are pure by default. Meaning you can unit test them super easily, including your UI!
You can see an example here.
Thinking About the UI
Thanks to its declarative nature, Fabulous also completely changes the way we need to think about the UI.
In MVVM, the UI is created once and bindings are listening for changes. This requires us to think carefully about the current UI state to make the necessary changes (“Is that spinner still displayed?”).
With declarative views, we only need to care about the state we’re given to build the required UI. Fabulous will take care of all the necessary changes when transitioning between the current UI to the new one.
This greatly reduce the burden on the developers, speeding the development process and avoiding a lot of potential issues, especially in big applications.
Finally, the fact that the entire app state is stored in a single object makes it dead simple to serialize it on disk when the OS forces you to stop. On reboot, simply deserialize this Model and you’re immediately back where you stopped!
Enough with abstract talk, let’s see an example.
The Counter App
We have a simple counter app. One button for incrementing, one for decrementing, and a label showing the current value.
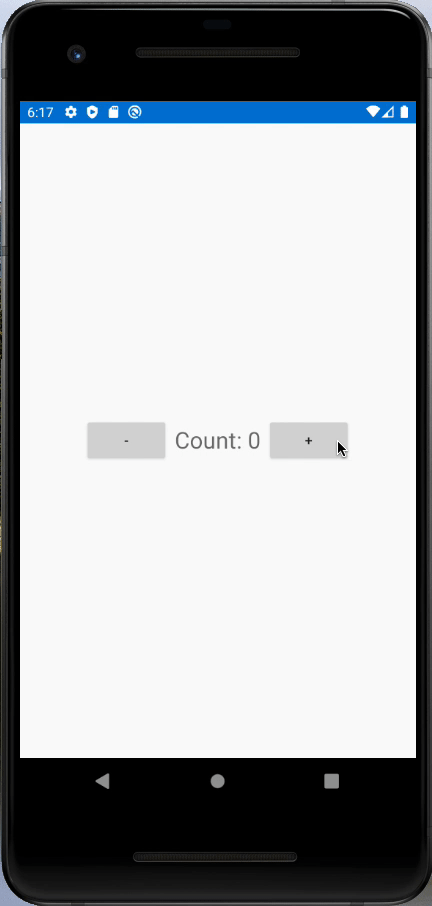
Here is the full code of the counter app:
module Counter

open Fabulous
open Fabulous.XamarinForms
open Xamarin.Forms

type Model =
    { Count: int }

type Msg =
    | Increment
    | Decrement

// "let" is kind of like C#'s "var", except it also declares functions
// F# automatically returns the last value as the result of the function
let init () =
    { Count = 0 }

// "match ... with" is known as Pattern Matching
// The "{ variable with X = Y }" means it creates a copy of the variable with the X field changed to another value
// This is because FP favors immutability so existing values can't mutate directly, to change a value we need to copy it.
let update msg model =
    match msg with
    | Increment -> { model with Count = model.Count + 1 }
    | Decrement -> { model with Count = model.Count - 1 }

// Here, we are using declarative views.
// It is only a description of what we'd like the UI to be. Fabulous will translate it to actual controls.
let view model dispatch =
    View.ContentPage(
        View.StackLayout(
            orientation = StackOrientation.Horizontal,
            verticalOptions = LayoutOptions.Center,
            horizontalOptions = LayoutOptions.Center,
            children = [
                View.Button(
                    text = "-",
                    command = fun () -> dispatch Decrement
                )
                View.Label(
                    text = (sprintf "Count: %i" model.Count),
                    fontSize = FontSize.fromNamedSize NamedSize.Title,
                    verticalOptions = LayoutOptions.Center
                )
                View.Button(
                    text = "+",
                    command = fun () -> dispatch Increment
                )
            ]
        )
    )

type App() as this =
    inherit Xamarin.Forms.Application()

    let runner =
        XamarinFormsProgram.mkSimple init update view
        |> Program.withConsoleTrace
        |> XamarinFormsProgram.run this
That is it! A full Fabulous application in only a few lines of code. Even if you don’t know F#, it should be fairly easy to understand.
Taking a closer look, we can see the 5(+1) major parts we discussed just before:
* the state definition (aka Model)
* the messages (aka Msg)
* an init function telling us what the initial state is when the app starts
* an update function telling us how the state changes according to the received message
* a view function telling us what the UI should look like for a given state
* and finally the App class starting the MVU loop and plugging it into Xamarin.Forms
Getting started with Fabulous for Xamarin.Forms
Getting started is super easy. Fabulous.XamarinForms comes with its own template so we can quickly start creating awesome apps.
In addition to .NET Core 3.1, Fabulous.XamarinForms has the same set of requirements than Xamarin.Forms, namely:
- An IDE: Visual Studio (Windows), Visual Studio for Mac, JetBrains Rider or even MonoDevelop on Linux
- `The Xamarin tooling: See the documentation of Xamarin for your IDE to install it.
First, install the templates on your machine with the following command:
dotnet new -i Fabulous.XamarinForms.Templates
Now, we can run dotnet new fabulous-xf-app to create our own Todo List app:
dotnet new fabulous-xf-app --name TodoList
By default this command will create a solution with a .NET Standard 2.0 library, a Xamarin.Android and a Xamarin.iOS projects. This template can optionally include more platforms like macOS, WPF, UWP and GTK. You can learn more in the documentation.
Writing a To-Do List App
After knowing the fundamentals and have created a project, we can write a simple to-do list app by replacing parts of the template little by little.
First, pause and think about what data our application will need. We are making a to-do list, so obviously we will need a list of to-dos. Also we want the user to add new to-dos, so we will need to track what the user inputted. This translates to a To-do record and a Model holding a list of To-dos and the current Entry‘s text.
type Todo =
    { Task: string }

type Model =
    { Todos: Todo list
      EntryText: string }
We can now define our initial state in the init function.
let init () =
    { Todos = []; EntryText = "" }
Time to focus on the interactions available in our application. We want to let the user add new to-dos and remove old ones. Additionally, we want to retrieve what the user wrote so we can add it to the list.
Two actions and one event, we can create those three entries in our Msg union. Notice how discriminated unions in F# make it super easy. You can even attach different types of data to each entry.
type Msg =
    | AddTodoFromEntryText
    | RemoveTodo of Todo
    | EntryTextChanged of string
We have our state, we have our messages. Now, we need to define how the state should change depending on the message in the update function.
let update msg model =
    match msg with
    | AddTodoFromEntryText ->
        // Because list is actually a linked list, it is better to prepend new items with "::"
        // We will reverse the list on the screen so new items are at the end
        // Also we reset the Entry field since we inserted the new todo
        let newTodo = { Task = model.EntryText }
        { model with Todos = newTodo :: model.Todos; EntryText = "" }

    | RemoveTodo todo ->
        // Filter out the old todo
        let filteredTodos = model.Todos |> List.filter (fun t -> t <> todo)
        { model with Todos = filteredTodos }

    | EntryTextChanged newText ->
        { model with EntryText = newText }
One neat thing with pattern matching is that the F# compiler will warn you if you are missing a case.
Using Xamarin.Forms
We are nearly done. Let us describe what our UI should look like. You will find all the Xamarin.Forms controls under the View module.
Unlike Xamarin.Forms, Bindings and Converters don’t exist in Fabulous. Instead you simply associate the value you want from the model to the corresponding property. Since Fabulous will call the view function each time the state changes, it will automatically detect changed fields just like bindings would.
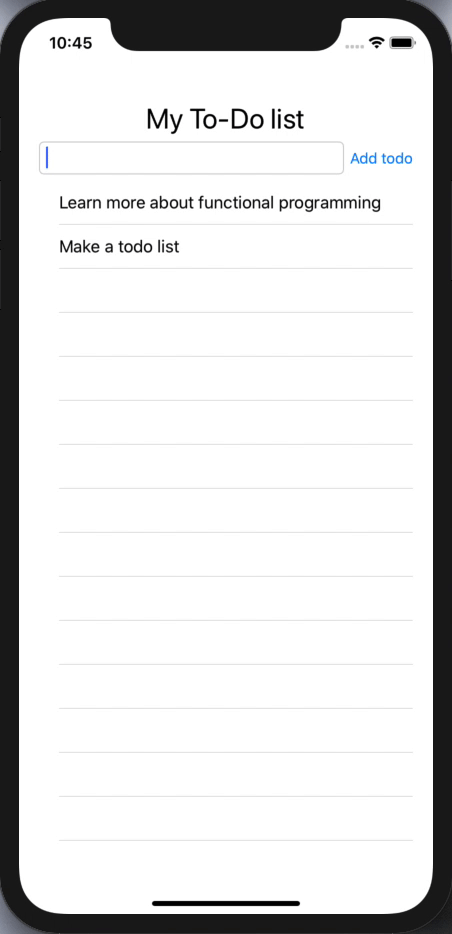
So, what do we want to display? A title would be nice. Also the list of to-dos is pretty important. Lastly, we need to display a field and a button so the user can add new to-dos. Once a to-do is done, we will let the user slide left on the to-do to reveal a “Complete” button to remove it from the list.
All this translates to the following code:
let view model dispatch =
    View.ContentPage(
        View.StackLayout(
            padding = (
                // Here the view is written in F#, so nothing prevents us from using F# code or even call other functions
                // Really useful when the view is becoming too complex or should be reused, it can be split in several chunks
                if Device.RuntimePlatform = Device.iOS then
                    Thickness(20., 40., 20., 20.)
                else
                    Thickness(20., 0.)
            ),
            children = [
                // Title
                View.Label(
                    text = "My To-Do list",
                    fontSize = FontSize.fromNamedSize NamedSize.Title,
                    horizontalOptions = LayoutOptions.Center
                )

                // Add new todo
                View.Grid(
                    coldefs = [ Star; Auto ],
                    children = [
                        View.Entry(
                            text = model.EntryText,

                            // `dispatch` here is a function provided by Fabulous that lets you send messages
                            // when an event you want to react to happen. Here for example, whenever the text
                            // of the Entry changes, an `EntryTextChanged` message will be sent.
                            textChanged = fun e -> dispatch (EntryTextChanged e.NewTextValue)
                        )

                        View.Button(
                            text = "Add todo",
                            command = fun () -> dispatch AddTodoFromEntryText
                        ).Column(1)
                    ]
                )

                // Todo list
                View.ListView([
                    // Notice the "List.rev" function, it reverses our list
                    // so the new todos are displayed at the end
                    for todo in List.rev model.Todos ->
                        View.TextCell(
                            text = todo.Task,
                            contextActions = [
                                View.MenuItem(
                                    text = "Complete",
                                    command = fun () -> dispatch (RemoveTodo todo)
                                )
                            ]
                        )
                ])
            ]
        )
    )
Finally, let’s update our program definition.
let program = XamarinFormsProgram.mkSimple init update view
Using a “Simple” program
Here we are using something called a “simple” program. Simple programs only need a state and messages.
Typically in real applications, use the mkProgram function instead to be able to execute side effects like asynchronously calling a web API.
And voilà! We are done. We have our To-do list app. Find the whole source code of this To-do list app on GitHub. Run this application and see the result.
More Real-World Apps
Regarding performance, Fabulous is really efficient and uses various diffing technics to do minimal changes between each updates. For more advanced scenarios, some tools are available to get better performance (see keyed nodes and view caching).
When your app gets bigger, easily scale it by breaking it down into independent components and stitch them together into a full app. MVU’s init/update/view loop is pretty generic and can be used on any level: application, page, component. Each thing being its own mini-Fabulous program with its own state, functions and UI. The parent component is responsible for calling the functions of its children components and keeping their states.
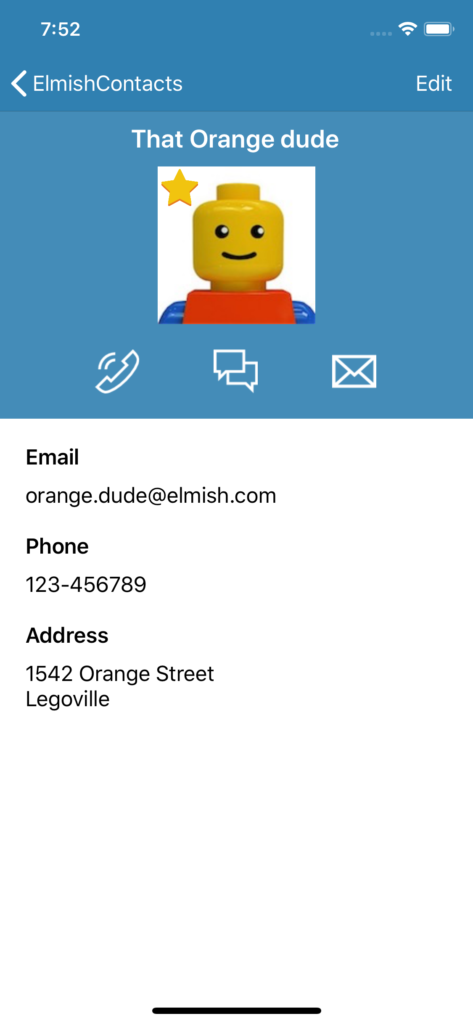
If you want to see this in action, you can take a look at FabulousContacts. It is a full application that manages your contacts, with database, maps and multiple pages.
Conclusion
App development using functional programming can make for a really great development experience. The combination of functional programming, MVU and F# allows you to write small codebase apps that are robust and easy to understand! Fabulous removes most hurdles of typical app development by centralizing all updates in one well-defined code path, preventing state to change unknowingly and making sure no concurrency issues can happen.
Fabulous.LiveUpdate (similar to Xamarin.Forms Hot Reload) can even let you see your changes in near-realtime on your device or emulator. Check out the videos of The Xamarin Show on Channel9 to learn more about Fabulous and see LiveUpdate in action.
If you want to learn more about F#, check out the F# for fun and profit website which nicely introduces F# to C# programmers. fsharp.org has you covered on all the topics. For a broader view of Fabulous and its ecosystem, you can learn more on my blog: How to become a Fabulous developer.
Also make sure to visit our GitHub repository for all the latest bits: https://github.com/fsprojects/Fabulous.
We welcome all contributions, either through issues, discussions or pull requests.
Is there a way to migrate apps over piecemeal or is it all or nothing?
Currently, it’s all or nothing. But in v2, we will include a way to mix Fabulous and classic Xamarin.Forms together in a single app. It will be easier for migrating an existing app.