
iOS developers know that app and device provisioning is a huge pain. Just to deploy an iOS app to a device for the first time, you must request a development certificate, generate a signing key, add a device in the Apple Developer Center, and create a development provisioning profile for the app that includes your device in the list of approved devices to deploy to. That was a mouthful.
We wanted to make it as easy as possible for you to get started with iOS development by streamlining this key pain point of app and device provisioning. Visual Studio for Mac now integrates with the open source project fastlane, which was created to simplify the app provisioning process from app and device provisioning to team provisioning management. In this blog post, you’ll learn how to quickly provision a new device and app in less than five minutes with the click of a few buttons.
Easy Provisioning with Fastlane
The fastlane toolchain has been integrated into Visual Studio for Mac version 7.1. To access these features, simply change the updater channel to Stable. Install fastlane from GitHub with HomeBrew, the installer script, or via Rubygems. To provision your apps, you’ll need to be a member of the Apple Developer Program.
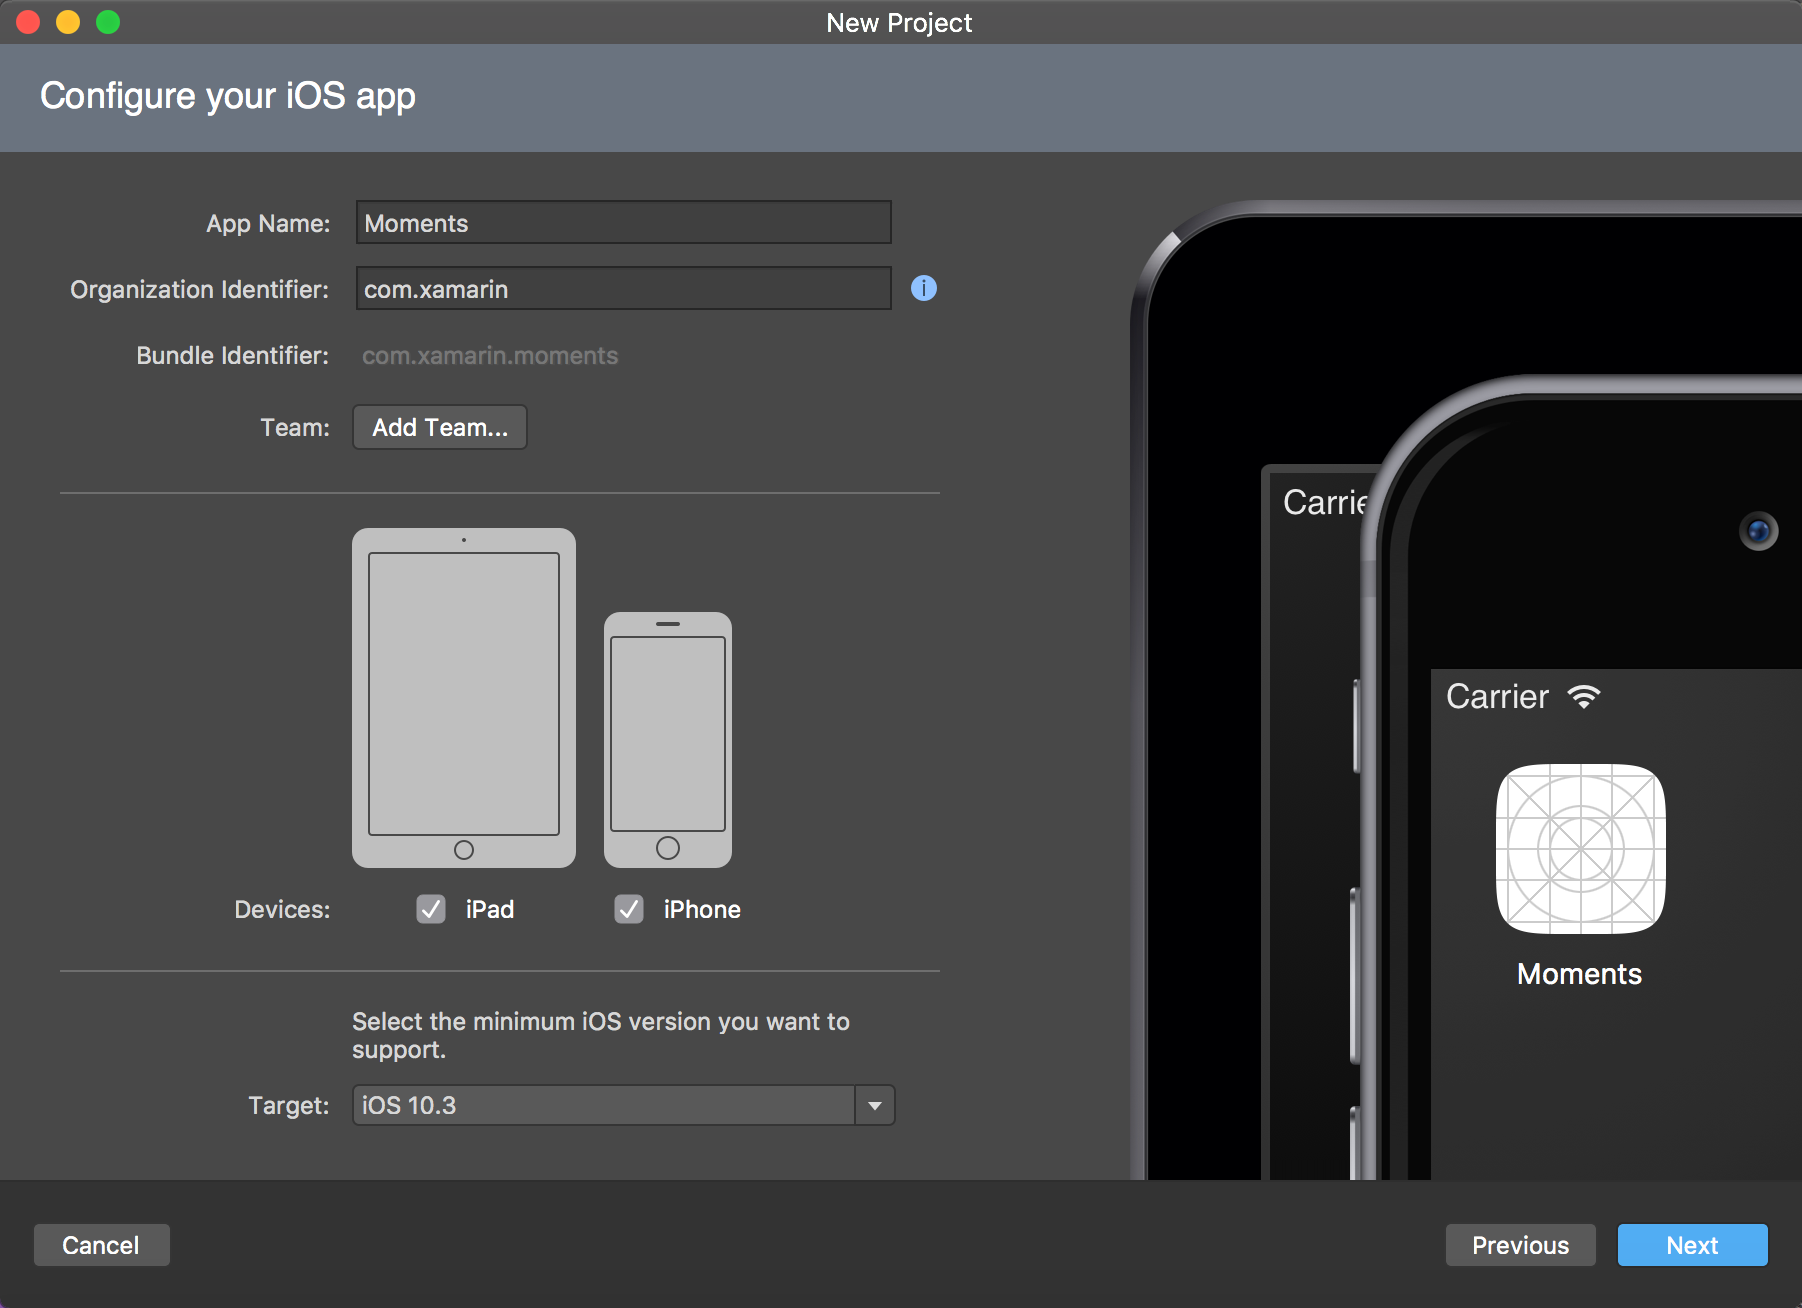
File -> New Project
The best time to provision apps is at creation, so we’ve integrated fastlane directly into our File -> New Project wizard in order to ensure every app you create is properly provisioned. In Visual Studio for Mac, select File -> New Project -> iOS -> Single View App. Click Add Team.
The Apple Developer Accounts tab within the Preferences window will appear. This is where you can manage all of your developer accounts across all of the apps you’re working on. Click the + icon to add your account. Enter your Apple ID and password to enable Fastlane to integrate with your iOS developer account.
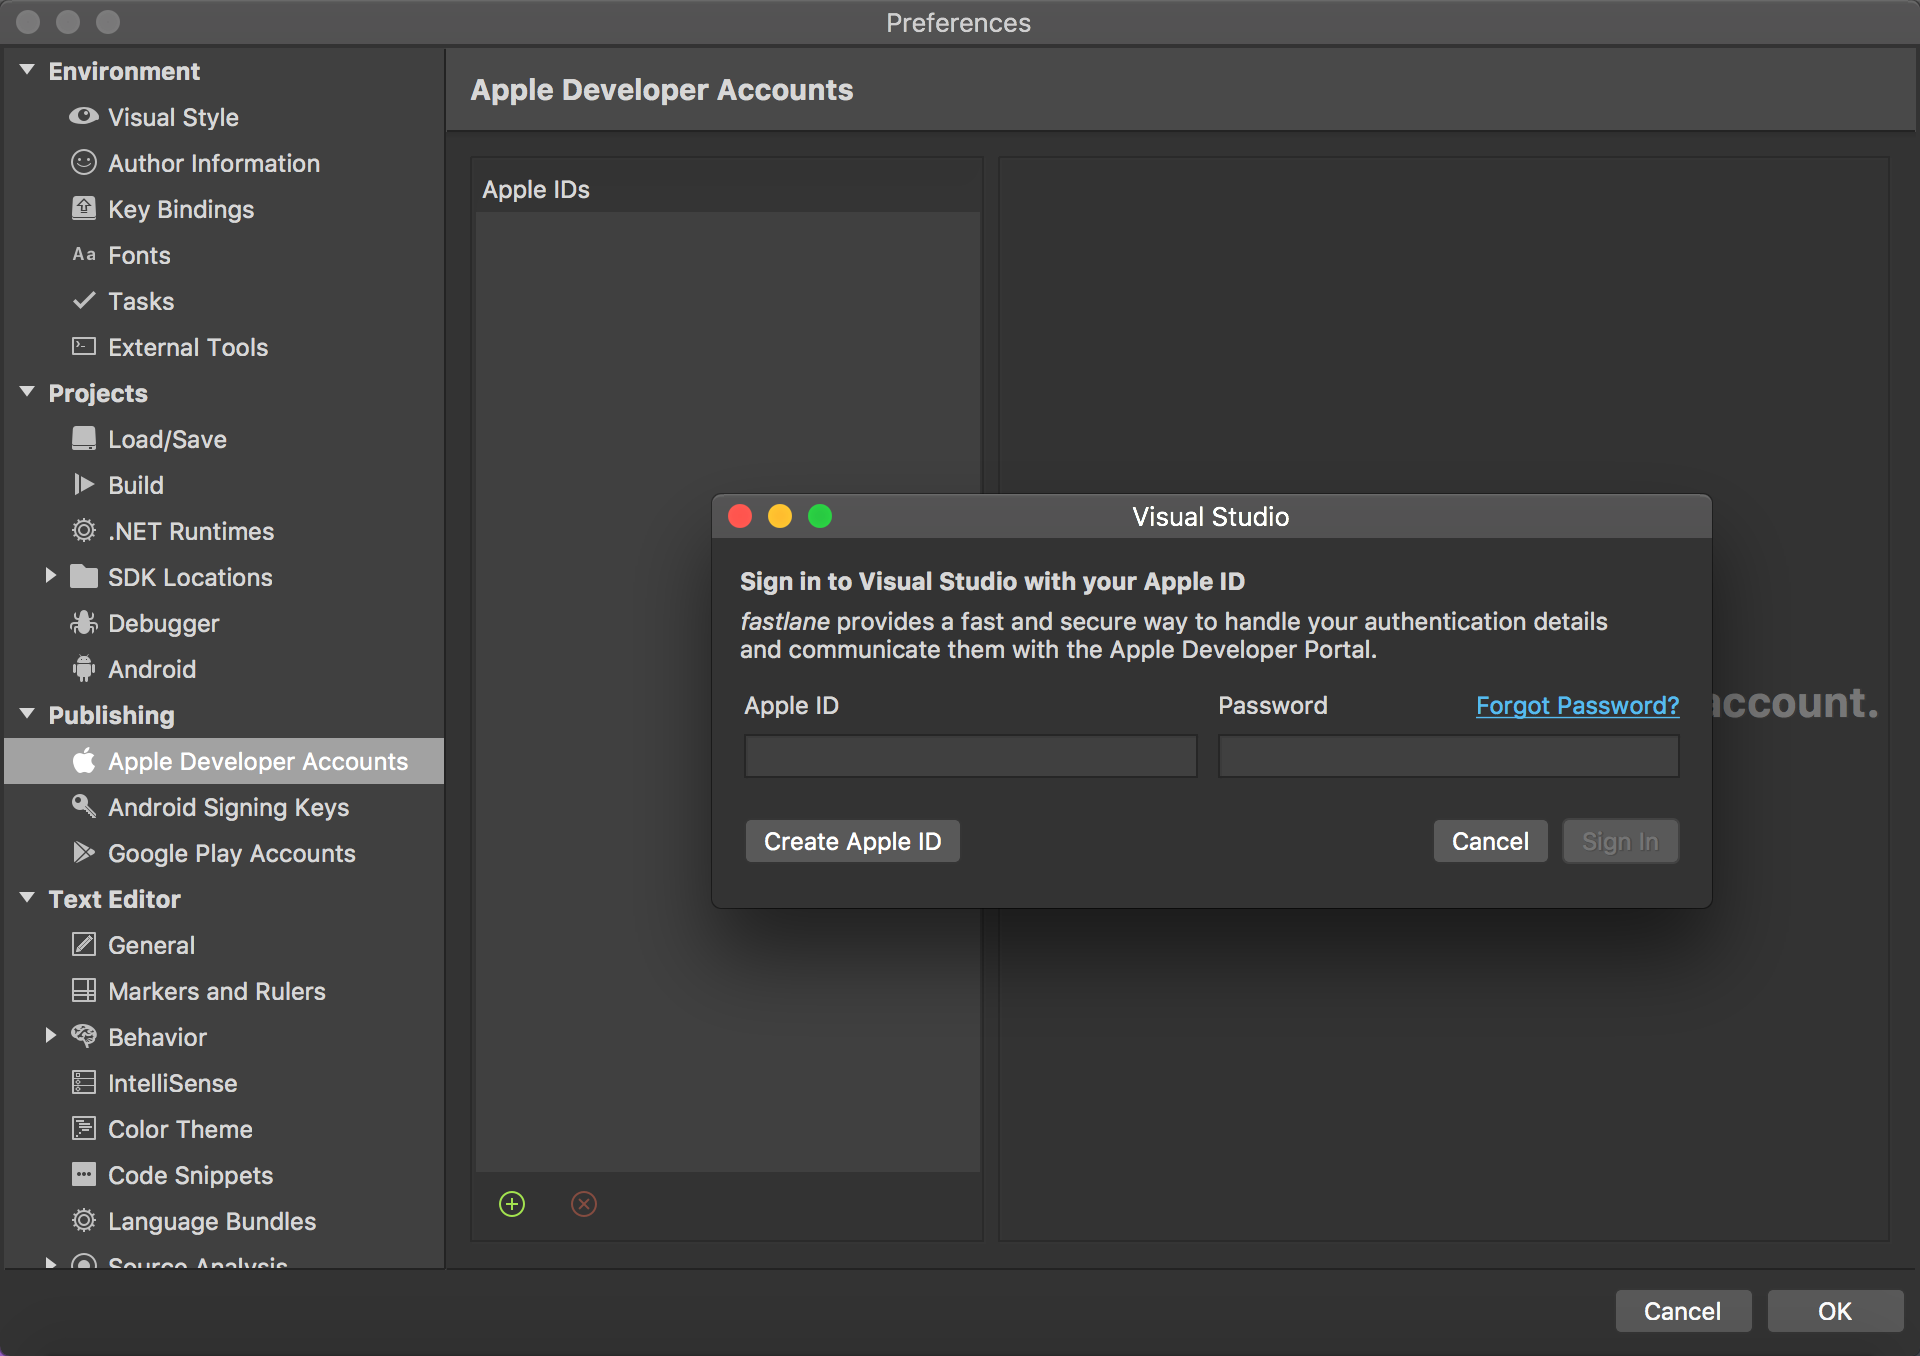
From this dialog, you can create certificates and manage provisioning profiles for all teams you’re a member of. Click OK and return to the File -> New dialog. Select your team from the dropdown, click Next, and click Create.
Create a Signing Identity
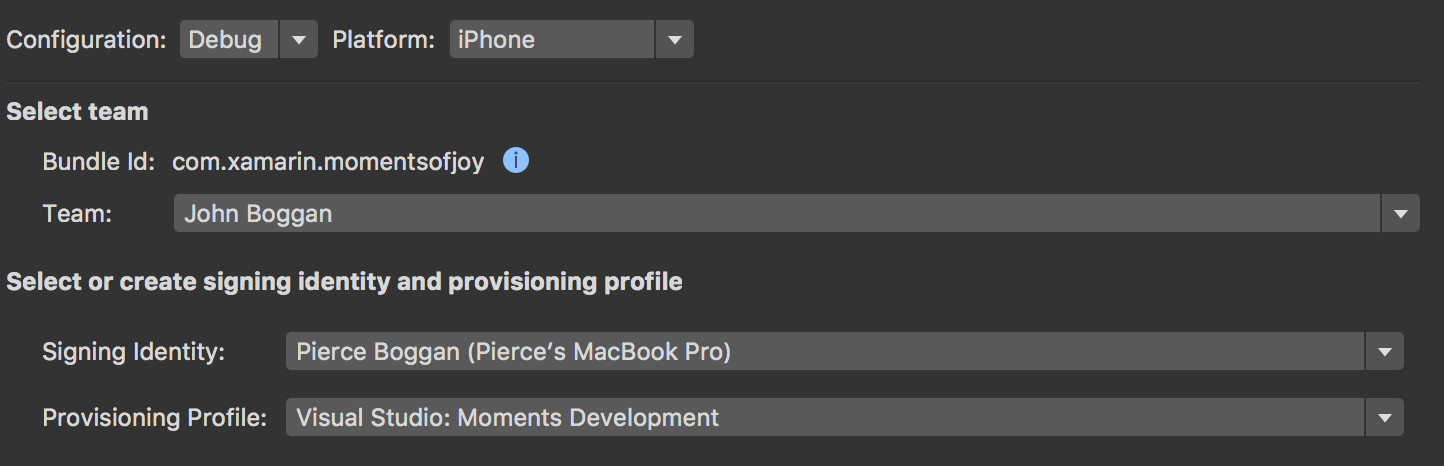
Right-click the iOS app you’ve just created, and select Options -> iOS Bundle Signing. The team you selected during the File -> New Project wizard is automatically set as the default team. Next to the Signing Identity heading, click the dropdown, and select Create signing identity. This automatically creates a new signing identity for you and associates it with your Apple developer account.
It’s worth noting that all setup up until this point only needs to be done once per Visual Studio for Mac installation.
Create a Provisioning Profile
Now that we have a signing identity, it’s time to create a provisioning profile for your app. In the iOS Bundle Signing tab, select the Provisioning Profile dropdown and click Create provisioning profile. In less than ten seconds, we have successfully provisioned our new app.

Provision a Device
To be able to deploy to a device, we must provision the device and “attach” it to the provisioning profile we just created. Normally, we would go to the Apple Developer Portal to do this, but Visual Studio for Mac provides a way to provision new devices directly within the IDE.
Plug your device into your Mac via the Lightning to USB cable. If the device attached is not associated with the provisioning profile selected, Visual Studio for Mac will suggest you provision the device. Click Register, followed by Add, and Visual Studio for Mac will add the device to your Apple developer account and associate it with the selected provisioning profile.
In Action
For a full breakdown of provisioning profiles and to see the fastlane integration in action checkout The Xamarin Show on Channel 9 with James and Oleg from the Xamarin team:
What’s Next?
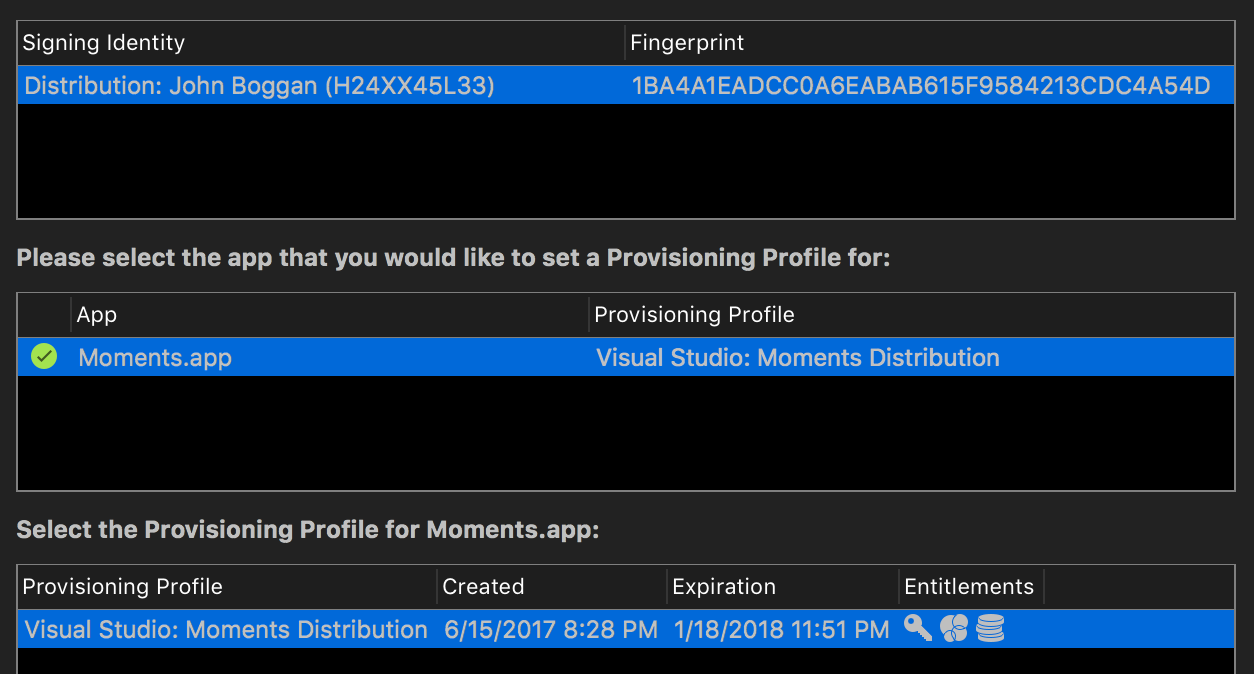
In this blog post, we successfully generated a development provisioning profile for a new app. Publishing iOS apps (either Ad Hoc for testing or for release in the App Store) requires a separate distribution certificate and provisioning profile. Now in Visual Studio for Mac version 7.1, you can easily create distribution signing identities for use in your app publishing workflow without leaving the IDE:
Wrapping Up
Visual Studio for Mac’s Fastlane integration makes it super easy for you to provision apps and devices directly from the IDE with just a few clicks. For more information, read our documentation on using the Fastlane tools with Xamarin. In the future, we will be working to bring easy app and device provisioning to Visual Studio on Windows and continue to integrate additional features of Fastlane directly into the IDE.