
Imagine that you’ve just been struck by inspiration for your next great app. You might start by jotting some notes and sketching out screens. If you’re thinking about reaching for a sketchbook, a whiteboard, or even the back of a napkin, think about reaching for your computer and installing Ink to Code instead.
Ink to Code, a Microsoft Garage project, is the digital version of the back of a napkin for your app ideas. A nimble Windows 10 app, it launches in seconds and provides a quick canvas for you to sketch out screens with your stylus. Let’s give it a try!
Getting Started
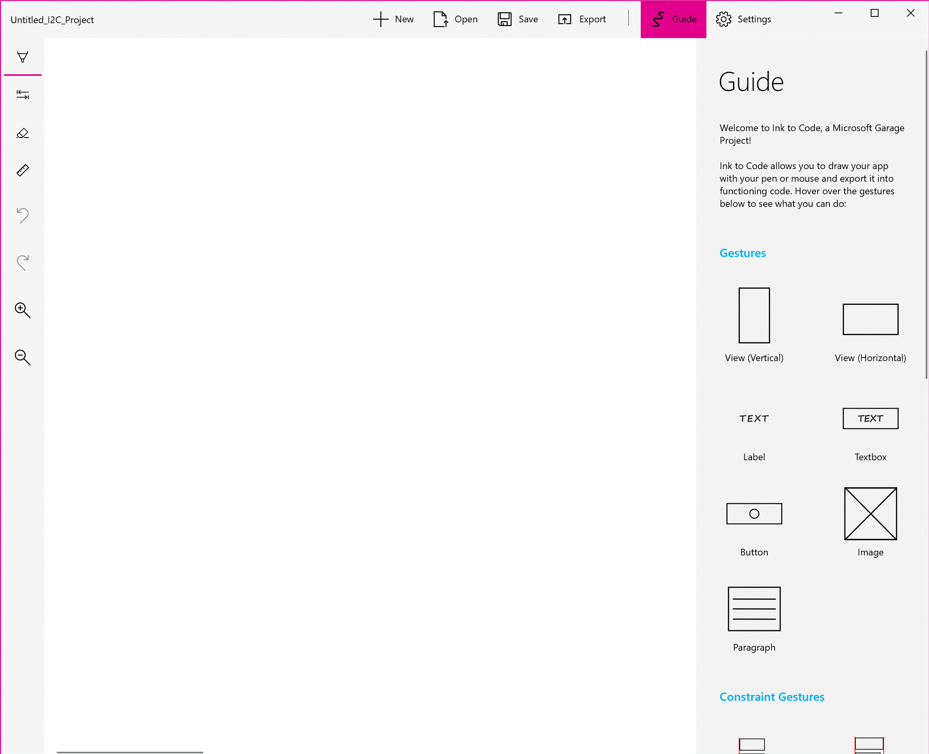
The first thing you’ll want to do is install Ink to Code from the Microsoft Store. Upon launching it, you’ll be greeted by its minimal user interface and large drawing area. To get some guidance on what to draw, click the Guide button in the toolbar. This shows you the different design elements that Ink to Code recognizes:
Drawing Your App with Ink to Code
Let’s pretend you’re inspired to make the next great tip calculator. This video illustrates how you might draw it in Ink to Code:
As you draw each design element, you’ll notice that Ink to Code converts the ink strokes into recognized components. Tapping on each of these items displays a menu that allows you to delete them, or if they were misrecognized, convert them into different components. You’ll also notice that tapping the second button in the left toolbar switches into constraint mode, where you can draw constraint lines that can be used to align other elements.
How does this magic work? Internally, Ink to Code uses the powerful Windows Ink platform and some of its own heuristics to recognize common design elements in your app sketches and then convert them into UWP XAML or Android layout XML that can be loaded directly into Visual Studio.
Exporting to Visual Studio
Ink to Code is great for quickly sketching the broad strokes of your app idea, but to start refining it into a prototype, you’ll want to export your drawings to Visual Studio. For this exercise, we’ll build a Xamarin.Android app:
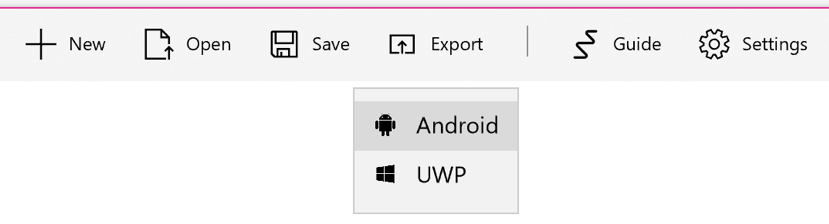
- Click the Export button in the Ink to Code toolbar and choose Android from the menu. Then choose a temporary directory in which to export the layout XML file.

- Open Visual Studio 2017 and create a new Blank Android App project. If you cannot find the project template, ensure that you have Xamarin installed. You can also use Visual Studio for Mac and ensure Android is selected during installation.
- Find
Main.axmlin your Android project under the pathResources\layout. Replace it with the file you exported in the first step. - Ink to Code uses
ConstraintLayoutin its exported Android XML, so you’ll need to add the Android.Support.Constraint.Layout NuGet package to your project. - Click Run, and you should see the screen you sketched launch in an Android emulator as real, interactive Android widgets!
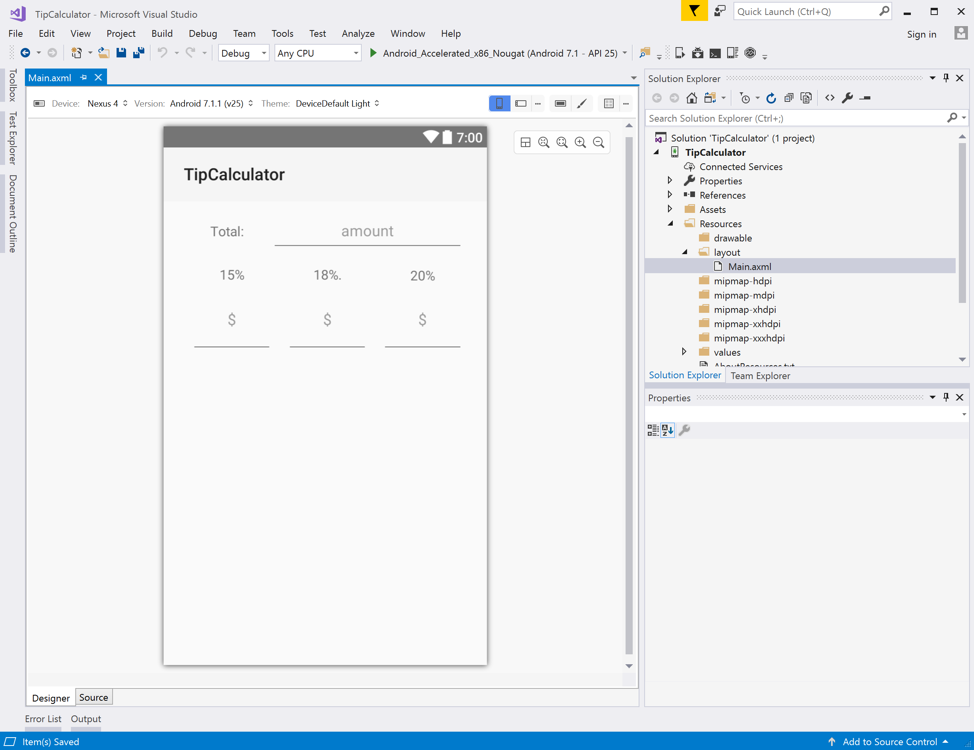
You’ll probably want to continue refining your layout in Visual Studio after you export it from Ink to Code. To do this, simply double click on the Main.axml file and the Xamarin Android Designer will open:
Unleash your Creativity!
Now that you have an idea of how you can use Ink to Code to quickly sketch your next app idea, it’s time to let your imagination run wild! Ink to Code is a Microsoft Garage project, which means it’s an experiment and your feedback will be pivotal in shaping its future.
So please install Ink to Code, sketch your next great app idea, and let us know how it goes. Happy inking!
Sorry, but non of the links provided in this post does work and Ink to Code is not availabe in the store any more.