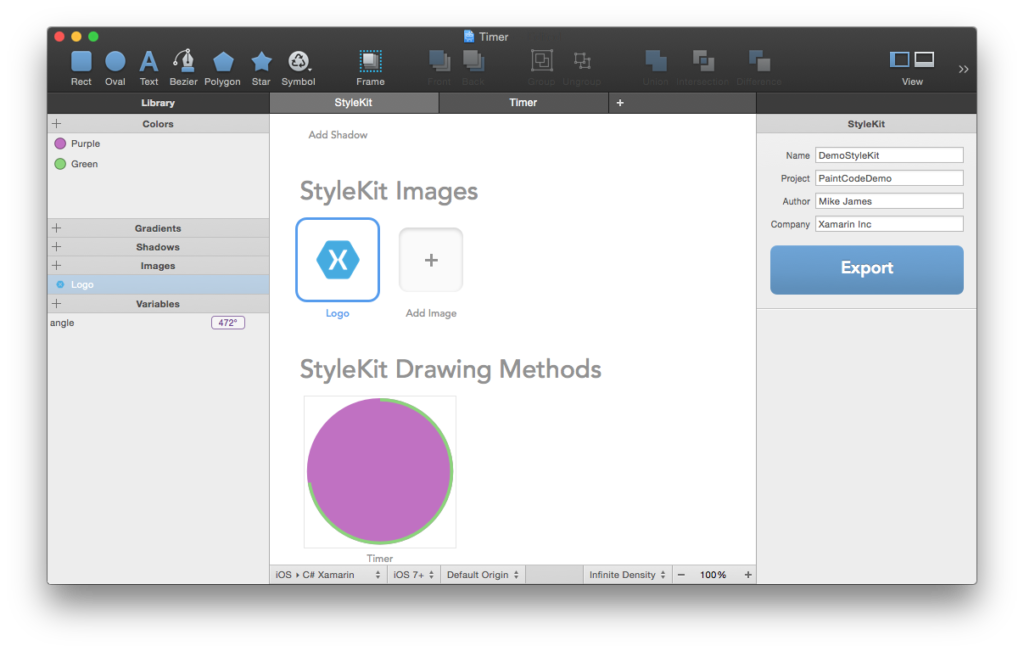
Delivering a beautifully designed app can be the difference between having an app that gets used, or having an app that no one notices. Of course, having a beautiful app doesn’t just happen – creating something different often means creating your own custom controls, and creating beautiful custom controls on iOS can be a difficult task without intimate knowledge of CoreGraphics. This is where PaintCode steps in. PaintCode is a vector drawing app that generates C# code in real-time, allowing you to design your iOS controls and export the resulting “drawing code”. This is great because it allows you to create resolution-independent controls that will look great on any size of device.
From the beginning, the Xamarin Designer for iOS has supported real-time rendering of custom controls, which allows you to see instant feedback on your code changes. A number of developers have been opting to use images for control customization, which leads to a series of issues including bloating your app store binary size and that these images simply won’t scale properly on new screen sizes that Apple may release in the future.
StyleKit
PaintCode can generate a special class that contains all of the drawings, colors, gradients, shadows, and other design assets used in your app. In the following example, I’ve named the StyleKit
DemoStyleKit. You’ll want to make sure you’re regularly exporting the StyleKit from PaintCode into your Xamarin project in order for changes to be made available to you in your project. Exporting your style sheet will create a .cs style and copy any images your styles use into the directory of your choice. Once you’ve done this, you’ll need to add these to your existing Xamarin.iOS project.
Creating a custom control
Once you’ve added the exported files, you’re ready to consume the drawing code in a custom control. You will need to create a new class which will be your custom control; in this sample I’ve called it ‘MyTimerView’ and it inherits from UIView.
It’s here where we’ll consume the auto-generated C# from PaintCode and set it up to support the Storyboard designer. In this example, I annotate the class with the DesignTimeVisible attribute. This tells our iOS Storyboard designer that I wish to use this class within the Storyboard designer. A basic class with Storyboard support should look something like this:
[Register("MyTimerView"), DesignTimeVisible(true)]
public class MyTimerView : UIView
{
  public MyTimerView(IntPtr p) : base(p)
  {
    Initialize ();
  }

  public MyTimerView ()
  {
   Initialize ();
  }

  void Initialize ()
  {
  }

  public override void Draw(CoreGraphics.CGRect rect)
  {
   base.Draw(rect);
  }
}
Because PaintCode exports the drawing code into the StyleKit, we can implement the drawing with just one line of code!
public override void Draw(CoreGraphics.CGRect rect)
{
  DemoStyleKit.DrawTimer(rect, Angle);
}
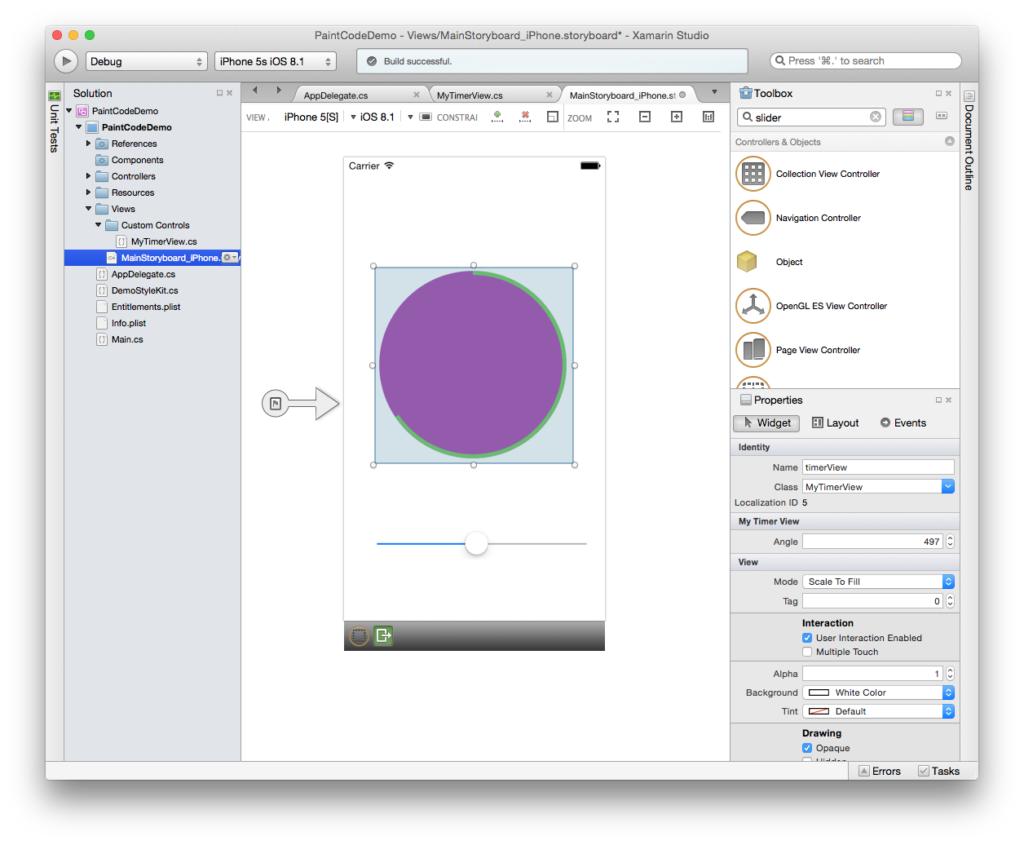
If you save and build the project now and open your Storyboard, you should find MyTimerView within the control toolbox. You can drag and drop this into your view and instantly see how it looks.
 Advanced properties
It would be great to be able to control the angle of the green progress line from the Properties panel within our IDE. Fortunately, custom controls allow for design time properties for a number of types, including string, bool, SizeF, UIColor, and UIImage. To add an angle property to our properties pad, let’s add the following to our class:
float angle;
[Export("Angle"), Browsable(true)]
public float Angle
{
  get { return angle; }
  set
  {
    angle = value;
    SetNeedsDisplay ();
  }
}
It’s also worth ensuring that the _angle property has an initial value by setting it in the Initialize method. Once you’ve done this, you’ll see a new property available to you and the changes to the value will automatically be updated in the custom control. This allows you to create very customizable controls without needing to drop into code to make tweaks.
Learn more
You can learn more about PaintCode on their website and purchase the app from the Mac App Store.
To get started, download the sample project from this blog post from GitHub.


