Mobile DevOps is much more than just continuously building an app with every commit, it also involves planning, testing, and iterating with continuous deployment. In the previous posts on continuous integration in Visual Studio Team Services (VSTS), we saw how to build and sign both an Android and an iOS application built with Xamarin and Xamarin.Forms. But what comes next? Today, we take a look at continuous delivery and release management for Android applications to get our apps in our testers hands and onto the app store for distribution.
Getting Started
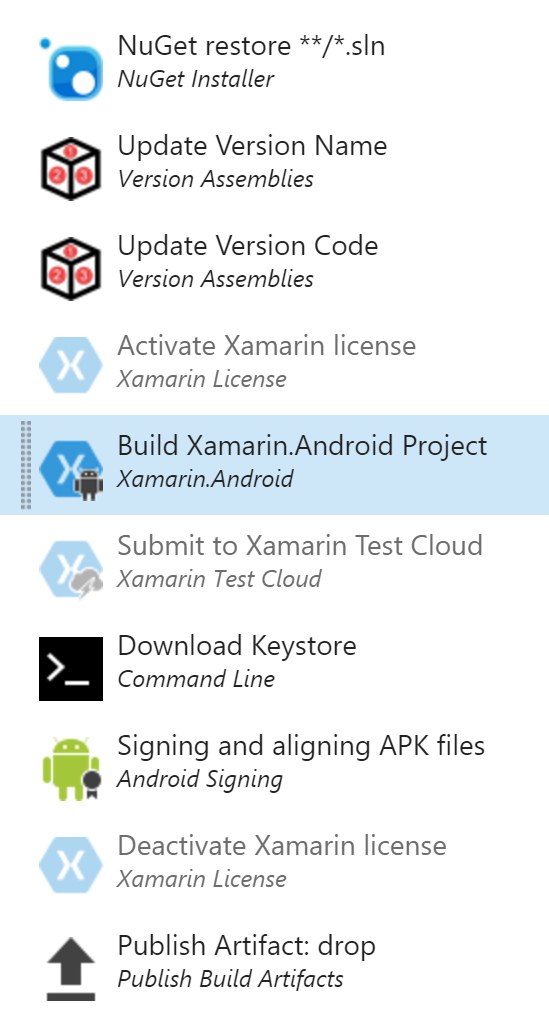
At this point of our DevOps cycle we have our Android application being continuously built with each code commit, signed with our keystore, and publishing our artifacts for release. If you’re not at that point yet, make sure to read through the first post on setting up Android apps in VSTS. Additionally, we may want to look into automatically increasing the version name and code for our Android app so each build generates a unique package.
Once everything is being built successfully, we can move on to the Releases tab. We can think of this section of VSTS as a one stop shop for anything we want to do with the artifacts that were generated from the Build section. We can create unique Release Definitions with steps of what we would like to perform, such as send to HockeyApp or to Google Play. Each step can occur automatically or with a gated release that has to be approved before the step can complete. We’ll build out a multi-step definition to first automatically deploy to HockeyApp for internal developers and testers to install, and then a gated deployment to Google Play.
Creating a Release Definition
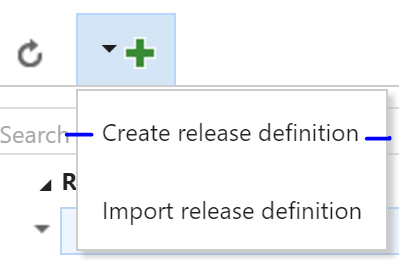
In the Releases section we will find a very similar work flow as when we set up the build definition. All we need to do is click on the green + arrow and then select Create Release Definition.
This will bring up the Create new release definition dialog. Select the bottom Empty definition to get started. After that, the second screen on the dialog will ask which artifacts we wish to include in the release definition. Select the build definition you would like to use and make sure to check Continuous deployment so a new release is created with every successful build. Lastly, we can choose the Hosted agent queue to do the deployments.

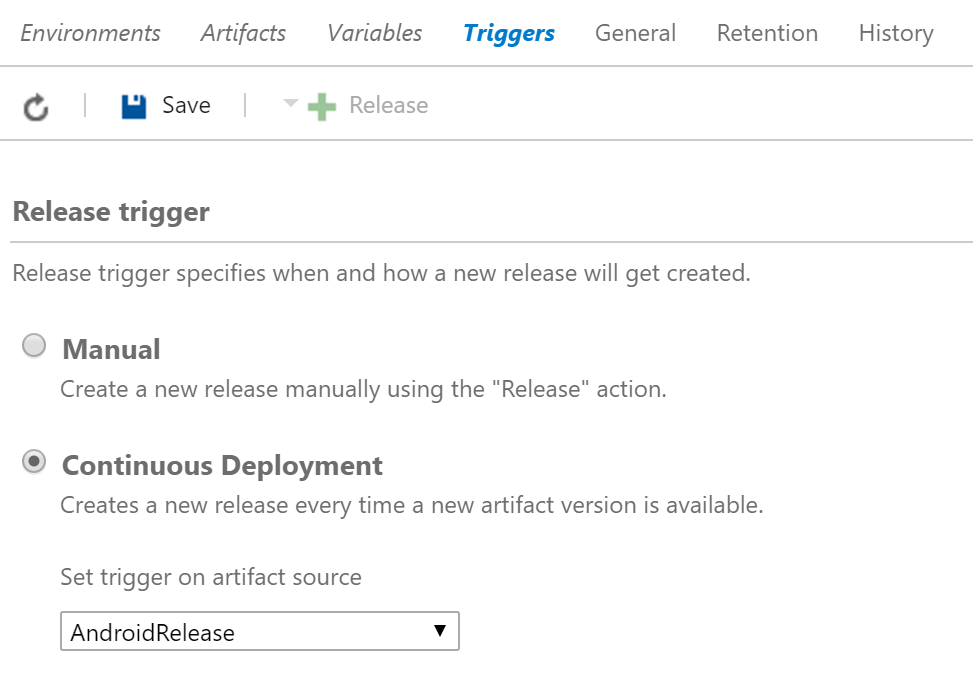
Clicking on Create will take us to our first release definition that has a list of Environments, which contain a list of tasks to run when a list of specific deployment conditions have been met. To specify what artifacts will trigger our build definition, tap on the Triggers tab and set the trigger artifact source to Continuous deployment:
Continuous Deployment to HockeyApp
In our first post we deployed to HockeyApp as part of the build process. This may work for development purposes, but integrating it into our release management cycle will give us greater control of when and how to deploy. The steps of deploying as part of releases are nearly identical: first, we must ensure that the HockeyApp VSTS extension is installed in our project. Then, we can add a new Task to our first release environment, which I have named HockeyApp.
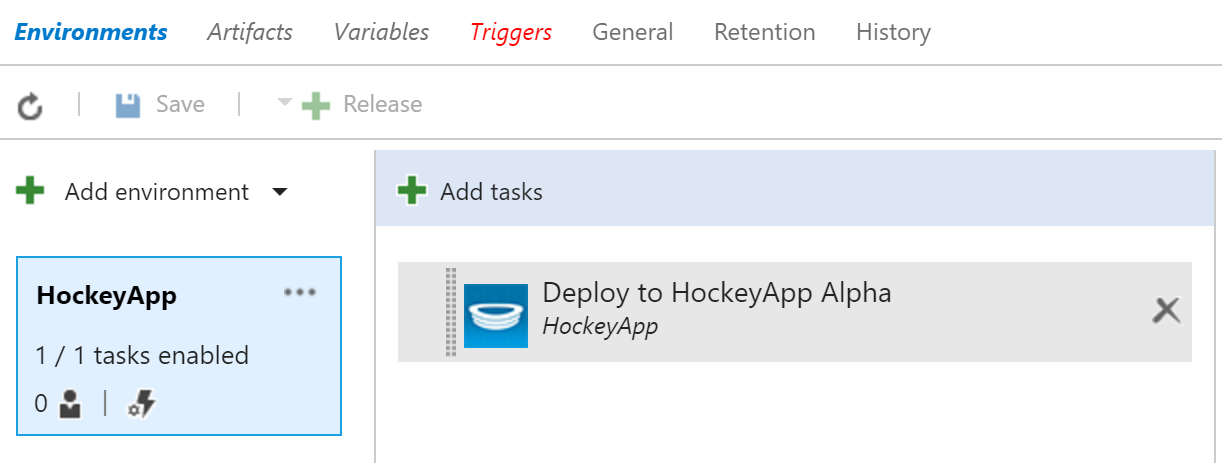
Fill in the HockeyApp Connection, App ID, and specify the APK from the drop folder that we should deploy. Additionally, we can specify if users should be notified, release notes, and if it’s a mandatory install. This deployment will happen automatically as soon as our build definition has successfully passed.
Deploy to Google Play
Once it’s in our internal testers hands, we want to release it to the next logical place, the Google Play Store to put it into production. This requires the VSTS Extension for Google Play to be installed in your project. This extension has multiple features, including releasing to alpha, beta, or production tracks, increasing a rollout percentage of an app previously deployed, and even promoting an app from one release track to another. Today, we’ll only take a look at releasing our app to the alpha track of Google Play for installation. There are a few steps required as prerequisites to set up a Google Play Service Account and generate an API key to make the Google Play connection as a service endpoint. Be sure to follow these instructions on the extension’s installation page.

With the Google Play extension and service configured, we can create a new environment that will be triggered after our HockeyApp environment succeeds. Select Add environment and then select Create new environment to bring up the Add new environment dialog. Again, we’ll select the Empty definition, but this time selecting “next” will allow us to configure additional pre-deployment configurations. What we can configure at this point are specific users that must approve a release. This is nice because we may not want every release going to Google Play and we can be selective over which build gets deployed. Leaving Deploy automatically checked means that this step will attempt to get approval after the app has been successfully deployed to HockeApp. This is optional, but a nice addition as we would also want it to deploy to HockeyApp first.

We can add a new Google Play – Release task to the newly created environment.

If you have configured the Service endpoint, you can specify it in the tasks settings; otherwise, you could also use the JSON auth file provided from Google. Then we just need to specify the APK file path, Alpha track, and we can optionally specify a release notes file and metadata to upload.
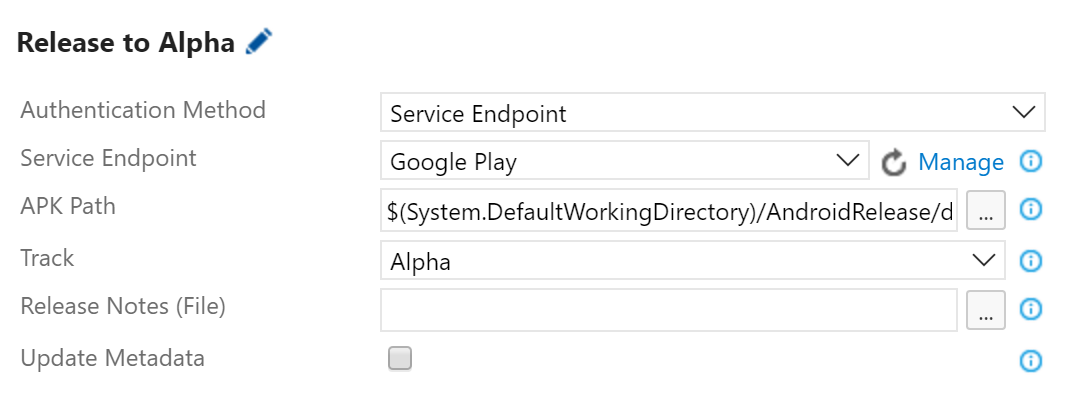
Save the release definition, and then we can simulate a release by selecting the “+” release button and selecting Create new release. This will bring up a dialog to select the build to deploy from and start a deployment. Within moment the app will be deployed to HockeyApp:

Selecting the release, we can see that the Google Play deployment is waiting for our approval for release.
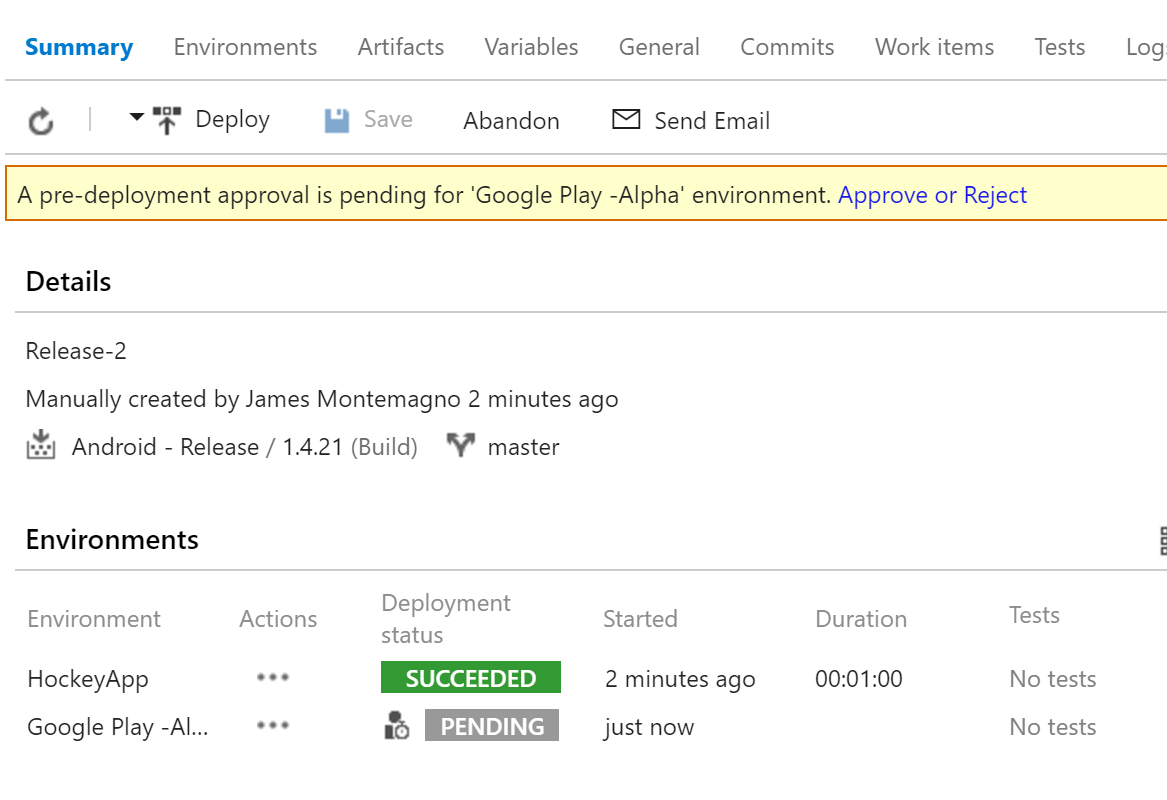
We can now approve or reject this release for deployment to go live to Google Play.
Learn More
In this post, we covered release management for Android application to HockeyApp and Google Play with just a few simple tasks. You can apply this same release management strategy for iOS applications using the Apple App Store VSTS Extension to help keep your iOS beta and production deployments up-to-date (see the announcement blog for more details). Implementing just a few parts of the DevOps cycle can dramatically save time and ensure high quality release with each commit of code.
Looking for more? Checkout The Xamarin Show on Channel 9:
