
Data is a big part of any application development and mobile apps are no exception; the way we handle data as developers is one of the many important decisions we must make for our mobile apps. From key-value stores to SQLite, there are many options available, but one that .NET developers are often especially familiar with is the Entity Framework.
Entity Framework is an object-relational mapper (O/RM) that enables .NET developers to work with a database using .NET objects and eliminates the need for more of the data-access code that developers usually need to write. Entity Framework is great, but was difficult to use in mobile development projects—until Entity Framework Core came along. Entity Framework Core is a lightweight, extensible, cross-platform version of Entity Framework data access technology.
What is Entity Framework Core?
Entity Framework Core (EF Core) introduces many new features and improvements when compared to full-scale Entity Framework, but is a completely brand new codebase that’s optimized for cross-platform applications. If you have experience with Entity Framework, you’ll find EF Core very familiar. Even though it doesn’t have all of the same features, many will show up in future releases (such as lazy loading and connection resiliency). Because EF Core is .NET Standard-compatible, we can now use it with Xamarin.Android.
Due to it’s ease-of-use, EF Core has been one of my favorite projects for quite some time. The challenge has always been, “how can I use the Entity Framework in my Xamarin apps?” In this blog post, I’ll show you how to do just that by building an Android app with a backing Entity Framework Core database.
Getting Started
Creating the .NET Standard Library
To get started, let’s create a .NET Standard library. .NET Standard is a formal specification of the .NET APIs that are intended to be available on all .NET runtimes, similar to Portable Class Libraries. This library is where we’ll place all of our shared application code, including our Entity Framework Core logic.
Create a new solution and add a Portable Class Library (PCL) to that solution.

Since this isn’t a .NET Standard (netstandard) library, we can convert it by right-clicking the project and navigating to the Properties:
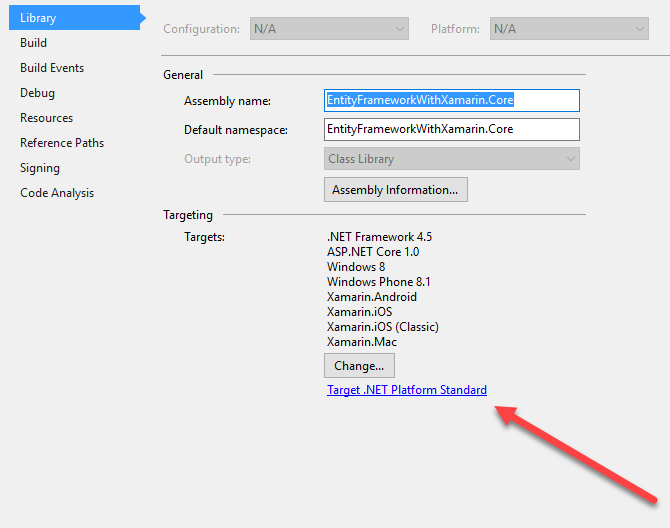
According to NuGet, the requirements of the Microsoft.EntityFrameworkCore and Microsoft.EntityFrameworkCore.Sqlite packages specify that the library needs to target netstandard 1.3. We can change the target in the same place:

We then need to add the Entity Framework packages to our project. Right-click the References folder, select Manage NuGet Packages…, and install the Microsoft.EntityFrameworkCore and Microsoft.EntityFrameworkCore.Sqlite packages.
Great! Now we’re ready to start diving into some Entity Framework code.
Defining the DbContext
If you’ve used Entity Framework before, you’ll be very familiar with how we define a DbContext and our underlying Models that define our database schema.
Let’s start with a simple data model that we’ll call Cat.
using System.ComponentModel.DataAnnotations;
using System.Threading.Tasks;
...
    public class Cat
    {
        [Key]
        public int CatId { get; set; }
        public string Name { get; set; }
        public int MeowsPerSecond { get; set; }
    }
Next, let’s ensure that our Cat class is part of our DbContext by defining a new context called CatContext.
using Microsoft.EntityFrameworkCore;
...
    public class CatContext : DbContext
    {
        public DbSet Cats { get; set; }

        private string DatabasePath { get; set; }

        public CatContext()
        {

        }

        public CatContext(string databasePath)
        {
            DatabasePath = databasePath;
        }

        protected override void OnConfiguring(DbContextOptionsBuilder optionsBuilder)
        {
            optionsBuilder.UseSqlite($"Filename={DatabasePath}");
        }
    }
Using Entity Framework Core with Xamarin.Android
Getting Started
Now that we have our database configured in our .NET Standard library with EF Core, let’s create an Android project to connect to this database from. Right-click the solution, click Add Project, and select Single-View App (Android).

Just like before, we need to add the
Microsoft.EntityFrameworkCore and Microsoft.EntityFrameworkCore.Sqlite NuGet packages to our Android project.
Implementing the Context
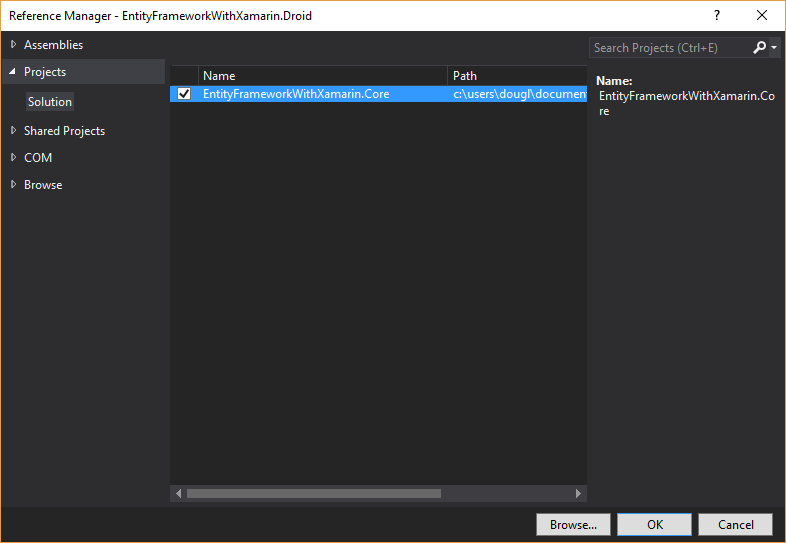
First, we need to make sure our Xamarin.Android project is referencing our .NET Standard library. In the Android project, right-click the References folder, select Add Reference…, and then select the library we created at the beginning of this blog post. Click OK to save this reference.
Now that we have that, let’s implement our MainActivity.cs with some Entity Framework code!
using System.IO;
using Microsoft.EntityFrameworkCore;
using System.Diagnostics;
using EntityFrameworkWithXamarin;
using EntityFrameworkWithXamarin.Core;
using System.Collections.Generic;
...
[Activity(Label = "EntityFrameworkWithXamarin.Droid", MainLauncher = true, Icon = "@drawable/icon")]
public class MainActivity : Activity
{
int count = 1;
protected async override void OnCreate(Bundle bundle)
{
base.OnCreate(bundle);
// Set our view from the "main" layout resource
SetContentView(Resource.Layout.Main);
// Get our button from the layout resource,
// and attach an event to it
Button button = FindViewById
And now add the TextView1 to our Resources > Layout > Main.axml to which we’re referring in our MainActivity.
  <?xml version="1.0" encoding="utf-8"?>
  <LinearLayout xmlns:android="http://schemas.android.com/apk/res/android"
      android:orientation="vertical"
      android:layout_width="match_parent"
      android:layout_height="match_parent"
      >
  <Button
      android:id="@+id/MyButton"
      android:layout_width="match_parent"
      android:layout_height="wrap_content"
      android:text="@string/Hello"
      />
  <TextView
      android:id="@+id/TextView1"
      android:layout_width="match_parent"
      android:layout_height="wrap_content"
      />
  </LinearLayout>
Next, let’s set our Android project as the startup project and run it in the emulator! Whoops, looks like we’ll get an error:
Microsoft.Data.Sqlite.SqliteException (0x80004005): SQLite Error 1: 'no such table: Cats'.
Generating an EF Core Migration
We’re missing a core Entity Framework feature called Migrations that creates our database schema. At the moment, there isn’t a great way to generate Entity Framework Migrations from within a Xamarin.Android project or the .NET Standard library. Let’s use a quick workaround by creating a new netcore Console Application so we can generate Migrations.

To generate our Migrations, add the Microsoft.EntityFrameworkCore.Tools.DotNet, Microsoft.EntityFrameworkCore.Design, and Microsoft.EntityFrameworkCore NuGet packages to this project so we can use the command line to generate our Migrations.
Note: Microsoft.EntityFrameworkCore.Tools.DotNet is currently prerelease and as such you’ll need to enable the Include prerelease checkbox in the NuGet Package Manager if you haven’t already.
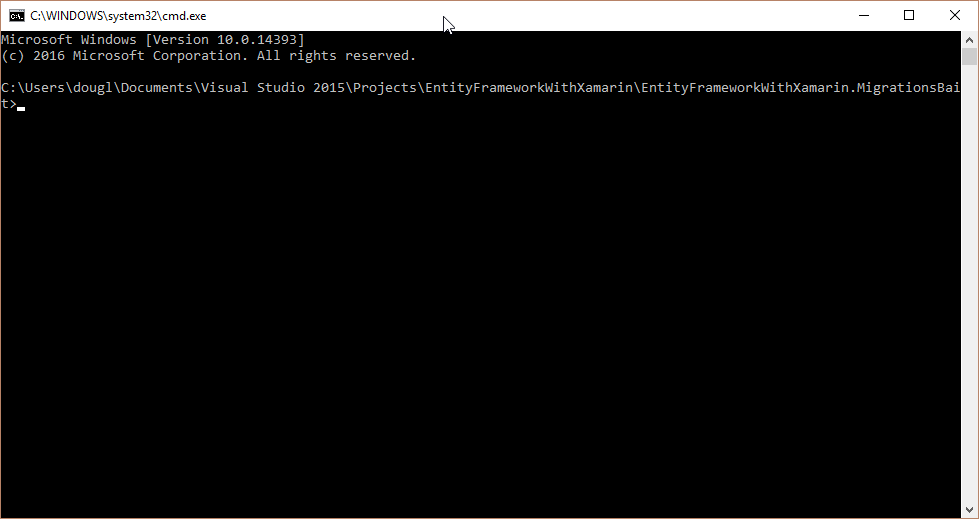
We now need to move our Cat and CatContext over to ensure there’s a DbContext it can generate Migrations for. Now we can generate a schema for our context. Let’s use the new dotnet tooling to do this. Open up a new console in our current Console App directory:
Generate a Migration by running:
dotnet ef migrations add Initial
which will generate the following:

Now we need to take the initial migrations generated in the Migrations folder of our project and move them over to our .NET Standard library.
Note: You can simply change the namespaces of these two generated files to the name of your netstandard namespace.
Putting it All Together
Run the Xamarin.Android project again and we’re now using Entity Framework Core successfully from our Android application to store data!

We can take a closer look at the SQLite file that gets generated by using an emulator and opening up the Android Device Monitor. Looking in the data/data/files folder, we’ll see our Cats.db that we created.

We can open this file in any SQLite explorer by selecting the file, clicking Pull a file from the device, and saving it locally, seen below using DB Browser for SQLite.

Wrapping Up
In this blog post, we used Entity Framework Core to generate a database we can use from within a Xamarin.Android application. For more information, check out the Entity Framework Core documentation. You can grab my full source code for building Android applications with Entity Framework by going to my GitHub.
Time and tide waits for no man; however, in the two plus years your blog was written many changes were made to Xamarin Forms and how Visual Studio templates the Android project. As far as I can see MainActivity.xaml has been replaced with Resources.layout.actiivity_main.xm and content_main.xml.
In class MainActivity SetContentView(Resource.Layout.Main) returns Resource.Layout does not contain a definition for Main. Furthermore, TextView textView = FindViewById(Resource.Id.TextView1) yeilds a casting error.
Please update your article to provide the corrected syntax to allow this project to compile.
Oh, one other thing DbSet signature is DbSet<T> and List signature is List<T>
Cheers!
Hi Jon,
Great article.
But I desperatly try to make EntityFrameworkCore work in my application. I am using the latest versions of the libraries (EntityFrameworkCore.Sqlite, Xamarin.Forms 4, …), but when calling MigrateAsync or EnsureCreatedAsync, my app crashes (on a Huawei P20), with no log, and no way to catch exception.
Have you any idea about this issue ?