
iOS device provisioning is largely regarded by all iOS developers, Xamarin or otherwise, as being one of the biggest barriers to getting started with iOS. To test and deploy your app on a device, you must enroll in Apple’s Developer Program, create a certificate to sign the app, create an app ID, and register your device with Apple. We’ve written some great documentation on the subject as it’s a complicated process with many points of failure.
We also always want to make things as simple as possible for Xamarin.iOS developers, so you can spend your time focusing on creating great apps, not on iOS provisioning. A few months ago, we introduced Automatic Provisioning to Visual Studio for Mac, and we’ve finally brought these capabilities to Visual Studio 2017 with Version 15.7 Preview 3. In this post, you’ll learn how to use the new automatic signing feature in Visual Studio to deploy your app to a device in about 30 seconds.
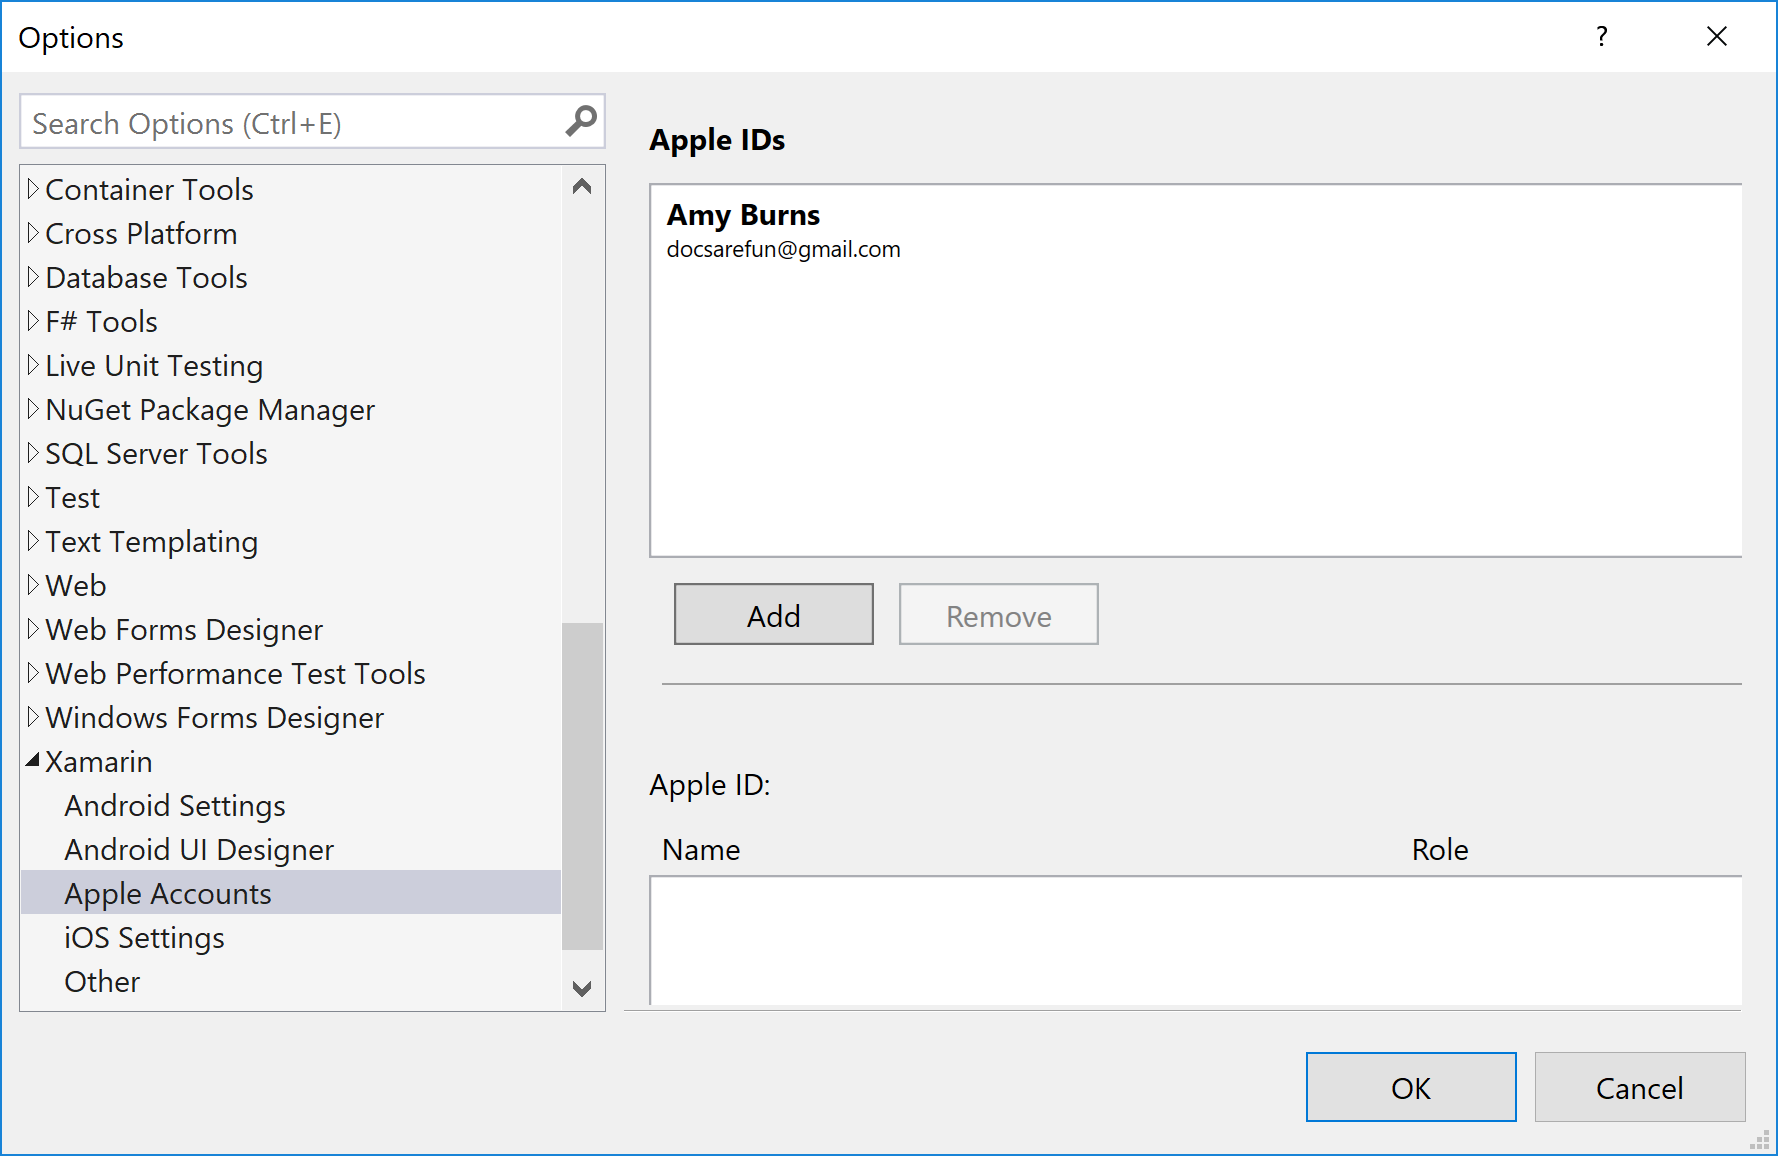
Connecting your Apple Account
To begin the automatic signing process, make sure you’ve signed in to Visual Studio with an Apple ID via the Apple Account options. iOS provisioning requires that you be a member of the Apple Developer Program. If you haven’t signed up yet, now is a good time to do it.
To open the account management window, go to Tools > Options > Xamarin > Apple Accounts. Select the Add button and enter your Apple ID and password. Your credentials are saved in the secure Keychain on your machine, and fastlane is used to handle your credentials securely while passing them to Apple’s developer portal.
Enabling Automatic Signing
Once you’ve ensured you have an Apple ID connected to Visual Studio, you’re ready to enable Automatic Signing.
In your iOS project, right-click on the project name and go to Properties > iOS Bundle Signing:

Select the Automatic Provisioning scheme radio button:

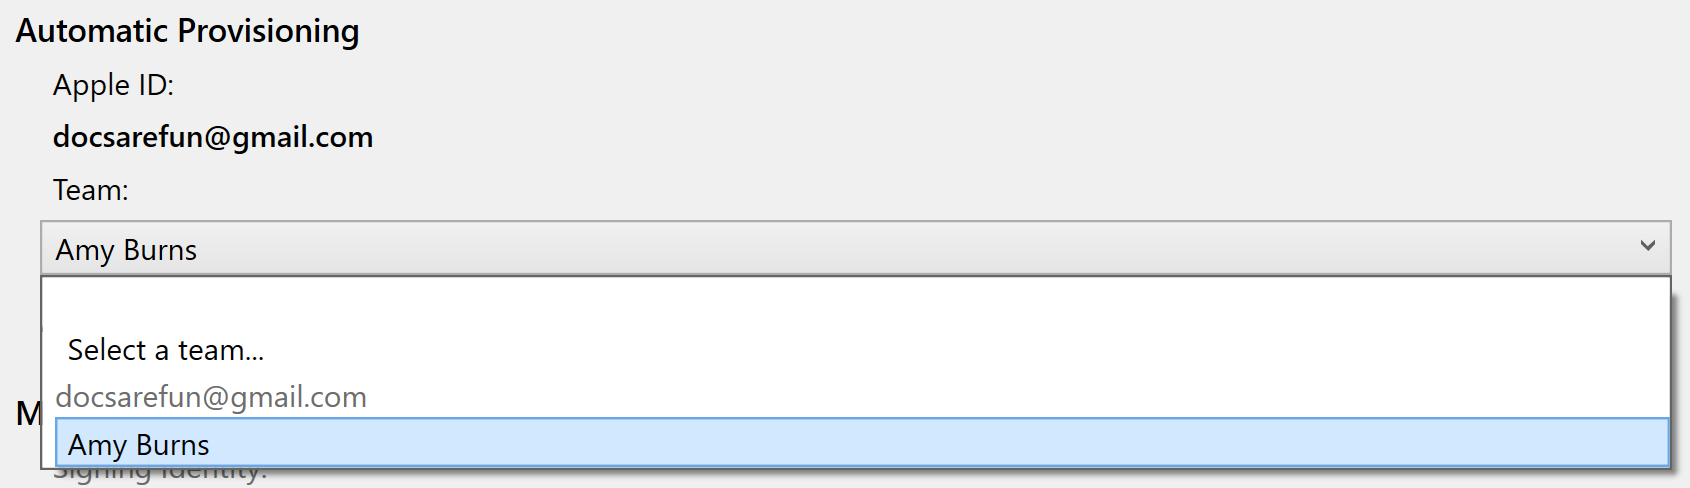
Then, select your team from the Team dropdown:
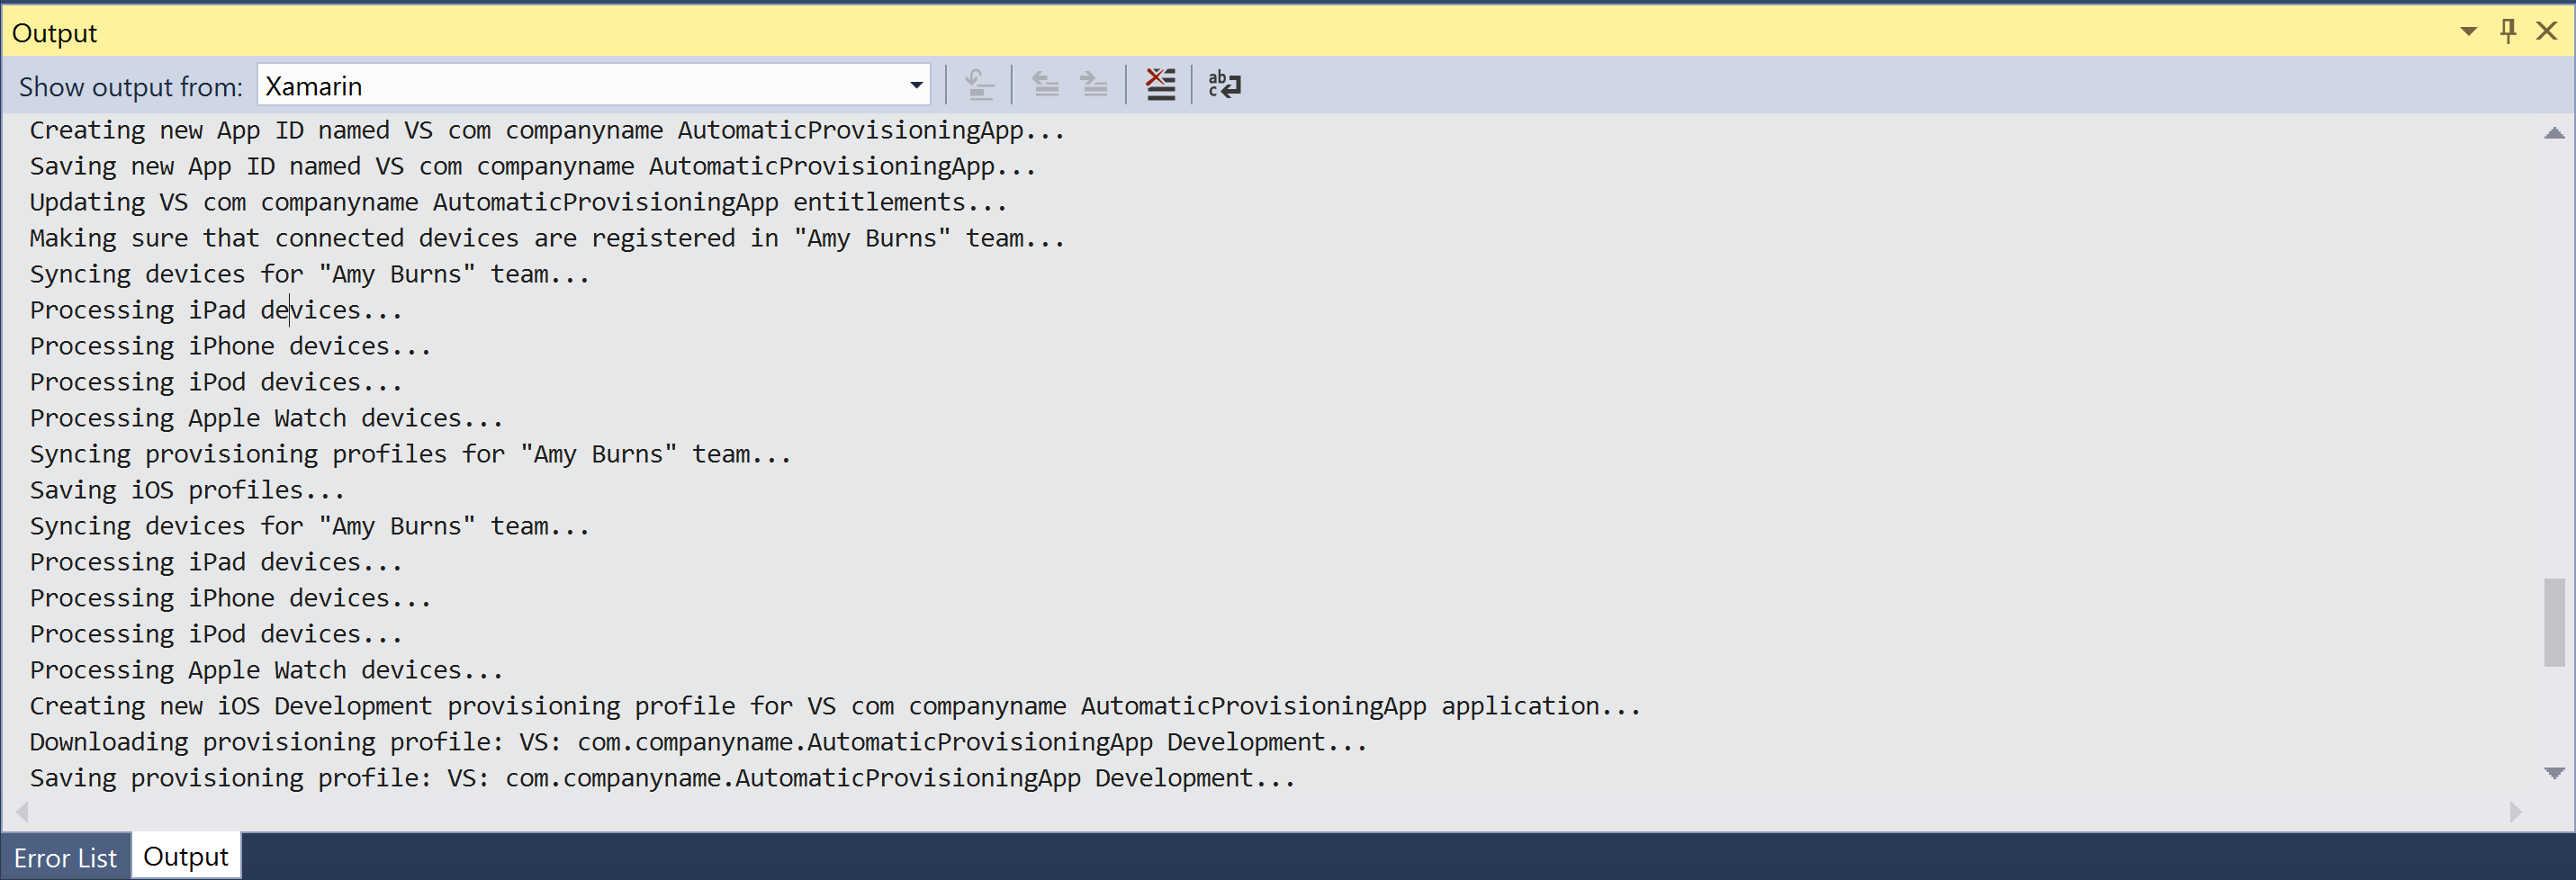
This starts the automatic signing process. Visual Studio then attempts to generate an App ID, provisioning profile, and a signing identity to use these artifacts for signing. You can see the generation process in the Build output:
When automatic signing has been enabled, Visual Studio updates the provisioning artifacts, if necessary, when any of the following things happen:
- When an iOS device is plugged in to the Mac build host.
- Visual Studio checks to see if the device is registered on the Apple Developer Portal. If it is not, then the device is added and a new provisioning profile is generated.
- When the bundle ID of your app is changed.
- Visual Studio updates the app ID to match the bundle ID. A new provisioning profile containing this app ID is generated.
- When a supported capability is enabled in the Entitlements.plist file.
- This capability is added to the app ID and a new provisioning profile with the updated app ID is generated.
- Not all capabilities are currently supported.
Deploying your App
To deploy your app to a provisioned device, plug your device in to your Mac build host and select it from deployment target list. Alternatively, if your iOS device is connected to the Mac build host wirelessly, you’ll be given an option to select it from the deployment target list.
Wrapping Up
This blog post introduced the new automatic signing capabilities in Visual Studio 2017 15.7 Preview 3 and demonstrated just how quickly you can now deploy your iOS, tvOS, and watchOS apps to a device.
For more information on Device Provisioning, refer to our documentation on Setting up a device for development.
Wahooo... Awsome !!! I'm sooooo close.. and need help. looks like i made it all the way to deploying on a physical device. However my visual studio will not "see" the physical iphone. I have the follwoing scenerioVisual Studio 2017 Version 15.9.11 (on a PC) + a networked Mac from the company (MacInCloud), which i use to build the iOS app and show in the simulator. That works fine. Your steps above worked and everything looks good but when i pulg in an iphone to my computer via USB, visual studio will not recognize it... does this need...