With Xamarin, you can extend your cross-platform apps with support for native speakers, reaching markets that might otherwise be overlooked. However, managing multiple languages and keeping everything current can be challenging, especially if you’re not fluent in those languages.
 This is where the Multilingual App Toolkit (MAT) can help by automating the management of your language support, so you can focus on what you do best: build great cross-platform apps!
Before getting started, it’s important to note that most project templates are not localization enabled. Fortunately, adding localization support is straightforward. Once you do the initial setup, your app will be ready to travel the world.
Getting Started with Multilingual App Toolkit
Let’s look quickly at this process using a Xamarin.Forms sample. The LocalizationSample project has all the plumbing and is available on GitHub.
Wiring up localization can be done quickly using a NuGet called Multilingual (Localization) Plugin for Xamarin and Windows. The documentation is straightforward, with the core being the addition of the TranslationExtension class to provide XAML binding for your app’s resources. Here’s the code-snippet Plugin.Multilingual used to wire up access to the resources:
[ContentProperty("Text")]
public class TranslateExtension : IMarkupExtension
{
    const string ResourceId = "LocalizationSample.Resources.AppResources";

    static readonly Lazy resmgr =
        new Lazy(() =>
            new ResourceManager(ResourceId, typeof(TranslateExtension)
                    .GetTypeInfo().Assembly));

    public string Text { get; set; }

    public object ProvideValue(IServiceProvider serviceProvider)
    {
        if (Text == null)
            return "";

        var ci = CrossMultilingual.Current.CurrentCultureInfo;
        var translation = resmgr.Value.GetString(Text, ci);

        if (translation == null)
        {
            translation = Text; // returns the key, which GETS DISPLAYED TO THE USER
        }
        return translation;
    }
}
Of course, you’ll need a place to store the localizable text. Using the familiar RESX file with Xamarin.Forms makes this a snap. Simply add a folder named “Resources” to the SampleLocalization project. In this folder, add AppResources.resx and “HelloWorld” with the value “Hello from App Resource” to the new RESX file:
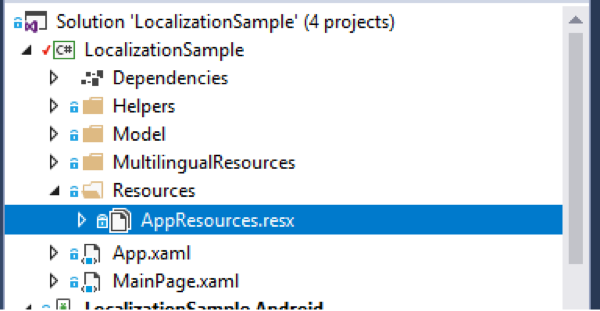

The final step before all the wiring is complete is to replace the hard-coded text in the XAML code with bindings that will retrieve the text from the resource file. All that remains is adding a reference to the TranslateExtension and applying the binding, like so:
<?xml version="1.0" encoding="utf-8" ?>
<ContentPage xmlns="http://xamarin.com/schemas/2014/forms"
             xmlns:x="http://schemas.microsoft.com/winfx/2009/xaml"
             xmlns:i18n="clr-namespace:LocalizationSample.Helpers;assembly=LocalizationSample"
             xmlns:local="clr-namespace:LocalizationSample"
             x:Class="LocalizationSample.MainPage"
             Title="Let's Translate!">

    <StackLayout Padding="20">
	    <Label Text="{i18n:Translate HelloWorld}"
               LineBreakMode="WordWrap"/>

	    <Label
                Margin="0,60,0,0"
                Text="Translate this automatically"
                LineBreakMode="WordWrap"
               x:Name="LabelTranslate"/>

	    <Picker ItemsSource="{Binding Languages}"
                ItemDisplayBinding="{Binding DisplayName}"
                x:Name="PickerLanguages"/>

    </StackLayout>

</ContentPage>
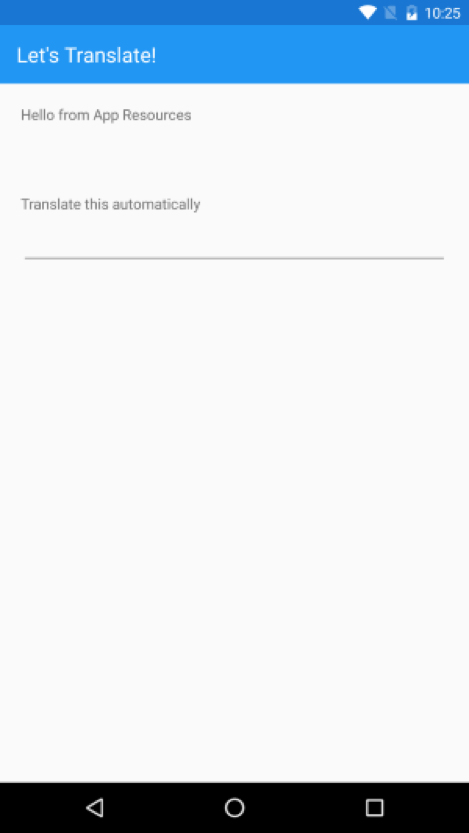
Running the app should now display the English string “Hello from App Resource” as well as the still hard-coded text values:
Traditionally, after ensuring the localization is wired up and displaying correctly, you would finish adding all the app’s resource data before considering adding additional languages to avoid managing the changes to the resource or the related translation during the ongoing development process. This can be a challenge with only one or two additional languages, but becomes daunting very quickly as more languages are added.
It’s best to validate that your app’s language support is working correctly throughout the development process to avoid bugs that may delay your app’s release, or worse, cause you to reduce market support by cutting additional language support.
This is where the Multilingual App Toolkit (MAT) comes in. It manages your target REXS files by applying on-demand Machine Translations throughout the development process. Once development nears completion, you can have the translations proofed and adjusted by family, friends, co-workers, or translation vendors.
Install and Enable
To Install the Multilingual App Toolkit(MAT), just use Visual Studio’s Tools -> Extensions and Updates menu:

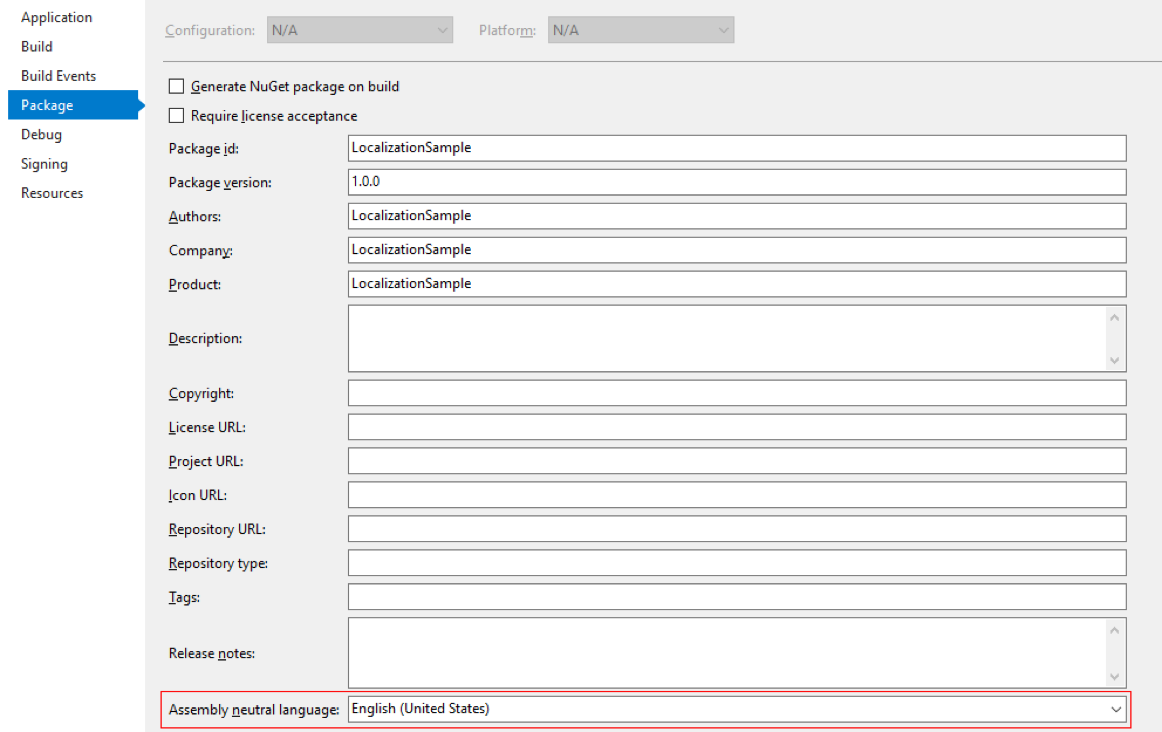
After the installation is completed, you will need to ensure your app has defined the default app language. This is the language displayed if the app does not support the language of the device. It’s also the language MAT uses to know how to translate into other languages.
To check the Neutral Language, right-click the LocalizationSample project and select Properties. On the package tab, the Assembly Neutral Language value determines the app’s default language. This should be set to the language you use in your AppResources.resx file. In this example, it will be English (en-US):
MAT needs to be enabled for any project that has localizable text. This is done by selecting the project in the Solution Explorer, then the Tools -> Multilingual App Toolkit -> Enabled selection:

Adding target languages is as simple as right-clicking on the project and selecting Multilingual App Toolkit -> Add translation languages. Remember to set up the Azure Cognitive Service configuration for MAT’s Microsoft Translator provider first.
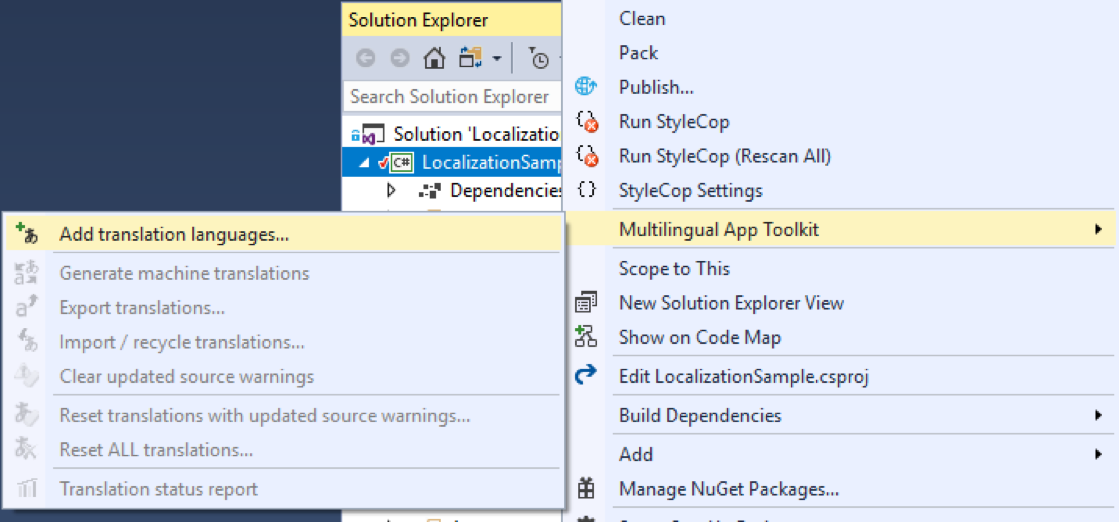
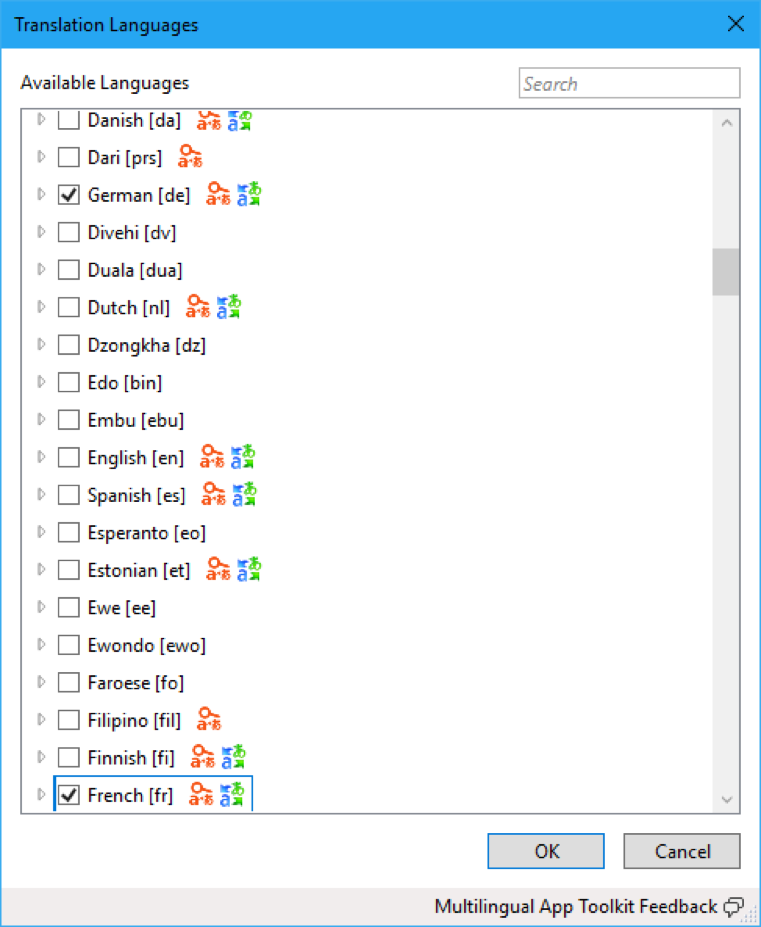
After selecting the desired language and clicking “OK” and MAT will add two files for every language selection, an .XLF file and the corresponding .RESX file. The .XLF file is an XLIFF 1.2 industry standard file that is designed to support translation data. The related RESX files are managed by MAT and used by Visual Studio to add the desired language support to your app.
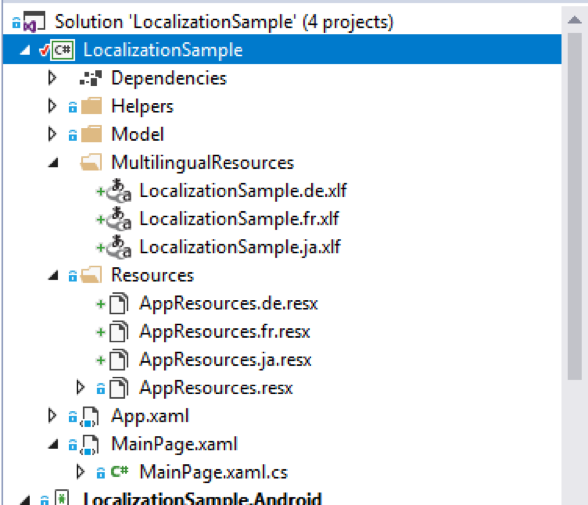
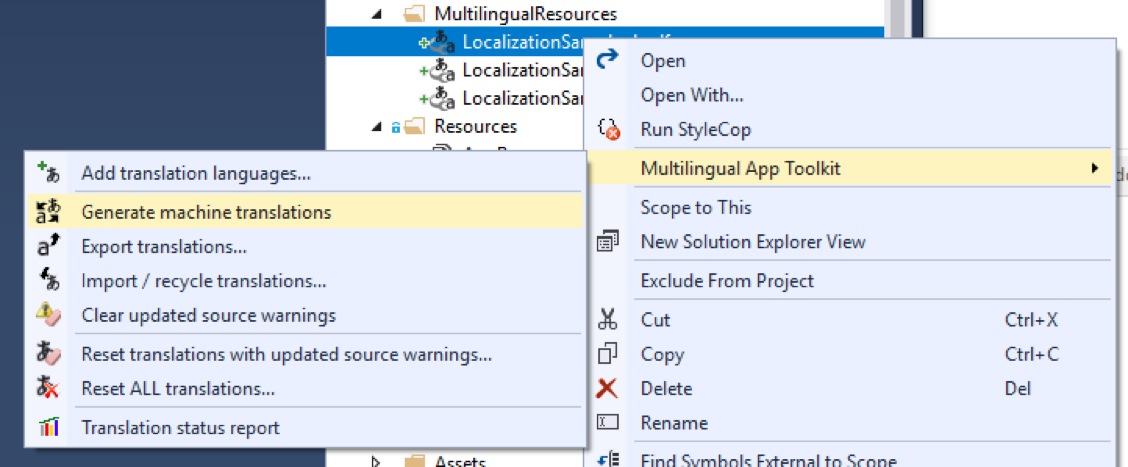
Selecting one or more .XLF file enables the menus that allow for Machine Translation or even exporting for external localization. Select Generate machine translations to apply machine-generated translations to your project:

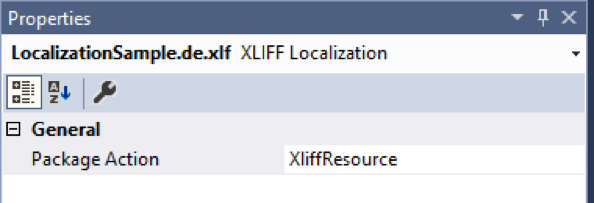
Note: Before building, ensure the Package Action is set to XliffResource. This setting is used by the build task to update related RESX with the translation in the .XLF file. Without this setting, your app will not contain the translation:
Now it’s time to build and run your app! Language picking in the sample is configured dynamically; you can switch the text for easy testing. For more application, let the device’s language pick the app’s language automatically.

See It In Action
This week I joined James Montemagno on The Xamarin Show to show off the Multilingual App Toolkit in action:
Wrapping Up
You’re now ready to create great cross-platform apps that work in many languages! To download, visit the Visual Studio Marketplace and search Multilingual App Toolkit (MAT). You can find the code for the LocalizationSample on Github.


This works well, but I am having problems with my drop down to switch languages. In UWP, the only resources that are installed for my app on the target machine are the languages that are already installed on the target machine's operating system. If I try to switch to any language that isn't installed on the operating system, it fall back to the default language.
I love the idea of having a switcher right inside the app, but I don't want my clients thinking that the app doesn't work for all languages listed. Is there a way to force UWP to...
No need for all of this!
Once you have the Resources, you’ll get static properties from it.
Let’s say you have two translations: “Hello, {0}” to “Olá, {0}” and “Yes” to “Sim”.
You can use both in XAML without coding anything:
Text=”{Static res:I18N.Yes}” will print “Sim” (res is clr-namescpace:YourProject.Resources, I18N is the ResourceName.resx).
Text=”{Binding CurrentUserDisplayName, StringFormat={Static res:I18N.Hello}}” will print “Olá, Julio” (when CurrentUserDisplayName = Julio on your view model).
You don’t even need to set CurrentCulture, is all automagic.