Although Xamarin technologies are most commonly used to develop mobile applications, Xamarin.Mac makes it easy to use your preferred .NET language to develop desktop Mac apps. There are many C# examples in Xamarin’s mac-samples directory on Github, but it’s also easy to use F# to develop desktop Mac apps as well.
Currently, there is no support for Storyboards when working with F# and Xamarin.Mac, so this leaves you with two options: develop your UI in code or manually add the links between the Storyboard XML and your F# code. Both are straightforward, but in this example we’ll build the UI in code.
The following code shows a simple custom NSView that the app uses to set the values of the input parameters:
[]
type InputView (identifier : string, items : int list) as this =
    inherit NSView ()

    let updated = new Event()
    let spinner = new NSPopUpButton()

    do
      let label = new NSText()
      label.Value <- identifier
      label.Editable <- false

      this.AddSubview label
      this.AddSubview spinner

      spinner.Target <- this
      spinner.Action  List.map (fun i -> i.ToString())
      |> List.toArray
      |> spinner.AddItems

      label.Frame <- new CGRect(10., 10., 100., 50.)
      spinner.Frame <- new CGRect(10., 70., 100., 50.)

    [CLIEvent]
    member this.Updated = updated.Publish

    []
    member this.SpinnerValueSelected =
       spinner.TitleOfSelectedItem
       |> float
       |> updated.Trigger
The class is typical of those that bridge the worlds of F# and the Mac. The AllowNullLiteralAttribute allows null references to the type, while CLIEventAttribute and OutletAttribute are used to map a native message to a .NET event. In this case, the assignments to spinner.Target and spinner.Action specify that the system should call the method associated with the Selector “SpinnerValueSelected” when the spinner’s value changes. That association is created with the OutletAttribute applied to this.SpinnerValueSelected. The code retrieves the text value, converts it to a floating point value, and triggers the Updated event.
Programming for the Mac will be very familiar to those who are accustomed to programming for iOS: you have an entry point that creates an NSApplicationDelegate which has one or more NSViewController objects that, in turn, have some number of NSView objects. However, it isn’t quite as simple as swapping NS for UI as the prefix for your objects! MacOS has a longer history than iOS and there are more legacy approaches and quirks than there are in iOS. For instance, NSView objects are not necessarily backed by CoreAnimation layers, and instead of NSViewController objects, you may work with NSWindowController objects.
Using CoreML with F#
The app has three InputView objects that specify the number of solar panels, greenhouses, and acreage of a property for sale on Mars. The app uses a (very simple) CoreML model file to estimate the price of such properties. CoreML is a framework introduced in MacOS High Sierra and iOS 11 for inferencing (making calculations) with machine learning models trained using other tools. At this point, you can neither train nor access the internals of a CoreML model.
To use a machine learning model with CoreML, the first step is to convert the model from the native training library to a CoreML .mlmodel file. This is done using Apple’s CoreML Tools or an open-source extension. The second step is to “compile” the .mlmodel using xcrun coremlcompiler compile model.mlmodel outputfolder. For a detailed walkthrough of training and converting an ML model to CoreML and Tensorflow Android Inference, see my MSDN Magazine article.
A compiled CoreML model results in a folder, e.g., MarsHabitatPricer.mlmodel that contains binary definitions of the model structure and weights. You may load that model from the Web (and that would be fine for a small model such as this), but you generally load it as a resource with code, such as:
let LoadCoreMLModel modelName =
      let assetPath = NSBundle.MainBundle.GetUrlForResource(modelName, "mlmodelc")
      let (model, err) = MLModel.Create(assetPath)
      match err  null with
      | true -> raise  model
You’d want to return an Option or a Maybe in a robust app, but, for learning purposes, we’ll just throw an Exception if there’s a problem.
CoreML apparently has its own internal datatypes for representing values, so instead of directly passing the input values, you need to wrap them in an IMLFeatureProvider instance that provides a mapping from strings to values. In this case, we have three features: the number of solar panels, the number of greenhouses, and the acreage. Those values are stored in mutable variables and, when any one of them is modified, we trigger an InputsChanged event:
type MarsHabitatPricerInput ()  =
    inherit NSObject()

    let mutable solarPanels = 1.
    let mutable greenhouses = 1.
    let mutable plotsize = 1000.

    let inputsChanged = new Event()

    []
    member this.InputsChanged = inputsChanged.Publish

    member this.SolarPanelCount f  = solarPanels <- f ; inputsChanged.Trigger(this)
    member this.GreenhousesCount f = greenhouses <- f; inputsChanged.Trigger(this)
    member this.Plotsize f = plotsize  List.map (fun s -> new NSString())
             |> Array.ofList
             |> fun ss -> new NSSet(ss)

        member this.GetFeatureValue featureName =
            match featureName with
            | "solarPanels" -> MLFeatureValue.Create(solarPanels)
            | "greenhouses" -> MLFeatureValue.Create(greenhouses)
            | "size" -> MLFeatureValue.Create(plotsize)
            | _ -> raise <| new ArgumentOutOfRangeException("featureName")
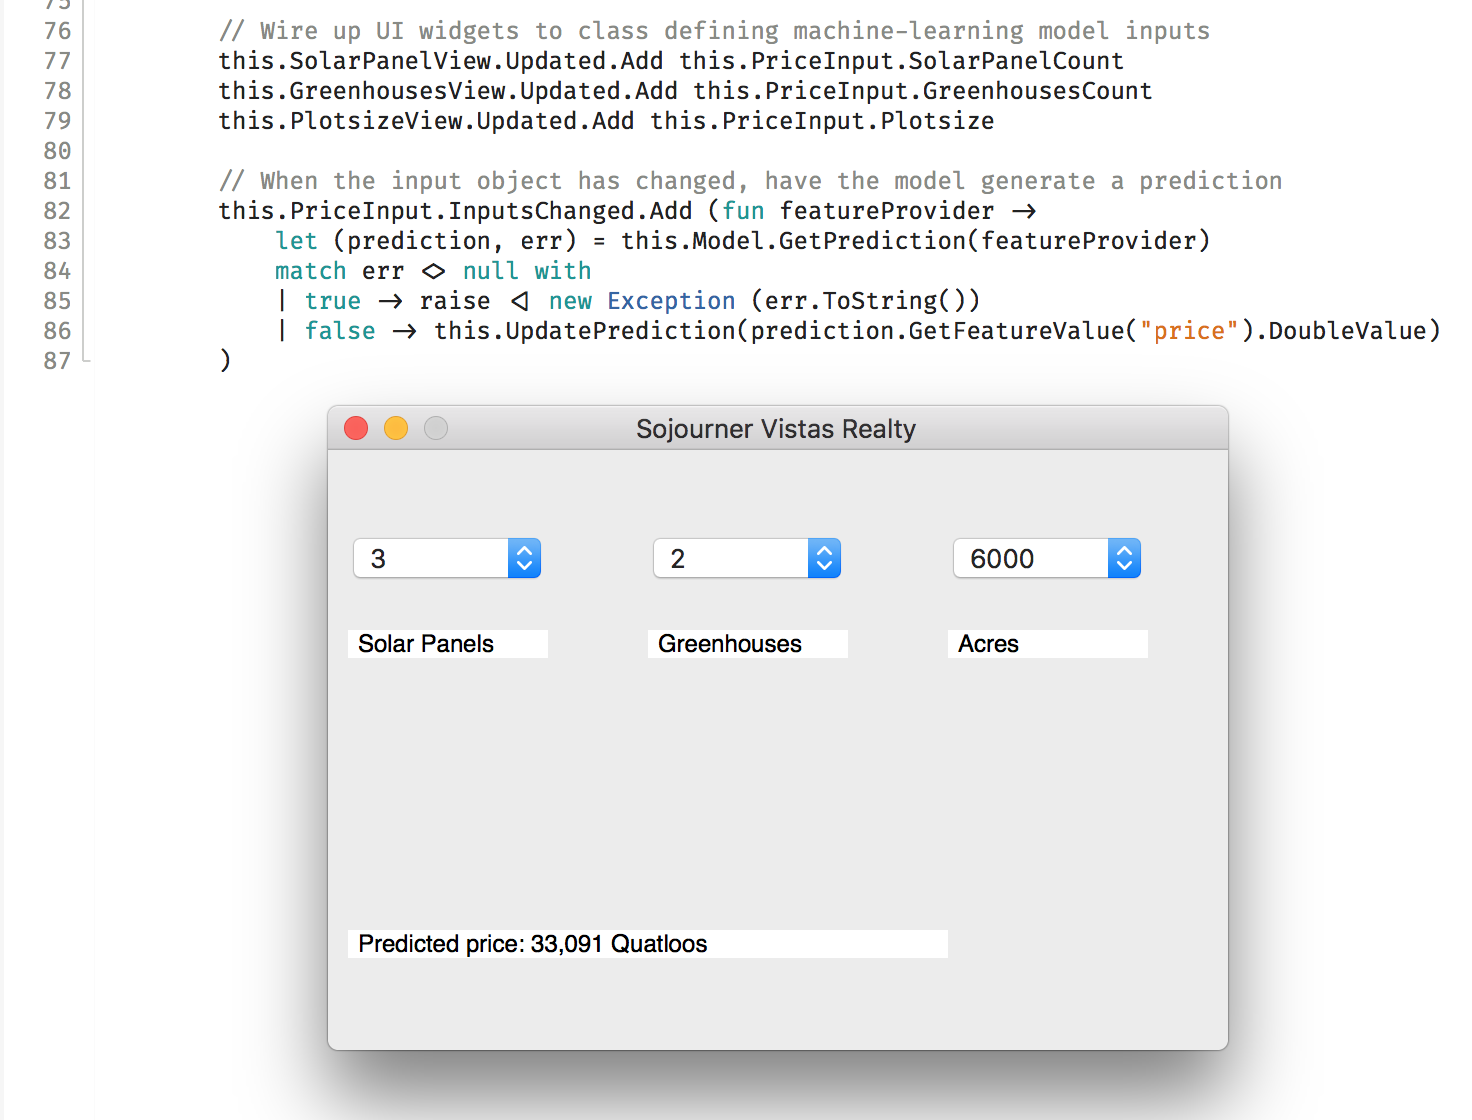
As you probably figured out, we subscribe an instance of this MarsHabitatPricerInput type to each of the InputView objects’ Updated events, so changing the input values leads to triggering the MarsHabitatPricerInput.InputsChanged event. That, in turn, leads us to:
this.PriceInput.InputsChanged.Add (fun featureProvider ->
            let (prediction, err) = this.Model.GetPrediction(featureProvider)
            match err  null with
            | true -> raise  this.UpdatePrediction(prediction.GetFeatureValue("price").DoubleValue)
        )
We pass the MarsHabitatPricerInput object to the MLModel object’s GetPrediction method. Again, we raise an exception on an error and otherwise retrieve the model’s “price” output, which we know to be a Double. The details of the model’s input and output strings and datatypes come from the training-and-conversion process.
The final application, available on Github, looks like this:
More Machine Learning Examples from Xamarin
Xamarin allows developers to deploy machine learning apps across desktops and mobile devices. You can learn more about developing programs based on CoreML by reading our Intro to CoreML article. When you’re ready to go deeper into developing apps that use both CoreML and TensorFlow Android Inference, see my article Deliver On-Device Machine Learning Solutions.

