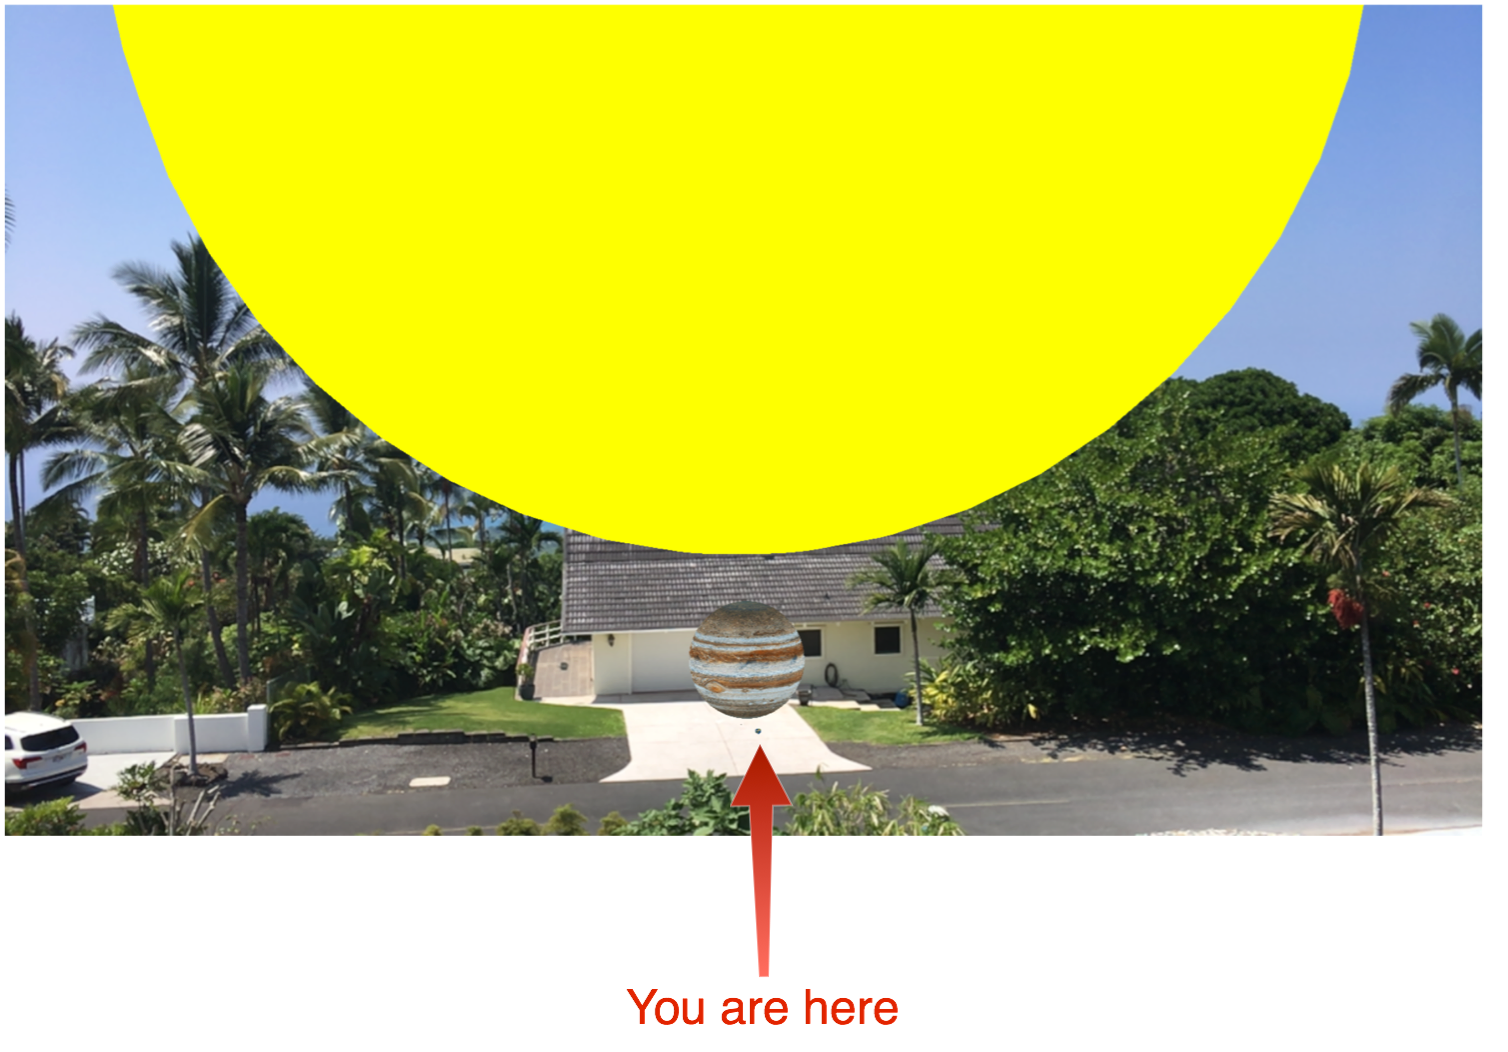
A few years ago, my colleague Joel Martinez and I wrote a F# program we called “Oculus Thrift” that demonstrated iOS SceneKit in a Google Cardboard stereoscopic viewer. With the recent release of iOS 11, I wanted to see if we could do something similar with ARKit, Apple’s augmented-reality framework. It took just 8 lines of F# code.

Let’s get 3D with ARKit
I do most of my exploratory iOS programming in F#. I typically start with Xamarin’s “Single View App” project and build my UI programmatically.
In the case of a simple ARKit application, this is especially easy: create an ARSCNView, set its Frame property, and add it to the view hierarchy. However, to create a Cardboard-compatible experience, you need two views, each of which consumes half the screen:
let halfWidth = this.View.Frame.Width / nfloat(2.)
let leftEyeView <- new ARSCNView()
leftEyeView.Frame <- new CGRect(nfloat(0.), nfloat(0.), halfWidth, this.View.Frame.Height)

let rightEyeView = new ARSCNView()
rightEyeView.Frame <- new CGRect(halfWidth, nfloat(0.), halfWidth, this.View.Frame.Height)

this.View.AddSubview leftEyeView
this.View.AddSubview rightEyeView
As I discussed in an earlier blog post, the ARSCNView class displays SceneKit-based 3D geometry. SceneKit itself uses a scene-graph model, in which nodes are positioned relative to their ParentNode.
In our original “Oculus Thrift” code, Joel and I created stereo vision by using two different camera nodes, offset slightly in space. That strategy won’t work with ARKit, since the camera in an ARSCNView is managed by the ARKit subsystem which moves the camera relative to real-world coordinates (more accurately: relative to an origin that is the real-world position and orientation of the device at the time the ARSession begins).
So instead of using two camera nodes, duplicate the left eye’s scene-graph geometry, offset it by the inter-pupillary distance (mine is 64mm), and add the cloned geometry to this offset node:
let offsetNode = new SCNNode()
offsetNode.Position <- new SCNVector3(0.064f, 0.f, 0.f)
rightEyeView.Scene.RootNode.Add offsetNode
let ems2 = earthMoonSystem.Clone()
offsetNode.Add ems2
The final trick is to get both views to use the same ARSession, which is simply a matter of assignment. Then, we kick off the session:
rightEyeView.Session <- leftEyeView.Session
leftEyeView.Session.Run (configuration, ARSessionRunOptions.RemoveExistingAnchors)
The result is side-by-side augmented-reality views whose computer-generated 3D imagery invites the mind to fuse into a 3D view:
Ironically, because the device's camera is shared between views, when viewed in a Google Cardboard device, the real-world view is flat and only the computer-generated imagery appears in 3D. Let's explore our solar system a little more with ARKit and see what else there is to learn.
Exploring the Solar System with ARKit
I think one of the real educational opportunities relating to mixed-reality is scale and proportion. It’s very difficult to relate to geological age or atomic scale or cosmic scale. Having just experienced the amazing total solar eclipse, I thought it might be interesting to do an AR experience that showed the Earth and Moon in their actual proportions. Of course, F#’s units-of-measure came in handy:
[] type km
[] type m

// 100 * 10^6 : 1
let scale = 100000.0/1.0

[
("earth", {Name = "Earth"; Radius = 6371.0; Surface = material "Earth.png" } );
("moon", {Name = "Moon"; Radius = 1079.0; Surface = material "moon-4k.png" } );
("jupiter", { Name = "Jupiter"; Radius = 139822.; Surface = material "jupiter2k.jpg" }) ;
("sun", { Name = "Sun"; Radius = 1391400.; Surface = material "sdo.jpg"})
] |> Map.ofList

let moonDistance = 384400.0

let globeGeometry body =
    let scaledRadius = float(body.Radius / scale) |> nfloat
    let geo = SCNSphere.Create scaledRadius
    geo.Materials <- [| body.Surface; body.Surface;body.Surface;body.Surface;body.Surface;body.Surface; |]
    geo
The problem with the above scale is that you lose the moon; it becomes a 1cm ball that orbits at a distance of 3.8m. For most of its orbit, it's barely a few pixels high. So, instead of going for realistic distances, I decided to go for realistic proportions.
The Orrery project puts the Moon, Earth, Jupiter, and Sun in an augmented-reality view. To get the whole Sun in the view, I find I have to stand about 30m away. To create a realistic eclipse simulator with the 1cm Moon, the Sun would have to be 1.5K away!
Since I'm a glutton for punishment, I calculated the distance to Proxima Centauri at this scale. Imagine a 6cm Earth and the 14m Sun an appropriate kilometer-and-a-half away... a properly-distant Proxima Centauri would be pretty much sitting on the surface of the Moon, 400,000km away!
As Douglas Adams said: "You may think it's a long way down the road to the chemist's, but that's just peanuts to space."
All source code for both the realistically-proportioned Orrery project and the Google Cardboard compatible stereoscopic AR project are available on Github. Pull-requests and questions welcome! Make sure to also check out the Introduction to iOS 11 guide in the Xamarin Developer Center.


0 comments