

This post will concentrate on everything new, cool, trendy, and useful around the integrated Web Live Preview tool in Visual Studio 2022.
More than 17 years ago, when I started my dev career with ASP.NET Web Forms as part of an ASP.NET development team, my first steps commenced out as many of us with the superior assistance of the Visual Studio Designer – I played with the famous drag and drop of controls from the Toolbox, configured their properties from the Action Panel (aka Smart tags), created server events by double clicking over the components and so on. It was like a magic to create the UI of the page so easily. Sounds familiar to many of us, right?
Nowadays, after so many years of successful service, the Visual Studio Designer is a bit outdated, shows different presentation and appearance results from the browsers, hard to maintain and not accessible. The good news is that Microsoft has taken this problem into account and offer a worthy solution with the Web Live Preview (WLP).
WLP is the new kid on the block and a modern successor of the noble Visual Studio Web Forms Designer. It offers not only all nice features supported by the Designer, but also many more. The successor allows you to see in real-time the configuration changes you made to the design, layout and settings of the web page and UI components you are currently working on, incorporating built-in accessibility support, and getting frequent updates and improvements by Microsoft.
Isn’t it great? – I hear you say, yes, it is! Well, let’s dive deep into the installation, usage, and new features.
Before we begin with the advantages of the latest version of WLP, you may be interested in checking out the quick getting started instructions below on how to install, enable and use the tool:
Installation
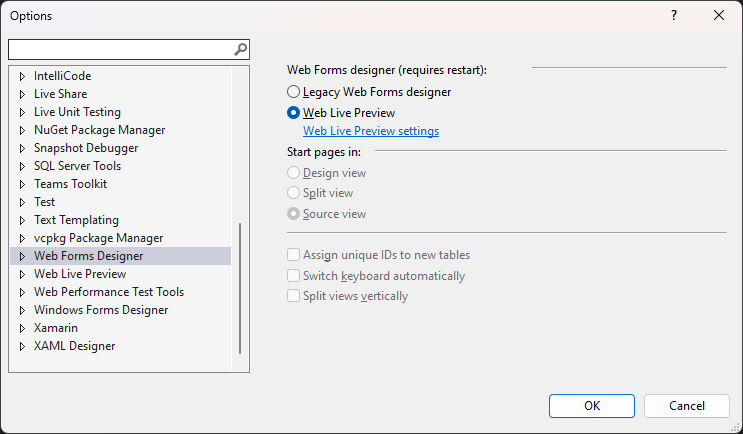
Web Live Preview is built into Visual Studio 2022. If not already enabled, you can activate it manually from Tools -> Options -> Web Forms Designer -> select the Web Live Preview option and press OK. You can also call the Options dialog by typing Web Forms Designer into the IDE search bar.
How-to use Web Live Preview
The new designer gives you the freedom to use it directly from within Visual Studio IDE. Amazing news for all existing Web Forms applications is that it supports not only the native ASP.NET Web Forms components, but also the third-party UI controls of the most popular Web Forms (AJAX) vendors. For demo purposes, I will use a sample Outlook-inspired Web Forms app created with the assistance of Visual Studio Extensions for Telerik UI for ASP.NET AJAX, but you can test out with your own ASP.NET Web Forms solutions and other third-party tools of your choice.
To launch WLP in Visual Studio: Click on the Split or Design buttons as you would do with the old-fashioned Visual Studio Web Forms Designer.
WLP Features and integration with regular and third-party components
Web Live Preview provides a number of visible and hidden gems that will save you a lot of time and boosts your productivity to the next level:
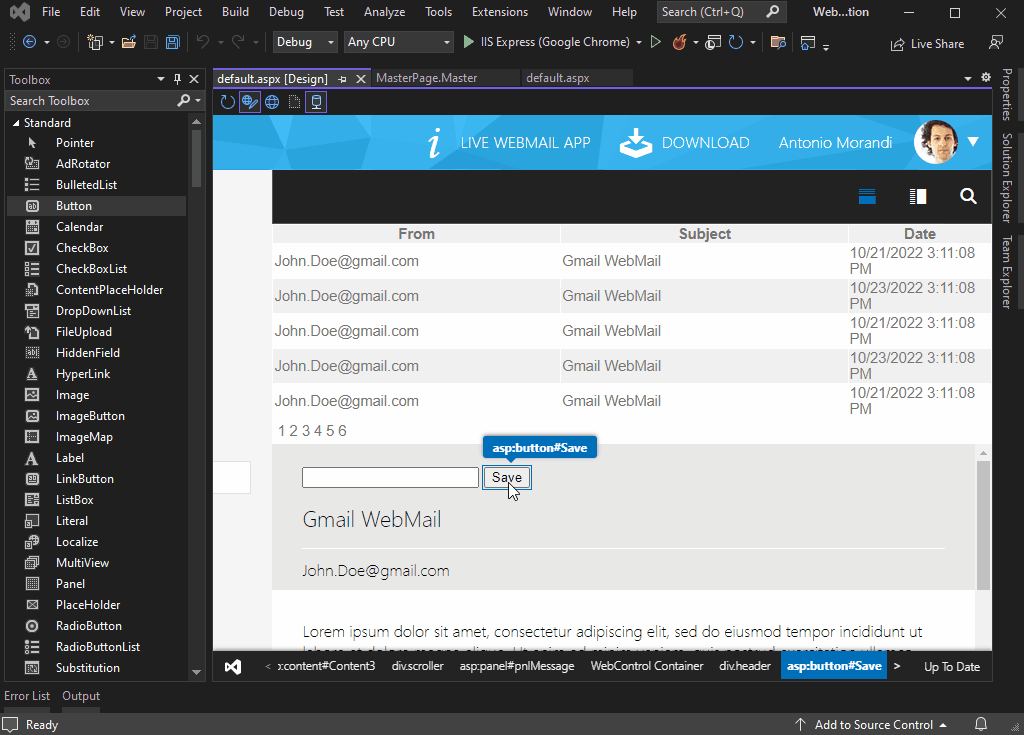
Visual Studio Toolbox integration – a preferred option by many developers that allows you to quickly insert via drag-and-drop ASP.NET components into your web pages and user controls. Check it out:

WLP toolbar and buttons (![]() ) explained in the same order shown in the screenshot:
) explained in the same order shown in the screenshot:
-
- Refresh (Ctrl+Shift+R) – refresh the WLP screen
- Toggle Design mode (Ctrl+Shift+D) – turn on/off WLP functionality in the Designer
- Show empty elements (Ctrl+Shift+M) – very handy feature for front end development
Use Live Data button (Ctrl+Shift+U) – by default, WLP renders in “preview” mode, which doesn’t require the site to run, but to just only use design-time-html rather than live data. Enable the feature to fetch and load real data from the server.
See the difference in the layout and rendering depending on the Use Live Data state:

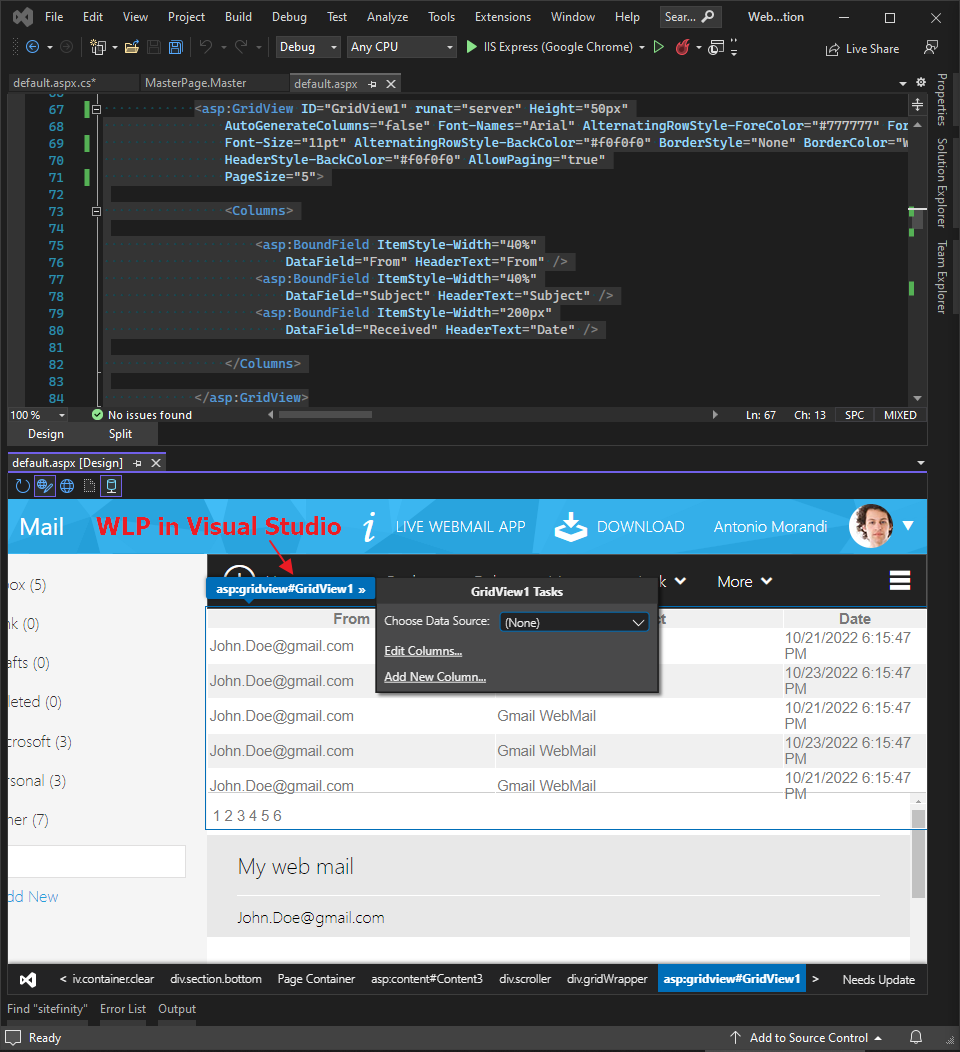
Action Panel (Smart tag) – you can configure the UI components through their smart tags which usually contains the most important properties and settings. In the following example, you can see how to open the GridView Action Panel and choose a new DataSource:
- WYSIWYG – there is virtually no differences between what you see in the Designer of WLP in Visual Studio and Chrome/Edge since WLP uses WebView2 (from Microsoft Edge). This is a huge improvement over the old Visual Studio Designer.
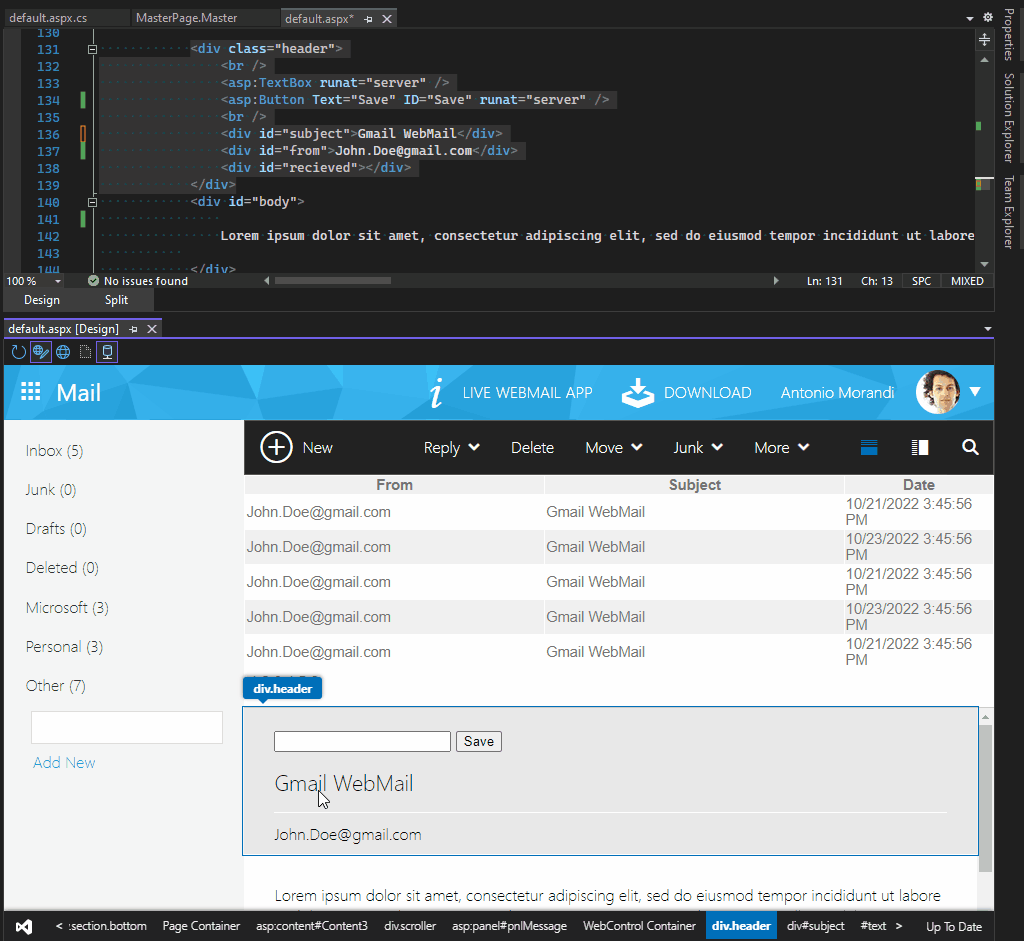
- Text Editing – Ability to directly edit the text of div, span and other HTML elements by double-clicking on them. Once you are ready click outside the editable element and the change will be applied to the page markup.
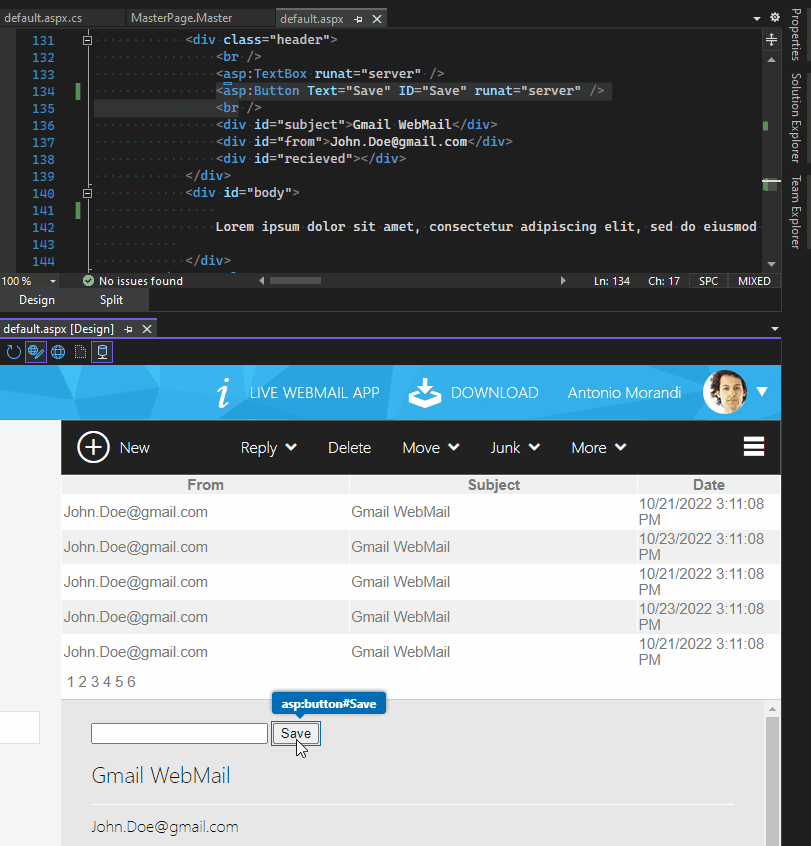
- Adding a default handler – This can be done by double clicking on the chosen UI control. This will create the handler and move the selection to the codebehind page just as shown below:
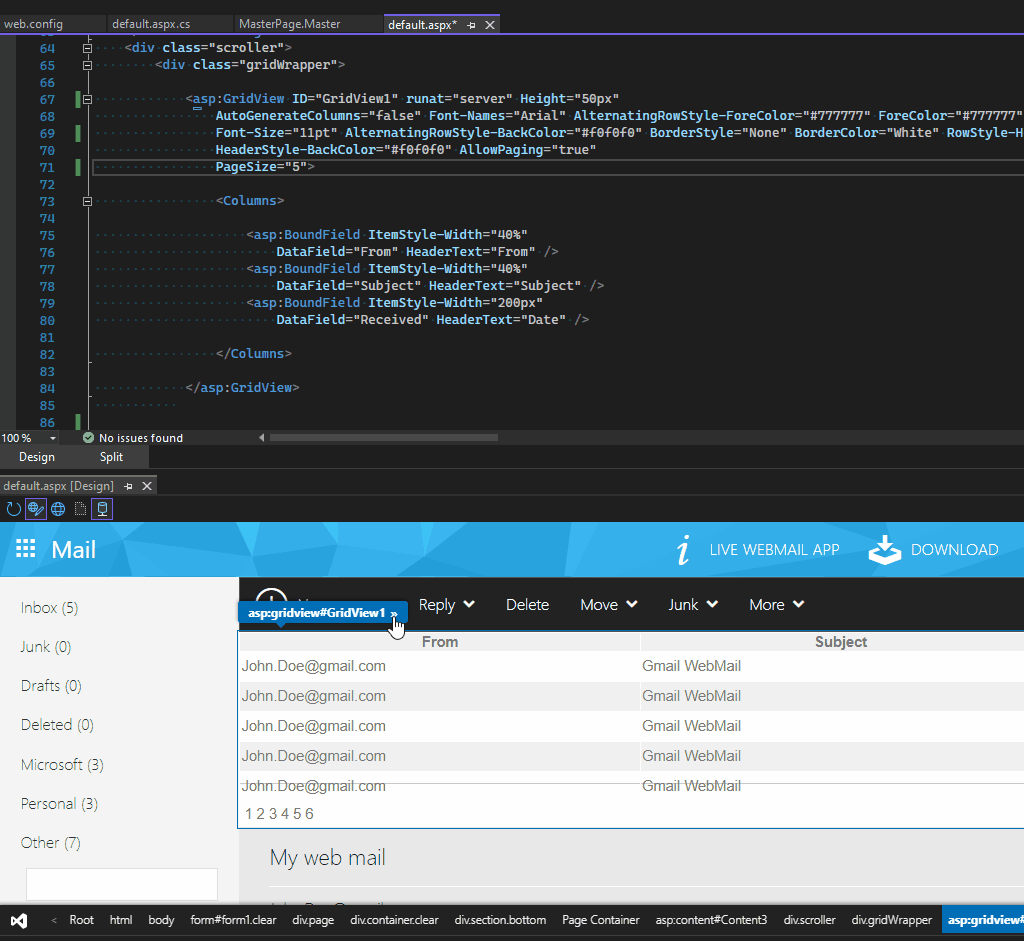
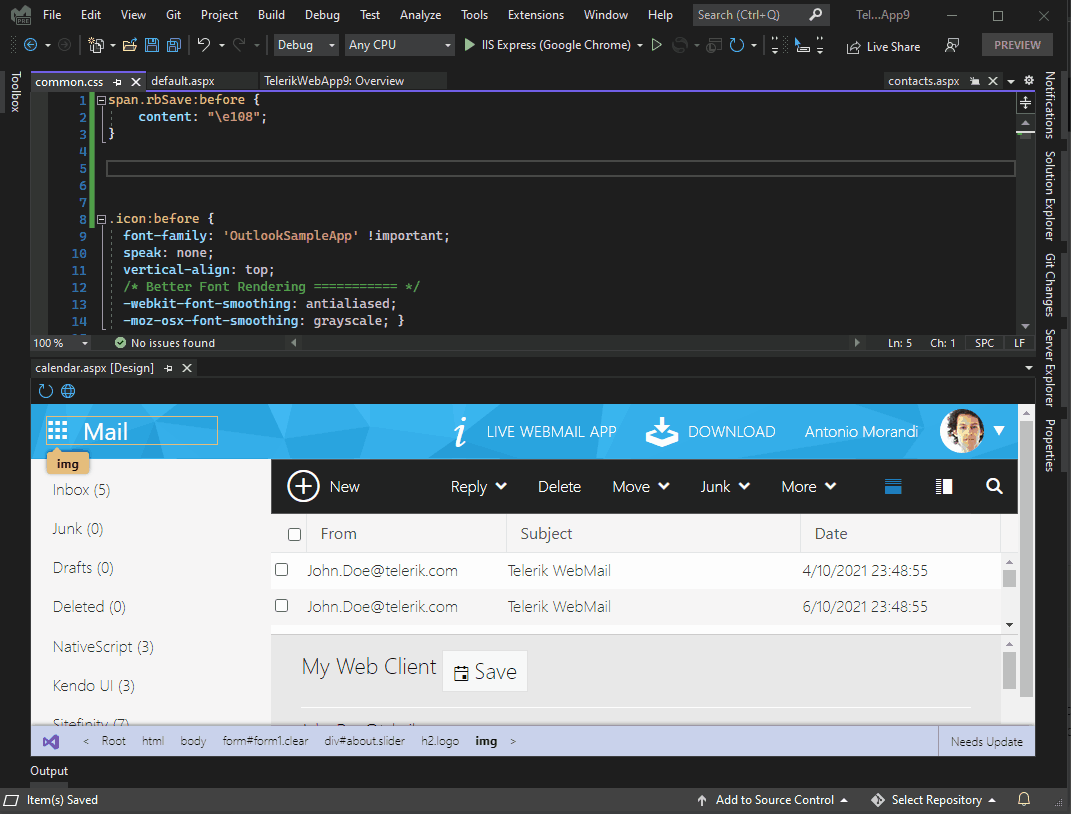
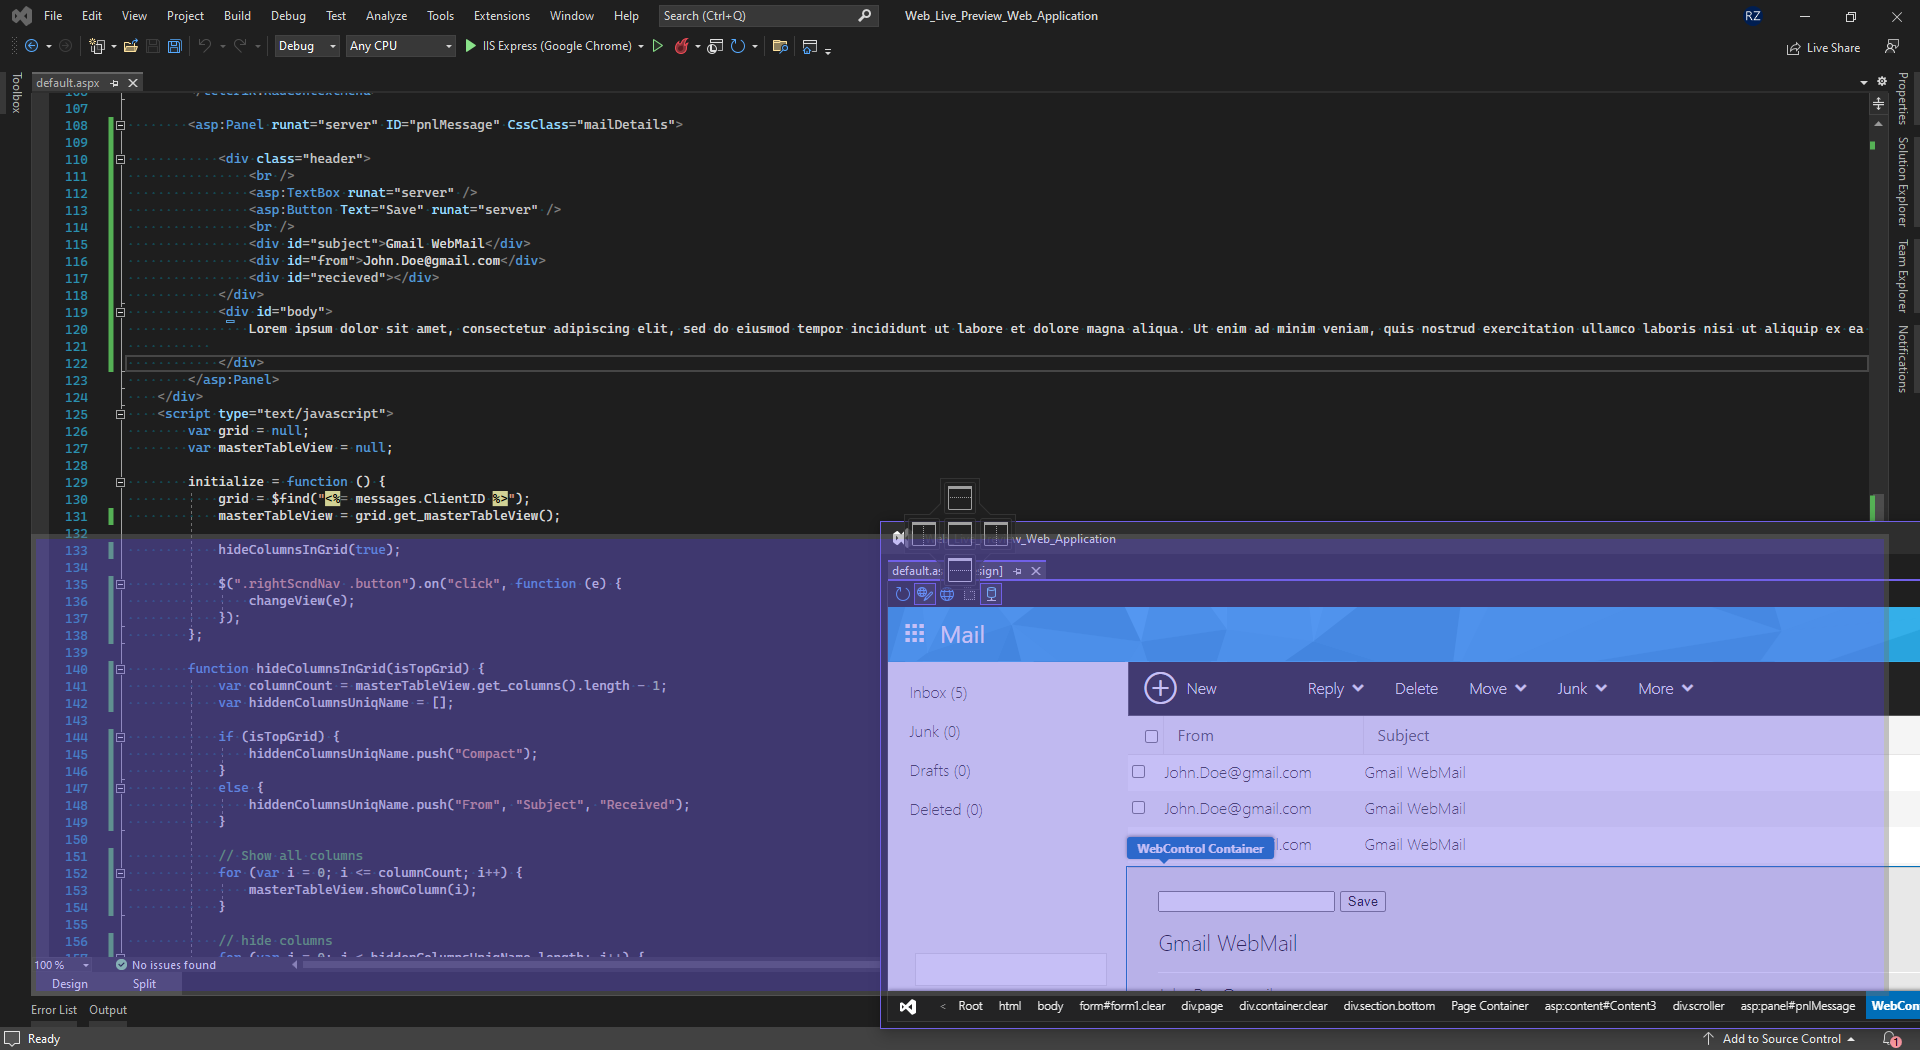
- Auto-sync selection across pages – whatever element or control you select in WLP Designer, it gets automatically selected in the markup view. Similarly, to DevTools of Chrome, but with the ability to show the type of the selected element as well as the Smart Tag of the UI control. If the selected element is on the masterpage, the masterpage will get open in Visual Studio and the element gets selected automatically – very handy especially when you work on a large project and you are not sure where the element/UI component you look for is in the code.
- CSS Auto Sync – Immediate auto-refresh and updates of CSS and appearance in real time while you type as far as the CSS is valid and there are no syntax-related errors. In this video example, I am showing you how to update the font icon of a button control and apply a border surrounding the control in real-time.
- Switching between Edit and Preview mode of WLP is easy and happens through the provided Enable/Disable Inspector button. This is handy when you’d like to disable the addon and be able to interact with the UI and the page. For example, by turning down the Inspector, you’ll be able to perform a button click, instead of selecting the button.

On the left side, the Inspector is enabled and you can select and edit elements and use the controls Smart tags. On the right side the Inspector (WLP) is disabled and you can interact with the page as an end-user by for example submitting the page by clicking on the Button control.
- Accessibility support – yet another great improvement of WLP over the classic Visual Studio Designer is that it offers screen reader support and keyboard shortcuts for easy interaction with its features and tag navigator. Some of the shortcuts that you can use to save time are:
- Ctrl+Alt+M to toggle the Inspector menu
- Arrow keys and Enter/Escape for navigating the menu
- Enter/Escape for closing dialogs
- Ctrl+Alt+E to enter simple text editing mode and escape to exit
- Shift+Alt+Left/Right arrow to move within Tag Navigator hierarchy
- Up/Down/Left/Right arrow keys to move between selected elements in the design surface
Layout setup – The WLP designer can be undocked and moved around in different directions on the screen. You can also pin it to a certain region of your choice:
Grab the designer tab over the center of Visual Studio screen and drop it on the desired quadrant:
As you have seen, Web Live Preview is a powerful tool, which brings new life to all existing ASP.NET Web Forms apps and Razor pages and promises support for ASP.NET Core and Blazor in the future! I am eager to try it out on these platforms where the Visual Studio Designer was not available so far.
Wrap-Up
As you can see Web Live Preview is a powerful UX usability tool which offers some of the great features of the browser’s Developer Tools (DevTools):
- You can select HTML elements and controls which will automatically synchronize Visual Studio
- You can edit the CSS of the page, UI and HTML in real-time and directly see the changes automagically synced in the Visual Studio Designer.
But that’s not all, you can also:
- Configure the Microsoft’s ASP.NET Web Forms native and third-party UI components either directly in Visual Studio design mode using their Action Panels (Smart Tags), which is something new and awesome.
- Save precious hours in a long-term by avoiding the back and forth switching between Visual Studio and the browser.
- Use the auto-sync feature to open different browsers and mobile devices and all of them will get automagically updated at the same time. This is a nice debugging (troubleshooting) technique that can be used to easily find out browser and device-specific glitches in your code and stylesheet.
Web Live Preview promises a bright future, by offering long-life support for Web Forms and MVC and I am eagerly waiting for its official launch and everything new that is coming.
Feedback is always welcome and if you’d like to share yours with us, you can do it in the comments section of the blog or using the Send Feedback functionality of your Visual Studio:

About the author
 |
Rumen Zhekov is a manager, software engineering at Progress. He is responsible for the Telerik ASP.NET AJAX (Web Forms) suite with 18+ years of experience in the ASP.NET field. Off work, he enjoys his family, traveling, attending tech shows, reading books, and listening to podcasts. |
0 comments