
I have experienced a lot of fun writing Windows Phone 7 applications in Visual Basic. Web browser is one of the applications that is commonly used on phones these days. In this blog post, I want to share some sample source code that will help you to create a mini browser application for Windows Phone 7. I will now demonstrate how easy it is to develop a mini browser application for Windows Phone 7, using Visual Basic for Windows Phone Developer Tools.
The mini browser application can be created in 3 simple steps:
- Create a sample application and add controls and an event handler
- Build and debug the application
- Rebuild in release mode before publishing
Before you create a mini browser application, you need to install the following applications:
- Visual Studio 2010 Professional, Premium, or Ultimate. If you do not have any of the releases, you can download any of the following trial versions as per your preference: Professional, Premium, or Ultimate.
- Windows Phone Developer Tools RTW
- Visual Basic
for Windows Phone Developer Tools – RTW
Note: You can install the newer version- Windows Phone Developer Tools 7.1 Beta instead of the above mentioned two tools as it will take comparatively less time. However, this sample was created using the previous version.
To create a mini browser application, follow the 3 simple steps mentioned earlier:
Step 1 – Create a sample application and add controls and an event handler
Create a sample application
- Create a new project and browse to the “Silverlight for Windows Phone” node.
- Select the “Windows Phone Application” template.
- Enter a name for the browser.

- Click OK. The MainPage.xaml page is displayed.

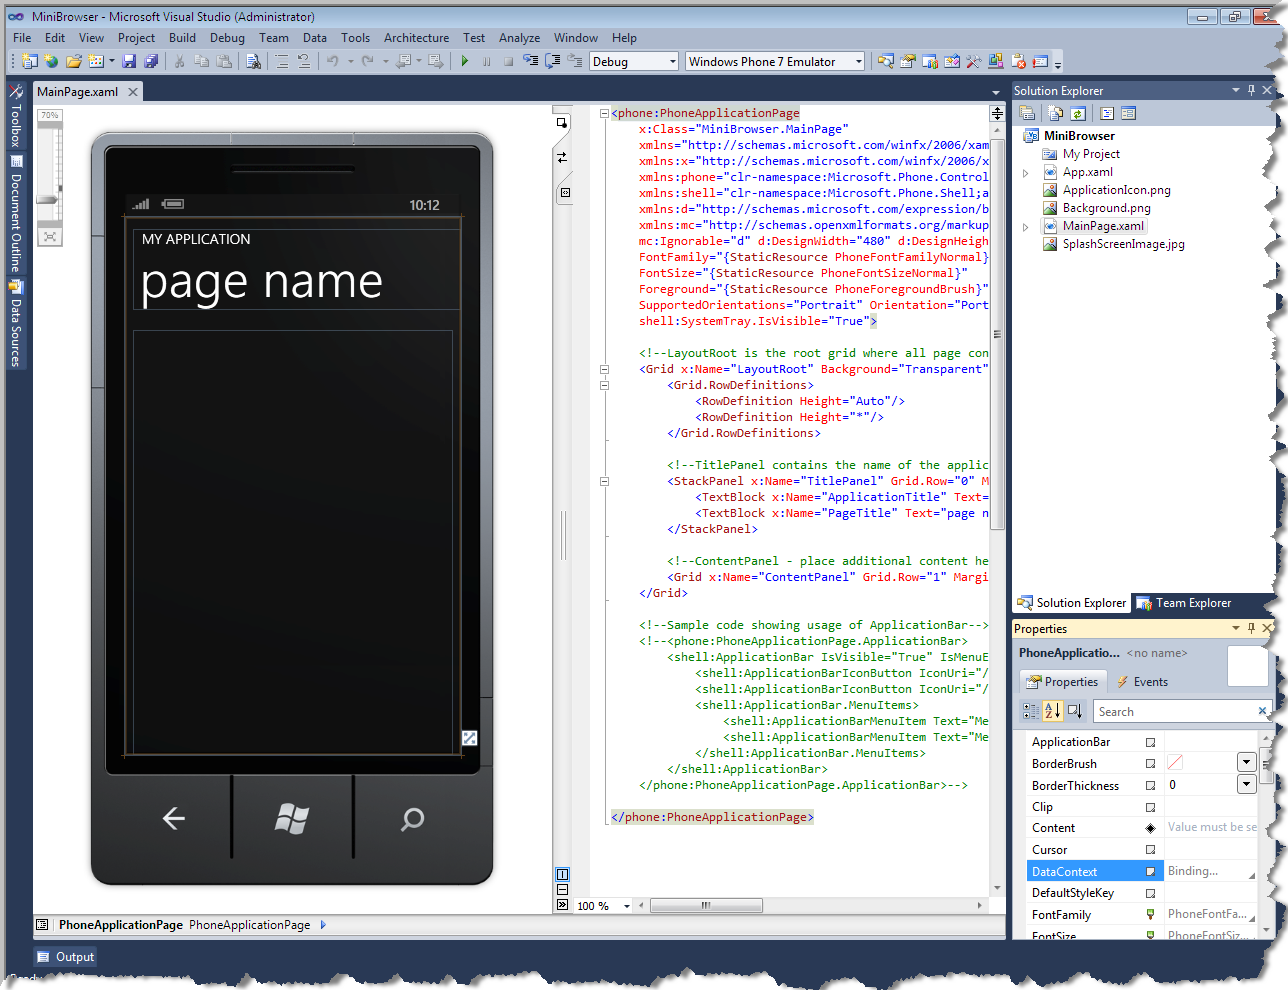
Add controls
- Click the MY APPLICATION text. In the Properties window, change the text property to “MY FIRST APPLICATION”.
- Click the page name text. In the Properties window, change the text property to “Mini Browser”.
- To enable the application to work in both the portrait and landscape modes, add the support for both the orientations.
- Click the first line of the XAML code. In the Properties window, change the SupportedOrientation property to “PortraitOrLandscape”.
- From the Toolbox, drag and drop the Textbox control to the design surface.
- Click the Textbox. In the Properties window, change the text property to “http://www.xbox.com”.
- From the Toolbox, drag and drop the Button control to the design surface.
- Click the Button. In the Properties window, change the content property to “Go”.
- From the Toolbox, drag and drop the WebBrowser control to the design surface. Place it below the other two controls you added earlier.
- Add the following XAML code to set the height, width, and the alignment of the WebBrowser control. This allows the control to position itself correctly in both the portrait and landscape modes.
<Grid x:Name=”ContentPanel” Grid.Row=”1″ Margin=”12,0,12,0″>
<TextBox Height=”Auto” HorizontalAlignment=”Stretch” Margin=”0,0,120,0″ Name=”textBox1″ Text=”http://www.xbox.com” VerticalAlignment=”Top” />
<Button Content=”Go” Height=”Auto” HorizontalAlignment=”Right” Name=”button1″ VerticalAlignment=”Top” Width=”Auto” Click=”button1_Click” />
<phone:WebBrowser HorizontalAlignment=”Stretch” Margin=”0,84,0,0″ Name=”webBrowser1″ VerticalAlignment=”Stretch” Height=”Auto” Width=”Auto” />
</Grid>
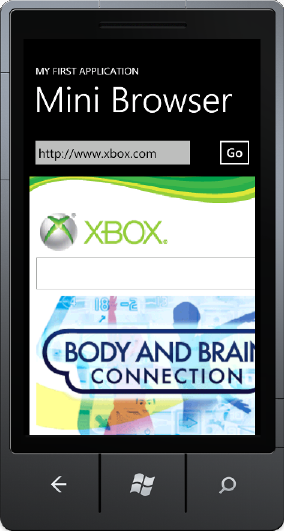
Your application now looks like this:

Add an event handler
It is essential to add an event handler to the application because it helps to navigate to the entered URL.
To add an event handler, do the following:
- Double-click the Go button. The MainPage.xaml.vb page is displayed with the following code:
Partial Public Class MainPage
Inherits PhoneApplicationPage
‘ Constructor
Public Sub New()
InitializeComponent()
End Sub
Private Sub button1_Click(ByVal sender As System.Object, ByVal e As System.Windows.RoutedEventArgs) Handles button1.Click
End Sub
End Class
- Replace the button1_Click event handler with the following code. This method will take the URL that is entered in the Textbox control and navigate to that page in the WebBrowser control.
Private Sub button1_Click(ByVal sender As Object, ByVal e As RoutedEventArgs)
Dim site As String
site = textBox1.Text
webBrowser1.Navigate(New Uri(site, UriKind.Absolute))
End Sub
Voila! Your mini browser application for Windows Phone 7 is ready! Now you just need to build and debug the application.
Step 2 – Building and debugging the application
- Select Build > Build Solution. The project builds without any errors. If there are errors, check the earlier steps, correct any errors, and then build the application again.
- On the standard toolbar, set the deployment target of the application to “Windows Phone 7 Emulator”.

- Debug the application by selecting Debug > Start Debugging. This opens the emulator window and launches the application. You can now test the application easily using the normal Visual Studio debugger and emulator controls.
- Click the Go button and verify that the browser window navigates to the given web site.

- When you hover the cursor on the emulator, the edit panel of the emulator pops up. To test the application in the landscape mode, select the rotation control from the edit panel.

The emulator rotates into the landscape mode and accordingly, the controls resize themselves to fit the screen.
- Select Debug > Stop Debugging to stop debugging the application.


Step 3 – Rebuilding for the release before it can be published
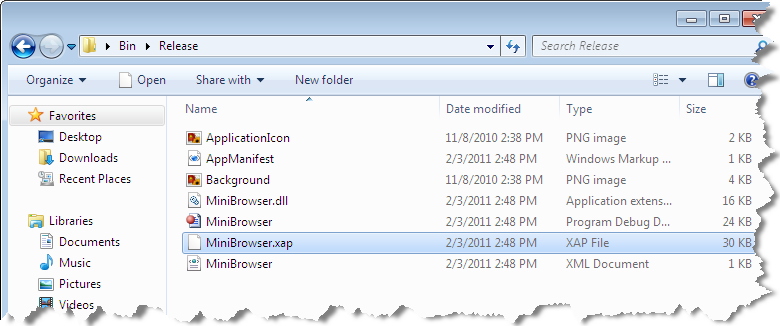
- On the standard toolbar, change the configuration to Release.

- Rebuild the application by selecting Build > Rebuild. The XAP file of the application is generated, which is the package you will have to submit to the marketplace in order to publish the application. You can also locate this XAP file in the BinRelease folder.

To submit your application to the market place, you can refer to upload your application walkthrough.
Summary
That’s it! You have now successfully created your first Windows Phone 7 Silverlight application, that too in just 3 simple steps! You can find the full source code for the Visual Basic Mini Browser application here. This application uses general Silverlight and Visual Basic features.
0 comments
Be the first to start the discussion.