
Hello Microsoft Surface Duo developers!
Today’s post was contributed by Nventive, the publishers of the Uno Platform.
In previous blog posts, the Surface Duo team demonstrated how you can build dual-screen apps using Java and Kotlin, Xamarin and C#, Flutter, React Native, Web, and games with Unity. Today’s blog post shows how UWP and WinUI developers can target the Surface Duo using Uno Platform.
 Figure 1: Car animation on Android on the Surface Duo Emulator with Uno Platform
For those new to Uno Platform, it allows for creation of pixel-perfect, single-source C# and XAML apps which run natively on Windows, iOS, Android, macOS, Linux, and Web via WebAssembly. Uno Platform is Open Source (Apache 2.0) and available on GitHub.
In this blog post you will learn how to:
- Use Uno Platform for your next Surface Duo application
- Test your application using the Surface Duo emulator
- Utilize Surface Duo’s unique Hinge
- Find code samples and resources for further Surface Duo development with Uno Platform
Architecture of Uno Platform and Surface Duo Solution
The Uno Platform philosophy is to replicate the WinUI and Windows APIs everywhere. Uno Platform support for the Surface Duo device is based on WinUI TwoPaneView control, which is a Windows 10 specific control providing the ability to layout content in two panes. It also handles your content well on dual-screen devices. It behaves like a dual ContentControl based on a set of parameters such as Pane length, tall and wide configuration modes and pane priorities to display content based on the available window space. It can be useful when dealing with orientation changes, in windowed modes, or snap/split screen scenarios.
Getting started with Surface Duo and Uno Platform
For this exercise, we are building a sample from scratch, so let’s start from the beginning and follow the steps below to get started:
- Download the Surface Duo SDK.
- Install the latest emulator.
- Run through the Uno Platform Getting Started tutorial. This will ensure you have the correct environment set up and that you have the latest release of Uno Platform.
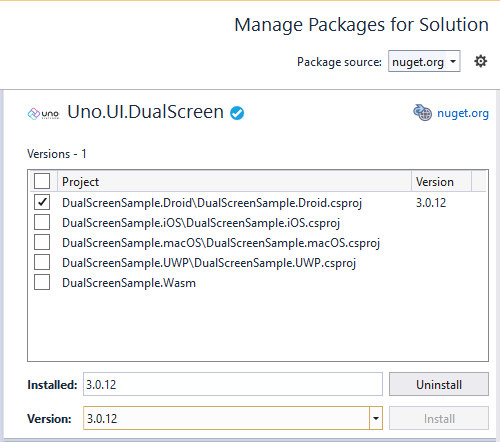
- Reference the Uno.UI.DualScreen NuGet package in the Android project:
- Right click on the Solution and select Manage NuGet Packages for Solution from the context menu or on the top main menu in Visual Studio go to Tools > Nuget Package Manager.
- Make sure to select nuget.org or NuGet official package source as the package source.
- Click on the Browse tab and search for Uno.UI.DualScreen.
- Install the latest stable version available for your Droid.csproj.
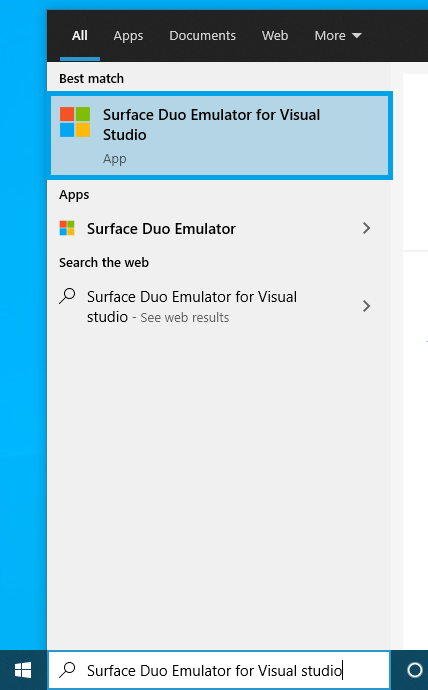
- Launch the Surface Duo Emulator for Visual Studio from the Start menu.
Once you have completed the above steps, you will be able to modify the content of your MainPage.xaml:
<Page x:Class="DualScreenSample.MainPage"
    xmlns="http://schemas.microsoft.com/winfx/2006/xaml/presentation"
    xmlns:x="http://schemas.microsoft.com/winfx/2006/xaml"
    xmlns:local="using:DualScreenSample"
    xmlns:d="http://schemas.microsoft.com/expression/blend/2008"
    xmlns:mc="http://schemas.openxmlformats.org/markup-compatibility/2006"
    xmlns:muxc="using:Microsoft.UI.Xaml.Controls"
    mc:Ignorable="d">

  <Grid>
    <muxc:TwoPaneView Pane1Length="*"
              Pane2Length="*"
              PanePriority="Pane1"
              WideModeConfiguration="LeftRight"
              TallModeConfiguration="SinglePane">
      <muxc:TwoPaneView.Resources>
        <Style TargetType="TextBlock">
          <Setter Property="FontSize"
              Value="24" />
        </Style>
      </muxc:TwoPaneView.Resources>
      <muxc:TwoPaneView.Pane1>
        <Grid Background="#FF159BFF">
          <StackPanel VerticalAlignment="Center"
                HorizontalAlignment="Center">
            <TextBlock Text="Pane 1" />
            <TextBlock Text="Priority pane for TallModeConfiguration" />
            <TextBlock Text="Left pane for WideModeConfiguration" />
          </StackPanel>
        </Grid>
      </muxc:TwoPaneView.Pane1>

      <muxc:TwoPaneView.Pane2>
        <Grid Background="#FF67E5AD">
          <StackPanel VerticalAlignment="Center"
                HorizontalAlignment="Center">
            <TextBlock Text="Pane 2" />
            <TextBlock Text="Not the priority pane for TallModeConfiguration" />
            <TextBlock Text="Right pane for WideModeConfiguration" />
          </StackPanel>
        </Grid>
      </muxc:TwoPaneView.Pane2>
    </muxc:TwoPaneView>
  </Grid>
</Page>
Select Android as the start-up project in Visual Studio, then run your sample on the Surface Duo Emulator.

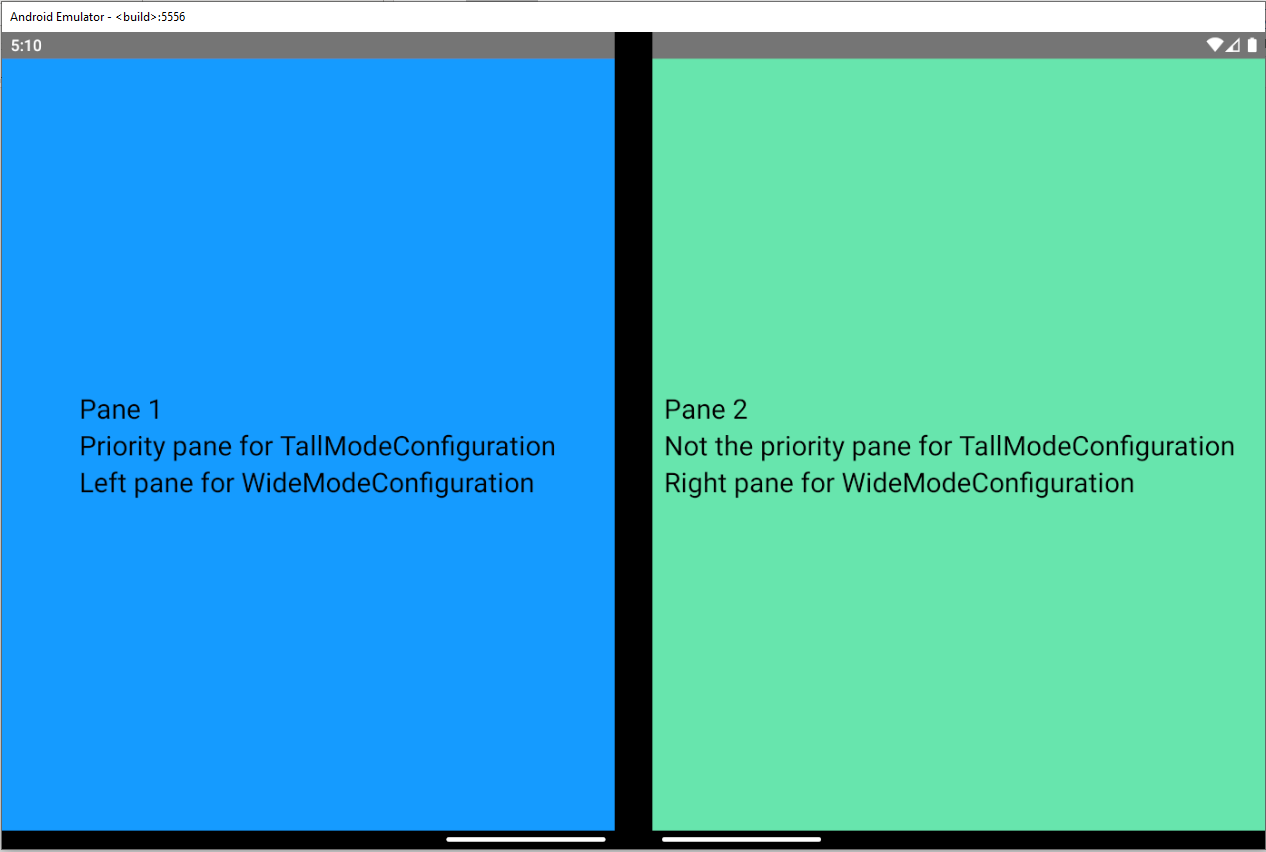
Figure 2: DualScreen sample running on Android on the Surface Duo Emulator
As you can see in this code snippet, you need to set a Star GridLength (Pane1Length="*" / Pane2Length="*") for the two pane to correctly take 50% for each side screens of the Surface Duo with the TwoPaneView.
The PanePriority sets which pane will be displayed when SinglePane mode is set (for TallModeConfiguration in this example). For WideModeConfiguration, the LeftRight is used for Pane1 to have priority and be shown on the left. The Pane2 is shown on the right.
The complete sample is available on GitHub.
If you also want to test your sample on UWP / WinUI:
- Make sure to reference the Microsoft.UI.Xaml NuGet package in the UWP project.
- Don’t forget also to set XamlControlsResources as your Application resources in App.xaml:
<Application> <Application.Resources> <XamlControlsResources xmlns="using:Microsoft.UI.Xaml.Controls" /> </Application.Resources> </Application> - And finally, as Microsoft.UI.Xaml nuget package requires TargetPlatformVersion of at least 10.0.18362.0, make sure to update the SDK version in the UWP properties.
What is and how to use the hinge angle
Now let’s do something more fun! I was really inspired by Justin Liu’s Surface Duo demo app which used Flutter. I wanted to see if I would be able to do the same with Uno Platform, so I re-created this car animation sample .
I was very happy to be able to reproduce the demo easily for the Surface Duo. Best of all, it was also running on other platforms Uno Platform supports without requiring any platform-specific code.
Figure 3: ToyCar sample running on Windows, WebAssembly, iOS and Android on the Surface Duo Emulator
But what if instead of moving the car with a mouse or a finger, we could move the car depending on the hinge angle value?
The hinge is unique for dual-screen devices and learning how to work with it based on the angle of two screens, is essential for creating unique user experiences on Surface devices. In a previous blog post, Cesar mentioned how to adjust the hinge angle in the Surface Duo emulator. Today, I’m going to show you how to take advantage of this feature using my car animation sample.
But first, a quick overview of how I implemented this cool concept. I have a toy car image on the left pane and a sketch car image on the right pane. The technique here is to have a transparent rectangle (same size as the car images) on top of the TwoPaneView control. This way it is possible to use the pointers ManipulationDelta event to move and to keep both cars at the same position. This gives the illusion of a car transformation.
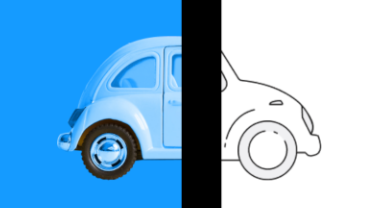
Figure 4: Car transformation close-up on Android on the Surface Duo Emulator
Now let’s try to move and animate the cars with the hinge angle.
On UWP / WinUI, we can use the Windows.Devices.Sensors.HingeAngleSensor API to be notified when the hinge’s angle changes. The HingeAngleReading.AngleInDegrees property gives us the hinge’s current angle in degrees.
With Uno Platform, you don’t need to worry that the Surface Duo runs Android and the fact that the API for the hinge sensor is different. Your UWP / WinUI implementation will just work on Android with no platform-specific code required!
In the code-behind I can simply have:
public async Task InitializeAsync()
{
  //Asynchronously retrieves the default hinge angle sensor.
  hinge = await HingeAngleSensor.GetDefaultAsync();

  if (hinge != null)
  {
    SensorStatus.Content = "HingeAngleSensor created";

    //Listener for the HingeAngleSensor ReadingChanged event.
    hinge.ReadingChanged += HingeAngleSensor_ReadingChanged;
  }
  else
  {
    SensorStatus.Content = "HingeAngleSensor not available on this device";
    AngleValue.Content = "Angle value: Not available";
  }
}
private async void HingeAngleSensor_ReadingChanged(HingeAngleSensor sender, HingeAngleSensorReadingChangedEventArgs args)
{
  await Dispatcher.RunAsync(CoreDispatcherPriority.Normal, () =>
  {
    var angleValue = args.Reading.AngleInDegrees;

    AngleValue.Content = "Angle value: " + angleValue.ToString();

    // When the dual-screen device is half-opened
    if (angleValue == 180)
    {
      // Move the car along the x-axis in the middle of the screen.
      dragTranslation.X = (MainRoot.ActualWidth / 2);
    }
    // When the dual-screen device is fully opened, meaning that both screens are facing aware from each other.
    else if (angleValue == 360)
    {
      // Move the car along the x-axis on the right side of the screen.
      dragTranslation.X = MainRoot.ActualWidth * rightSideThresholdRatio;
    }
  });
}
I used HingeAngleSensor.GetDefaultAsync to asynchronously retrieve the default hinge angle. If the hinge is available, I subscribe to the HingeAngleSensor ReadingChanged event.
If the angle is equal to 180 degrees (meaning the device is half opened), the car is moved to the middle of the device.
If the angle is equal to 360 degrees (meaning that both screens are facing away from each other and the device is fully opened), the car is moved to the right side of the device. The car animation and background scene animation will start at the same time.
Figure 5: Car animation while changing the hinge angle on Android on the Surface Duo Emulator
The complete sample is available on GitHub.
Additional code sample from OSS real-world implementation
Uno Platform community member Ian Bebbington has put together an app called COduo to help users in the UK understand the environmental impact of their energy usage. The app is available on Google Play and Windows. The complete solution is available on GitHub.
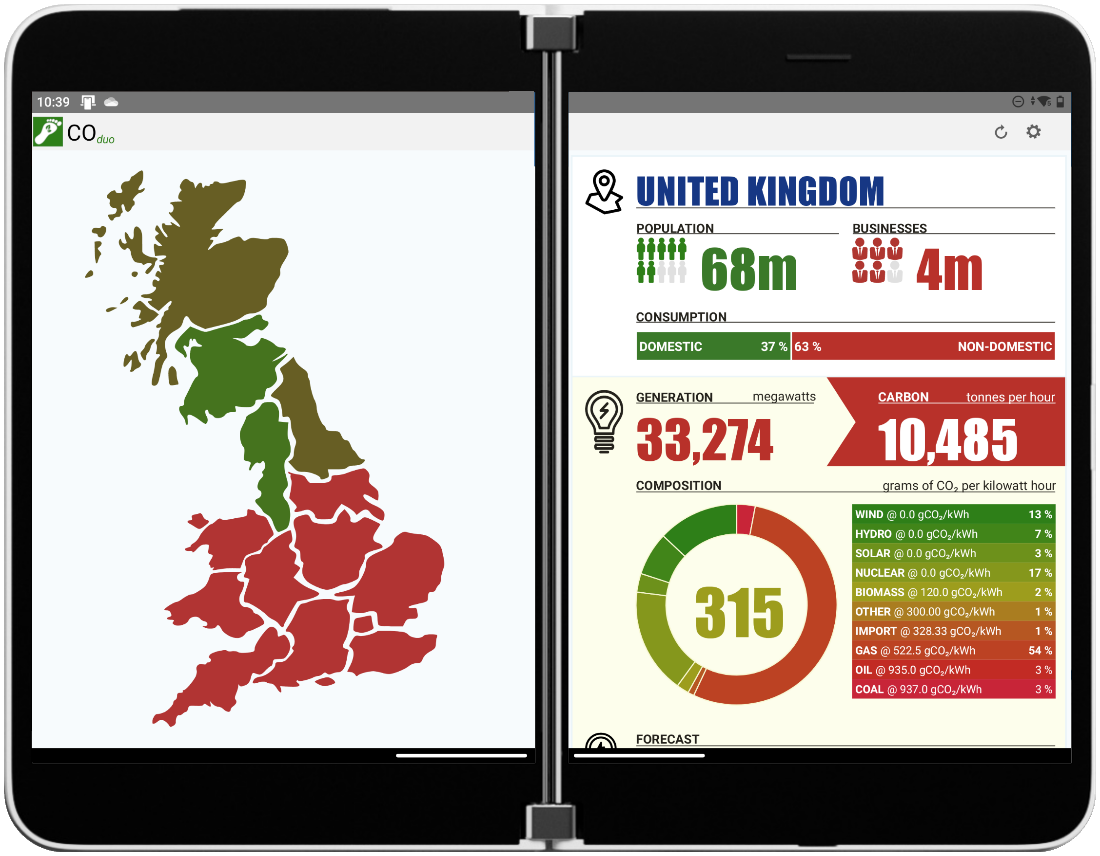
Figure 6: COduo on Android on Surface Duo Emulator with Uno Platform
Additional resources and feedback
If you already have a UWP/ WinUI application, try porting your current C# code base on multiple platforms, including Surface Duo, with Uno Platform. Or just for fun, start a new multi-platform project targeting Surface Duo. I’m sure you will find our platform valuable.
You will be able to use the UWP/WinUI tooling from Windows in Visual Studio, such as XAML Hot Reload and C# Edit and Continue, build your application as much as possible on Windows, then validate that your application runs on every platform supported by Uno Platform, including Android, on Surface Duo. You can develop Uno Platform applications on Visual Studio and Windows like I did above, but also use Visual Studio for Mac or Visual Studio Code.
If you have questions, feature requests, or issues about using Uno Platform, you can find our engineering team on Discord – Channel #uno-platform. You can also find us on Twitter.
Finally, reach out to the Surface Duo team using their feedback forum or on Twitter or GitHub with your feedback regarding your experience with the Surface Duo.
0 comments