
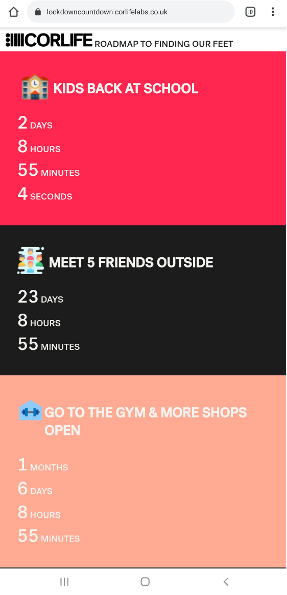
Here in the UK, England is in the third (and hopefully final) national lockdown as a public health measure to battle the pandemic. A timetable or roadmap out of lockdown has been announced by the government. We decided to build a simple countdown website as a static web application to visualise the roadmap – https://lockdowncountdown.corlifelabs.co.uk/
The building blocks we used to build the actual static web app is basic – a couple of NodeJS libraries cobbled together with webpack and some basic HTML / CSS. What is exciting is the technology we used to build and deploy this to the web – Azure Static Web Apps, which is now in Public Preview. Using Azure Static Web Apps, GitHub actions and Azure App Service Domains we were able to spin up the entire website with domain name in about an hour. So how did we do it?
-
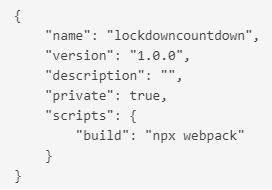
Ensure you have your project in a repository on GitHub It can be private or public, it does not matter. Ours was private and inside our organisation on GitHub. If your project is built using npm you’ll want to ensure you have a “build” entry in the scripts section of the package.json to build your static web app – this will be needed later.
- Create a static web app in the Azure Portal As with all manual UI steps in the Azure Portal, this was a straightforward process. There is a short wizard to configure the basics like subscription and resource group and then sign in with GitHub. It is important to note that if your repo is in an organization, you will need to grant Azure Static Web Apps permission to that too. If you miss this step and are wondering why you cannot select your org in the static web apps wizard, you can go here to grant permission. Once this is done you can drill down through the dropdowns to your repo and then choose a build template. I chose custom for this one as ours was a webpack project. Underneath the custom build template there are three things to configure:
- App Location: for us this is where the package.json is so simply / for the root of the directory
- API Location: we do not have an api (function app) for this project, so we left it empty.
- Output Location: this value is important, and sensitive. This setting tells the pipeline where to find the output of your build. It does not work with a leading slash the way you might assume. We tried /dist and it was failing. What worked for us was to use dist/. Then you can complete the wizard, adding any tags necessary and going through the review + create step to finalise and create your static web app.
-
Confirm the pipeline is working in GitHub Actions Now that we have configured the static web app, we should see an ‘Azure Static Web Apps CI/CD’ workflow in the Actions tab of our GitHub project. There should be a green tick next to the latest build in the run history. If not, have a look at the latest run and debug any issues you find.
-
Check the static web app is deployed In the Azure Portal, in the overview pane of your static web app, there should be a URL entry in the top right. Click the link and confirm that your web app is deployed as expected.
-
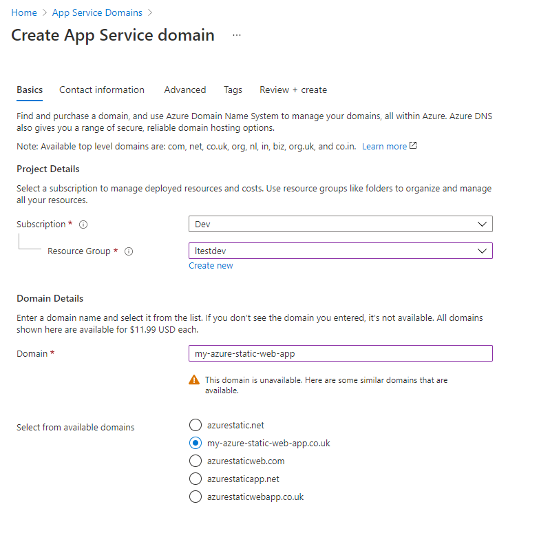
Purchase a domain using App Service Domains Using the App Service Domains service in Azure, it is trivial to purchase and manage a domain name. Simply open the service, choose a subscription and resource group and then search for a domain, next, next, done.
-
Configure the static web app to use the domain You can configure the custom domain for the static web app in a few steps. Go to your static web app in the portal and click on Custom Domains under the settings group in the left pane. Click Add at the top and then follow the wizard on the right hand side – it will provide all the instructions you need to setup a CNAME record for your domain.
-
Configure the CSP In order to prevent visitors to our site from becoming the victim of an XSS attack, it is wise to configure a content security policy (CSP). With Azure Static Web Apps, this can be achieved using a static web app config file: example. We simply added the file (staticwebapp.config.json) to the root of our project as follows:
Having built a static web app, we were able to go from function code complete to having a full build chain, hosting, and domain name in the space of about an hour. Azure Static Web Apps offers developers a very attractive, build chain ready and quickly deployable choice when building their web applications.
0 comments