

Semantic Kernel fully supports dependency injection. After receiving many questions from the community as to how to best use dependency injection with Semantic Kernel, the team created an app to illustrate some effective patterns.
Dependency injection is a technique in which an object receives other objects that it requires rather than creating them internally. This leads to greater separation of concerns and classes that are loosely coupled to the objects on which they depend. In turn, this leads to software that is easier to test and maintain.
The Demo App
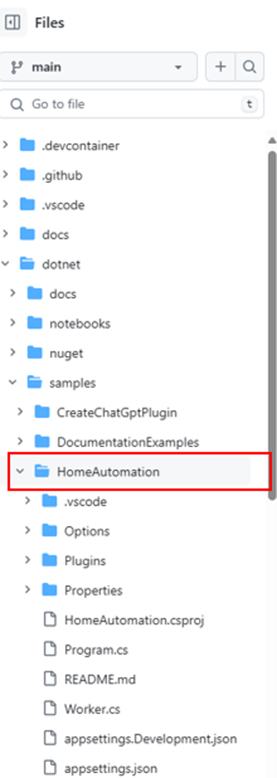
The code for the application demonstrating usage of dependency injection with Semantic Kernel is found in the library’s GitHub repository. The application is called HomeAutomation and simulates the automation of home devices such as lights.
To successfully run the application, you must provide the details of the model you intend to use. For example, if you want to use the gpt-4 model in Azure OpenAI, you will need to enter the following .Net secrets to use the application:
cd dotnet/samples/HouseAutomation
dotnet user-secrets init
dotnet user-secrets set "AzureOpenAI:ChatDeploymentName" "gpt-4"
dotnet user-secrets set "AzureOpenAI:Endpoint" "https://YOUR_ENDPOINT.openai.azure.com/"
dotnet user-secrets set "AzureOpenAI:ApiKey" "YOUR_API_KEY"
YOUR_ENDPOINT needs to be replaced with the host on which your Azure OpenAI instance is running and YOUR_API_KEY with your instance’s API key.
Alternatively, you can set these values through the following environment variables:
AzureOpenAI__ChatDeploymentName
AzureOpenAI__Endpoint
AzureOpenAI__ApiKey
Once running, the program will wait for and respond to user queries.
The Code
The application code is broadly divided into two parts: one setting up dependency injection and another making use of it.
Setting up dependency injection
The code in program.cs sets up dependency injection. Let’s examine it. First, an application builder is created:
HostApplicationBuilder builder = Host.CreateApplicationBuilder(args);For an ASP.Net application, you would use WebApplication.CreateBuilder(args) instead.
The options are loaded into the application with the following code:
builder.Services.AddOptions<AzureOpenAI>()
       .Bind(builder.Configuration.GetSection(nameof(AzureOpenAI)))
       .ValidateDataAnnotations()
       .ValidateOnStart();
Then, a singleton IChatCompletionService to be re-used by all kernels is created:
builder.Services.AddSingleton<IChatCompletionService>(sp =>
{
    AzureOpenAI options = sp.GetRequiredService<IOptions<AzureOpenAI>>().Value;
    return new AzureOpenAIChatCompletionService(options.ChatDeploymentName, options.Endpoint, options.ApiKey);
});
Note that a custom HttpClient could be passed into AzureOpenAIChatCompletionService’s constructor, for instance if specific headers needed to be present.
Plugins to be used by the Semantic Kernel are then provided:
builder.Services.AddSingleton<MyTimePlugin>();
builder.Services.AddSingleton<MyAlarmPlugin>();
builder.Services.AddKeyedSingleton<MyLightPlugin>("OfficeLight");
builder.Services.AddKeyedSingleton<MyLightPlugin>("PorchLight", (sp, key) =>
{
    return new MyLightPlugin(turnedOn: true);
});
The plugins are provided as singletons so that they can be re-used by multiple kernels. Note the keyed singletons “OfficeLight” and “PorchLight”. Keyed singletons are used when distinct instances of the same class need to be provided.
To add an OpenAI or OpenAPI plugin, you need to create a temporary kernel, use it to load the plugin and add it as a keyed singleton:
Kernel kernel = new();
KernelPlugin openAIPlugin = await kernel.ImportPluginFromOpenAIAsync("<OpenAI plugin name>", new Uri("<OpenAI plugin URI>"));
builder.Services.AddKeyedSingleton<KernelPlugin>("MyImportedOpenAIPlugin", openAIPlugin);

KernelPlugin openApiPlugin = await kernel.ImportPluginFromOpenApiAsync("<OpenAPI plugin name>", new Uri("<OpenAPI plugin URI>"));
builder.Services.AddKeyedSingleton<KernelPlugin>("MyImportedOpenApiPlugin", openApiPlugin);
Once you have registered all the plugins you require, you can register a kernel with the plugins you want:
builder.Services.AddKeyedTransient<Kernel>("HomeAutomationKernel", (sp, key) =>
{
    // Create a collection of plugins that the kernel will use
    KernelPluginCollection pluginCollection = new();
    pluginCollection.AddFromObject(sp.GetRequiredService<MyTimePlugin>());
    pluginCollection.AddFromObject(sp.GetRequiredService<MyAlarmPlugin>());
    pluginCollection.AddFromObject(sp.GetRequiredKeyedService<MyLightPlugin>("OfficeLight"), "OfficeLight");
    pluginCollection.AddFromObject(sp.GetRequiredKeyedService<MyLightPlugin>("PorchLight"), "PorchLight");

    return new Kernel(sp, pluginCollection);
});
The kernel is normally registered as transient so that a new one is created for each operation where one is requested.
Note that appropriate loggers are automagically passed to the Semantic Kernel components when using dependency injection.
Using dependency injection
In Program.cs, the code to execute after setup is complete is specified by the following line:
builder.Services.AddHostedService<Worker>();This line causes an instance of Worker to be created and its ExecuteAsync() method to be invoked.
Let’s look at Worker.cs. First, its constructor takes in a Kernel parameter that is populated by dependency injection:
public Worker(IHostApplicationLifetime hostApplicationLifetime,
    [FromKeyedServices("HomeAutomationKernel")] Kernel kernel)
{
    _hostApplicationLifetime = hostApplicationLifetime;
    _kernel = kernel;
}
In this case, the HomeAutomationKernel keyed Kernel is selected. This way, you could use a certain variation of the kernel with the Worker class and another variation with other classes.
In many cases, that is all you would need to do to use Semantic Kernel with dependency injection. But, to illustrate that kernels themselves have a set of services, we access one of them in the application:
var chatCompletionService = _kernel.GetRequiredService<IChatCompletionService>();chatCompletionService can then be used in the code.
The IChatCompletionService instance could also have been passed through Worker’s constructor. You have the flexibility to use whichever approach suits your requirements better.
Recap
Semantic Kernel supports dependency injection both to construct its objects and to provide services. Logging is automatically taken care of when using dependency injection. Services and plugins used by Semantic Kernel are typically registered with the dependency injection container as singletons so that they can be re-used / shared between various kernels. Kernels are typically registered as transient so that each instance remains unaffected by changes made to kernels handling other tasks. In addition to being usable as services, Kernels themselves possess services which can be accessed and used.
Please reach out if you have any questions or feedback through our Semantic Kernel GitHub Discussion Channel. We look forward to hearing from you! We would also love your support, if you’ve enjoyed using Semantic Kernel, give us a star on GitHub.
0 comments