
Windows 10 is one of the most powerful platforms on the market when it comes to supporting digital inking experiences. As such, the Universal Windows Platform comes with a dedicated series of controls that you can add to your application to enable inking experiences. Thanks to these controls, you can easily implements features like capturing signatures, text and shape recognition, etc.
If you’re building a Windows application with React Native, there are a few options you can explore to add such a feature. One of them is using a community module called react-native-sketch-canvas, which provides a Windows implementation as well. This module is based on Win2D and it enables the recording and playback of ink strokes. While this solution can be a great fit for many applications, there are scenarios in which you need more precision and better integration with the Windows ecosystem, like when you need to capture a signature. For these purposes, Windows 10 offers a native control called InkCanvas, which enables powerful inking experiences. InkCanvas is specifically a Windows control and isn’t exposed automatically by React Native. As such, we’ll have to wrap it with a native UI component, which is a feature provided by React Native which exposes native UI controls for Windows, Android or iOS to the JavaScript layer using JSX.
In this article we’ll walk through the process of wrapping the InkCanvas control, with the dual goals of enabling your apps to support inking and walking you through the process of creating a native UI component, which can be useful for exposing other native controls.
Create a native module
From a development perspective, there are no differences between a native module and a native UI component. They are both defined inside a Windows Runtime Component, which exposes a ReactPackageProvider class that gets registered by the main application via autolinking.
You can either choose to build a dedicated native module library or you can just add your Windows Runtime Component to your React Native for Windows solution. The first approach is suggested if you’re planning to share your module and reuse it with multiple projects; the second one is good if it’s a one-time module you’re planning to use only with the app you’re building.
The documentation on the official website is very clear and detailed, so I won’t repeat the steps in this article. I’m going to use a C# Windows Runtime Component, since it’s the language I’m more familiar with, but you can do the same with C++.
Create a custom control
The first step is to create a user control which we want to make available to the JavaScript layer via JSX. You can choose to create the control in code or via XAML. In this article, I will guide you through the XAML approach, so right click on the Windows Runtime Component, choose Add -> New item, select the User Control template and give it a meaningful name, like InkCanvasControl.xaml.
You can start working on the look & feel of the User Control in the XAML file, based on your requirements. We could just add an InkCanvas control for our purpose but, for the sake of showing a more realistic scenario, let’s make the UI slightly more complex:
<UserControl
    x:Class="InkCanvasModule.InkCanvasControl"
    xmlns="http://schemas.microsoft.com/winfx/2006/xaml/presentation"
    xmlns:x="http://schemas.microsoft.com/winfx/2006/xaml"
    xmlns:local="using:InkCanvasModule"
    xmlns:d="http://schemas.microsoft.com/expression/blend/2008"
    xmlns:mc="http://schemas.openxmlformats.org/markup-compatibility/2006"
    mc:Ignorable="d"
    d:DesignHeight="300"
    d:DesignWidth="400">

    <Grid>
        <Grid.RowDefinitions>
            <RowDefinition Height="50" />
            <RowDefinition Height="*" />
        </Grid.RowDefinitions>
        <TextBlock Text="{x:Bind Path=Title}" Style="{StaticResource HeaderTextBlockStyle}"
                   Grid.Row="0" HorizontalAlignment="Center" />
        <InkCanvas x:Name="MyInkCanvas" Width="1000" Height="1000" Grid.Row="1"  />
    </Grid>
</UserControl>
The InkCanvas control is placed inside a Grid together with a TextBlock control, which is used to display a header. Exactly like we would do with a standard User Control, the title isn’t fixed, but it’s connected to a dependency property via binding. This enables us, as developers, to customize the title when we add the User Control to a page. In the React Native context, this is is the first step to expose the property to JSX, so that we can customize the look & feel of the control directly in JavaScript.
In the code behind of the control we have, of course, to define Title as a dependency property:
public string Title
{
    get { return (string)GetValue(TitlePropertyField); }
    set { SetValue(TitlePropertyField, value); }
}

// Using a DependencyProperty as the backing store for Title.  This enables animation, styling, binding, etc...
private static readonly DependencyProperty TitlePropertyField =
    DependencyProperty.Register("Title", typeof(string), typeof(InkCanvasControl), new PropertyMetadata(string.Empty));

internal static DependencyProperty TitleProperty
{
    get
    {
        return TitlePropertyField;
    }
}
The last change to do in the code behind is adding the following line in the public constructor:
public InkCanvasControl()
{
    this.InitializeComponent();
    MyInkCanvas.InkPresenter.InputDeviceTypes = Windows.UI.Core.CoreInputDeviceTypes.Mouse | Windows.UI.Core.CoreInputDeviceTypes.Touch | Windows.UI.Core.CoreInputDeviceTypes.Pen;
}
This will enable the canvas to receive ink inputs from multiple devices, including mouse, which is especially useful during testing if you don’t have a pen-enabled device.
Expose the user control to React Native
So far, we didn’t do anything related to React Native. We built a User Control in the same way we would do for a traditional UWP application. To expose it to React Native and use the control in JSX we need to add a new class to our Windows Runtime Component which will wrap the User Control in a View Manager.
Right click on the Windows Runtime Component, choose Add -> Class and give it a meaningful name (a common convention is the name of the control followed by the ViewManager suffix, like InkCanvasControlViewManager.cs).
The class must be marked as internal and inherit from AttributedViewManager<T>, where T is the user control. For example, this is how it looks like for the InkCanvasControl we have previously created:
using Microsoft.ReactNative.Managed;

namespace InkCanvasModule
{
    internal class InkCanvasControlViewManager: AttributedViewManager<InkCanvasControl>
    {
        //add code here
    }
}
Now we are ready to expose native features of the user control to the JavaScript layer. The React Native for Windows SDK enables us to expose multiple elements:
- Properties, which can be used to customize the user control.
- Commands, which can be used to interact with the user control.
- Events, which can be used to react to changes in the user control.
In the following sections we’re going to see how to implement all three scenarios. But before doing that, let’s see how we can expose the native control to JavaScript.
The process is the same you would follow for a native module. First, you have to add a new class to your Windows Runtime Component called ReactPackageProvider, which must have the following implementation:
using Microsoft.ReactNative;

namespace InkCanvasModule
{
    public partial class ReactPackageProvider : IReactPackageProvider
    {
        public void CreatePackage(IReactPackageBuilder packageBuilder)
        {
            CreatePackageImplementation(packageBuilder);
        }

        /// <summary>
        /// This method is implemented by the C# code generator
        /// </summary>
        partial void CreatePackageImplementation(IReactPackageBuilder packageBuilder);
    }
}
Then you have to register the module with your main React Native application. If you’re building this component as a dedicated native module, you can leverage autolinking to do everything automatically. If, instead, you have added the component as a project to an existing React Native for Windows solution, you can follow the manual linking approach.
Once the native module is linked, you can reference it in JavaScript using the requireNativeComponent() function:
import { requireNativeComponent } from "react-native";

const InkCanvas = requireNativeComponent("InkCanvasControl");
As parameter, you have to pass the name of the class which defines the User Control you have previously created (InkCanvasControl, in our example).
From now on, you will be able to reference the control in JSX using the InkCanvas constant, like in the following example:
class App extends React.Component {
  render() {
    return (
      <View>
        <InkCanvas style={{ width: 1000, height: 1000 }} />
      </View>
    );
  }
}
Enabling the InkCanvas control in a React Native for Windows app
If you test the implementation so far, you will notice that the header will be rendered fine, but the InkCanvas won’t work. The reason can be found in the documentation:
Some UWP XAML controls do not support being hosted in environments where 3D transforms are involved (i.e. the Transform3D property is set on the control or on any of the control’s ancestors in the XAML tree). Currently, React Native for Windows uses a global PerspectiveTransform to provide a 3D look to objects being rotated along the x or y axes, which means these controls that do not work in 3D environments, will not work out of the box.
InkCanvas is exactly one of these controls that doesn’t work in a 3D environment. React Native for Windows offers us a workaround which, however, is supported only starting from version 0.64.
As the documentation explains, React Native for Windows supports an experimental feature to disable the 3D perspective. Open the MainPage.xaml file in your React Native project, in which you’ll find the ReactRootView control which hosts the React Native content. Add a new property to the control called IsPerspectiveEnabled and set it to False. This is how the control should look like:
<react:ReactRootView
    x:Name="reactRootView"
    ComponentName="InkCanvasv064"
    IsPerspectiveEnabled="False"
    Background="{ThemeResource ApplicationPageBackgroundThemeBrush}"
    MinHeight="400"/>
That’s it. Now we can continue the implementation of the features of our custom control.
Exposing a property
This isn’t stricly related to enable inking, but it’s a good learning when it comes to build native UI modules. The goal of this section is to expose the dependency property called Title that we have created to JavaScript, so that we can customize it using JSX. Properties can be exposed using the ViewManagerProperty attribute, like in the following sample:
[ViewManagerProperty("title")]
public void SetTitle(InkCanvasControl view, string value)
{
    if (null != value)
    {
        view.Title = value;
    }
    else
    {
        view.ClearValue(InkCanvasControl.TitleProperty);
    }
}
The method, called SetTitle(), is decorated with the ViewManagerProperty attribute, which sets the name that will be used to expose the property to JSX (in this case, it’s title in lowercase, to follow the JavaScript naming conventions).
The method receives, as input, a reference to the user control and the value assigned via JSX. The implementation of the method is straigthforward: if the property assigned in JSX has a value, we assign it to the Title property of the user control; otherwise, we clear it.
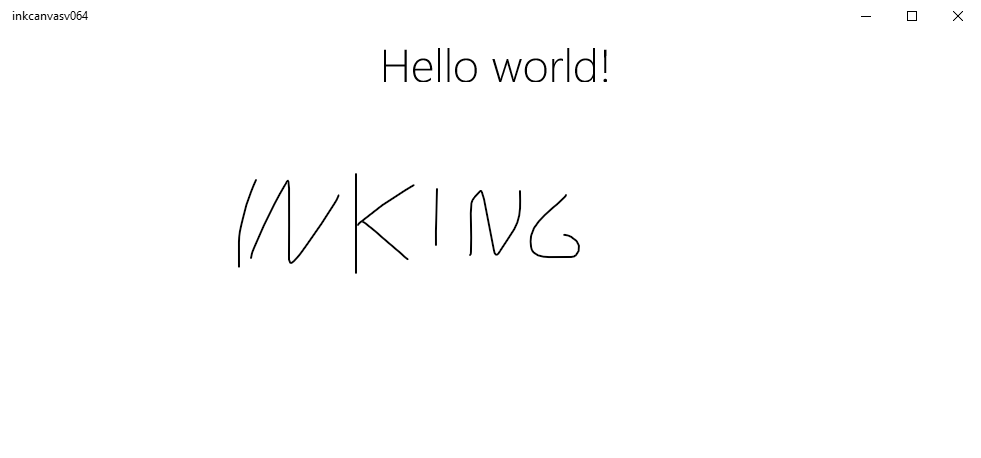
Now we’ll be able to leverage the title property in our React Native components, like in the following sample:
class App extends React.Component {
  render() {
    return (
      <View>
        <InkCanvas style={{ width: 1000, height: 1000 }} title="Hello world!" />
      </View>
    );
  }
}
And this is the final result:
Exposing a command
One of the most common features that developers want to implement when they work with inking is the ability to save the content of the InkCanvas control as an image. To enable this feature we’re going to implement a command. The concept is very similar to exposing a method in a React Native module and it will enable us to trigger, from JavaScript, the native APIs exposed by the InkCanvas control to render the ink into a stream.
The first step is to install a library called Win2D, which enables advanced 2D operations in a UWP app. Thanks to this library, we’ll be able to render the content of the canvas into a stream that we can save into a file. To install it, right click on your Windows Runtime Component, choose Manage NuGet Packages and look for the Win2D package.
The command is defined using the ViewManagerCommand attribute which, like in the previous section, accepts a parameter that specifies the name of the method that will be exposed to JavaScript. This is the full implementation:
[ViewManagerCommand("saveInkToFile")]
public async Task SaveInkToFile(InkCanvasControl view, IReadOnlyList<string> commandArgs)
{
    string fileName = commandArgs[0].ToString();

    var inkCanvas = view.FindName("MyInkCanvas") as InkCanvas;

    CanvasDevice device = CanvasDevice.GetSharedDevice();
    CanvasRenderTarget renderTarget = new CanvasRenderTarget(device, (int)inkCanvas.ActualWidth, (int)inkCanvas.ActualHeight, 96);

    using (var ds = renderTarget.CreateDrawingSession())
    {
        ds.Clear(Colors.White);
        ds.DrawInk(inkCanvas.InkPresenter.StrokeContainer.GetStrokes());
    }

    FileSavePicker fileSavePicker = new FileSavePicker();
    fileSavePicker.FileTypeChoices.Add("Image", new List<string>() { ".jpg" });
    fileSavePicker.SuggestedFileName = fileName;
    var file = await fileSavePicker.PickSaveFileAsync();

    using (var fileStream = await file.OpenAsync(FileAccessMode.ReadWrite))
    {
        await renderTarget.SaveAsync(fileStream, CanvasBitmapFileFormat.Jpeg, 1f);
    }
}
The method receives, as input, a reference to the user control and a series of parameters that the JavaScript app can pass to it. In our scenario, we’re getting from the JavaScript layer the default name of the file that is suggested when you save the image. The method performs the following actions:
- It retrieves a reference to the
InkCanvascontrol included in the User Control, using theFindName()method. - It creates a
CanvasRenderTargetto store the inking session, which is exposed by theInkPresenterproperty of theInkCanvascontrol. - It uses the
FileSavePickerAPI to prompt to the user where he/she/they want to save the image. Once we have a reference to the destination file, we use theSaveAsync()method of theCanvasRenderTargetobject to save the stream.
In this scenario, we can use a simple command because we are interacting with the User Control, but we aren’t expecting anything in return. The content of the InkCanvas will be just saved to a file and then the operation will be considered completed.
Now we can leverage the command directly in JavaScript, as in the following example:
class App extends React.Component {
  saveInk = () => {
    if (this._inkCanvasRef) {
      const tag = findNodeHandle(this._inkCanvasRef);
      UIManager.dispatchViewManagerCommand(
        tag,
        UIManager.getViewManagerConfig("InkCanvasControl").Commands
          .saveInkToFile,
        ["ink.jpg"]
      );
    }
  };

  render() {
    return (
      <View>
        <Button
          title="Save ink"
          onPress={() => {
            this.saveInk();
          }}
        />

        <InkCanvas
          ref={(ref) => {
            this._inkCanvasRef = ref;
          }}
          style={{ width: 1000, height: 1000 }}
          title="Hello world!"
        />
      </View>
    );
  }
}
As first step, we have to use the ref property to store a reference to the InkCanvas control in JSX. Then, we can use this reference to create a function that will invoke our command by using the UIManager.dispatchViewManagerCommand() function. It requires as input:
- The tag associated to the
InkCanvasControl, which we get by calling thefindNodeHandle()method with the reference we have previously stored. - The command to execute, which is exposed by the
UIManager.getViewManagerConfig().Commandsfunction. There are two key concept here to highlight: the parameter we pass to thegetViewManagerConfig()method is the name of the class which hosts our User Control (InkCanvasControl); theCommandsproperty, instead, exposes all our commands using the name we have passed to theViewManagerCommandattribute (in this case, we’re using thesaveInkToFileone). - This is optional. If your command accepts one or more arguments coming from the JavaScript layer. you can pass them here as an array. In our scenario, we are passing the default name of the image that will be used by the
FileSavePickerAPIs.
Now that we have defined a JavaScript function, we can just connect it to the onPress event of a Button control. When you press the button, this is what you’re going to see:
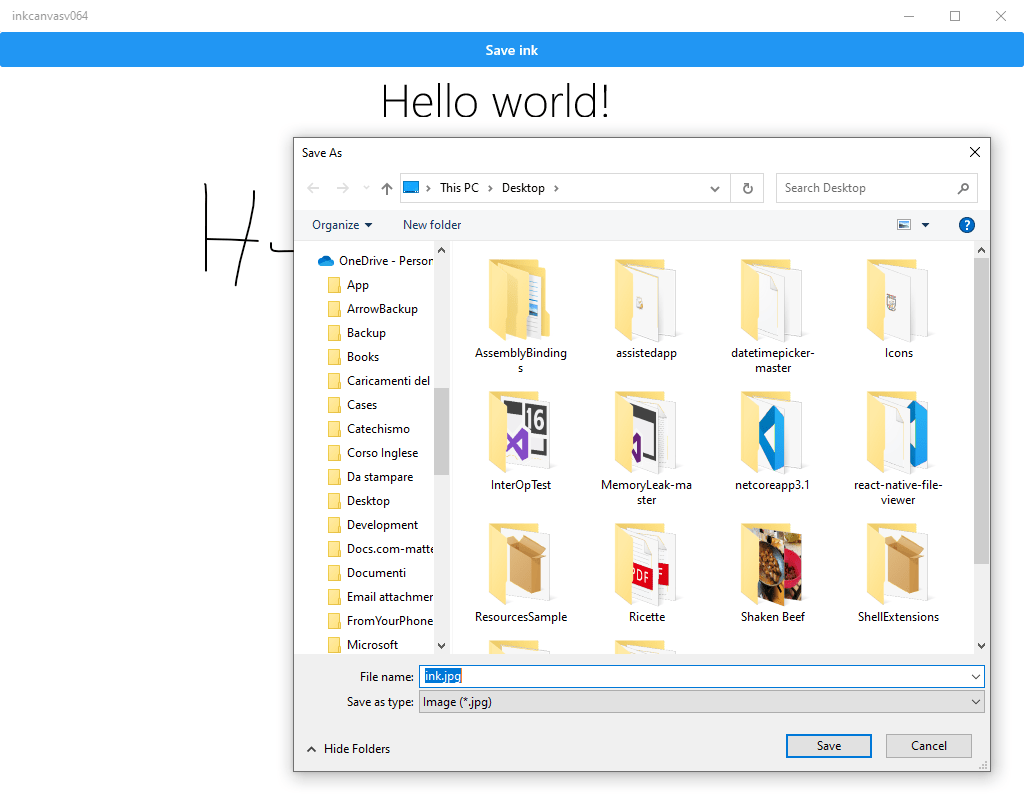
The picker will show up and will ask you where you want to save the image. Once the operation is completed, you will find in that location an image with the content of the InkCanvas control.
Exposing an event handler
Another common inking scenario is the requirement to save the content of the canvas, but not as a file on the device, but as as base64 encoded string. This enables developers to send the image, for example, to a cloud service for further processing. The APIs we need to use in the native layer are almost the same as the previous scenario. However, in this case, there’s an important difference: it isn’t anymore a fire & forget command, but we need to get a result back.
Commands don’t directly support the option to return a value. However, for these scenarios we can use events. We’ll trigger a command to save the content of the canvas as a base64 image and then we’ll raise an event, passing the image as parameter. In JavaScript, we’ll subscribe to this event so that we can receive the base64 image when it’s ready.
Events are implemented using the ViewManagerEvent class and they are decorated with the ViewManagerExportedDirectEventTypeConstant attribute:
[ViewManagerExportedDirectEventTypeConstant]
public ViewManagerEvent<InkCanvasControl, string> InkSaved = null;
The event is defined as a ViewManagerEvent<T, Y>, where T is the name of the class which will raise the event (our user control), while Y is the type of the data that will be returned (the string which contains the image encoded in base64).
Now we can define our command using, again, the ViewManagerCommand attribute:
[ViewManagerCommand("saveInkToBase64")]
public async Task SaveInkToBase64(InkCanvasControl view, IReadOnlyList<object> commandArgs)
{
    var inkCanvas = view.FindName("MyInkCanvas") as InkCanvas;

    string base64String = string.Empty;

    CanvasDevice device = CanvasDevice.GetSharedDevice();
    CanvasRenderTarget renderTarget = new CanvasRenderTarget(device, (int)inkCanvas.ActualWidth, (int)inkCanvas.ActualHeight, 96);

    using (var ds = renderTarget.CreateDrawingSession())
    {
        ds.Clear(Colors.White);
        ds.DrawInk(inkCanvas.InkPresenter.StrokeContainer.GetStrokes());
    }

    using (InMemoryRandomAccessStream stream = new InMemoryRandomAccessStream())
    {
        await renderTarget.SaveAsync(stream, CanvasBitmapFileFormat.Jpeg);
        var reader = new DataReader(stream.GetInputStreamAt(0));
        await reader.LoadAsync((uint)stream.Size);
        byte[] byteArray = new byte[stream.Size];
        reader.ReadBytes(byteArray);
        base64String = Convert.ToBase64String(byteArray);
    }

    InkSaved?.Invoke(view, base64String);
}
The core of the implementation is the same as the previous one. The main difference is that, instead of using the FileSavePicker APIs, we’re storing the content of the canvas in an InMemoryRandomAccessStream object. Then, using the DataReader class, we read the stream and we convert it into a base64 string.
In the end, we raise the event we have previously created with the Invoke() method, passing as parameter the reference to the InkCanvasControl that we have and the base64 string we have just created.
Let’s see now how we can use the event in JavaScript:
class App extends React.Component {
  saveInkToBase64 = () => {
    if (this._inkCanvasRef) {
      const tag = findNodeHandle(this._inkCanvasRef);
      UIManager.dispatchViewManagerCommand(
        tag,
        UIManager.getViewManagerConfig("InkCanvasControl").Commands
          .saveInkToBase64
      );
    }
  };

  onGetInk = (result) => {
    var image = "data:image/png;base64," + result.nativeEvent;
    console.log(image);
  };

  render() {
    return (
      <View>
        <Button
          title="Save ink to base64"
          onPress={() => {
            this.saveInkToBase64();
          }}
        />
        <InkCanvas
          ref={(ref) => {
            this._inkCanvasRef = ref;
          }}
          style={{ width: 1000, height: 1000 }}
          title="Hello world!"
          onInkSaved={(evt) => {
            this.onGetInk(evt);
          }}
        />
      </View>
    );
  }
}
The implementation of the command is the same we have seen in the previous section. The difference is that, this time, the InkCanvas control in JSX exposes also an onInkSaved event, that we can subscribe.
The subscription is handled by the onGetInk() function which receives, as parameter, the image in base64 returned by the native module. When the user presses the button, React Native will trigger the saveInkToBase64 command exposed by the control. Once the generation of the image encoded in a base64 string is completed in the native layer, the onInkSaved event will be raised and the onGetInk() function will be executed.
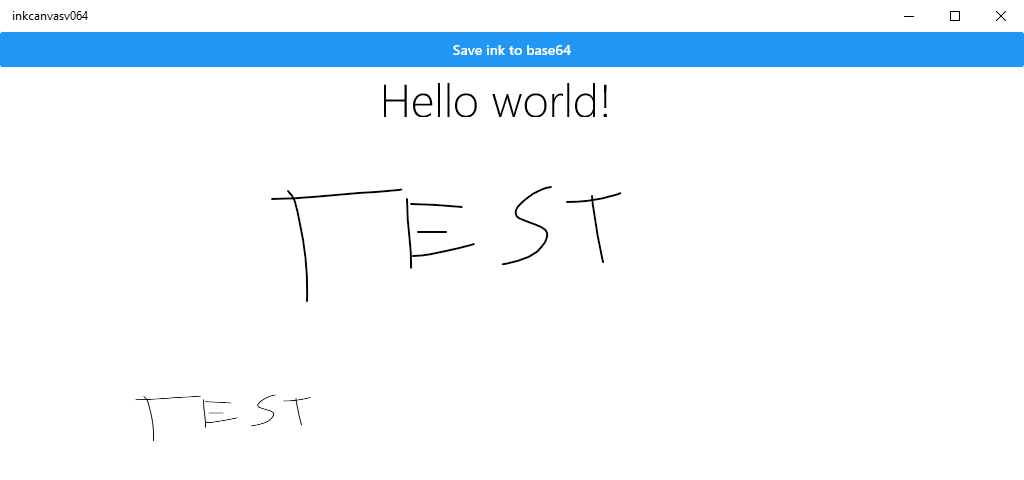
In this example we’re just showing the base64 string in the debugger console, but we could also set it as source of an Image control to display it, like in the example below:
Wrapping up
In this article we have learned how to enable inking features in our React Native for Windows application, by wrapping the InkCanvas control in a native UI module. However, the lessons we have learned aren’t specific to the inking scenario, but they can be applied anytime you have a native Windows control that it isn’t directly supported by React Native but that you would like to use in your applications.
I would like to thank Alexander Sklar for the guidance he provided during the implementation of this feature.
You can find the sample project used in this article on GitHub.
If you’re interested in getting started with React Native for Windows, check out our website at aka.ms/reactnative.
You can also follow us on Twitter @ReactNativeMSFT to keep up to date on news, feature roadmaps, and more.
0 comments