One of the most important parts of writing code is making sure your code is readable. There are so many positive downstream effects of clean code from its ease to maintain and add features, debug subtle programming errors or find uninitialized variables. Some people call this code hygiene. VS Code has linter extension support that enables you develop faster, produce cleaner code and is tweaked to your set up.
How VS Code handles Python linters
Linters are the development tool that is used to make sure your code is formatted consistently across your team. Then add your linter to your requirements-dev.txt— or otherwise named file to store your development only requirements — and pip install -r requirements-dev.txt. The linter development experience can live entirely within VS Code if you’d like. This means you do not need to pip install pylint in your Python environment for example. However in most collaborative programming projects, I prefer to install my linter in my virtual environment (old habits die hard) so if I want to use local terminal features of Pylint in VS Code, I can.
🔥PRO-TIP: Set your default importStrategy
importStrategyis a setting on all of our Python linter extensions that defines which linter should be automatically used in VS Code. I like to set it tofromEnvironmentin my User level settings so that it automatically uses the linter from my the Python environment for any project I’m working on with a team, but also allow VS Code to default to any Workspace level settings my team is sharing.settings.json// use the pylint version with extension "pylint.importStrategy": "useBundled" // use the pylint version found in requirements "pylint.importStrategy": "fromEnvironment"
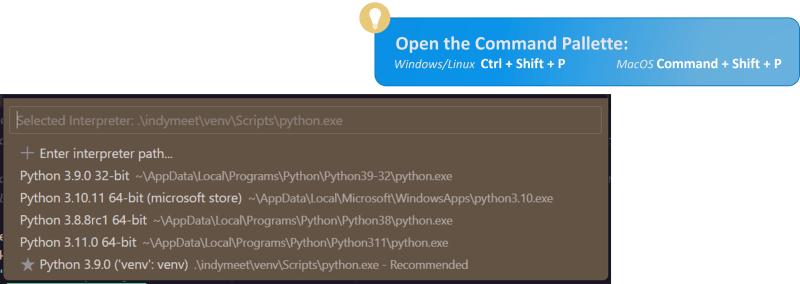
When you start your project, the first thing you will likely do is activate your virtual environment or open up a container to develop in (like Dev Containers). In VS Code, you’ll select your Python interpreter by using shortcut key Ctrl+P to open up the Command Pallette, and select from the dropdown menu which environment you’d like to use for your project. I select the interpreter associated with my project environment.

There are many packages for code quality. At the time of this post, VS Code and its active extension-contributing community supports flake8, ruff, pylint and the newly released mypy. The Ruff linter was created from the Python tools extension template by Charlie R. Marsh. The VS Code team encourages community contributed packages and you can learn more in the VS Code documentation.
🔥PRO-TIP: VS Code extension works as soon as its installed VS Code linting is automatically enabled once the extension is installed. You no longer need
python.linting.enabledset to true undersettings.json.
Enable what you want and disable what you don’t
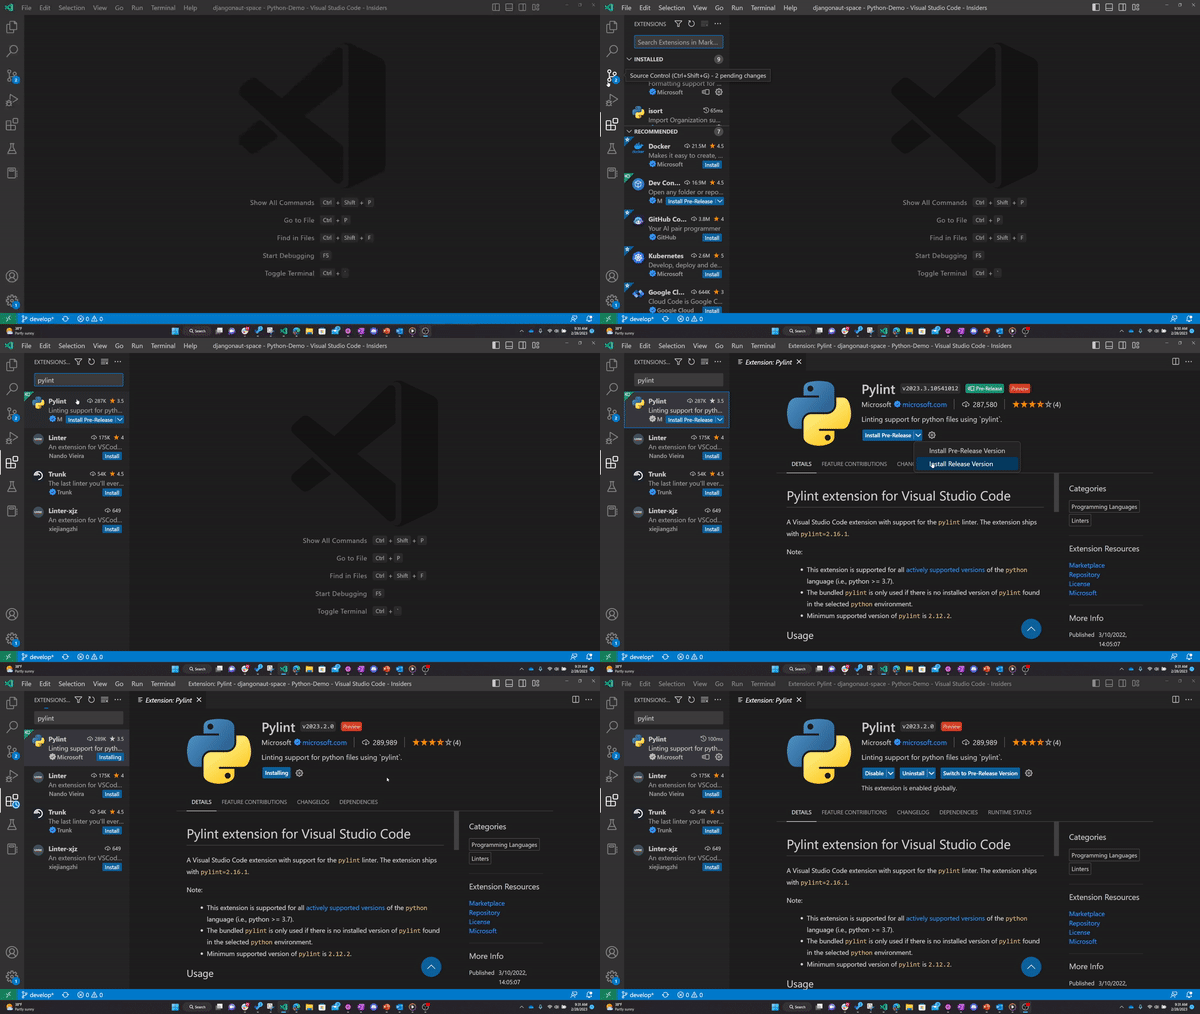
Navigate to the extensions tab in the activity bar to the far left and search for “Pylint.” I often like to enable pre-release so I can get the latest features and report bugs if I come across them, doing my part for the community.
GIF: Enable Pylint

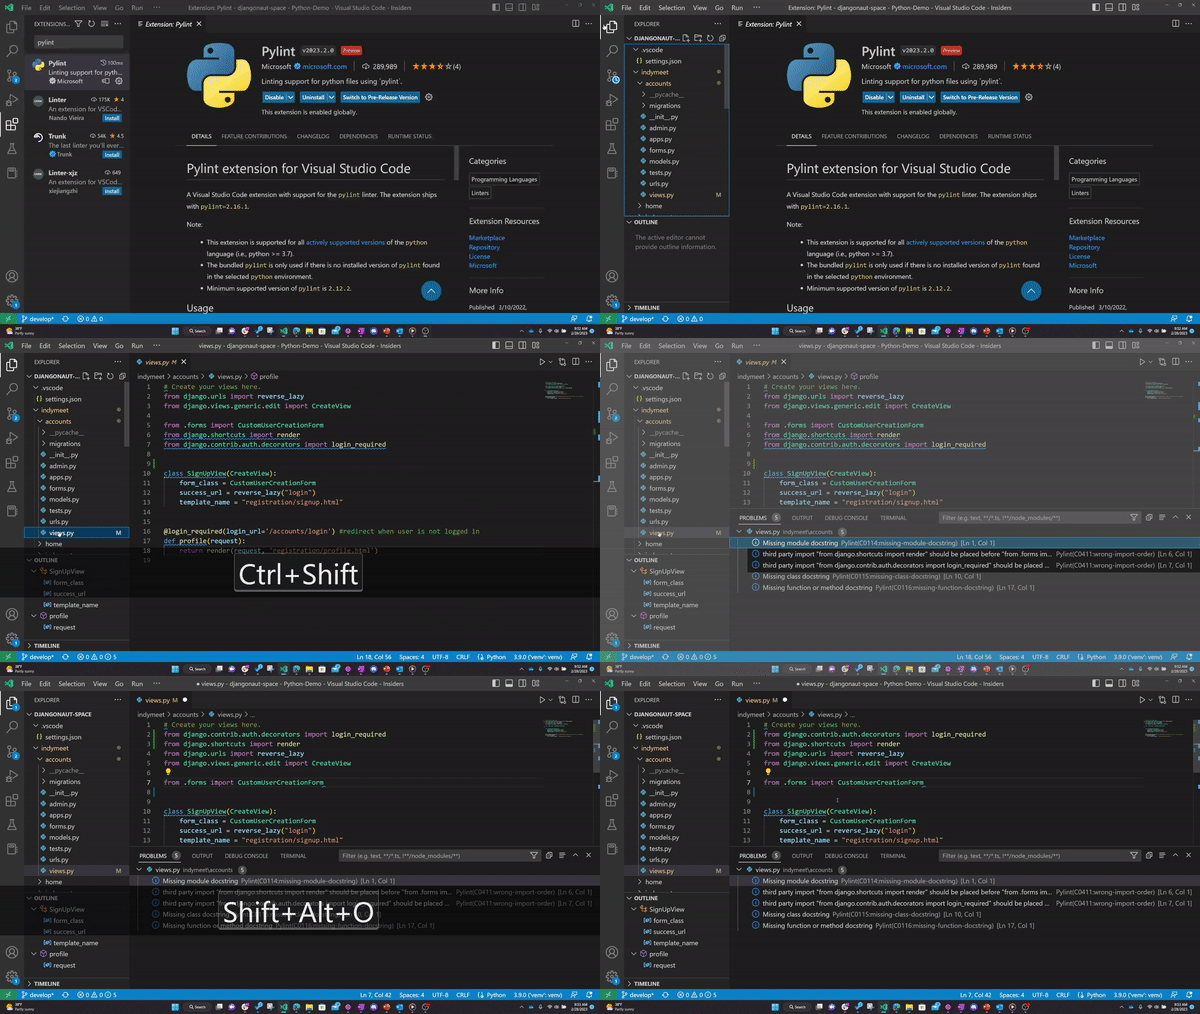
🔥PRO-TIP: Install isort Install an import sorting extension like isort then use the shortcut key
Shift+Alt+Oin order to sort your imports quickly.🔥PRO-TIP: Toggle Problems tab Use
Ctrl+Shift+Mto toggle open and close the Problems tab in VS Code to access any issues reported by linters.
GIF: Solving my first problems in VS Code for a Wagtail project

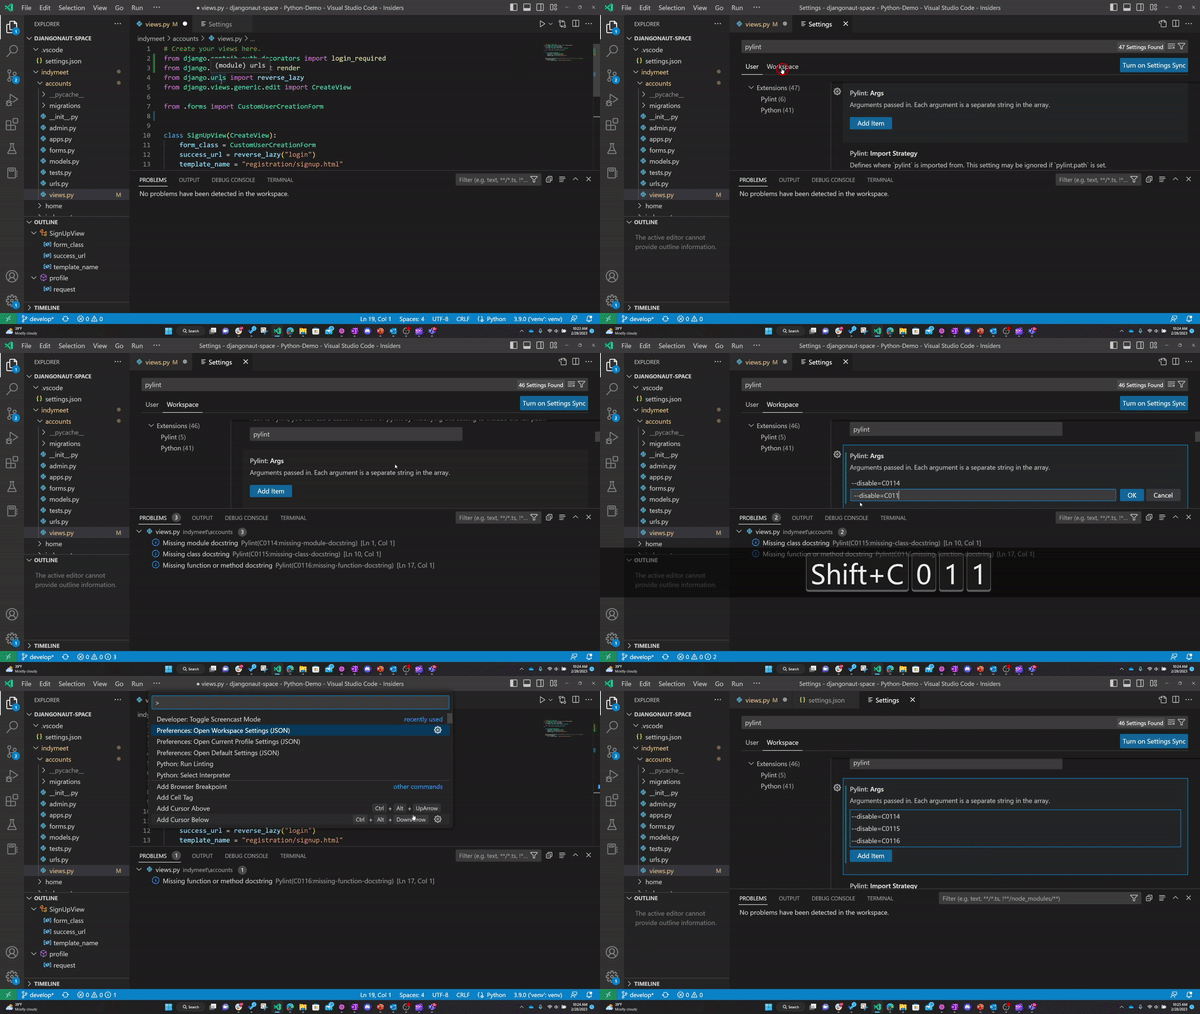
You can specify problems to consistently ignore in your projects by adding disable flags to your settings. You can do this either in your settings panel Ctrl+, or with your settings.json Ctrl+P then typing “Settings JSON” in the text bar. The following can be added via your Workspace or User settings depending on your desired scope.
Here’s what it looks like to disable a few doc string problems among other arguments in Pylint. “Args” are always lists in brackets:
settings.json
"pylint.arg": [
    "--reports",
    "12",
    "--disable=C0114",
    "--disable=C0115",
    "--disable=C0116",
]
The same settings work for other linter extensions:
settings.json
"flake8.arg": ["--ignore=E24,W504", "--verbose"],
"ruff.args": ["--config=/path/to/pyproject.toml"]
Want to dig more into the VS Code Linting documentation? https://code.visualstudio.com/docs/python/linting
Keep in touch!
I host The Python Pulse every second Friday of the month 11 AM PT / 2 PM ET / 7 PM UTC https://aka.ms/python-pulse-live

… or join me on the Microsoft Python Discord
More Reading…
- VS Code Shortcuts Windows | Linux | MacOS
- User and Workspace settings
- Python Pulse Playlist


0 comments