App Dev Manager Vijetha Marinagammanavar provides a walk-through of setting up IIS on a Windows Virtual machine hosted in Azure.
Let’s see How to set up IIS on Windows Virtual Machine hosted on Azure.
Login to https://portal.azure.com and select Microsoft Azure Subscription (MSDN subscribers or sign up for a one-month free trial).
Follow steps mentioned in this article https://docs.microsoft.com/en-us/azure/virtual-machines/windows/quick-create-portal to create Virtual Machines in Azure using Azure portal. And then to configure IIS on your Azure virtual machine, follow the steps below. In this demo I have chosen a Windows Server 2012 R2 Datacenter image. To setup IIS on Windows VM using PowerShell follow the steps mentioned in this article https://docs.microsoft.com/en-us/azure/virtual-machines/windows/tutorial-iis-sql
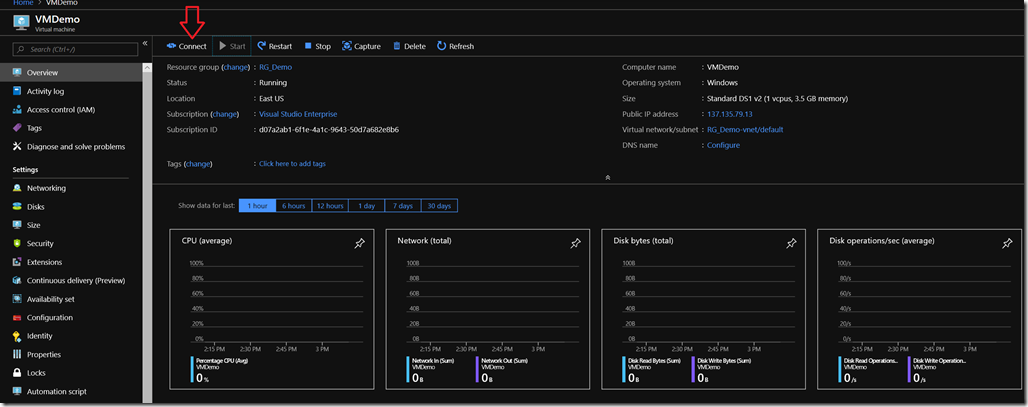
1) Go to Azure Portal and navigate to Virtual Machine pane. Hit “Connect” to login to you Virtual Machine. Make sure you have configured the VM for RDP access.
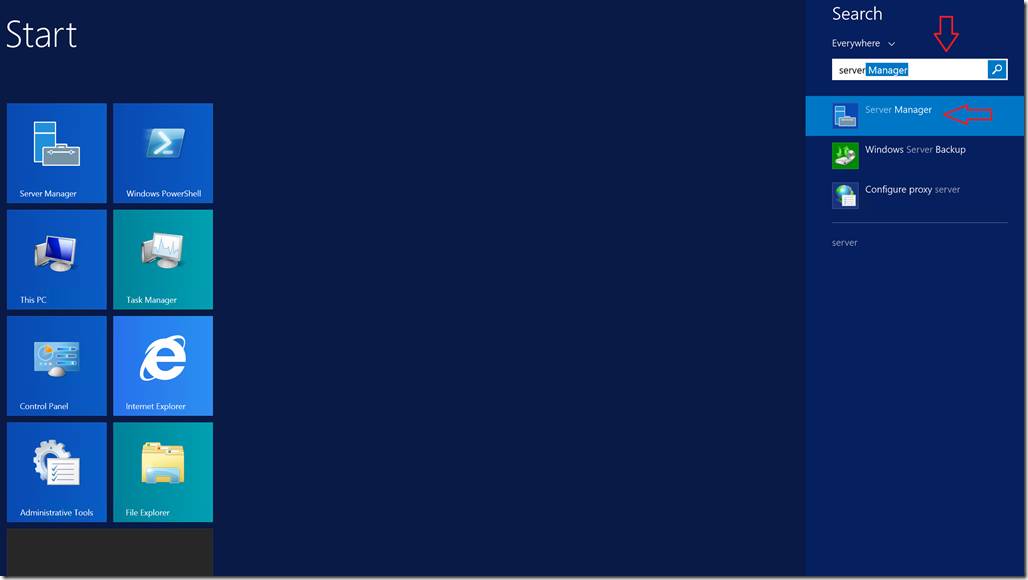
2) Go to your Virtual machine and on the Start menu search for “Server Manager” as shown in below screen.
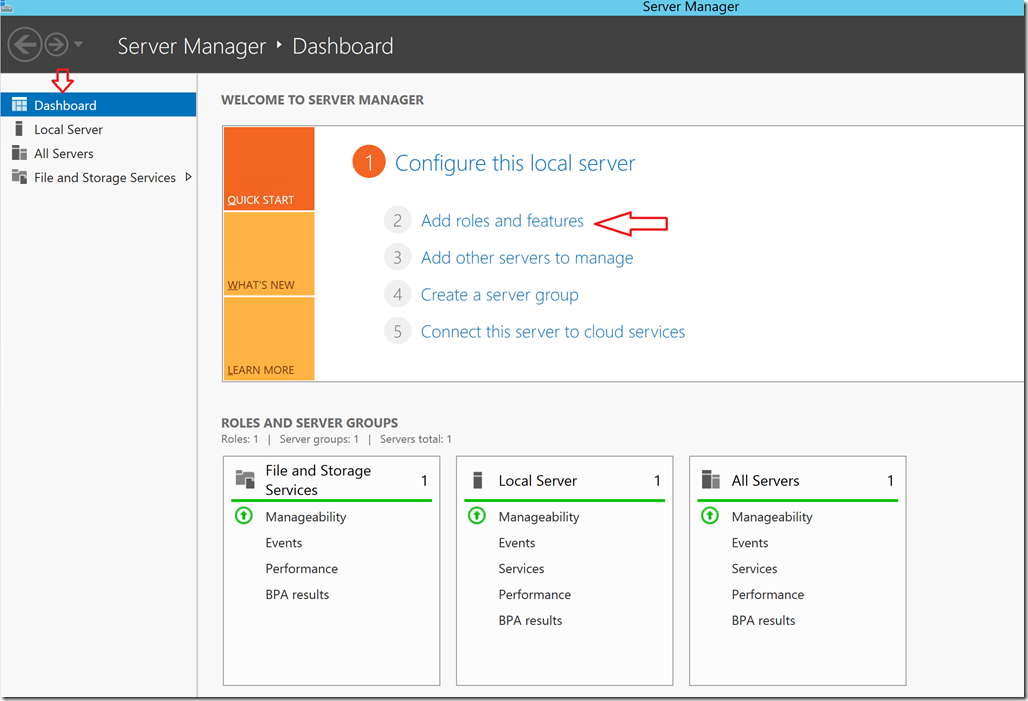
3) Open Server Manager and Select “Dashboard” on the left navigation bar. Then select “Add roles and features” option from the welcome screen.
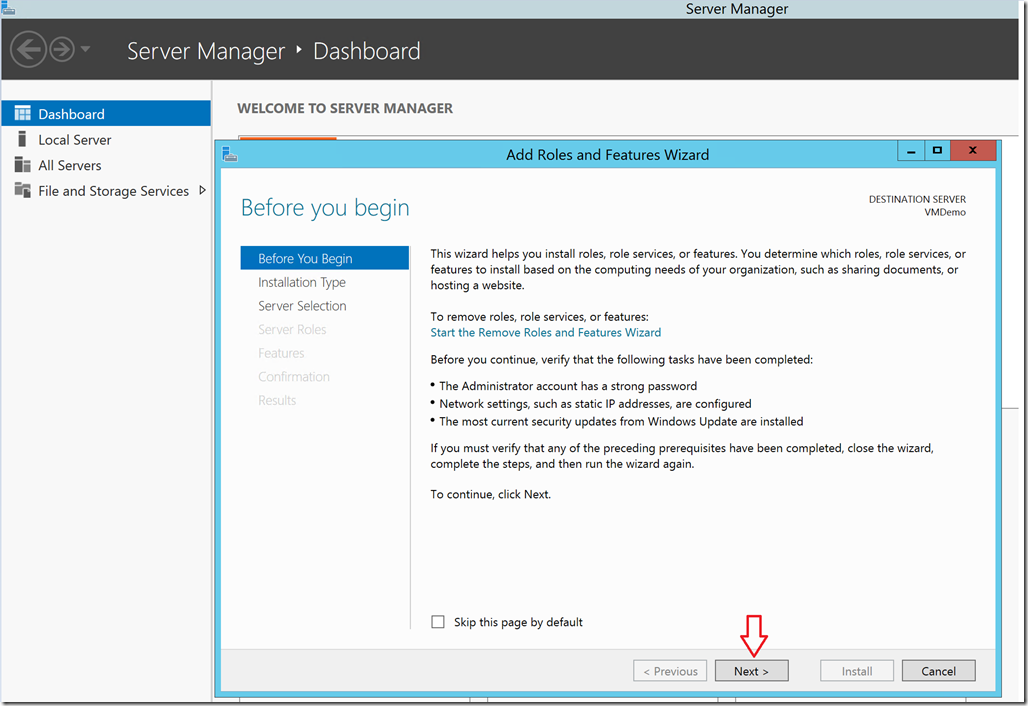
4) Click on “Next” from the Add roles and features Wizard.
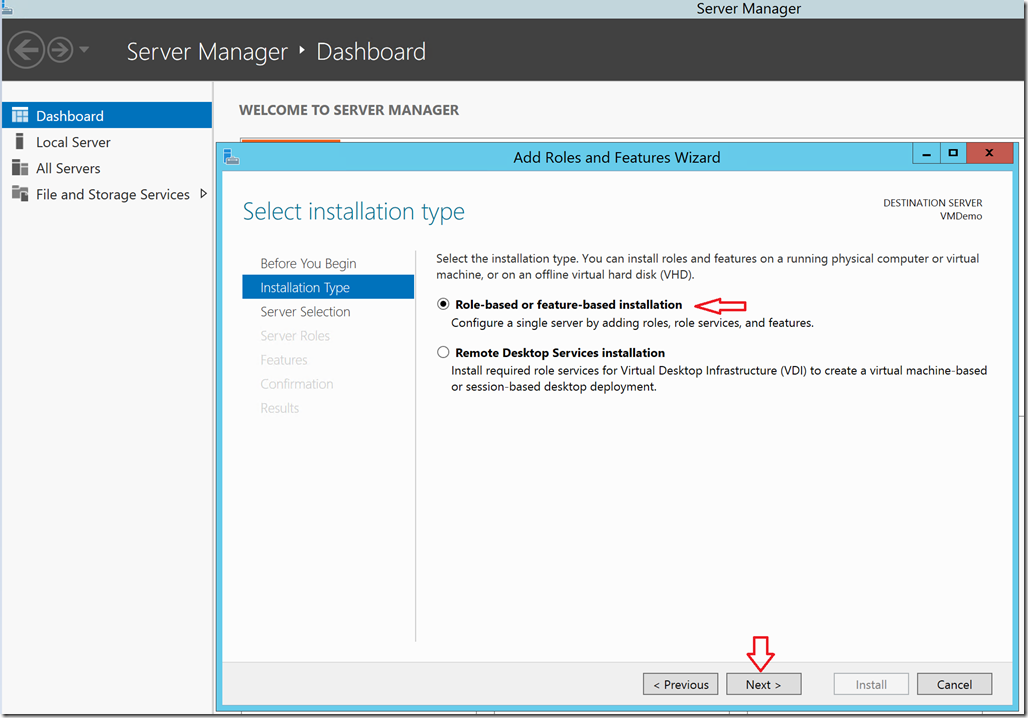
5) Choose “Role-based or feature-based installation” to configure a single server and click on “Next”.
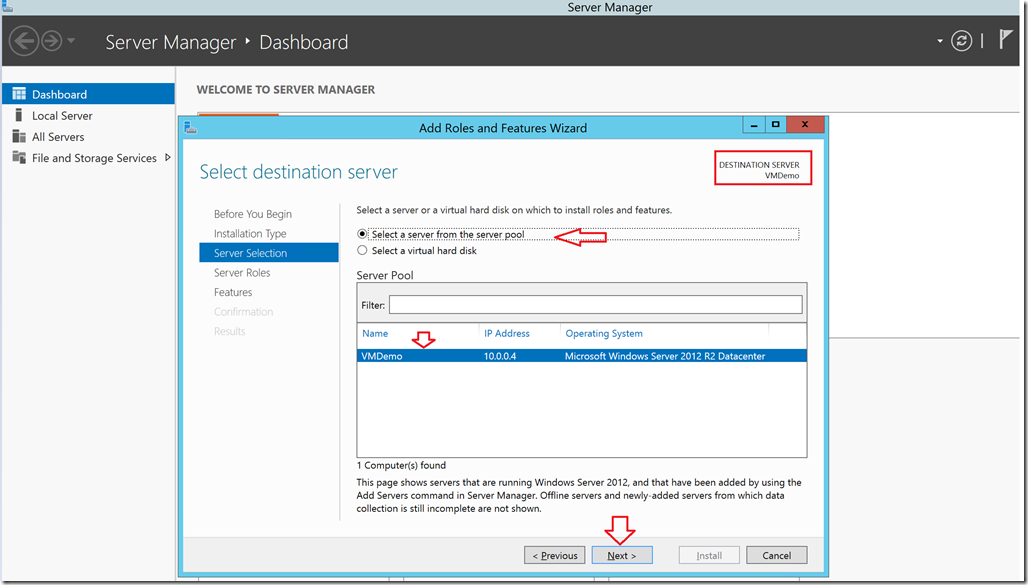
6) From Server Selection option, click on Select a server from the server pool and click on Next.
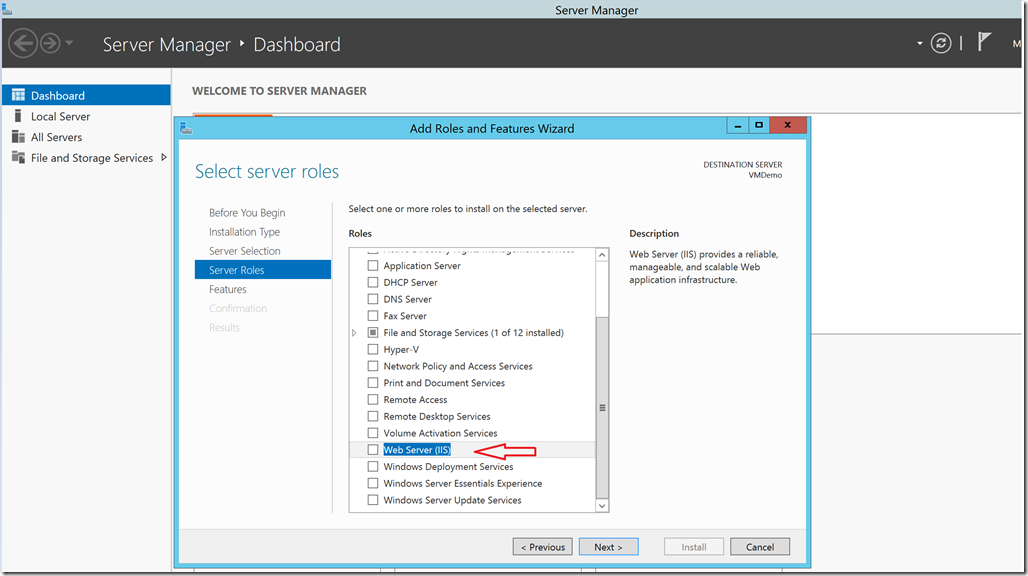
7) In server roles please choose “Web Server(IIS)” and click on “Next”.
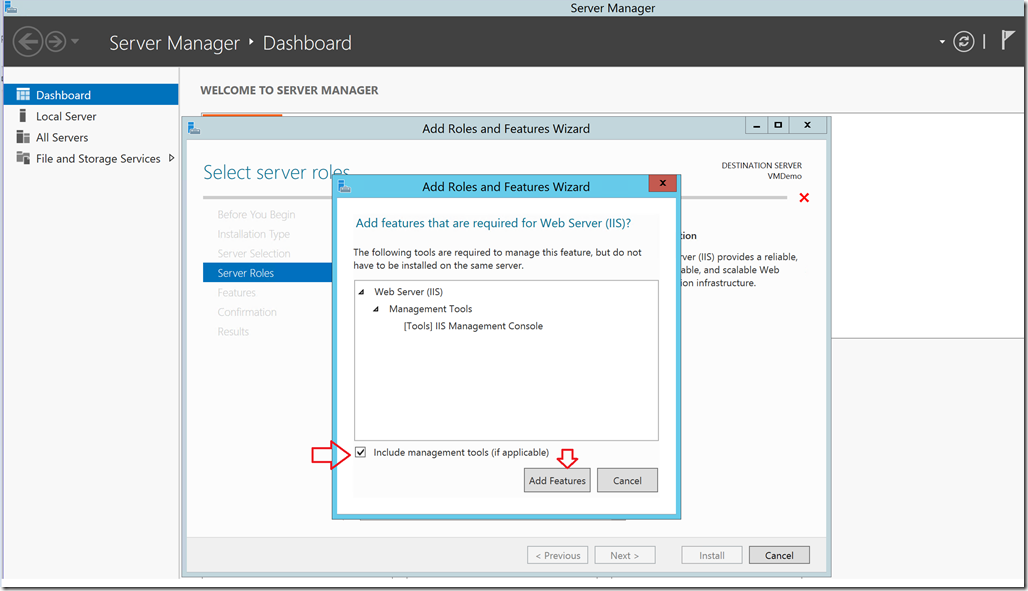
8) From the Add roles and features wizard pop up, check Include Management tools and click on “Add Features”.
9)From the Features option for now just click on “Next”.
Note: If you have any Prerequisites to install you can select from the Features list.
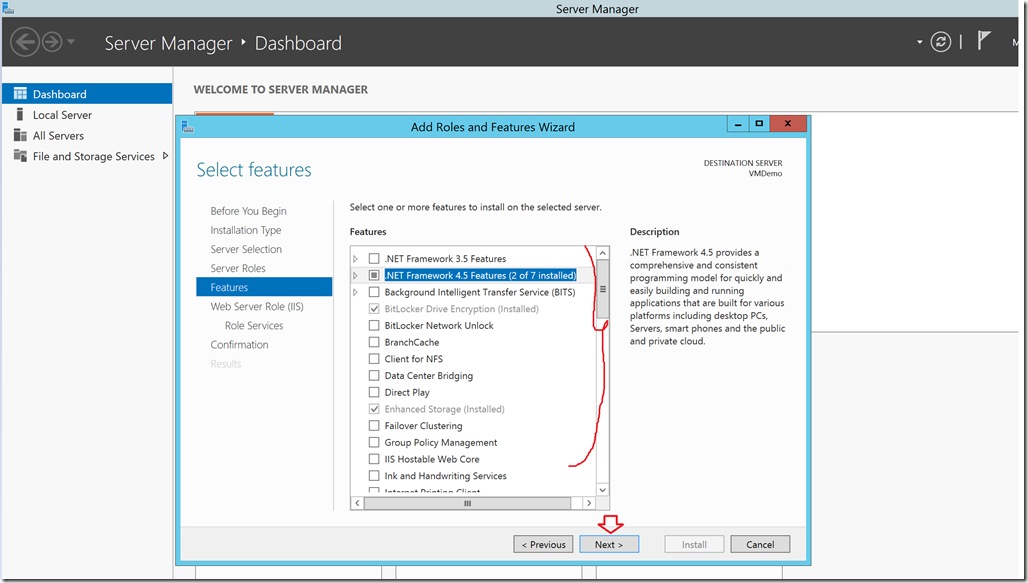
10)From the Web Server role (IIS) just click on Next.
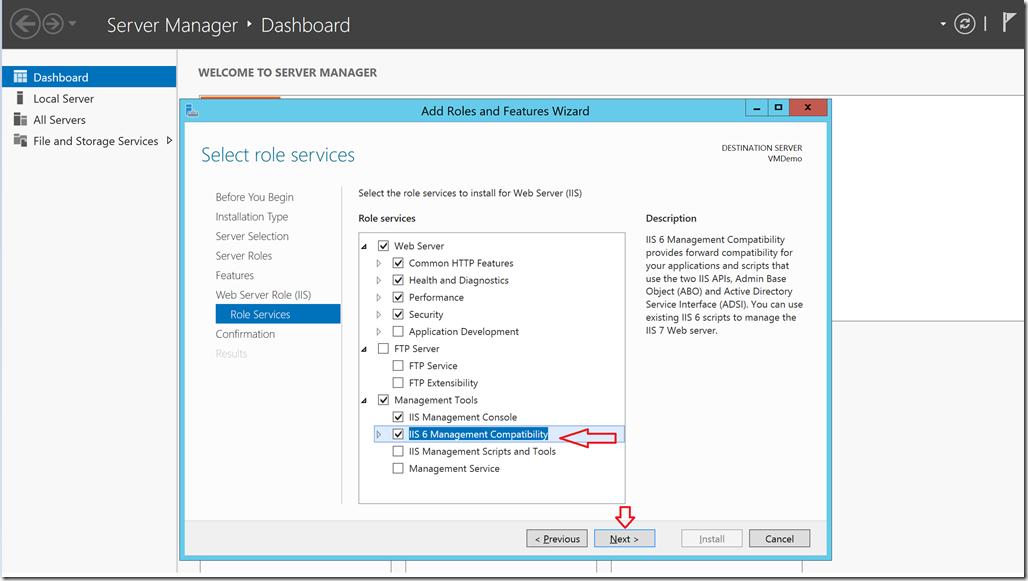
11)From Role Services choose “IIS 6 management compatibility” and click on “Next”.
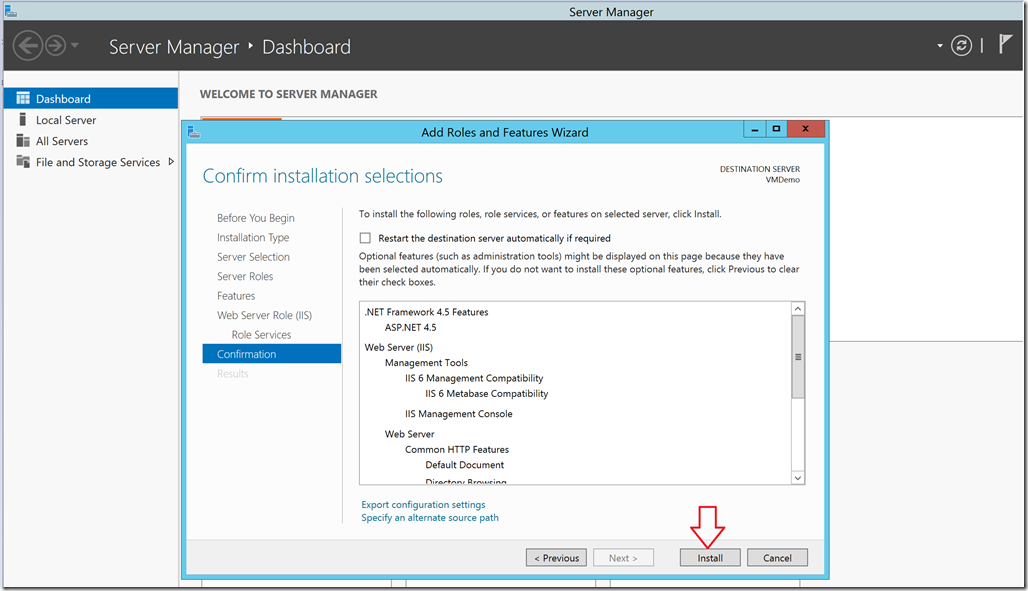
12) Click on “Install” and wait for the Installation and setup to complete.
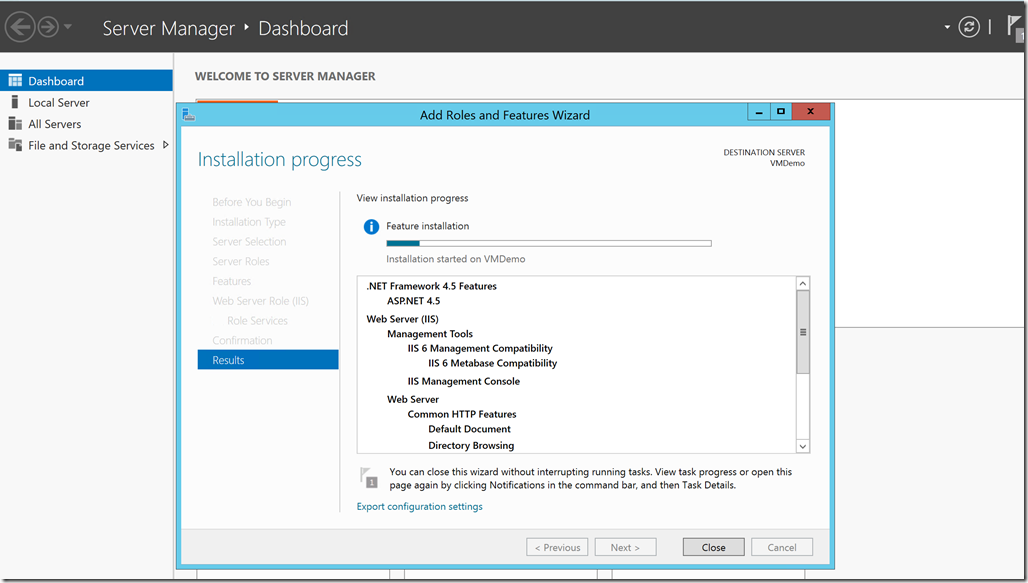
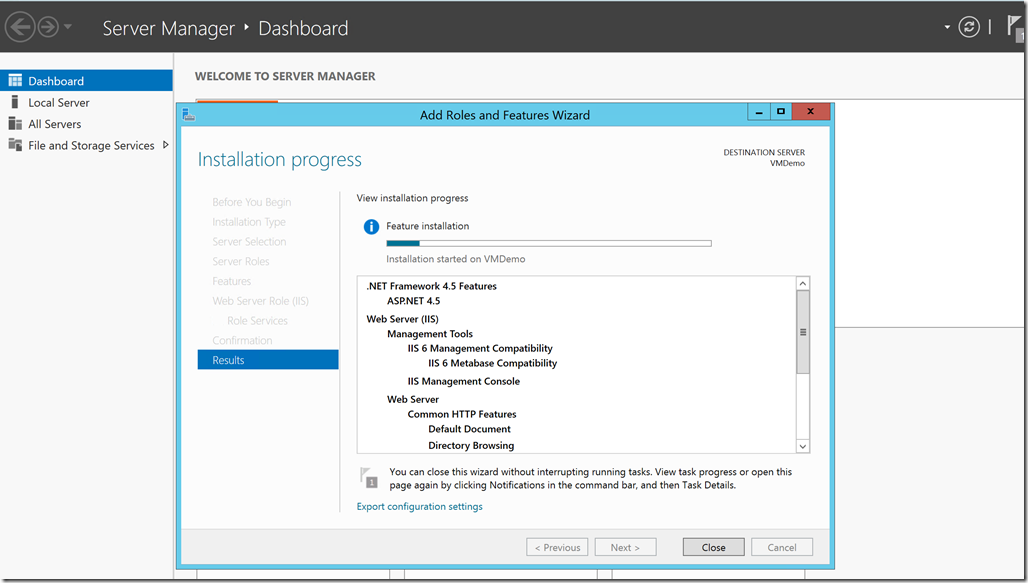
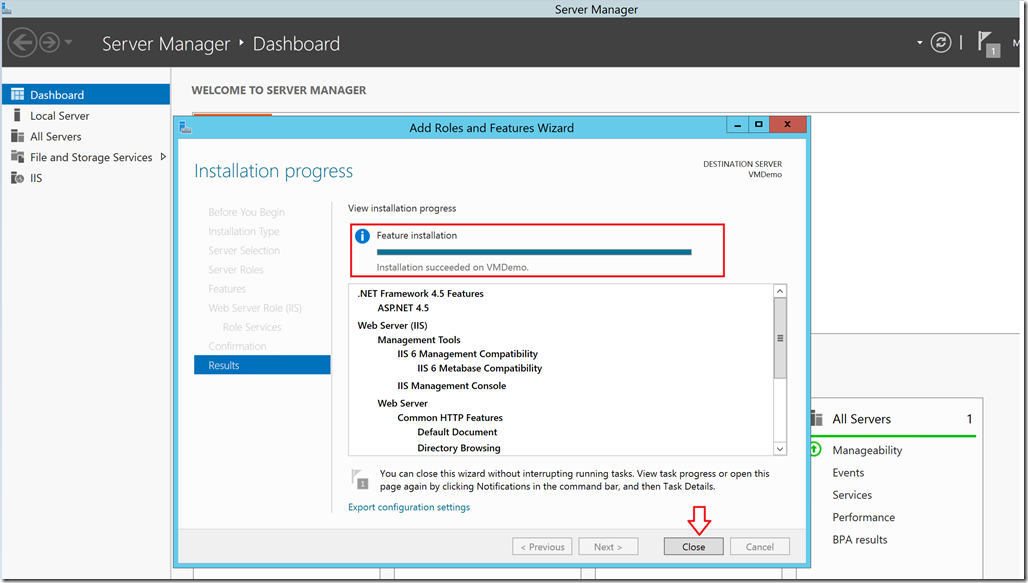
13) Once you received the Installation Succeeded message, click on “Close”.
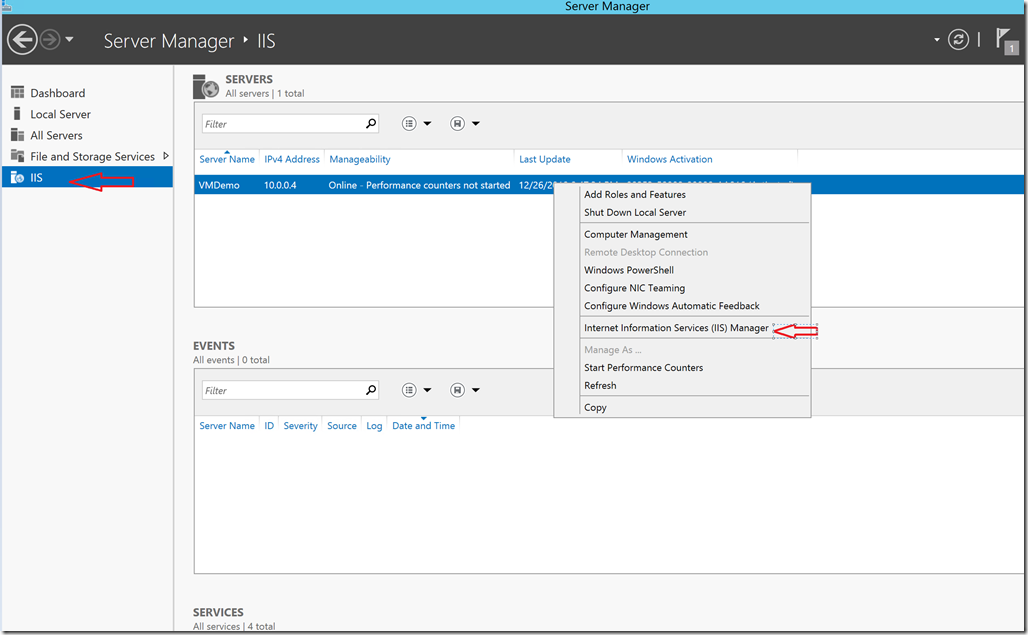
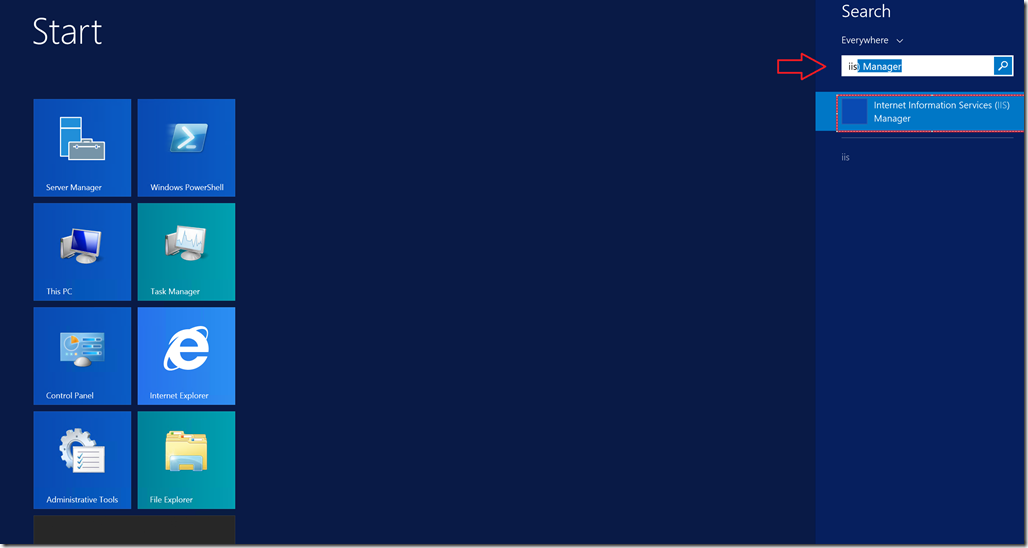
14) To test the IIS installation, go to Server Manager, right click on Server name and open IIS manager or you can directly search for IIS in the Start menu.
 OR
OR
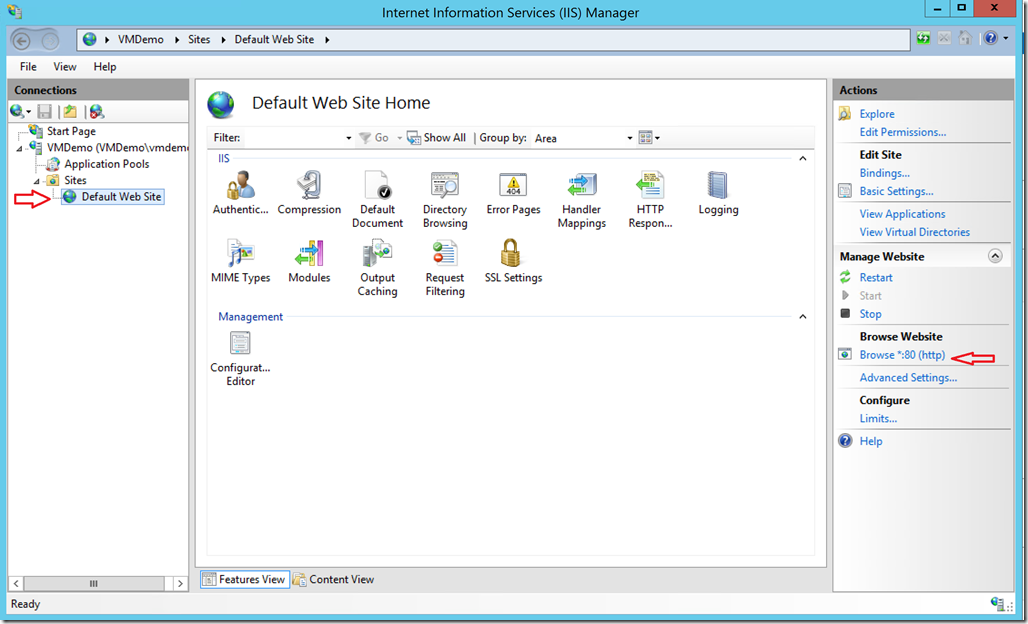
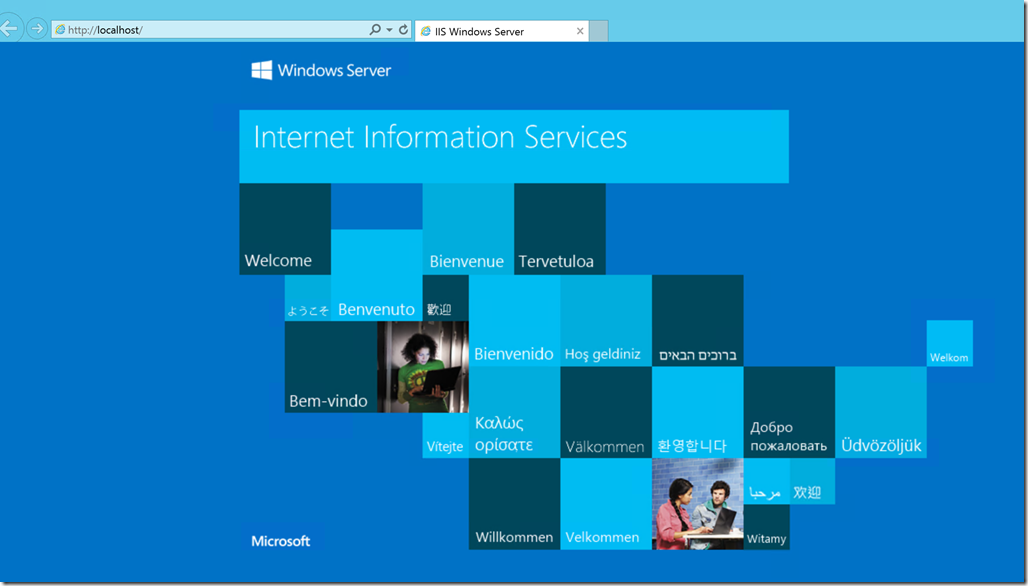
15) On the IIS Manager, Select Default Web Site and click on Browse, it will open the http://localhost on the port no: 80. This confirms the IIS configuration on the Virtual machine.

0 comments