Ramping up on Powershell & CLI
In this post, Senior Application Development Manager, Danny Kolke, gives a practical guide on getting started with PowerShell and Azure CLI.
“For the things we have to learn before we can do them, we learn by doing them.” Aristotle
In working with my customers I often run into those who want to get started with Azure but just haven’t done anything yet. My encouragement with them is pretty much summed up by Aristotle’s famous words, or Yoda; whichever comes first to mind. With as much foresight as Aristotle had I still doubt that he was talking about Azure; of course Yoda was. Regardless, this wisdom sure holds true for me; in my experience with Azure the best way to learn is just to start building something.
The following labs I developed as an exercise to teach Powershell and CLI for one of my customers. This customer wanted to cover things like Virtual Networks, Network Security Groups, Resource Groups, Load Balancers vs Application Gateways and how to setup failover recovery and other scenarios. But they didn’t want to just learn about them, they wanted to do lots of labs. Plus this class was going to have half of the students on Windows machines and half on Mac’s wanting to do both Powershell and CLI. The following is the first set of labs in a journey of labs we did together.
The Scenario
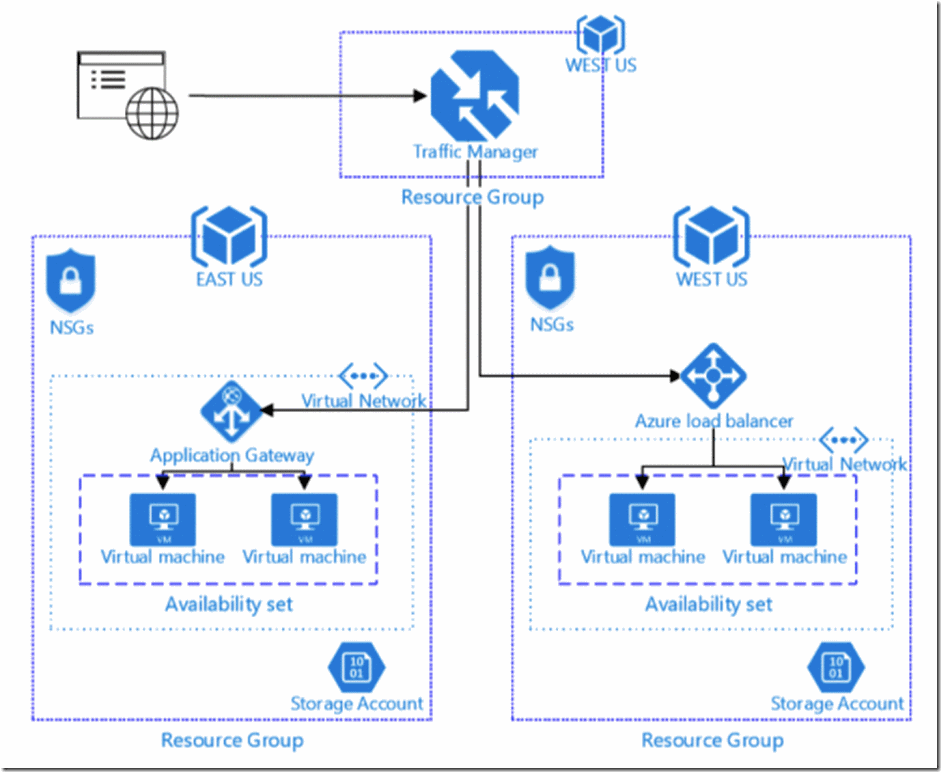
In these labs you will create hosted websites on virtual machines in both the East US and West US regions with a solution to manage traffic routing and failover between the two regions.
- Traffic Manager –> East & West Regions
- East & West US Regions
- Resource Group
- App Gateway in East
- Azure Load Balancer in West
- VNETs/Subnets
- 2 VM’s in an Availability Set
Prerequisites
If you haven’t done it already, there is some stuff you need to make sure you have installed before we begin on the lab.
Windows, use the Webplatform Installer: https://www.microsoft.com/web/downloads/platform.aspx
Download and run the application. This will enable you to install Microsoft Azure Powershell latest version
Azure CLI 2.0 (Mac or Windows) https://docs.microsoft.com/en-us/cli/azure/install-azure-cli
Pick your Editor
If you are just getting started with Azure and don’t know what tools to use to run the scripts I would recommend the following for your choice of Editors.
- For Windows use Powershell ISE and setup the split window with your script in one window, and the terminal in the other. Highlight one line at a time and run the selection by selecting F8. In windows, you can use Powershell ISE with either the Powershell lab, or the CLI lab, both will work in ISE.
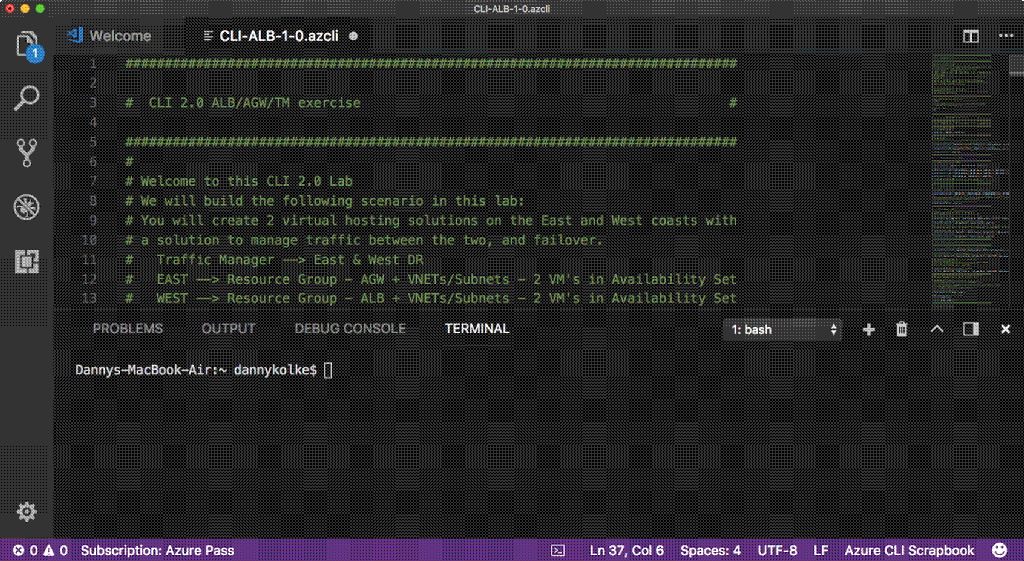
- For Mac users, I’d recommend using VS Code and setup the same split window. You want to add the Azure CLI extension and save your file with the .azcli. Then you can highlight your code and do the same process. Rumor is you can also use VS Code to run Powershell on your mac but I haven’t spent the time to try that. VS Code also works on Windows. So you can do that as well.
One more thing, of course you will need an Azure Subscription. If you don’t have one, you can sign up for a free trial at www.azure.com.
Download the Labs and Get Going
Download the following labs from my github.
- Repository: https://github.com/dkj0/rampup01-clips
- Link to CLI: https://github.com/dkj0/rampup01-clips/blob/master/cli-lab-agw-alb-tm.azcli
- Link to PS: https://github.com/dkj0/rampup01-clips/blob/master/ps-lab-agw-alb-tm.ps
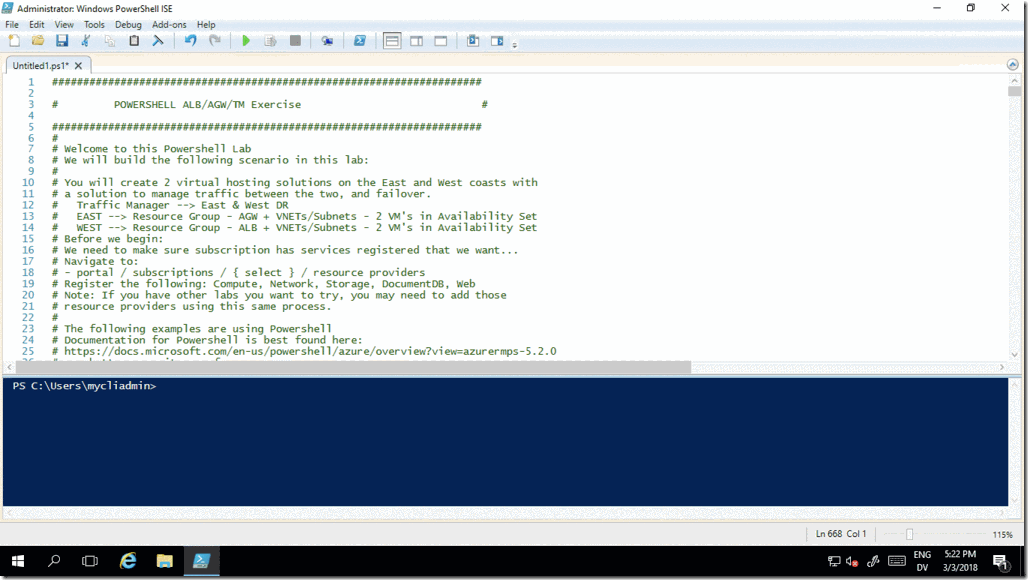
You can open the files as text files and copy and paste them into your editor, not terminal. When you are ready to go, it should look like this.
Tips & Tricks
Read the Labs and Follow the Links
All the instructions you need are in the labs. Follow the links to find out more about the various services and solutions you are deploying.
You can’t run it all at once
Note that with these labs you will not be able to just run the code all at once. You will have to read the scripts, edit them and make changes and run them. In this process hopefully you will learn a lot about Powershell and CLI and how the various solutions work. Part of the process is also learning how to read the error messages. It’s all part of getting comfortable with Azure and how this stuff works.
Edit, Select and Run
Select each line of the code, right click and run. Read the variables and values.
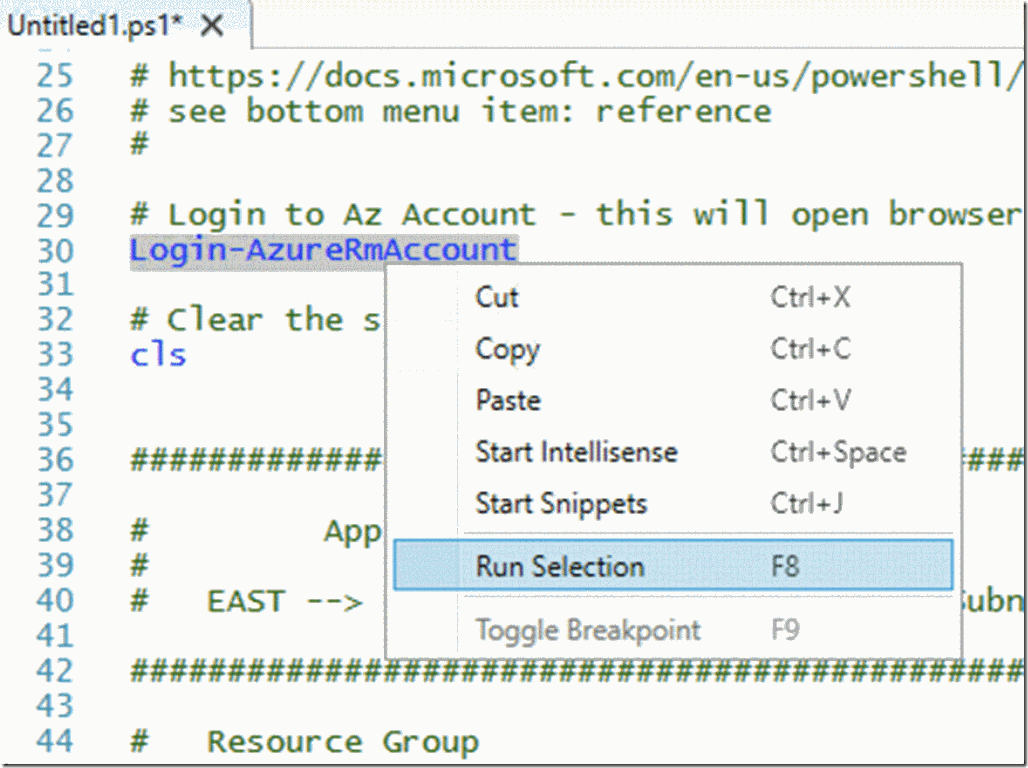
Powershell ISE – Right Click Run Selection
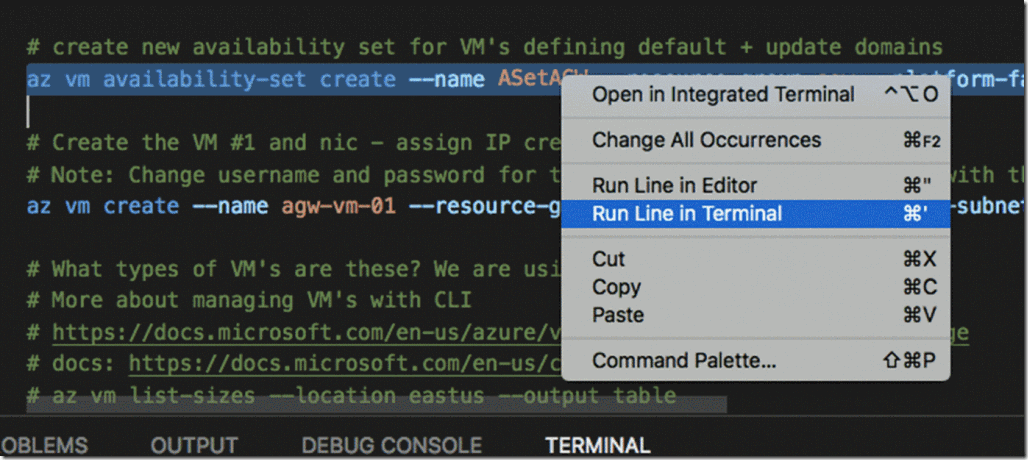
VS Code – Right Click Run Line in Terminal
Don’t forget the ` when using Powershell
In the powershell example I used ` for to continue the script on the next line. So when you highlight and run a script, make sure you catch the wrapped lines.
The Virtual Machines and IIS installed for this lab to work
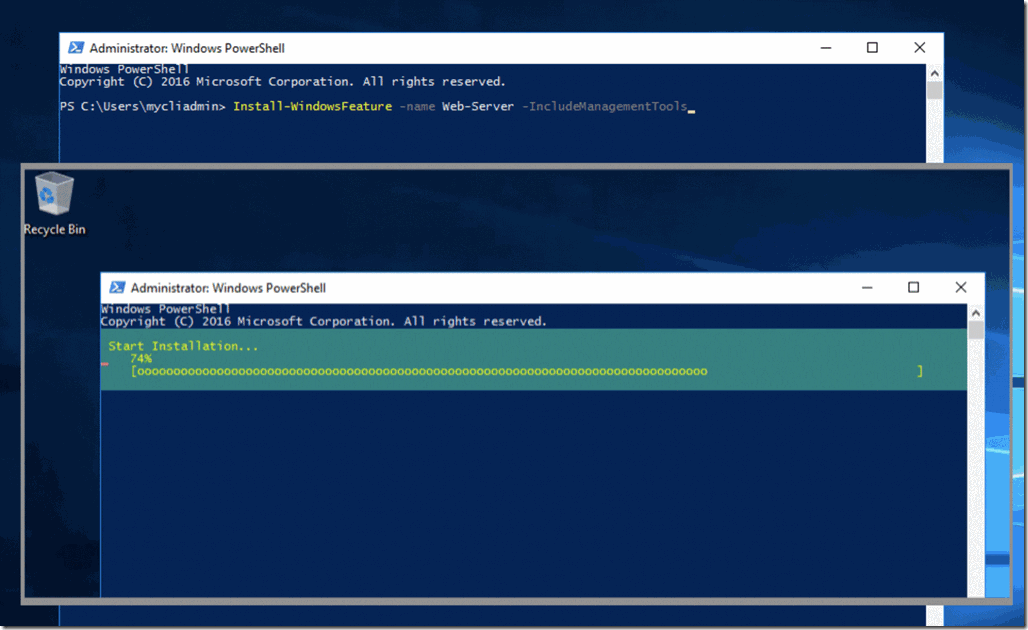
For these labs we are deploying Windows VM’s and in order to have them act like web servers you will need to install IIS. Do do this you will RDP to the VM’s and run a powershell script on each VM to install IIS and the necessary tools. Don’t worry, it’s all in the instructions/comments of the script. The powershell to run on the VM’s is. The biggest mistake is that students forget to remove the # when trying to run it.
Install-WindowsFeature -name Web-Server -IncludeManagementTools
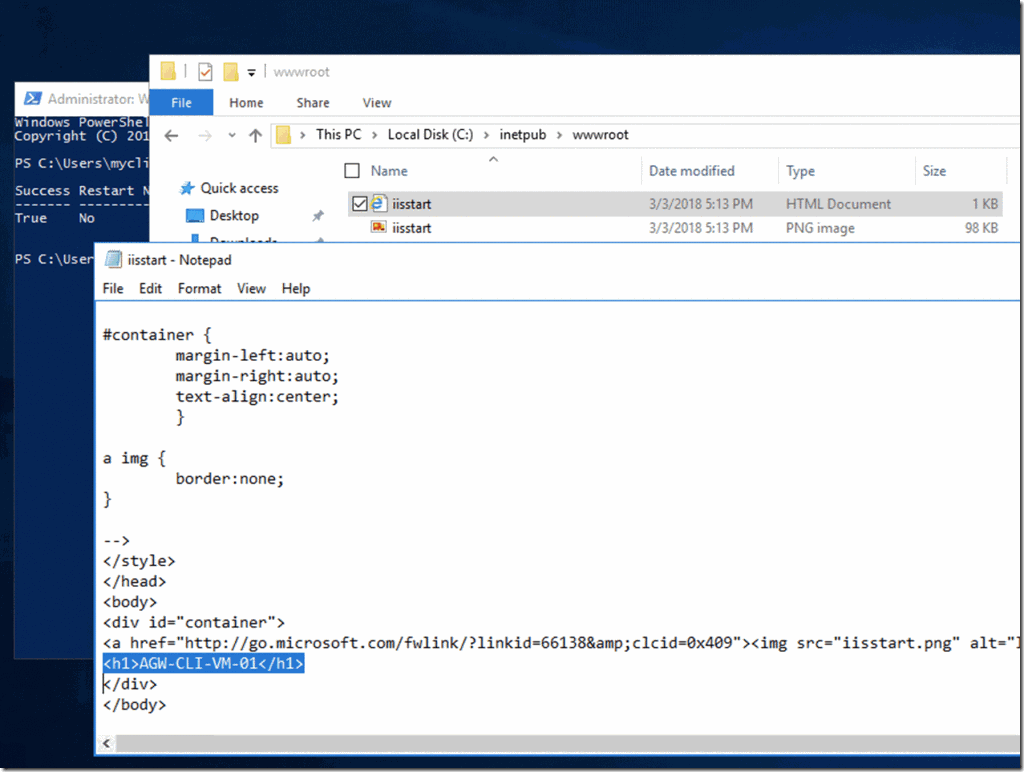
After running this, navigate to the following file on the VM and edit in Notepad.
C:\inetpub\wwwroot\iistart.html
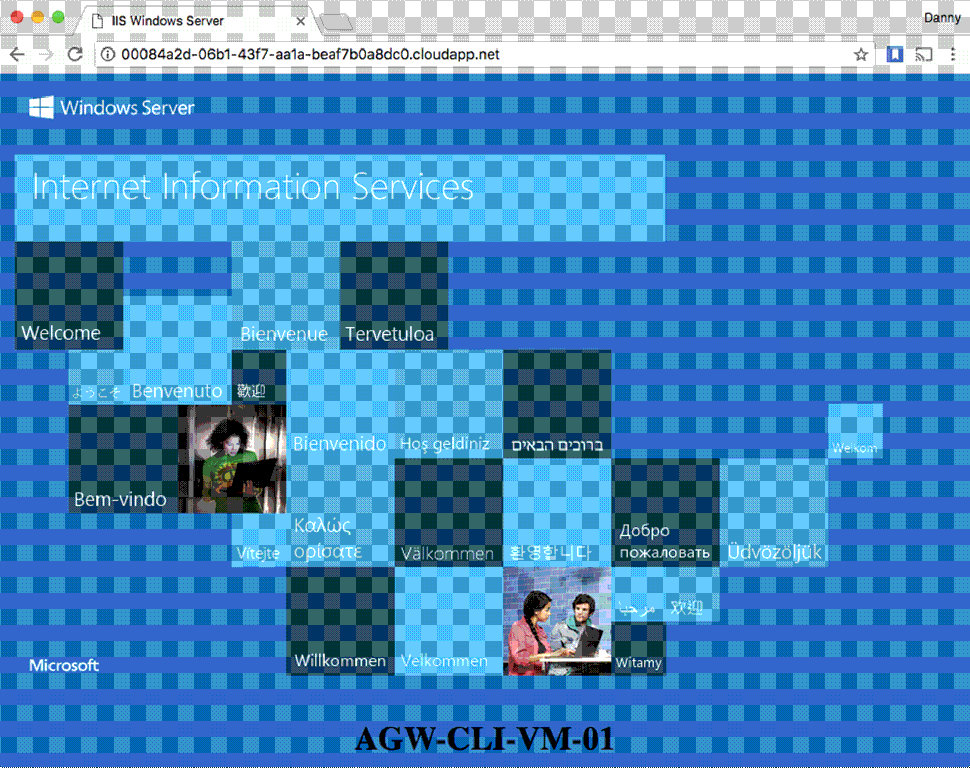
Note that iistart.html is the default website homepage. We want to edit the HTML in this file so you can easily identify which VM is being hit in the tests. AGW, ALB and Traffic Manager will all mask the URL so editing the HTML makes it easy to know which machine is which. The result will look like this.
Watch What Happens
Use portal.azure.com to see what you are building and how things show up as you are working through your labs. Also you can use resources.azure.com to see the same.
Don’t be afraid to break stuff
If you get stuck, do some research and figure it out. Don’t be afraid to break anything. You can always delete your resource group and start over. The best way to ramp up on this stuff, is to just start doing it and learn as you go.
Delete and Do It Again
When you are all done, I recommend deleting your resource groups and doing it all over again. Change the setup and try again.
Always Create a New Resource Group
When trying new stuff, ALWAYS create a new Resource Group so you can easily delete, and or move it later if you want to keep it.
Where to from here?
After getting comfortable with powershell and CLI, I like to work on the following with my class
- Try ARM template deployments with CLI and Powershell
- Try Creating a Web App using PaaS and CosmosDB
- Use Powershell and Update the App Gateway above to point to your Web App
- Best practices for ramping up on ARM
- Use the portal to select and configure your solution
- Then export the ARM template and play with it
- Or try finding something on github and play with it and deploy
- Try it first on the portal to create, poke around and maybe try a “fast start”
Have fun!
Oh, which Yoda quote? There are too many to choose from. How about “will he finish what he begins?” or “You must unlearn what you have learned.”
Premier Support for Developers provides strategic technology guidance, critical support coverage, and a range of essential services to help teams optimize development lifecycles and improve software quality. Contact your Application Development Manager (ADM) or email us to learn more about what we can do for you.


 Light
Light Dark
Dark
0 comments