How to setup live streaming server using Azure Media Service in less than 30 mins
In this post, Senior App Dev Manager Randy Park walks us through Azure Media Services to setup a live streaming PoC.
Background: A customer recently launched a global intranet portal with an audience distributed across the globe. They expected an increase of the audience on a daily basis and leadership team requested one more interesting feature– live video streaming. Microsoft Premier was asked to help with the live video streaming PoC to assess feasibility and performance. An additional requirement was that first, the live content should stream in real time and the be available after the event for later viewing. Second, the encoding of the media should be controlled internally so that they can manage the media and video codecs required. Third, secure content only accessible to the intended audience. Though everyone had somewhat of an idea that Azure Media Service (AMS) should easily make this possible, none were sure how fast this could be done. This blog will highlight step-by-step of setting up live streaming service less than 30 mins by incorporating a few steps outlined in below articles.
If you are new to Azure Media Service, here are a few resources that provide additional background:
- Azure Media Services – Live Streaming Overview
- Overview of Live Streaming using Azure Media Services
- Azure Media Services RTMP Support and Live Encoders
Creating AMS Live Stream channel
For the very first PoC, we didn’t have the development environment equipped with a camera thus we chose the FFmpeg encoder for the quick PoC of the live video encoder.
1. Create Azure Media Service, steps specified here.
2. Select the AMS account and in the Settings window, click Live streaming.
3. For channel creation, click Custom Create.
a. On Settings, select Encoding type to Live Encoding and supply the channel Name. Leave Automatically start the channel after creation checked. b. On Ingest, select Streaming protocol to RTMP. c. On Preview, leave IP restriction on the preview to None. d. On Encoding, only option for Encoding preset is Default 720p. e. Click Create. This process will take at least a few mins then will also start the channel. Starting channel will also take at least 5 mins to the Running status.
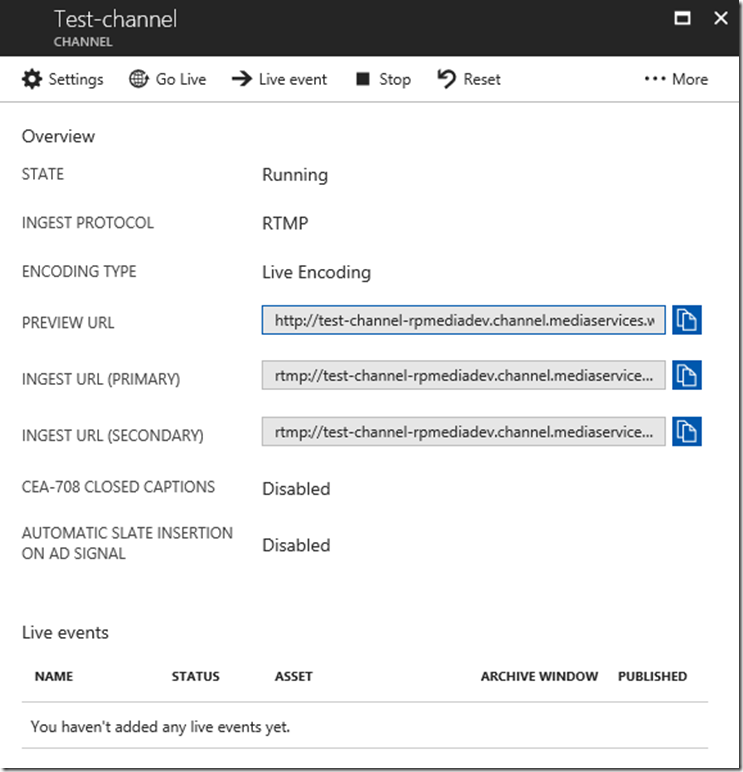
4. On Live streaming list, click on the channel just created. The screen containing below information will appear. Copy Ingest URL (Primary) and save it somewhere, we will use this in the step 8 and step 12.
5. Click Go Live. You should be able see the Live events section like below, since we didn’t create a specific live event, the default live event gets created. The status will change from Starting to Running in a few minutes.
 Figure 2. Creating default live event
6. Click on the default live event then click on Streaming locator to open multiple streaming URLs.
7. Azure Media Live steaming provides multiple streaming URLs, Smooth Streaming, MPEG-DASH, HLS(v3) and HLS(v4). Copy Smooth Streaming endpoint URL and save it somewhere, we will use this endpoint for the testing in the step 9.
Testing with local mp4 file streaming
8. Download FFmpeg encoder and install it. Have your sample mp4 file ready (let’s suppose the file name is my-sample-video.mp4) and execute the ffmpeg.exe like below. You would need to have the Ingest URL captured in step 4.
C:\tools\ffmpeg\bin\ffmpeg.exe -v verbose -i my-sample-video.mp4 -strict -2 -c:a aac -b:a 128k -ar 44100 -r 30 -g 60 -keyint_min 60 -b:v 400000 -c:v libx264 -preset medium -bufsize 400k -maxrate 400k -f flv {paste_your_Ingest_url_from_step_4_here}/mystream
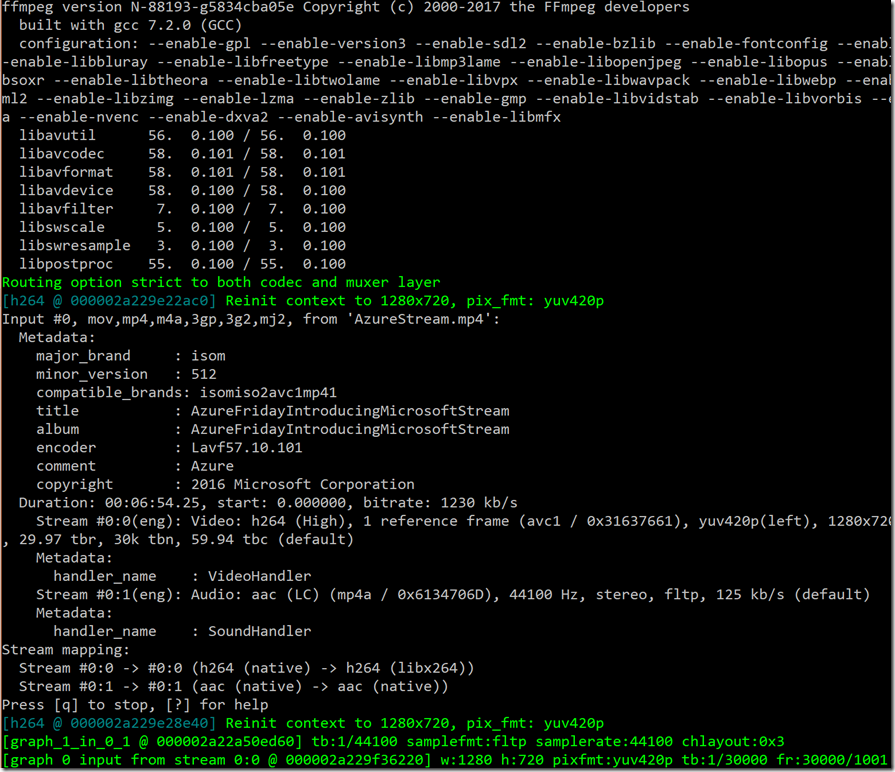
Below is sample screenshot of the lab machine, note of different filename and the media and codec information, … etc.
 Figure 4. Result output of FFmpeg streaming
9. Immediately open Internet Explorer (before step 8’s streaming gets ended), go to Azure Media Player demo site. Select the Samples as Live (Smooth Ingest) – 24×7, and paste the URL from step 7. The URL should contain *.ism/manifest at the end. Click Update Player. Voila! you will see the step 8’s streaming content playing in the Azure Media player!
Testing live event streaming
10. Locate the PC with a camera. We chose Wirecast as it is a well-known RTMP encoder. Wirecast enables capture, live production, and encoding of live streams for broadcast. You can get more information and download a trial version from the Telestream web site. Install the trial version and this step is for Wirecast 8.0.
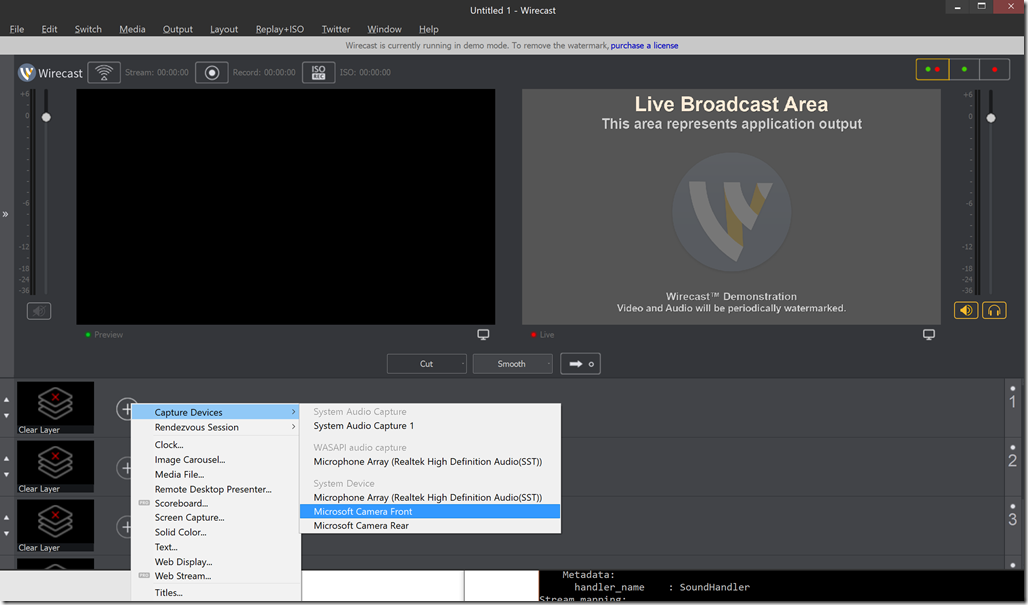
11. Open Wirecast and click on the very first layer’s (+) button, select the Capture Device.
 Figure 5. Capture device / Select the camera
12. Setup Output Settings and configure the Wirecast use the RTMP Server and enter the RTMP address copied from the AMS Live Stream’s Ingest URL from step 4.
13. Kick off the Live by pressing ![]() button.
button.
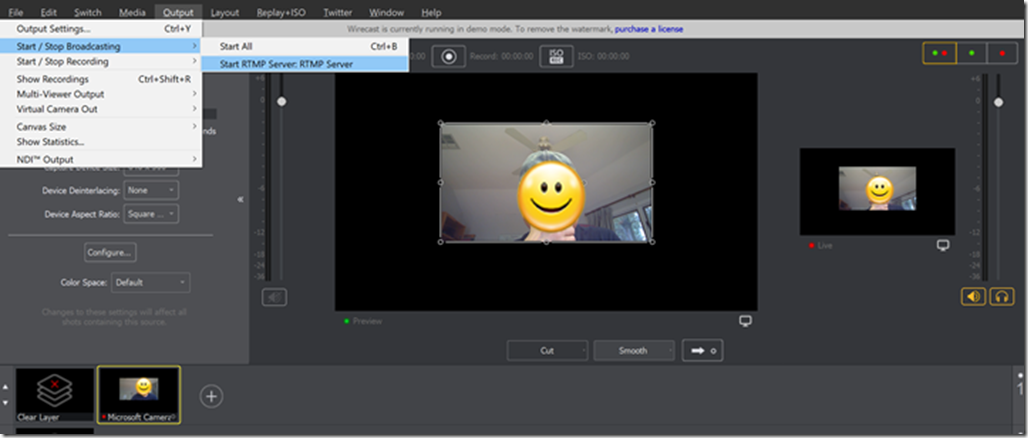
14. Start broadcast by Output > Start / Stop Broadcasting > Start RTMP Server: RTMP Server. You should be seeing something like below screen.
 Figure 6. Start the live broadcasting
15. For live event validation, go to Step 9 and Voila, you should be able to see the live broadcasting. If you’re using Wirecast demo version, you will see the Wirecast watermark as well as Wirecast announcement audio to the live streaming.
16. For the archival video access, from the AMS blade, select Assets, you should be able to see the Live Archive stored for you to share to those who may want to see the streaming at later time. This channel access has very similar experience mentioned in step 6 and step 7, and one can easily see this archive streaming endpoints are identical than that of live streaming.
And, that’s it. Cool live steaming setup in less than 30 minutes and can share this to the global audience.
Conclusion: Of course, this isn’t all there is to the PoC. The team continued to build additional components and customized services on this platform. Placing the corporate security context was another big concern to address and currently in the works, but the team was excited to see how easy it is to utilize Azure Media Services for their live streaming experience. Stay tuned on this Premier Blog for subsequent implementations on using the .NET code, wrapping with security context plus integration of multiple Azure Cognitive services to this platform.
Premier Support for Developers provides strategic technology guidance, critical support coverage, and a range of essential services to help teams optimize development lifecycles and improve software quality. Contact your Application Development Manager (ADM) or email us to learn more about what we can do for you.


 Light
Light Dark
Dark
0 comments