UPDATE 11/21/2014: For information on OS support, and other features, please refer to our release history.
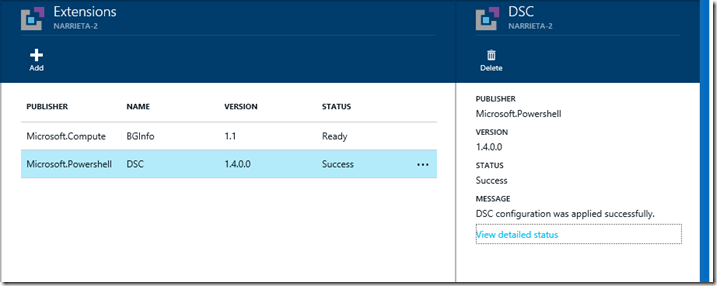
If you haven’t yet started using the Azure Preview Portal and are a fan of PowerShell DSC and the Azure PowerShell DSC Extension (announced in August here), now just might be the time to start. We are pleased to announce that you can now manage the extension using the Preview Portal! Before today, you could use the Preview Portal to get information about the PowerShell DSC Extension (version, status, and status text – example below), but you couldn’t add the extension to an existing virtual machine or update the configuration if the extension was already present.
Preparing for the UI
Just like with the original example using Fourth Coffee, we need to have a few things ready in order to use the new UI, specifically the ZIP file (containing the Configuration and custom DSC Resources). For our example today, we’ve trimmed down the DSC Configuration for Fourth Coffee and made a slight change (file saved as C:\examples\FourthCoffee.ps1):
|
001
002
003
004
005
006
007
008
009
010
011
012
013
014
015
016
017
018
019
020
021
022
023
024
025
026
027
028
029
030
031
032
033
034
035
036
037
038
039
040
041
042
043
044
045
046
047
048
049
050
|
Configuration WebSite { Import-DscResource -Module xWebAdministration # Install the IIS role WindowsFeature IIS { Ensure = ‘Present’ Name = ‘Web-Server’ } # Install the ASP .NET 4.5 role WindowsFeature AspNet45 { Ensure = ‘Present’ Name = ‘Web-Asp-Net45’ } # Stop the default website xWebsite DefaultSite { Ensure = ‘Present’ Name = ‘Default Web Site’ State = ‘Stopped’ PhysicalPath = ‘C:\inetpub\wwwroot’ DependsOn = ‘[WindowsFeature]IIS’ } # Copy the website content File WebContent { Ensure = ‘Present’ SourcePath = ‘C:\Program Files\WindowsPowerShell\Modules\BakeryWebsite’ DestinationPath = ‘C:\inetpub\FourthCoffee’ Recurse = $true Type = ‘Directory’ DependsOn = ‘[WindowsFeature]AspNet45’ } # Create a new website xWebsite BakeryWebSite { Ensure = ‘Present’ Name = ‘FourthCoffee’ State = ‘Started’ PhysicalPath = ‘C:\inetpub\FourthCoffee’ DependsOn = ‘[File]WebContent’ } } |
You’ll note that we are using the xWebAdministration DSC Resource again. If you haven’t downloaded it and the rest of most current Wave of the DSC Resource Kit, grab the ‘All Modules’ package here.
With our Configuration file ready, we’ll use PowerShell to prepare the ZIP file. Note that we are using the same cmdlet as before (Publish-AzureVMDscConfiguration), but with a different switch (run from C:\examples; I split the command in two lines; note the backtick character at the end of the first line):
PS> Publish-AzureVMDscConfiguration .\FourthCoffee.ps1 `
>>> -ConfigurationArchivePath .\WebsitePackage1.zip
This doesn’t actually upload anything to your Storage Account, it just prepares the ZIP file with the specified Configuration. Additionally, it parses the Configuration for custom DSC Resources and as long as they are present, copies them from your Modules folder into the newly created ZIP.
For our example, we are going to manually copy the required web content (available at the bottom of this post) into the ZIP file. You’ll notice in the new FourthCoffe.ps1 Configuration that we declared [File]WebContent as getting the files from ‘C:\Program Files\WindowsPowerShell\Modules\BakeryWebsite’, so we’ll put it at the same root of the ZIP as the ‘xWebAdministration’ folder is. Note that there are of course other ways with PowerShell DSC to get content, this is just for this example (using the Azure Files Preview is my new favorite way).
Using the UI
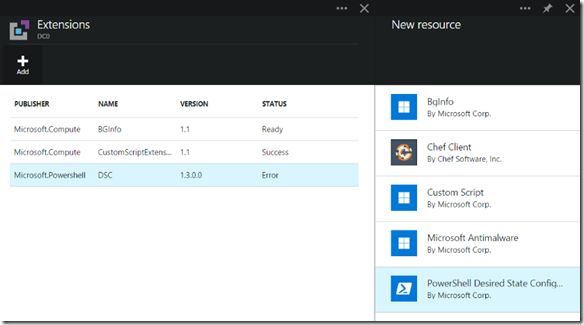
Now that our Configuration ZIP (with content) is ready, it’s time to look at the new UI and see what’s possible. In the Azure Preview Portal, browse to your Virtual Machine and in the Configuration space, click on the Extensions box (just like if you were going to go look at the status of the extensions). Now, in the Extensions pane, click the ‘Add’ button and note that our friend ‘PowerShell DSC’ is now present!
Just like all of the other existing Azure Extensions, when we click on the PowerShell DSC Extension, we get some descriptive information, a Publisher, and a link to resources:
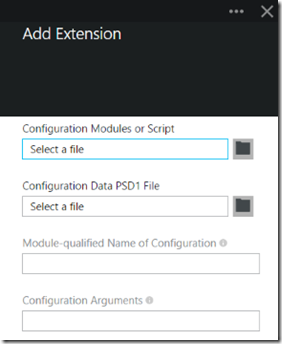
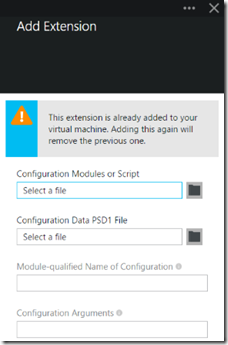
Clicking on the ‘Create’ button gives the window to input the needed settings. In the event you already have a DSC Extension installed on a VM, you’ll get the second window with the warning:
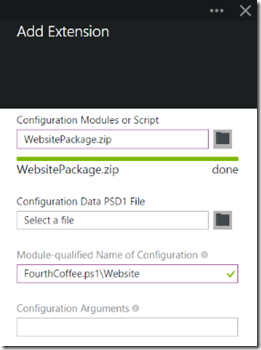
For ‘Configuration Modules or Script’, use the folder and browse to the WebsitePackage.zip that we previously created and added content to. Since we didn’t use any Configuration Data in this example, we’ll skip the ‘ConfigurationData PSD1 File’. That option allows for the specifying of a Configuration Data file as the name implies and is the equivalent of using –ConfigurationDataPath with the Set-AzureVMDscExtension cmdlet. For ‘Module-qualified Name of Configuration’, use the name of the DSC Configuration file included in the ZIP along with the name of the Configuration in this format (note that the ‘Configuration File’ may contain more than one DSC configuration; this format ensures the Azure Extension picks up the correct one):
<ConfigurationFile>.ps1\<ConfigurationName>
For our example, it will look like this when all put together:
We didn’t have any arguments to pass to the Configuration in this example either, but the ‘Configuration Arguments’ would be where you placed –ConfigurationArgument details. Instead of using a hashtable like in the PowerShell cmdlets, use the format ‘name1=value1,name2=value’.
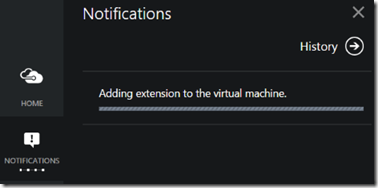
When you click the ‘Create’ button, the Add Extension pane will disappear and close. You can see that the work is being done and the status by using the Notifications icon on the left bar:
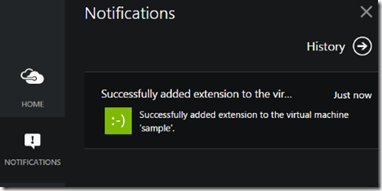
And when completed:
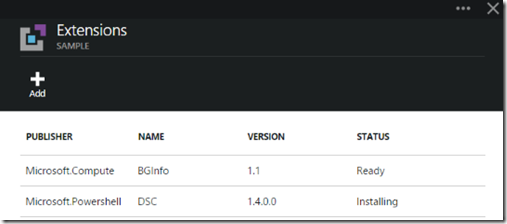
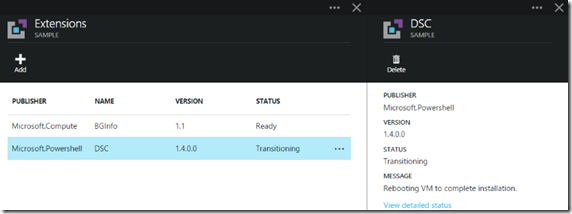
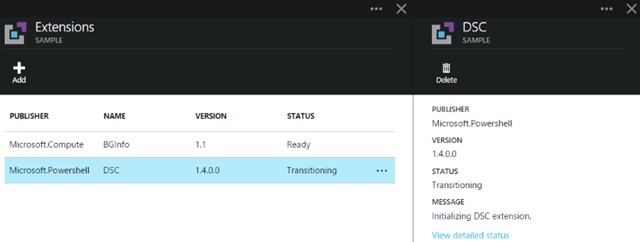
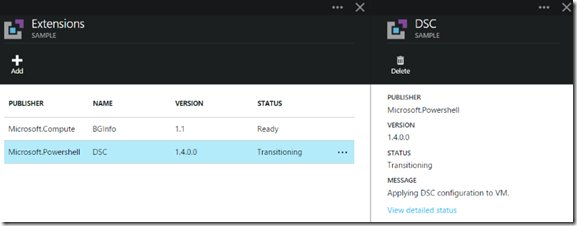
Browsing back into our Virtual Machines Configuration and Extensions, we can see that the PowerShell DSC Extension is being installed:
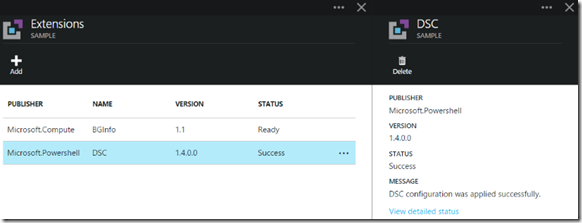
Here’s a rapid set of screen grabs as it progresses and finishes (took about 5 minutes on my VM):
Success! Now, the only thing we have to do is check to see if our content was put in place and the website is working. You can use the Azure Portal to configure an endpoint for this Virtual Machine, but I did it the quick way with PowerShell (note that I split the command in 3 lines):
PS> Get-AzureVM -Name sample -ServiceName sample-i5oc0t5i |
>>> Add-AzureEndpoint -Name HTTP -Protocol TCP -LocalPort 80 -PublicPort 80 |
>>> Update-AzureVM
>>>
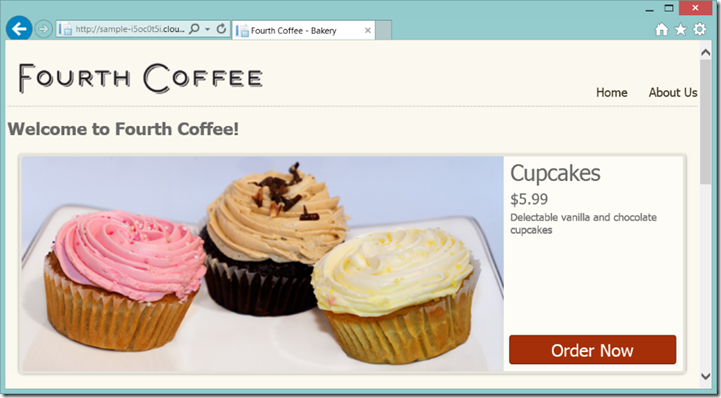
Then I took my favorite browser and went to see if it worked and see that everything on my new VM is exactly as I wanted it. All done!
Additional Resources
Here are just a few other PowerShell DSC related resources:
· Secure Credentials in the Azure Powershell DSC Extension
· Troubleshooting the DSC Extension for Azure
· DSC Resource Kit (All Modules)
Happy configuring!
David Coulter – Microsoft, Senior Consultant




0 comments