There are many available blog posts on internet explaining how to update XML files in PowerShell. But I felt need of one consolidated blog where complex XML files can be updated using PowerShell. These complex xml files can have long complex hierarchy of XML nodes and attributes.
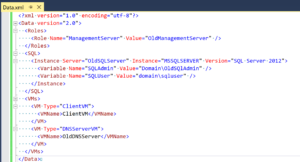
Let us try to update below XML sample at various levels of node hierarchy.
Sample XML Code
<?xml version="1.0" encoding="utf-8"?>
<Data version="2.0">
  <Roles>
    <Role Name="ManagementServer" Value="OldManagementServer" />
  </Roles>
  <SQL>
    <Instance Server="OldSQLServer" Instance="MSSQLSERVER" Version="SQL Server 2012">
      <Variable Name="SQLAdmin" Value="Domain\OldSQlAdmin" />
      <Variable Name="SQLUser" Value="domain\sqluser" />
    </Instance>
  </SQL>
  <VMs>
    <VM Type="ClientVM">
      <VMName>ClientVM</VMName>
    </VM>
    <VM Type="DNSServerVM">
      <VMName>OldDNSServer</VMName>
    </VM>
  </VMs>
</Data>
Steps to follow
Save the above xml block in C: drive with name “Data.xml”.
We will update the nodes in XML file to use a new management, SQL, and DNS servers. Below are the step-by-step PowerShell commands on how we can update the nodes and their attributes at various levels.
-
Define the variables that we need to modify.
$path = 'C:\Users\sorastog\Desktop\blog\Variable.xml' $ManagementServer = 'NewManagementServer' $SQLServer = 'NewSQLServer' $SQLAdmin = 'Domain\NewSQlAdmin' $DNSServerVMName = 'NewDNSServer' -
Read the content of XML file.
$xml = [xml](Get-Content -Path $path) -
Update
ManagementServer: Change the attribute Value of nodes at level 3 based on the Name attribute on the same level.$node = $xml.Data.Roles.Role | where {$_.Name -eq 'ManagementServer'} $node.Value = $ManagementServer -
Update
SQLServer: Change the attribute Value of a node at level 3.$node = $xml.Data.SQL.Instance $node.Server = $SQLServer -
Update
SQLAdmin: Change the attribute Value of nodes at level 4 based on the Name attribute on the same level.$node = $xml.Data.SQL.Instance.Variable | where {$_.Name -eq 'SQLAdmin'} $node.Value = $SQLAdmin -
Update
DNSServerVM: Change the attribute Value of nodes at level 4 based on the VMType attribute at the level above.$node = $xml.Data.VMs.VM | where {$_.Type -eq 'DNSServerVM'} $node.VMName = $DNSServerVMName -
Save changes to the XML file.
$xml.Save($path)
Output
The final PowerShell script will look like below:
$path = 'C:\Data.xml'
$ManagementServer = 'NewManagementServer'
$SQLServer = 'NewSQLServer'
$SQLAdmin = 'Domain\NewSQlAdmin'
$DNSServerVMName = 'NewDNSServer'
$xml = [xml](Get-Content $path)
$node = $xml.Data.Roles.Role |
where {$_.Name -eq 'ManagementServer'}
$node.Value = $ManagementServer
$node        = $xml.Data.SQL.Instance
$node.Server = $SQLServer
$node = $xml.Data.SQL.Instance.Variable |
where {$_.Name -eq 'SQLAdmin'}
$node.Value = $SQLAdmin
$node = $xml.Data.VMs.VM |
where {$_.Type -eq 'DNSServerVM'}
$node.VMName = $DNSServerVMName
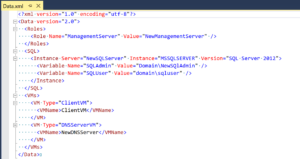
$xml.Save($path)The final xml will look like below.
Hope this post will help you to update complex XML files using PowerShell. If there are suggestions on how to improve this blog post, then please comment below. I will be happy to include them.
Till Then, Happy Scripting 🙂
Follow more PowerShell posts here.


One of the things I had to fully understand before I could be confident was this:
The $node variable is not a standalone or separate variable with a copy of XML in it. It connects directly to the original XML object ($xml) and directly modifies it if $node is changed. It seems to be more accurate to call it a view into the original XML object.
Yes that’s right. Hence, we can save the $xml variable at the end in one go once all changes are made.
The code in this blog doesn’t even work.
Where-Objectdoesn’t have a-Processparameter.Thanks for the check. It has been updated now 🙂