

Ensuring secure and seamless access to applications is crucial, especially when utilizing AI-driven agents. Copilot Studio is a cutting-edge platform that enables you to create and customize AI agents. However, integrating customer access to your Copilot Studio agents via Microsoft Entra External ID isn’t straightforward out-of-the-box.
This tutorial video walks you through the process of integrating Copilot Studio agents with Microsoft Entra External ID using the Generic OAUTH 2.0 service provider option, ensuring your customers can securely log in to your agents. We have also added the step by steps here.
How to enable External ID on your Copilot Studio agents
Prerequisites
- A Copilot Studio account
- A published agent on Copilot Studio. If you don’t have one, create an agent on Copilot Studio.
- An external tenant on Microsoft Entra Admin Center.
- If you don’t have one, create an external tenant with an Azure subscription.
- Ensure you have the Cloud Application Administrator role on Microsoft Entra.
Get the redirect URL for the Copilot Studio agent
Now that you have your agent running, let’s set up sign in for your customers by first getting the redirect URL. A redirect URI is the location where the Microsoft identity platform redirects a user’s client and sends security tokens after authentication.
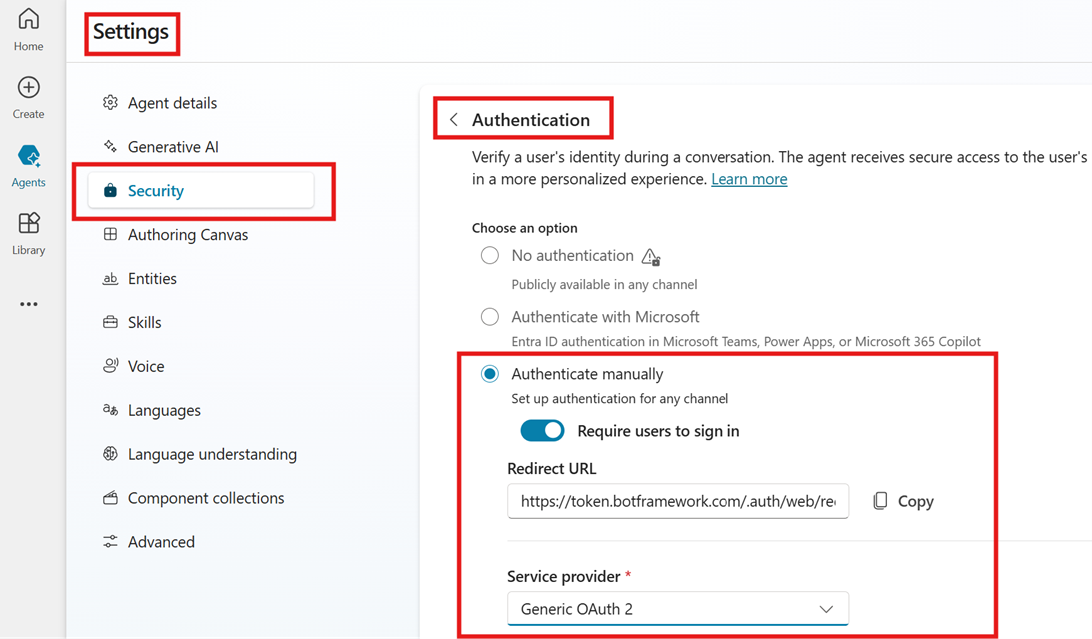
- Navigate to your agent then Settings > Security > Authentication.
- Since there is no out of the box integration, we will manually set up authentication by selecting Authenticate manually.
- Make sure the Require users to sign in option is selected.
-
Copy the Redirect URL. This will be used to configure the Microsoft Entra External ID integration.

Create an app registration on Microsoft Entra
Registering your application establishes a trust relationship between your app and the Microsoft identity platform. The trust is unidirectional: your app trusts the Microsoft identity platform, and not the other way around. Once created, the application object cannot be moved between different tenants.
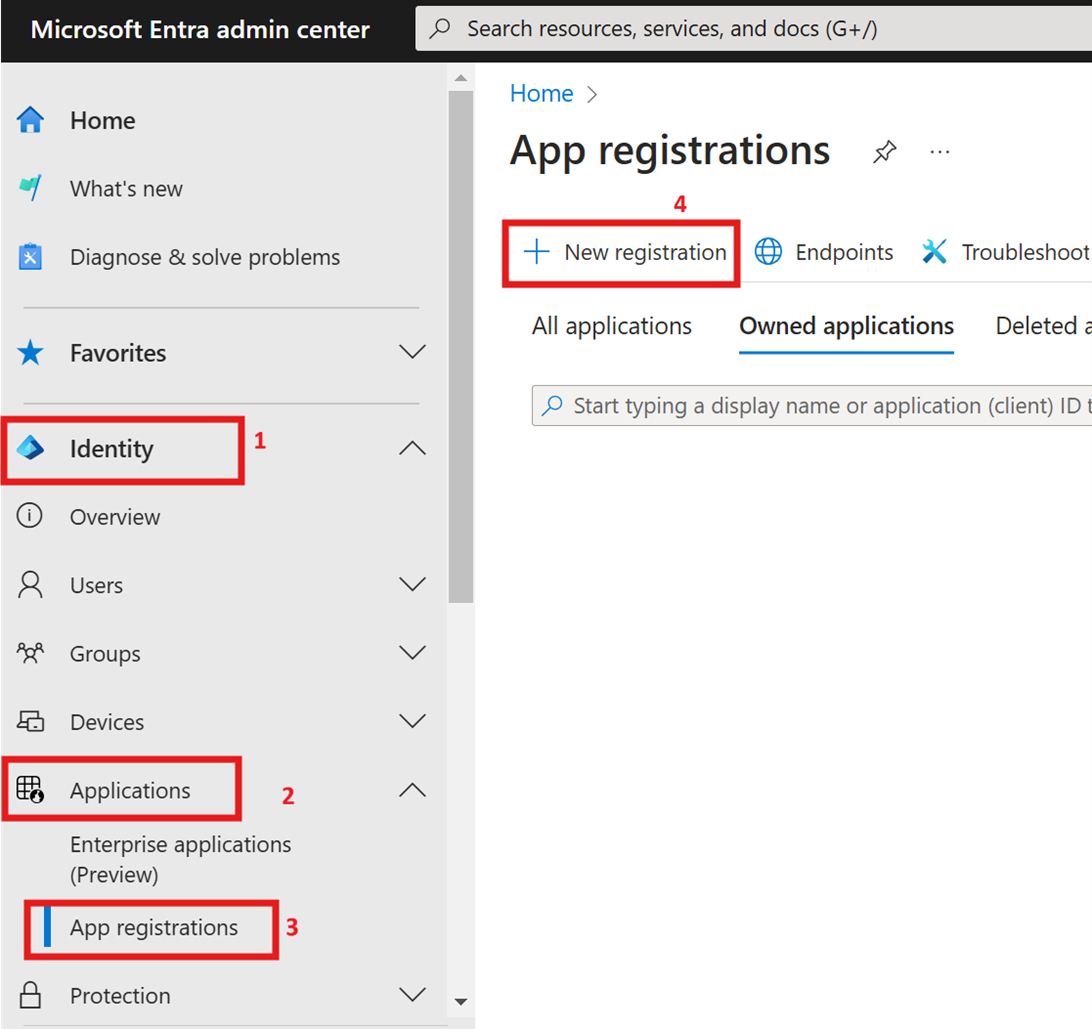
- Navigate to the Microsoft Entra Admin Center, Under Identity, click Applications and then select App registrations.(Make sure you are on the External tenant)
-
To create a new app registration, select the New registration option. Select an existing tenant to use from the drop-down, or select Create new to create a new external tenant.

-
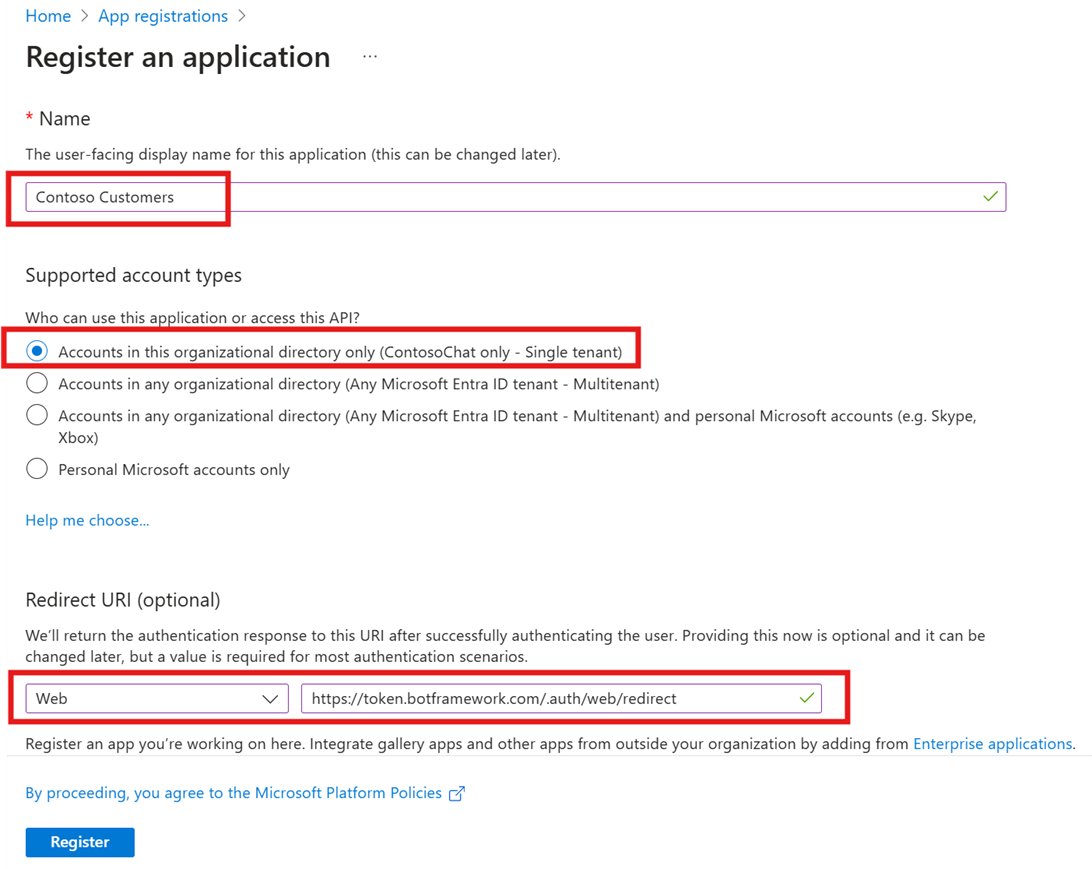
Enter a display Name for your application. Users of your application might see the display name when they use the app, for example during sign-in.
-
Specify who can use the application, sometimes called its sign-in audience. In our case, since we want our customers to sign in, under Account type, select ‘Accounts in this organizational directory only’.
-
In the Redirect URL section, select ‘Web Platform’ then paste the Redirect URL copied from Step 1. Then click Register.

-
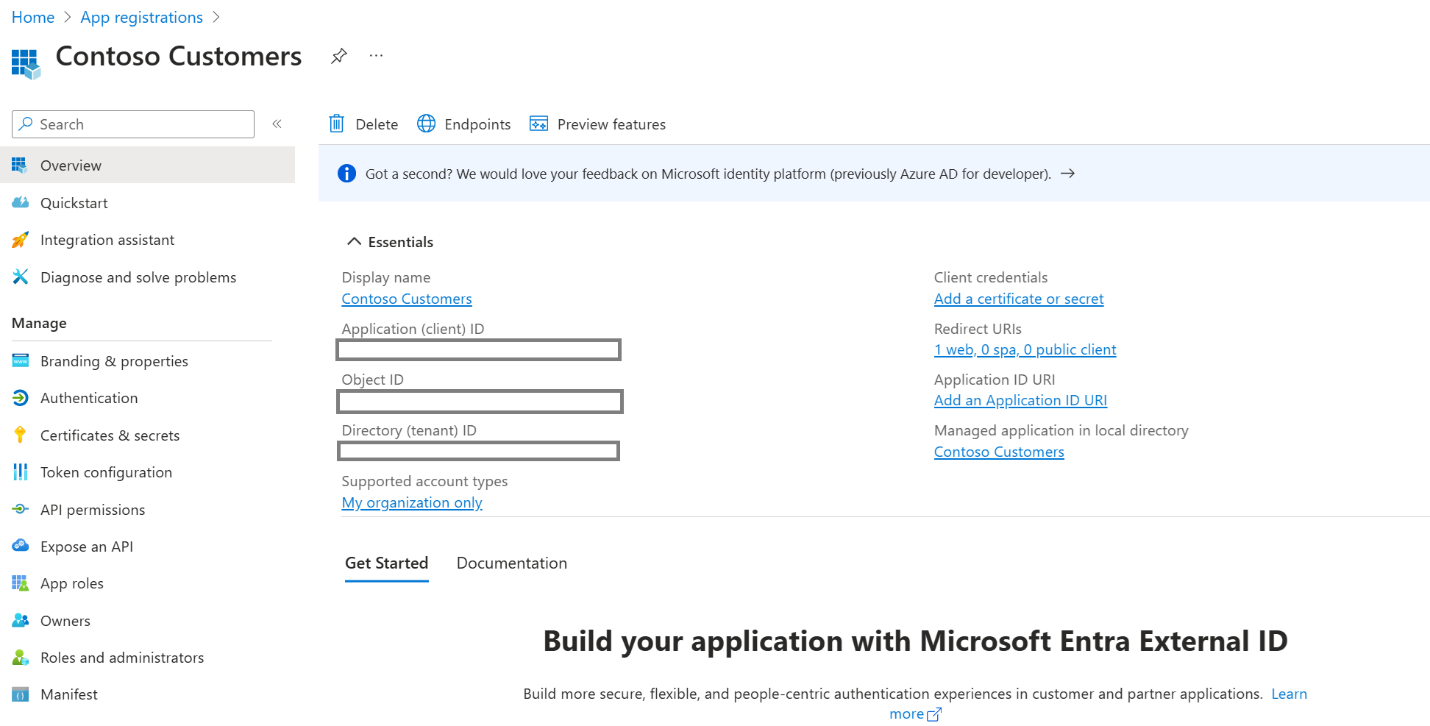
Once the app registration is done, you will be directed to the app registered and you’ll see the below details.

-
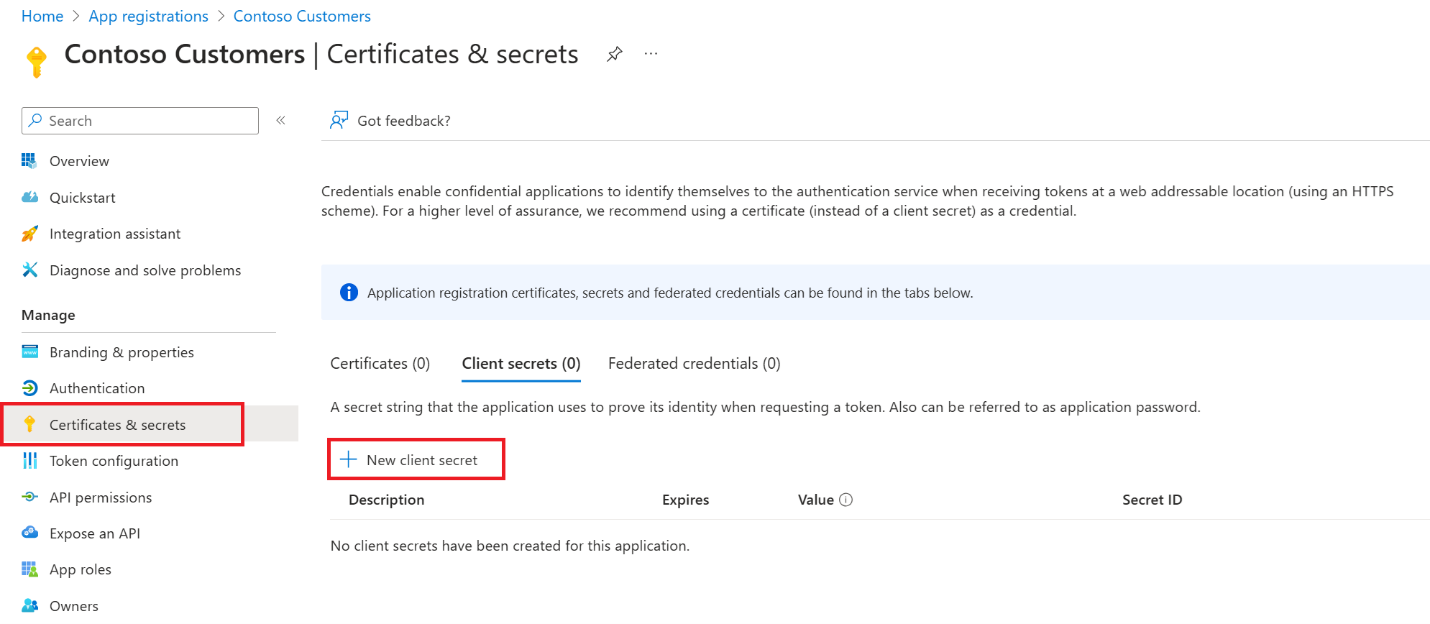
Next, let’s add client credentials by clicking ‘Add a certificate or secret’ under Client credentials or selecting Certificates & secrets under Manage. Then click New client secret. Credentials allow your application to authenticate as itself, requiring no interaction from a user at runtime. A client secret, sometimes called an application password, is a string value your app can use in place of a certificate to identify itself.

-
Add a description for your client secret and select an expiration period for the secret. Then select Add. The client secret is now added. Copy secret’s value for use in the Copilot Studio agent.
-
Copy and save the Application (client) ID, Directory (tenant) ID and tenant name for the next step.
Configure authentication settings on Copilot Studio
Now that we have registered the app on Microsoft Entra, let’s fill the details copied from Microsoft Entra on our Copilot Studio agent.
- Navigate back to your agent then Settings > Security > Authentication.
- Select Authenticate Manually.
-
Fill the rest of the details with the details below. Make sure to replace the TENANTNAME and CLIENTID with the actual names and values from Step 2.
- Service provider: Generic OAuth 2
- Client ID: Paste the client ID copied from step 2
- Client secret: Paste the client secret copied from step 2
- Scope list delimiter: use a comma (,)
-
Authorization URL template: https://TENANTNAME.ciamlogin.com/TENANTNAME.onmicrosoft.com/oauth2/v2.0/authorize
-
Authorization URL query string template: ?client_id=CLIENTID&redirect_uri= https%3A%2F%2Ftoken.botframework.com%2F.auth%2Fweb%2Fredirect&scope=openid%20profile&response_type=code&state={state}
-
Token URL template: https://TENANTNAME.ciamlogin.com/TENANTNAME.onmicrosoft.com/oauth2/v2.0/token
-
Token URL query string template: use a question mark (?)
-
Token body template: client_id=CLIENTID&redirect_uri= https%3A%2F%2Ftoken.botframework.com%2F.auth%2Fweb%2Fredirect&grant_type=authorization_code&code={code}
-
Refresh URL template: https://TENANTNAME.ciamlogin.com//TENANTNAME.onmicrosoft.com/oauth2/v2.0/token
-
Refresh URL query string template: use a question mark (?)
-
Refresh body template: client_id=CLIENTID&redirect_uri= https%3A%2F%2Ftoken.botframework.com%2F.auth%2Fweb%2Fredirect&grant_type=refresh_token&refresh_token={refresh_token}
Test the integration
-
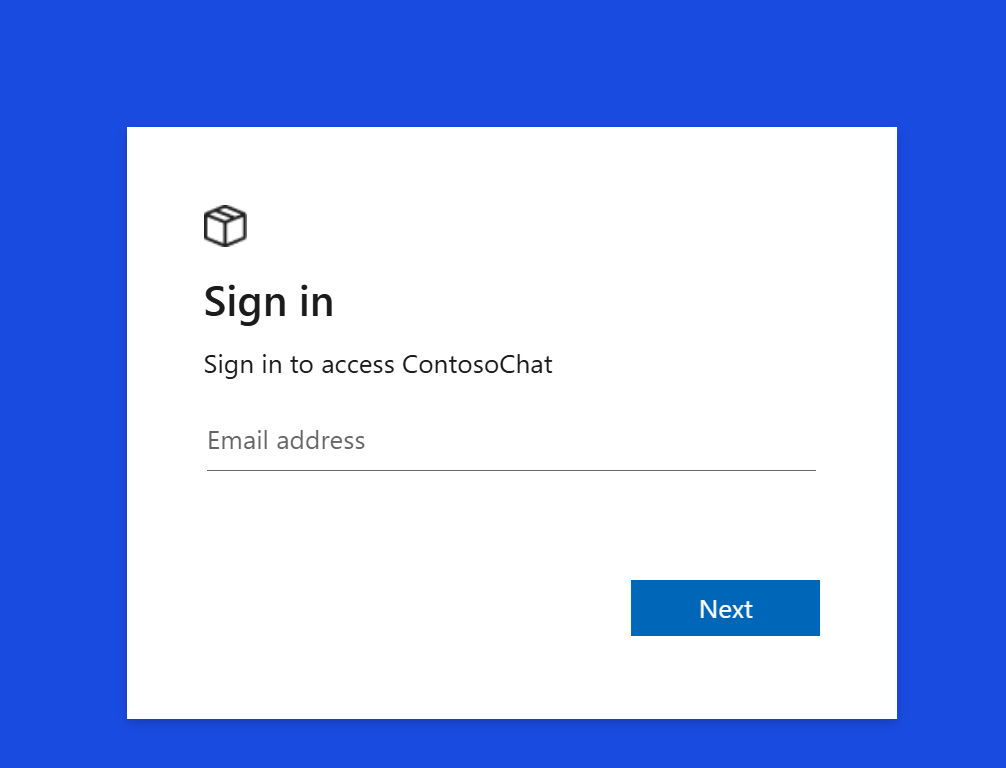
Publish the agent and navigate to the demo website and click Login.

-
This will take you to the External ID login page as shown below.

-
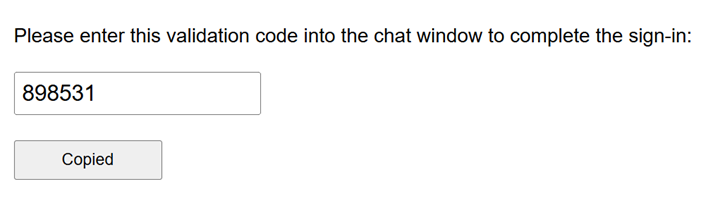
After logging in, you will be redirected to a validation code page. Copy the code generated.

-
Return to Copilot Studio agent authentication process and enter the code validator provided in previous step.


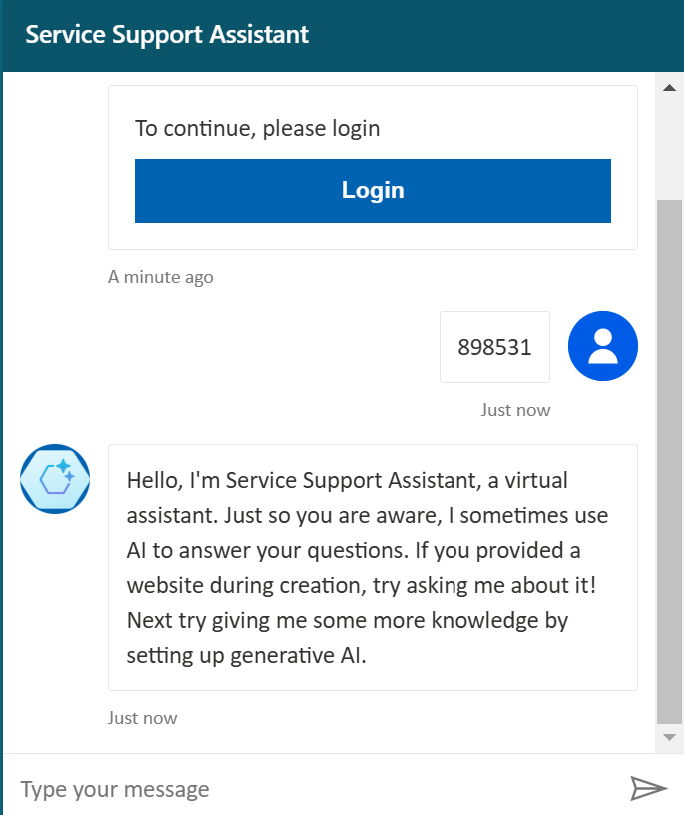
Now your customers can access your copilot studio agents.
Explore other ways of integrating Microsoft Entra External ID and share feedback with us and checkout our YouTube playlist on ‘Identity for developers’ to learn more on other integrations.
0 comments