OData Connected Service 0.4.0 has been released and is now available on the Visual Studio Marketplace.
The new version adds the following features:
- Support for Visual Studio 2019 (in addition to Visual Studio 2017)
- Option to generate types as internal so that they are not accessible outside the assembly
- Bug fixes
In this article, I would like to take you through some key new features and get you up to speed with using the OData Connected Service.
OData Connected Service in Visual Studio 2019
We start by illustrating how you can use the extension in Visual Studio 2019. Open Visual Studio 2019 and create a new C# .Net Core Console project. Let’s call the project “SampleClient”, and the solution “OCSTest”. Once the project is open, click the Extensions menu, then Manage Extensions. In the Manage Extensions window, search for “OData Connected Service”. Select the extension and install it. You may need to close Visual Studio to allow the extension to install, then restart it after installation completes.

Alternatively, you can just download the VSIX from the marketplace and double click to install.
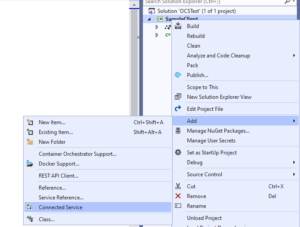
Once the extension has been installed. Right-click your project in the solution explorer, then in the context menu select Add > Connected Service. This will open the Connected Services window where you can select which services to add to your project. Select OData Connected Service.
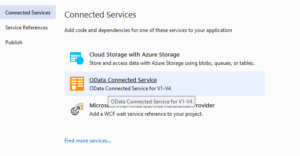
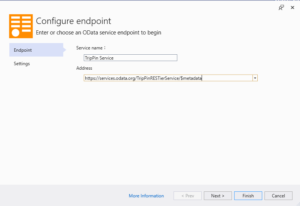
Next, a configuration wizard will open where you can configure how code will be generated for your service.
On the first page, we’ll add the metadata URL of the service we want to access. For this example, we will use the sample Trip Pin Service. Set the service name to “TripPin Service” and the Address to https://services.odata.org/TripPinRESTierService/$metadata
Then click Finish.
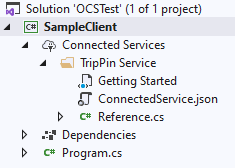
After the process completes, the OData docs website will be launched. Go back to Visual Studio and you will see a connected service added to your project and a Reference.cs file that contains all the code generated from the OData code generator.
Let’s proceed to use the generate classes to interact with the service. Replace the code in Program.cs with the following:
using System;
using System.Threading.Tasks;
using Microsoft.OData.Service.Sample.TrippinInMemory.Models;

class Program
{
    static string serviceUri = "https://services.odata.org/TripPinRESTierService/";
    static Container context = new Container(new Uri(serviceUri));
    static void Main()
    {
        // from C# 7.1 You can use async Main instead
        ShowPeople().Wait();
    }

    static async Task ShowPeople()
    {
        var people = await context.People.ExecuteAsync();
        foreach (var person in people)
        {
            Console.WriteLine(person.FirstName);
        }
    }
}
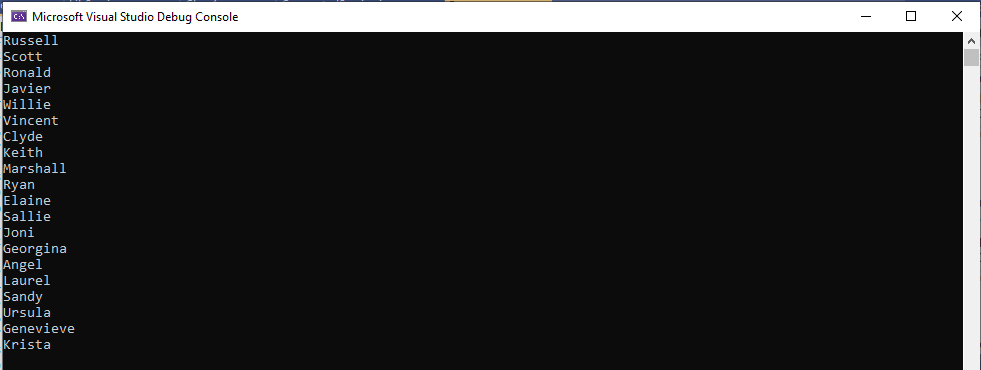
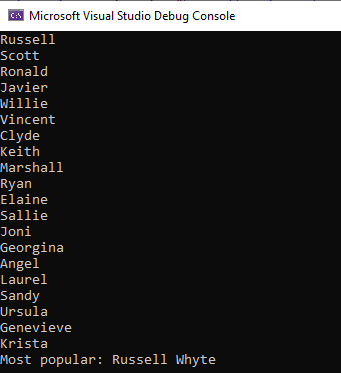
The above program fetches people data from the Trip Pin service and then displays their names. If you run the program, it should display a list of names.
To learn more about using the generated client to interact with an OData service, visit this guide.
Generating types as internal
This feature allows you to mark generated types as internal instead of public, so that they are not accessible outside your assembly. This helps avoid conflicts if you’re referencing different projects that use the same classes generated by OData Connected Service from the same service endpoint.
To illustrate this, add a library project to our OCSTest solution. Right-click the solution and click Add > New Project. Create a C# .Net Standard Class Library project and call it SampleLib. This library will expose a simple method that makes use of the same Trip Pin service we used earlier.
Follow the same steps as in the previous section to add an OData Connected Service to this project using the same Trip Pin service metadata endpoint.
Next, add a public class to our library project that will contain the method we want to expose to consumers of the library. Name the file LibService.cs and add the following code to the file:
using System;
using System.Threading.Tasks;
using Microsoft.OData.Service.Sample.TrippinInMemory.Models;

namespace SampleLib
{
    public static class LibService
    {
        private static string serviceUri = "https://services.odata.org/TripPinRESTierService/";
        private static Container context = new Container(new Uri(serviceUri));

        public static async Task<string> GetMostPopularPerson()
        {
            var person = await context.GetPersonWithMostFriends().GetValueAsync();
            return $"{person.FirstName} {person.LastName}";
        }
    }
}
The GetMostPopularPerson() method simply fetches the person with the most friends from the service and returns that person’s full name.
Let’s add a reference to SampleLib in our initial console applicaton so that we can use it. Right click the SampleClient project > Add > Reference > Projects > Solution > SampleLib then press OK.
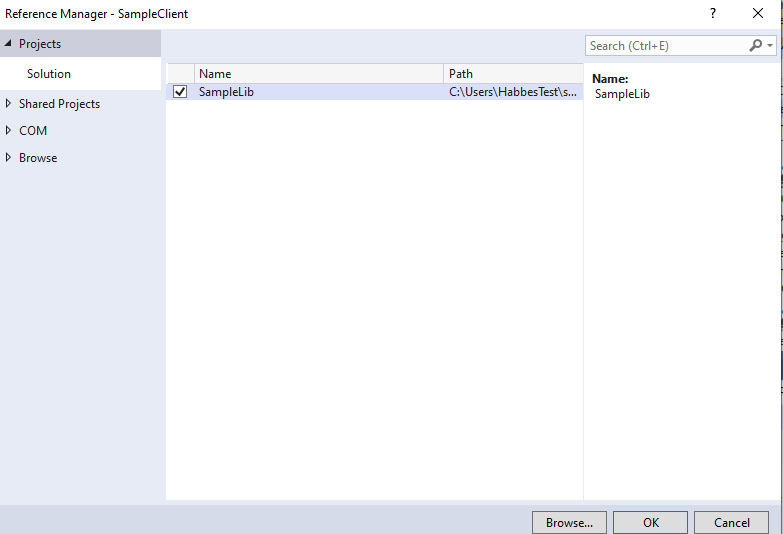
At this point, we can call the method from our SampleLib library in the Main method of the SampleClient console app, by adding the following line at the end of the Main method. The Main method should now look like:
static void Main()
{
    // from C# 7.1 You can use async Main instead
    ShowPeople().Wait();
    Console.WriteLine("Most popular: {0}", SampleLib.LibService.GetMostPopularPerson().Result);
}
If you try to run this application, you will get compiler warnings on the Container class, because both the console app and library define classes with the same names in the same namespace. The console app has access to all the proxy classes of the library because they are public. But this is not what we want, we only want to expose the LibService.GetMostPopularPerson() method from the service, the proxy classes should not be accessible outside the library.
To correct this issue, go to the SampleLib project in the solution explorer, under the Connected Services node, you will see a folder for the connected service you added, which is TripPin Service in our example. Right click the folder and select Update Connected Service.
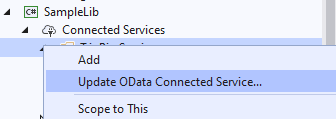
This will open up the OData Connected Wizard and allow you to update the configuration. On the Endpoint page click Next to navigate to the Settings page, then click the AdvancedSettings link to reveal more options. Check the Mark generated types as internal checkbox and click Finish.
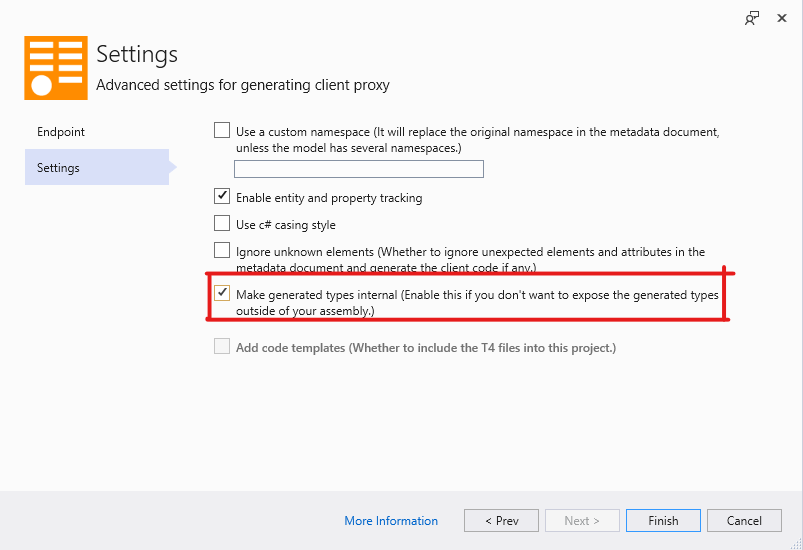
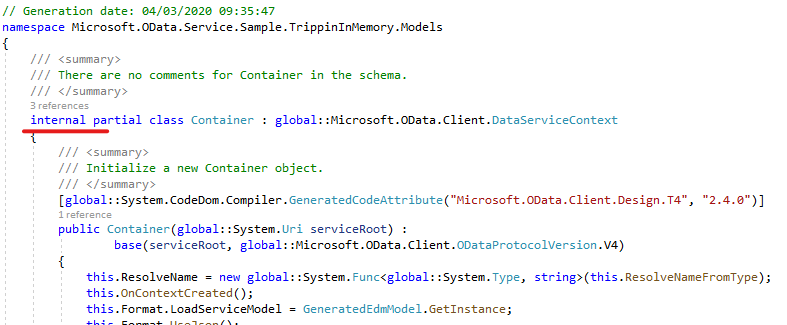
When asked whether to replace the existing Reference.cs file, click Yes. After the code generation is complete, you can open the generated Reference.cs file and confirm that all top-level classes and enums have an internal access modifier.
Finally, build and run the SampleClient project, you will not see the warnings again. The program will display the name of the person with most friends at the end.
Minor updates and bug fixes
The ByKey method now accepts an IDictionary as a parameter as opposed to the concrete Dictionary class that it allowed before. This allows you to pass your own implementation of IDictionary instead of the standard Dictionary when you need to.
In addition, references to EdmxReader have been replaced with Microsoft.
There are more features and fixes coming to OData Connected Service soon, so stay tuned for upcoming releases.

Thanks for the great work!
Is this supposed to make the official end of Simple.OData.Client? I mean is this the official way to implement OData clients from now on?
Thank you Shimmy.
We are committed to supporting the OData Connected service and official OData client libraries. And while we do recommend their use, I do not see a problem with using Simple.OData.Client if it works for you and if it is well maintained by its authors.