
We talked in previous articles about the amount of enterprise technologies that offer OData out-of-the-box for it’s RESTFul API communications. some of these technologies are widely spread such as SharePoint, SAP, SQL Server and so many other technologies that leverage a multi-billion user powerful technology like OData.
In this article, I’m going to show you how you can leverage OData with Microsoft Graph, so you can power your applications with extensive capabilities to search, sort, order and filter all users information, including calendars, security groups, mail and so much more within Microsoft Graph with the smallest effort possible.
But before we start talking about OData integration with Microsoft Graph, let me explain to you first what Microsoft Graph is, and why it’s so beneficial for small, medium size and larger enterprises to have OData as an option if they have their employee data stored and exposed through Graph.
Microsoft Graph is the gateway to data and intelligence in Microsoft 365. It provides a unified programmability model that you can use to access the tremendous amount of data in Office 365, Windows 10, and Enterprise Mobility + Security. Use the wealth of data in Microsoft Graph to build apps for organizations and consumers that interact with millions of users.
In other words, Microsoft Graph exposes an API endpoint to interact programmatically with all Office 365 products to extend the capabilities and features of Office 365 beyond the UI to include your own customized Web, mobile and desktop applications while still being connected to enterprise data.
To bring Microsoft Graph to a real-world scenario, imagine that you need to build a web application that enables employees in your organization to search and contact other employees who are proficient in a particular technology, for instance: in a 20,000 employees company, you want to enable software engineers to find colleagues who can help them with SQL Server – Graph integration with OData today enables you to search through all employees information and find out about the employees who defined SQL Server as a skill set of theirs.
Trying Things Out
Microsoft Graph exposes a public demo API explorer where you can make sample API calls and explore the capabilities (and the possibilities) of what Graph could offer with a simple API call.
To get started, navigate to Microsoft Graph Explorer URL, and hit the run query button against the following URL:
https://graph.microsoft.com/v1.0/me/
Graph Explorer will return the following entity as a result:
{
    "@odata.context": "https://graph.microsoft.com/v1.0/$metadata#users/$entity",
    "businessPhones": [
        "+1 412 555 0109"
    ],
    "displayName": "Megan Bowen",
    "givenName": "Megan",
    "jobTitle": "Auditor",
    "mail": "MeganB@M365x214355.onmicrosoft.com",
    "mobilePhone": null,
    "officeLocation": "12/1110",
    "preferredLanguage": "en-US",
    "surname": "Bowen",
    "userPrincipalName": "MeganB@M365x214355.onmicrosoft.com",
    "id": "48d31887-5fad-4d73-a9f5-3c356e68a038"
}
This outcome is just a demo result, we can now modify out API call to include some OData queries as follows:
https://graph.microsoft.com/v1.0/me?$select=displayName
Now, hit the Run Query button, the outcome would be as follows:
{
    "@odata.context": "https://graph.microsoft.com/v1.0/$metadata#users(displayName)/$entity",
    "displayName": "Megan Bowen"
}
Searching Across The Organization
Let’s take Graph a bit further, with respect to the aforementioned example, by finding all the employees in your organization who have experience with Product Marketing Management – let’s see if Graph powered by OData could help us find individuals who have that skill set.
Let’s hit the following endpoint:
https://graph.microsoft.com/v1.0/users?$filter=jobTitle eq 'Product Marketing Manager'
The result of the query should be as follows:
{
    "@odata.context": "https://graph.microsoft.com/v1.0/$metadata#users",
    "value": [
        {
            "businessPhones": [
                "+1 425 555 0109"
            ],
            "displayName": "Adele Vance",
            "givenName": "Adele",
            "jobTitle": "Product Marketing Manager",
            "mail": "AdeleV@M365x214355.onmicrosoft.com",
            "mobilePhone": null,
            "officeLocation": "18/2111",
            "preferredLanguage": "en-US",
            "surname": "Vance",
            "userPrincipalName": "AdeleV@M365x214355.onmicrosoft.com",
            "id": "87d349ed-44d7-43e1-9a83-5f2406dee5bd"
        }
    ]
}
Setting Things Up
Now that you can see the capabilities and possibilities of Graph, you must be wondering how can I integrate that in my web, mobile or desktop application?
In this section, I am going to walk you step by step through the process of enabling Microsoft Graph in your current organization and being able to connect to your Graph service in the simplest way possible.
Let’s start with creating a Graph app in our Azure portal by searching for App Registrations as follows:
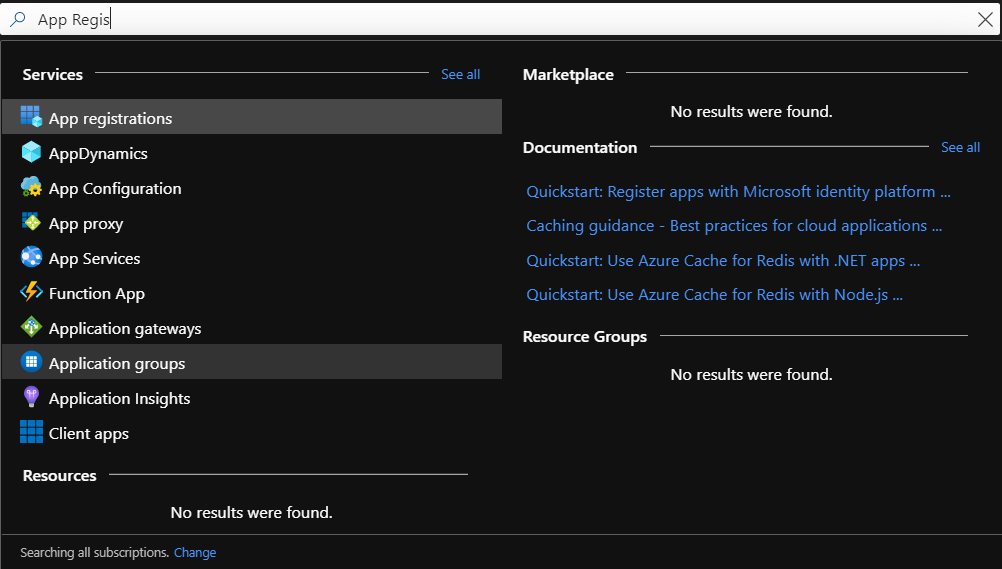
In the App Registrations view, let’s create a new App, click on the New Registration button at the top left corner as follows:

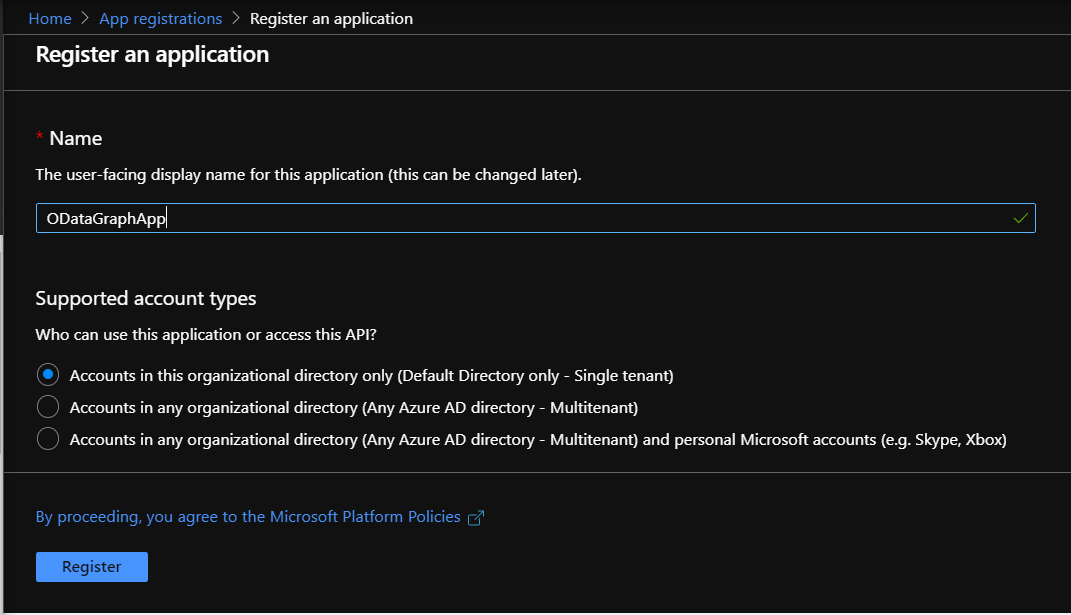
Once you clicked New Registration, now we need to fill a form and select the options for creating a new app, for the purpose of this demo, let’s just call our app ODataGraphApp as follows, then click Register:
Once you click register, you should see the entire dashboard and overview of your new app as follows:
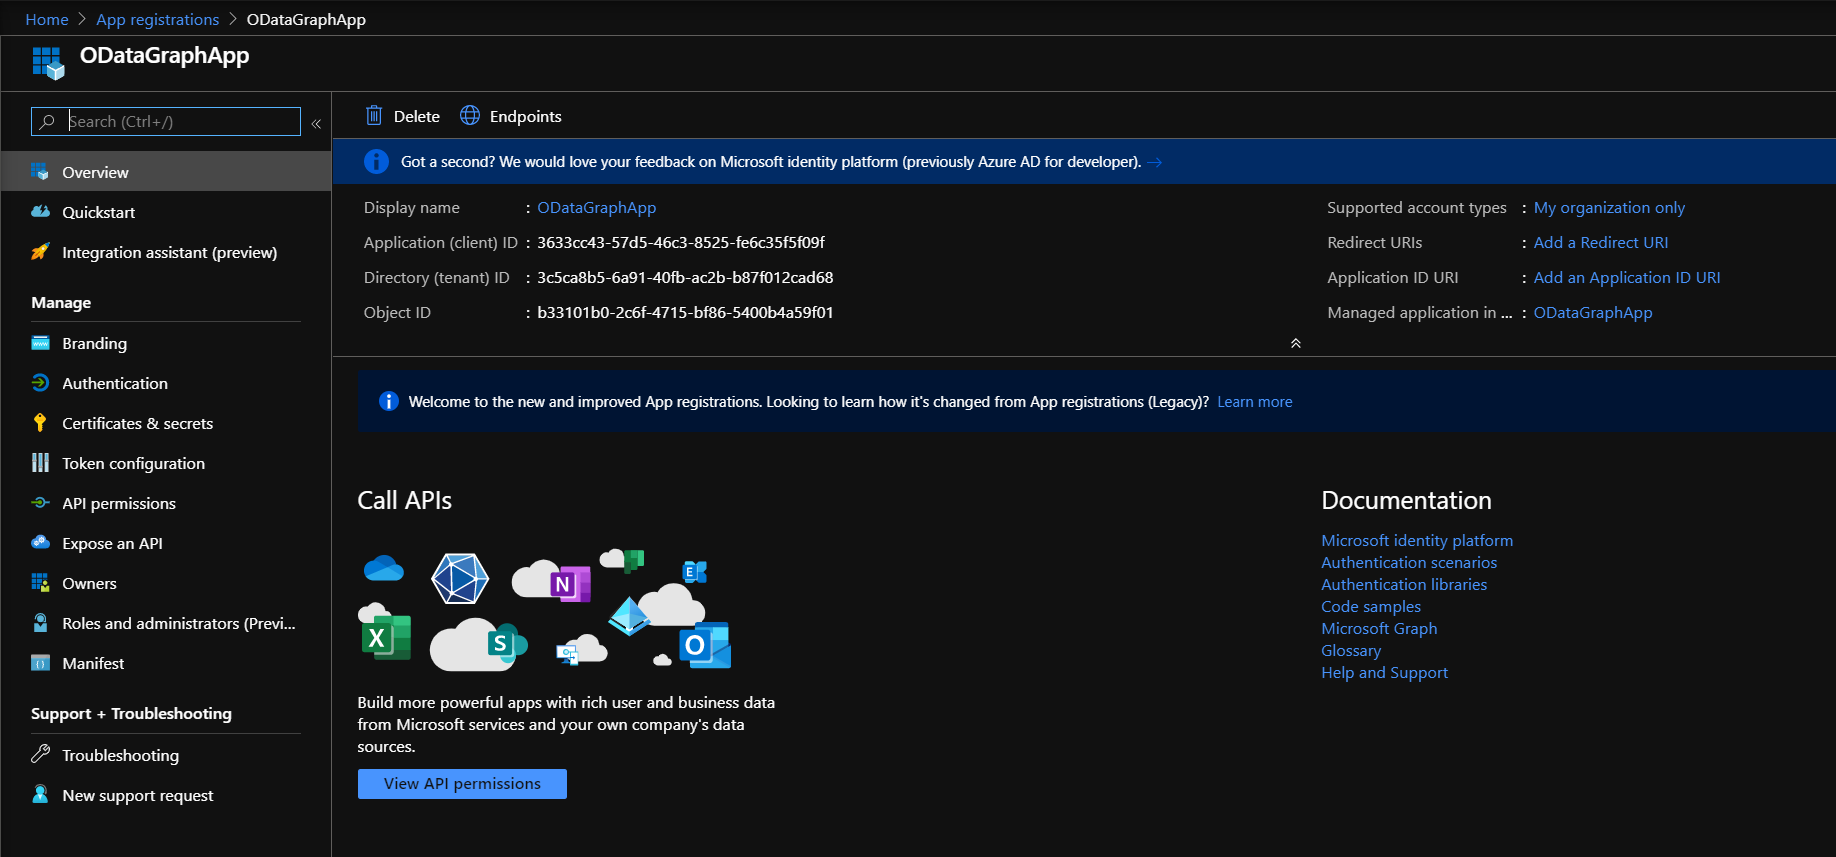
let’s take note of Application (client) ID and the Directory (tenant) ID, we are going to need those later to communicate with our organization Graph endpoint.
the next step is generate a secret key to allow us to communicate with Graph, in order for us to do that, let’s click on the Certificates & Secrets side menu option on the left, the following view should appear:
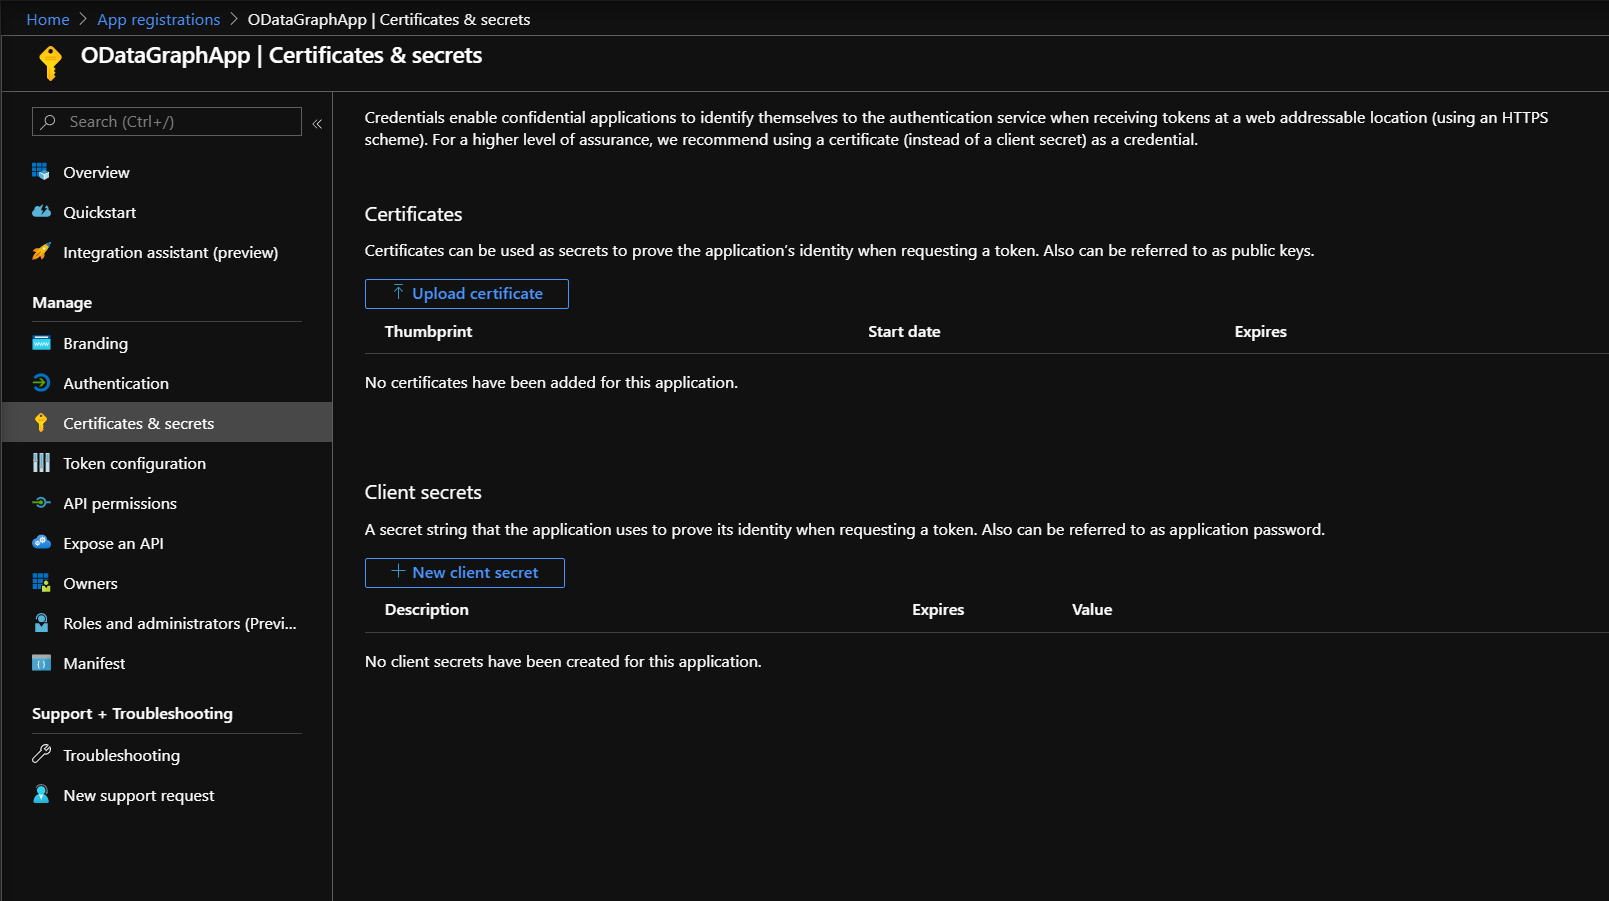
In this view, let’s click on New client secret, select the expiration time of the secret then click Add as follows:
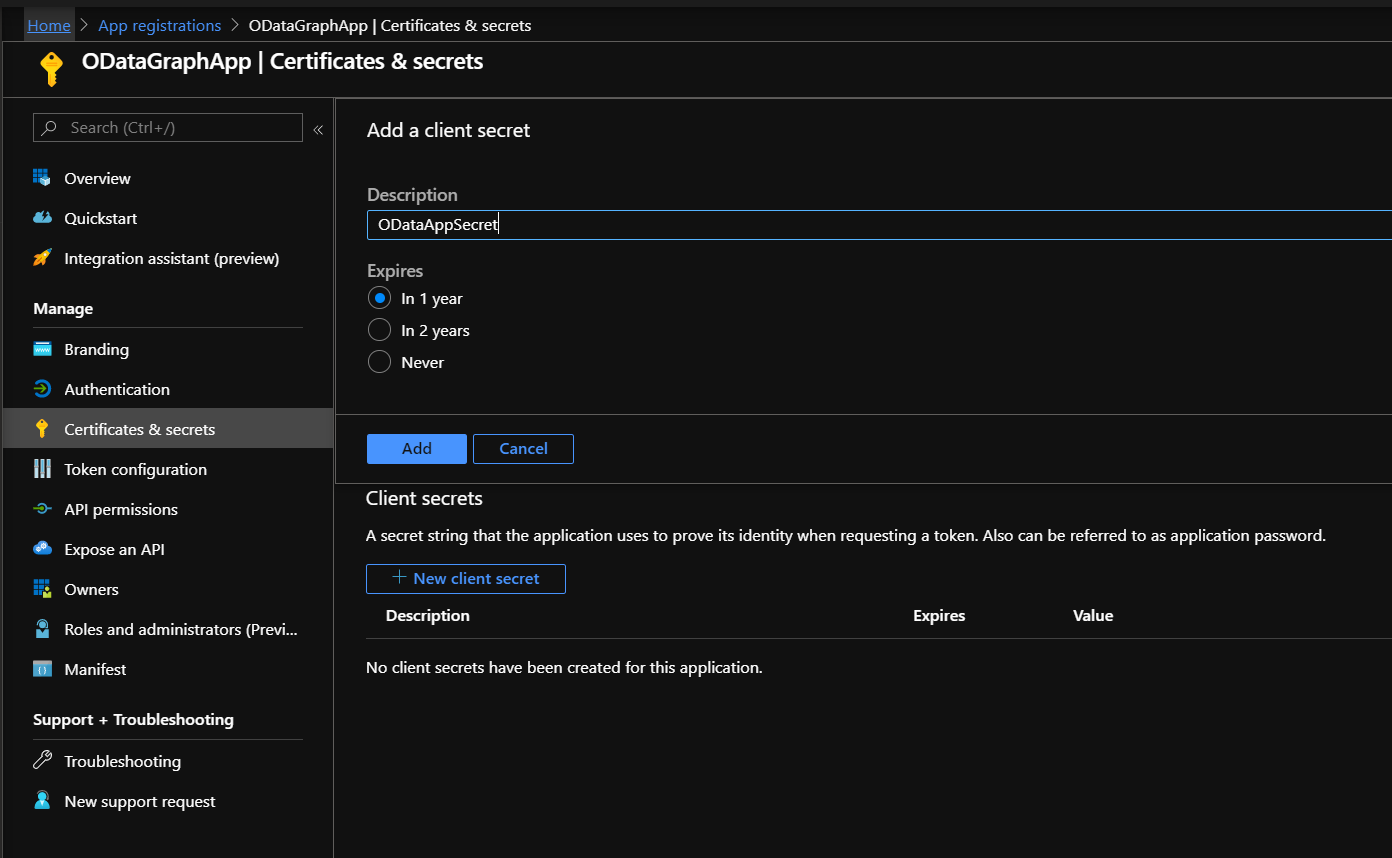
Once you click Add, you will be presented with a new secret, save that somewhere safe (KeyVault is an option) and along with the client and tenant IDs we saved earlier let’s start giving our new App some permissions to access data in our organization.
Granting Permissions
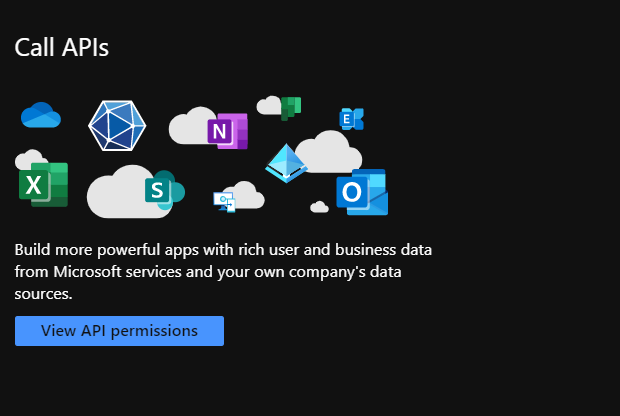
In order for our newly registered app to be able to access particular information, a permission has to be granted first, let’s go back to our new app dashboard in Azure and click on the View API Permissions button as follows:
You will notice at first glance, that there’s an existing default permission for your app, which is a user delegated permission to allow users accessing your app to view their own information.
Before we go any further, Graph offers two different types of permissions, Application Permissions and Delegated Permissions, the first type doesn’t require a user to present or logged in to access the information throughout the organization, the second type requires a user to authorize the app to access the information, which is much more secure.
Both types of permissions are needed, depending on the business requirement and the architecture of your application, for the purpose of this demo, we are going to grant an application permission to our new app to read all the information about all users in our organization as follows:
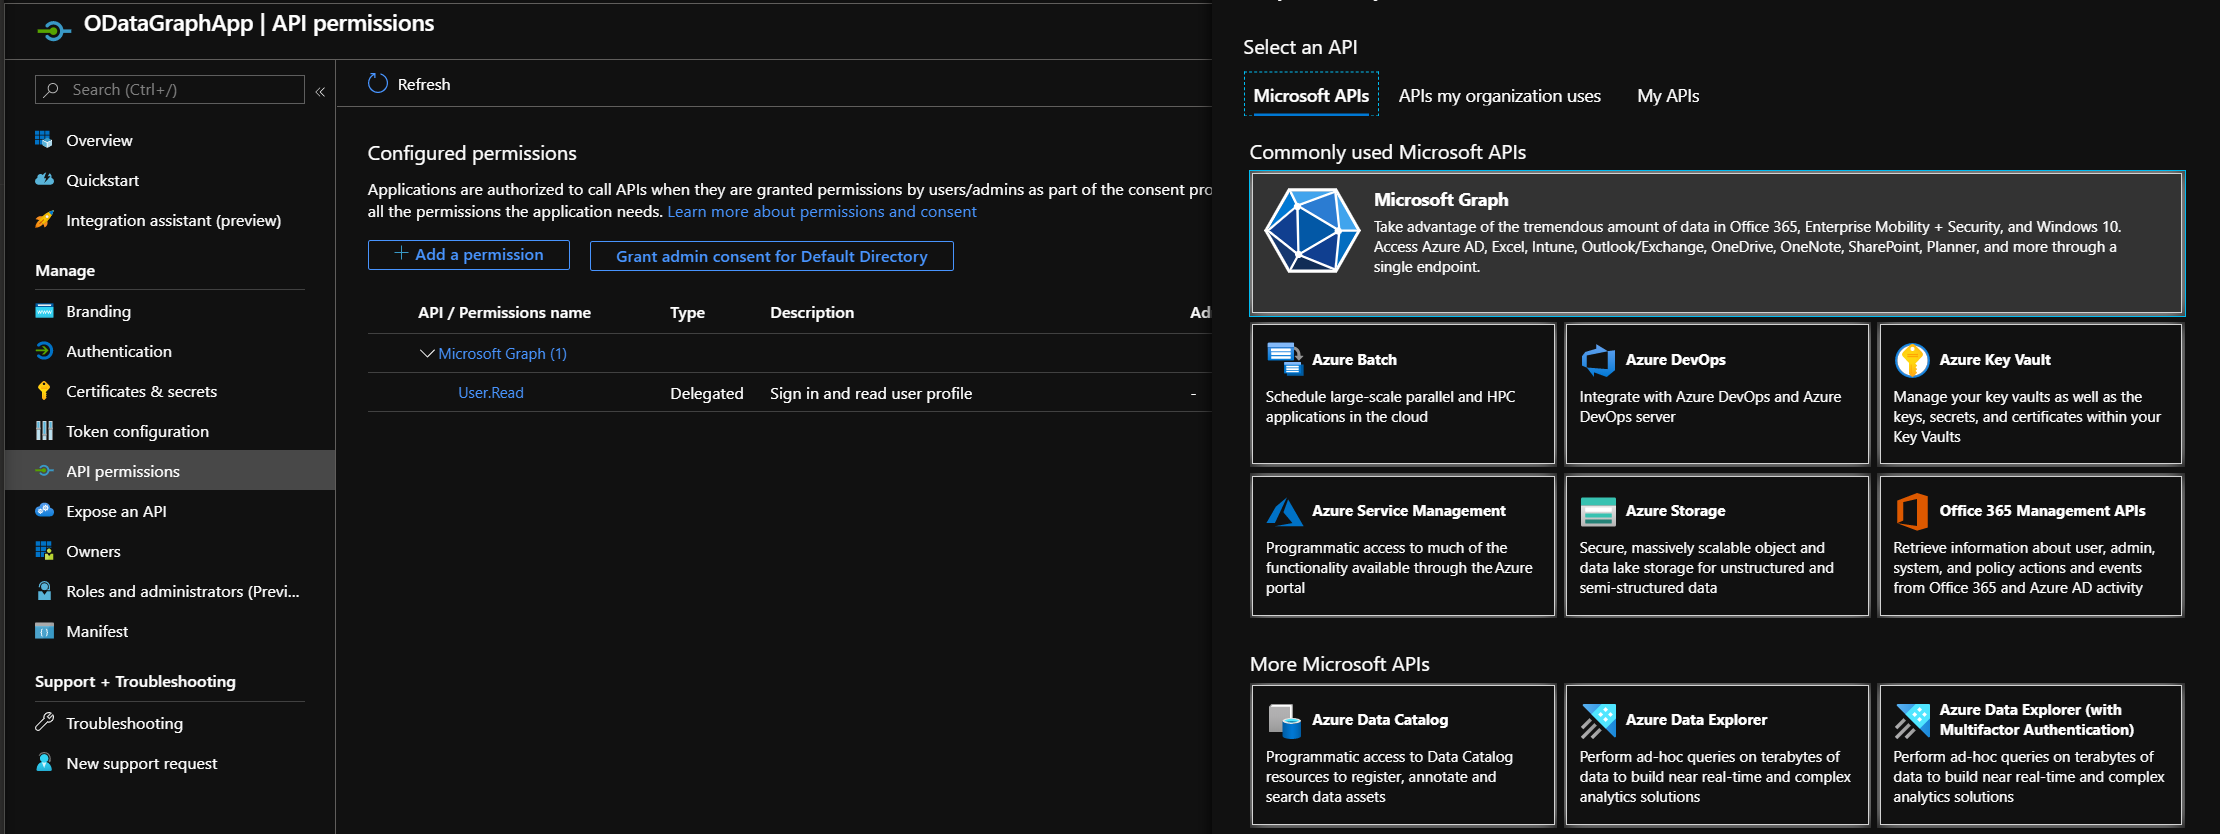
Click on Add Permission then select Microsoft Graph from the menu that will appear on the right side as shows above.
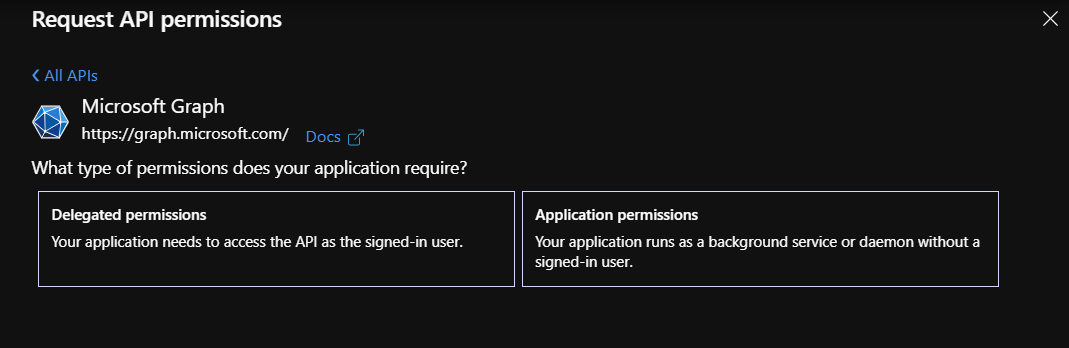
We will need to select Application Permissions before moving forward with which types of permissions we need to grant our app, once you’ve selected Application permissions, you will be presented with all types of permissions categorized by the entity type these permissions grant for access as follows:
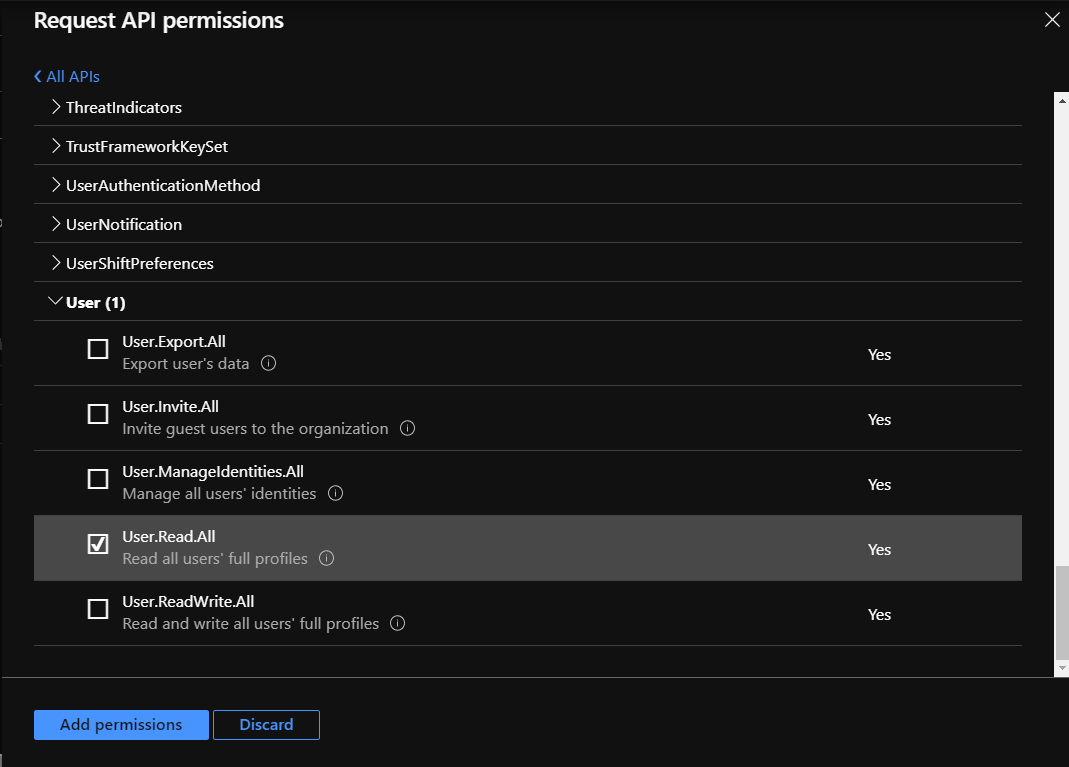
As shows above, there are hundreds of permissions that we can grant our app, in so many different aspects, for our demo we will select User.Read.All permission then click Add permissions as shows above.
Once you click Add Permissions, we will need to grant Admin consent for Default Directory permissions as follows:
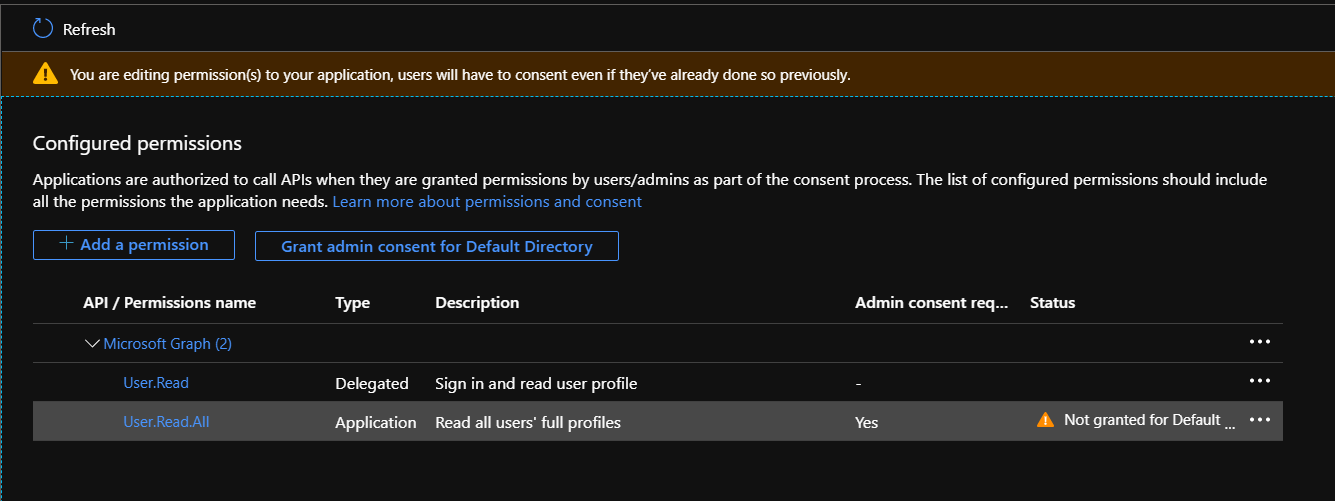
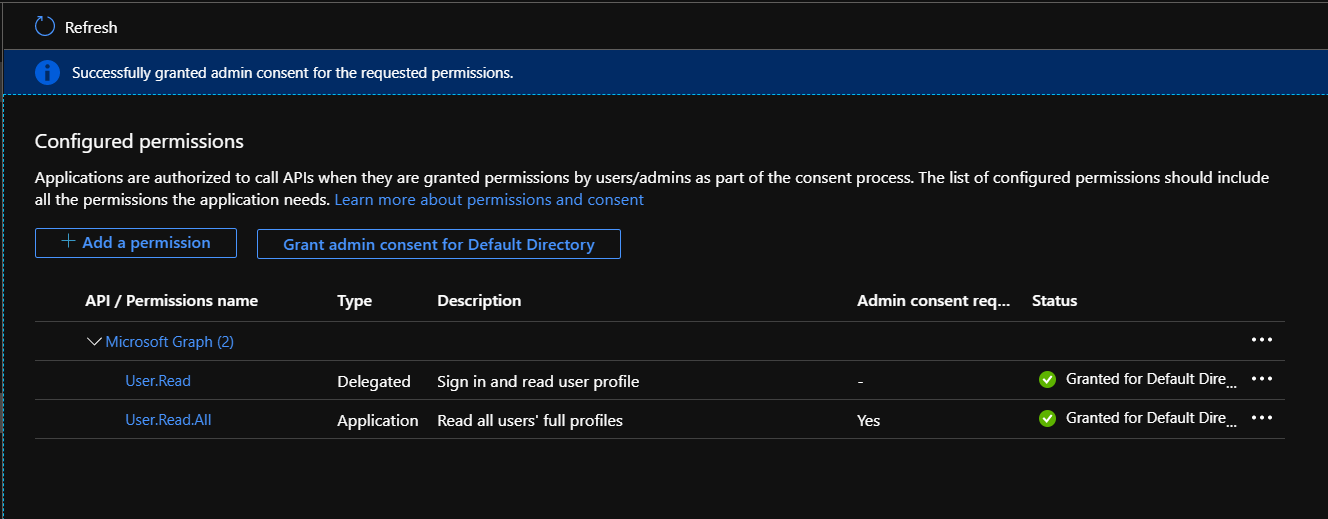
You can grant the consent but selecting the highlighted permission we added then click the Grant admin consent for Default Directory button to do so, when the permission is granted, a green check mark should be displayed next to the new permission you just granted consent as follows:
Now we are all set! we are ready to access all organization users information using Graph through a simple Console Application.
The Code
In this section, I am going to show you how you can write a simple console application to retrieve Users information, let’s create a simple console app and add the following Nuget packages in its:
- Microsoft.Graph (3.5.0)
- Microsoft.Graph.Auth (1.0.0-preview.4)
With these two libraries, let’s change the default code in our console app Program.cs file to the following:
using System;
using System.Threading.Tasks;
using Microsoft.Graph;
using Microsoft.Graph.Auth;
using Microsoft.Identity.Client;

namespace GraphODataDemo
{
    class Program
    {
        static async Task Main(string[] args)
        {
            var confidentialClientApplication = ConfidentialClientApplicationBuilder
               .Create("YOUR_CLIENT_ID")
               .WithTenantId("YOUR_TENANT_ID")
               .WithClientSecret("YOUR_APP_SECRET")
               .Build();

            var clientCredentialProvider =
                new ClientCredentialProvider(confidentialClientApplication);

            var graphServiceClient =
                new GraphServiceClient(clientCredentialProvider);

            var users = await graphServiceClient.Users.Request()
                .Filter("displayName eq 'Hassan Habib'").GetAsync();

            foreach(var user in users)
            {
                Console.WriteLine(user.DisplayName);
            }
        }
    }
}
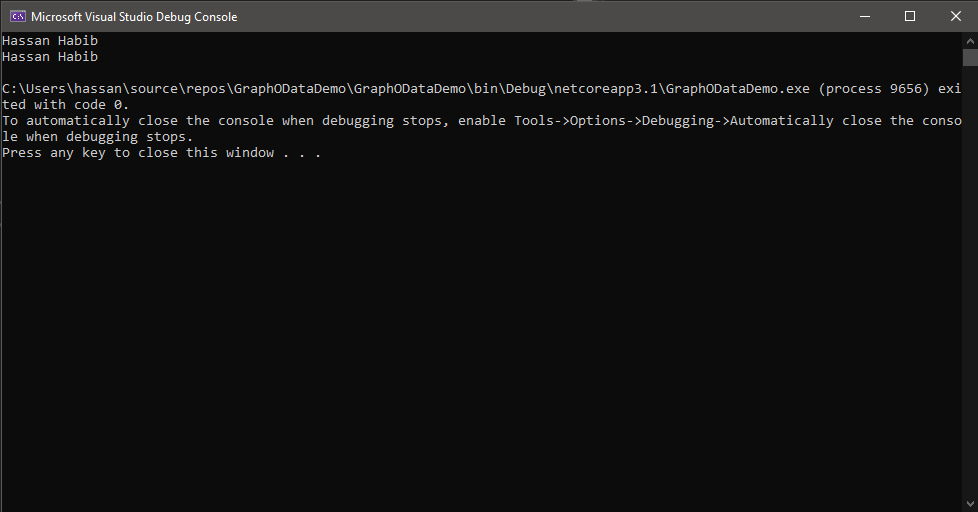
When you run your application the application will filter all users to only the ones with the displayName equivalent to Hassan Habib, here’s a screenshot of the result:
Native Support
As you saw in the code above, the Filter functionality comes out of the box with the Graph client we are using, so is the case with the following features:
$Select
We can examine the select option as follows:
var users = await graphServiceClient.Users.Request()
    .Select(user => user.DisplayName).GetAsync();
The Select functionality in the Graph Client supports both fluent API with expressions and raw select queries as follows:
var users = await graphServiceClient.Users.Request()
    .Select("displayName").GetAsync();
in both cases, the API will return entire objects with all their properties nullified except for the properties we selected.
$Expand
You can also use the expand to search through other related entities, for instance, we can check the calendar of a particular user as follows:
var users = await graphServiceClient.Users.Request()
    .Expand(user => user.Calendar).GetAsync();
You can also do the same thing with raw queries as follows:
var users = await graphServiceClient.Users.Request()
    .Expand("calendar").GetAsync();
It’s important to understand that expanding to related entities might require additional permissions, just the exact same way we granted our app access to user information.
$Filter
The filter functionality doesn’t currently support expressions, but as we have shown above it can support raw expressions as follows:
var users = await graphServiceClient.Users.Request()
    .Filter("displayName eq 'Hassan Habib'").GetAsync();
The same functionality applies to other OData features such as $OrderBy, $Skip and $Top.
Final Notes
- Microsoft Graph combined with OData is a very powerful technology that grants access to all members within an organization, it also prevents duplication of an organization members data and offers an option to reference these members by their organization id.
- Microsoft Graph team has provided tremendous documentations around the technology and it’s use cases, you can find all about Microsoft Graph here.
- You can find the source code for the Console app I created for this demo in here
- OData is natively supported in much more platforms for multi-billion users, it’s heavily used within these platforms which should encourage application developers to trust OData to integrate the technology in their current or future applications.
This is a great article about OData!!
I have a simple question on how to wrap query result object inside another object which is not having a property on which we are filtering? (To avoid JSON hijacking we are following this methodology of wrapping)
GET products?$filter=Id eq 1
we have an Entity called Product
<code>
we have a scenario where we need to filter the Product by Id which is happening fine but we are trying to send Result object in return
<code>
whatever query result we got after applying filter we are trying to wrap inside the response property of result object.
Product Controller looks...
Thank you for your sharing. By the way, I have a question regarding cosmosdb with mongodb api and Odata integration. Do we have any way to convert $filter clause of odata to mongo query? Thanks! I’m really looking forward your sharing about it.
Nice and well written.
Thanks for sharing, Hassan!