List of all posts in the #30DaysMSGraph series
In Day 24 we concluded configuring implicit flow authentication on a single-page application. Today we’ll extend the base console application to create a OneNote notebook, section, and page.

You can create OneNote notebooks on a variety of resources including the “/me” endpoint, SharePoint Online team sites, SharePoint Online personal sites, and Office 365 Group sites. These correspond to the following endpoints:
- /me/onenote/notebooks
- /sites/{id}/onenote/notebooks
- /users/{id | userPrincipalName}/onenote/notebooks
- /groups/{id | userPrincipalName}/onenote/notebooks
In this post and associated code sample we are covering how to add a OneNote notebook, section, and page for a given user’s SharePoint Online personal site. The process can be applied to the other targets above with minor modifications.
Permissions required
OneNote notebooks can be created with several permissions. In today’s example we’ll be using application permissions for Notes.ReadWrite.All so that you can create and update notebooks for other users, but it is also possible to use delegated Notes.Create or Notes.ReadWrite for some of the same operations.
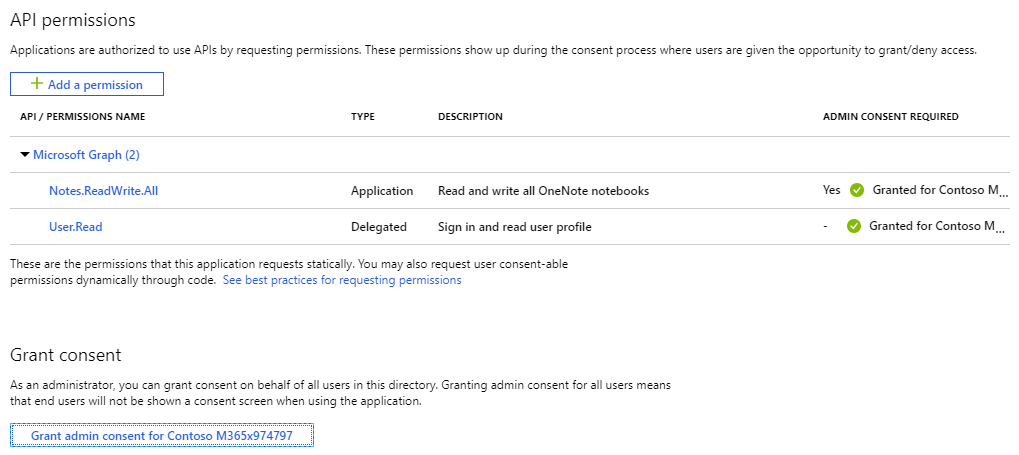
Since you didn’t assign the Notes.ReadWrite.All permission in a previous day ensure that you assign that now to your Azure AD application. Navigate to the Preview App Registrations experience in the Azure AD portal and assign the application permission for Notes.ReadWrite.All under Microsoft Graph API.

Create a OneNote notebook
Start out by creating a OneNote notebook for a user. Since we are creating the notebook on a user’s SharePoint Online personal site we’ll reference the user by their UPN (user principal name) and then access the OneNote endpoint.
public async Task<Notebook> CreateNoteBook(string upn, string notebookName)
{
    var notebook = new Notebook{
        DisplayName = notebookName
    };

    return (await _graphClient.Users[upn].Onenote.Notebooks.Request().AddAsync(notebook));
}
Create a OneNote section
After creating a OneNote notebook we keep a reference to the notebook created (or query for the notebook if it had already been created). Next create a section within the notebook.
public async Task<OnenoteSection> CreateSection(string upn, Notebook notebook, string sectionName)
{
    var section = new OnenoteSection{
        DisplayName = sectionName
    };

    return (await _graphClient.Users[upn].Onenote.Notebooks[notebook.Id].Sections.Request().AddAsync(section));
}
Create a OneNote page
The last step is creating a new page in the section. Interestingly enough you can reference the /Pages endpoint directly from /Users/OneNote/Sections without needing to go through the /Notebooks endpoint. We are using the HttpClient to make the call against Microsoft Graph to show the versatility as well as conform to many of the examples you will see on Microsoft Graph and OneNote documentation.
public async Task<HttpResponseMessage> CreatePage(string upn, OnenoteSection section, string pageName)
{
     Uri Uri = new Uri($"https://graph.microsoft.com/v1.0/users/{upn}/onenote/sections/{section.Id}/pages");

    // use a verbatim interpolated string to represent the HTML text to be used for page creation
    var html = $@"
    <!DOCTYPE html>
    <html>
    <head>
        <title>{pageName}</title>
    </head>
    <body>
        I'm learning about the Microsoft Graph!
    </body>
    </html>";

    HttpContent httpContent = new StringContent(html, System.Text.Encoding.UTF8, "application/xhtml+xml");

    return (await _httpClient.PostAsync(Uri, httpContent));
}
Try It Out
Navigate to the dotnetcore-console-sample repo. Do one (or both) of the following:
- Clone the repo and configure the project in the Day 25 sub-folder.
- Follow the instructions in Day 25 sub-folder to build the project from scratch yourself.
If you run into any issues while building or configuring the project please create a new Issue on the repo.
Join us tomorrow as we integrate Microsoft Flow with Microsoft Graph in Day 26.

0 comments