

This blog post has been co-authored by Martin Gjoshevski, Senior Customer Engineer at Microsoft and Alex Olivier, Chief Product Officer from Cerbos, a Microsoft Partner.
In this blog post, part two of a three-part series, we look at how you can use Microsoft Entra External ID and Cerbos to decouple authentication and authorization.
In part one, we looked at the role that authentication and authorization play and the benefits and considerations you need to take into account when designing systems. In this blog post, we are going to see how you can build a web application with decoupled authentication and authorization using Microsoft Entra External ID and Cerbos.
What you’ll build in this tutorial
In this tutorial, you are going to build a web application that uses Microsoft Entra External ID for user authentication, and leverages Cerbos for implementing fine-grained authorization. Our web application lets authenticated users create and update posts.
We have two roles in our application: User and Admin. These roles have different capabilities, as shown in the table below:
| Role | Create Posts | Edit Posts | Delete Posts | View Posts |
|---|---|---|---|---|
| User | Y | If Owner | If Owner | If Owner and All Published |
| Admin | N | Y | N | All |
Table 1: Roles and Actions
Architecture
Our application relies on Microsoft Entra to authenticate users. All user information and data is stored in Microsoft Entra External ID, which enables you to leverage powerful CIAM features such as self-service registration, customized sign-in experiences, and customer account management. External ID builds upon the proven platform of Microsoft Entra, so you also get to reap the benefits of the platform, like improved security, compliance, and scalability.
The following diagram illustrates the design of the application:
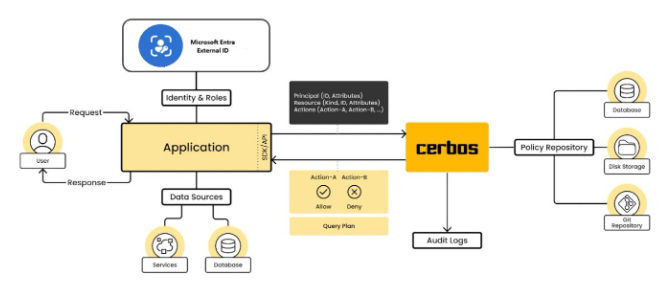
Once users are authenticated, our application leverages Cerbos to evaluate authorization policies and allow only authorized users to perform specific actions.
Code sample
Explore the code sample and scripts to implement this application.
Prerequisites
Before getting started, make sure you have the following prerequisites:
- Node.js installed on your machine.
- A code editor such as Visual Studio Code.
- Docker, for running the Cerbos Policy Decision Point (PDP).
- An external tenant, if you don’t already have one, you can sign up for a free trial or create a tenant with external configuration in the Microsoft Entra admin center.
- (Optional) PowerShell – You can either use the Microsoft Entra admin center to configure the app, or you can automate this using the PowerShell script in the GitHub repo, which will create and configure all the required resources in Microsoft Entra.
How to use Microsoft Entra External ID to add authentication to your external-facing apps
To enable your application to sign in users with Microsoft Entra, you must register your application. Creating an app registration establishes a trust relationship between the application and Microsoft Entra.
To create the app registration and apply the necessary configuration in Microsoft Entra, please choose one of the following options:
- A step-by-step guide using the Microsoft Entra admin center, can be found here.
- A PowerShell script, which will create and configure all the required resources in Microsoft Entra, can be found here.
After creating the app registration, creating and associating a user flow, and configuring the app roles, please proceed with the next steps.
Integrate your application with Microsoft Entra External ID using MSAL
If you haven’t cloned the GitHub repository, please do so. The source code for the application is in the App folder.
For a quick start, replace the values in the .env file.
- In your code editor, open the
.envfile in the App directory. - Change the values for the following variables:
TENANT_SUBDOMAIN- replace it with the Directory (tenant) subdomain. For example, if your tenant’s primary domain is contoso.ciamlogin.com, use contoso. If you don’t have your tenant name, learn how to read your tenant details.CLIENT_ID- replace it with the Application (client) ID of the app you registered earlier.CLIENT_SECRET- replace it with the app secret value you copied earlier.
Explore the implementation
We use the Microsoft Authentication Library (MSAL), which enables developers to acquire security tokens from the Microsoft identity platform to authenticate users and access secured web APIs.
MSAL supports a large set of platforms and frameworks. You can read more here.
The core integration using MSAL in our application can be found in the App/auth/AuthProvider.js file.
Note: For a detailed walkthrough on how to integrate an application with External ID using the Node.js MSAL library, please check our documentation which takes you through the process step-by-step.
Now, let’s leverage Cerbos to add authorization to the application.
Add Authorization to your application using Cerbos
Fine-grained authorization involves defining and enforcing policies that specify who can access what resources, under which conditions. The implementation process is broken into two separate stages—policy definition and policy enforcement.
Note: At this point, after having cloned the repo in following the instructions above, you should have all policies already defined. The next step you need to perform is to deploy a policy decision point (PDP).
Policy Definition
When defining an authorization policy with Cerbos, you would begin by specifying the different resource types, such as a Post, Comment, Order, etc., and the actions which can be performed, such as create, read, update, delete, comment, flag, etc.
Then, for each of these actions, you would define under which condition they should be allowed or denied. This could be as simple as checking if a user has a role (performing RBAC), or more fine-grained where individual attributes of a resource or principal are checked.
In our sample application, we have defined one policy which can be found in the Cerbos/policies folder.
The posts.yaml file is a policy that represents a basic Post resource which has the actions of create, read, update, and delete. Our policy states:
- The read action can be performed by any user with the
Posts.AdminorPosts.Userroles. - The create action can be performed by any user with the
Posts.Userrole. - The update or delete actions can be performed by any user with the
Posts.Adminrole for any article. - The update or delete actions can be performed by any user with the
Posts.Usersrole, ONLY if theauthorIdof the post is equal to the ID of the user making the request.
apiVersion: api.cerbos.dev/v1
resourcePolicy:
  version: default
  resource: post
  rules:
  - actions: ["read"]
    effect: EFFECT_ALLOW
    roles:
      - Posts.Admin
      - Posts.User
  - actions: ["create"]
    effect: EFFECT_ALLOW
    roles:
      - Posts.User
  - actions: ["update", "delete"]
    effect: EFFECT_ALLOW
    roles:
      - Posts.Admin
  - actions: ["update", "delete"]
    effect: EFFECT_ALLOW
    roles:
      - Posts.User
    condition:
      match:
        expr: request.principal.attr.oid == request.resource.attr.authorId
Note: With Cerbos, you can also write unit tests around these policies to test them in isolation.
Deploy a policy decision point (PDP)
Once a policy is defined, the next step is to deploy a policy decision point local to your application and then make authorization checks against it.
- To run the Cerbos PDP instance inside a docker locally, run the
start.shscript located in the Cerbos directory.
cd Cerbos
./start.sh
Integrate the Cerbos SDK
To talk to the PDP from your application, you need to implement the SDK (or call the API directly). Our example application uses Node.js, but Cerbos publishes SDKs for most common languages.
The SDKs all work the same way by creating a client, pointing it to the PDP running in your infrastructure, and then issuing check calls against it.
- In the Node.js application, run
“npm install @cerbos/grpc”to install the gRPC client (or@cerbos/httpfor HTTP) and import it into your application code:
import { GRPC as Cerbos } from "@cerbos/grpc";

const cerbos = new Cerbos(
    process.env.CERBOS_INSTANCE, // The Cerbos PDP instance,
    { tls: process.env.CERBOS_INSTANCE_TLS === "true" } // TLS options
);
Now, checks to Cerbos can be made from any part of the application.
Navigate to App/routes/posts.js, to see the example integration.
Make authorization checks
In our application, when a request makes it down to the request handler, we essentially know three things:
- Who is making the request (the principal – as it could be a user or a service account)
- The operation they are trying to perform (the action)
- The object they are performing the action on (the resource)
These are the three inputs to Cerbos which are required to make an authorization check against the policies.
Starting with the principal, in our application once a user is authenticated against Microsoft Entra, the token returned contains the user information which will be passed on to Cerbos as the principal object.
Unpacking an example token issued by Microsoft Entra, see that the user ID, name, roles, and other metadata is returned:
{
  "aud": "00f1f0c3-1200-1200-1200-cd12f3xx2eb3",
  "iss": "https://contoso.ciamlogin.com/1234-1234-1234-1234-1234/v2.0",
  "iat": 1709588495,
  "nbf": 1709588495,
  "exp": 1709592395,
  "name": "Zoki Poki",
  "oid": "177xx34a-0cd4-0cd4-0cd4-348a6b800cd4",
  "preferred_username": "email@microsoft.com",
  "rh": "0.Ac9X8wBiBPq4oRSB0V7whIN4aq4oRUlBEnpNjKnNEvOuLrPPA.",
  "roles": [
    "Posts.Admin"
  ],
  "sub": "Ie00UZma1BBzqvtXXXZdEq4oRZlBgwyj8jDwm8RGKok",
  "tid": "040000f3-q4oR-q4oR-q4oR-5ef08483786a",
  "uti": "x0WdMLMEzq4oRq4oRC1UFAA",
  "ver": "2.0"
}
Taking the contents of this token, the fields map into the principal object in the request to Cerbos.
const principal = {
  "id": "177xx34a-0cd4-4e5a-b89b-348a6b80003d ",
  "roles": ["Posts.Admin"],
  "attr": {
    "name": "Zoki Poki",
    "preferred_username": "email@microsoft.com",
  }
}
For the resource, based on the request, we need to query it out of the database and construct the resource object. In our demo application, the resource we are interacting with is a Post which we query out based on the ID in the request and structure the resource object as shown below:
const result = await prisma.post.findOne({id: req.param.id}}
const resource = {
  "id": result.id,
  "kind": “post”,
  "attr": {
    "published": result.published,
    "authorId": result.authorId
  }
}
The final piece is the action, which is known based on the request, e.g. a POST request will be the ‘create’ action, a GET will be a ‘read’ action, etc. This is open to be defined based on your application and doesn’t need to be tied to HTTP verbs.
Now, with these 3 bits of information, the principal, resource, and action, all that’s needed is a simple SDK call to check the permissions. The SDK makes a call out to the local PDP, the policies are evaluated, and what comes back is a simple boolean—allowed or denied:
    const decision = await cerbos.isAllowed({principal, resource, action: “read”});

    if (!decision) {
        return res.status(403).send('Unauthorized');
    }

    // permissions granted, do the relevant action
Navigate to App/routes/posts.js, to see the example integration.
Policy Evolution
With your application set up to carry out all authorization logic via calls to Cerbos, whenever the logic needs to change, be it to add a new role, change a condition, or something else, this only needs to be done once in your policy files. Once the change is rolled out, your application will handle requests based on the new logic without requiring a single code change or deployment.
Test the application
After configuring the Node.js web application and starting the Cerbos PDP, you can start the application and test it.
- Open a console window and navigate to the directory that contains the Node.js sample app. Install the dependencies and start the application.
cd App
npm install
npm start
- Open your browser and navigate to http://localhost:3000. You should see a page like the screenshot below:
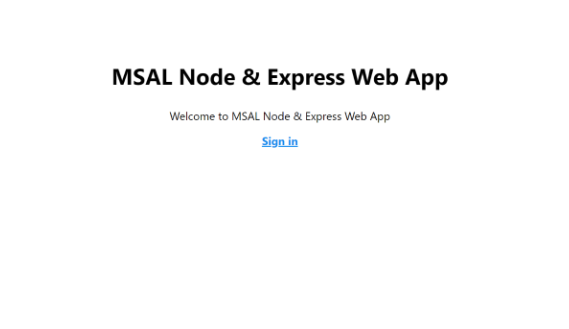
- Once the page has loaded, click Sign in. You will be prompted to sign in.
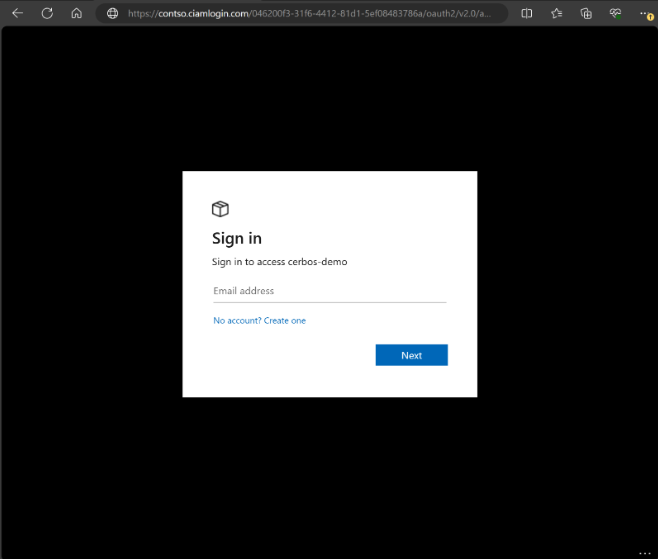
- On the sign-in page, enter your email address, click Next, enter your password, and then click Sign in. If you don’t have an account, you can click on the No account? Create one link to start the sign-up flow.
- If you choose the sign-up option, you will need to provide your email, one-time passcode, new password, and other account details to complete the sign-up flow.
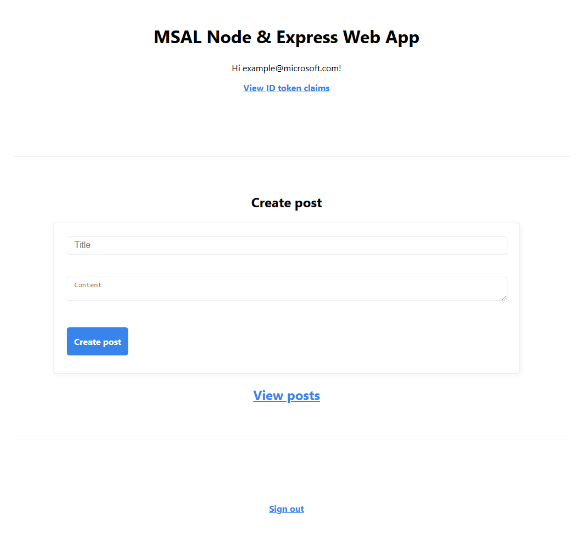
- After signing in, you will be able to perform all of the regular user actions, Create, Edit (Publish), and Delete (only your own Posts, described in the “Table 1: Roles and Actions” above).
Assign Admin role
If you want to switch your role and get admin permissions, you need to change the role of your user by follow these steps:
- Sign in to the Microsoft Entra admin center as at least a Cloud Application Administrator.
- Browse to Identity > Applications > Enterprise applications.
- Select All applications to view a list of all your applications and select the application that you created (such as ciam-client-app). If your application doesn’t appear in the list, use the filters at the top of the All applications list to restrict the list, or scroll down the list to locate your application.
- Select the application in which you want to assign users or security groups to roles.
- Under Manage, select Users and groups.
- Select Add user to open the Add Assignment pane.
- Select Users and groups from the Add Assignment pane. A list of users and security groups should be displayed. You can search for a certain user or group and select multiple users and groups that appear in the list.
- Once you’ve selected users and groups, click Select to proceed.
- Click Select a role in the Add assignment pane. All the roles that you’ve defined for the application should be displayed. Choose Admin.
- Choose a role and click Select.
- Click Assign to finish.
Confirm that the users and groups you added appear in the Users and groups list.
After following all the steps above, you should see the Admin role assigned in the ID token.
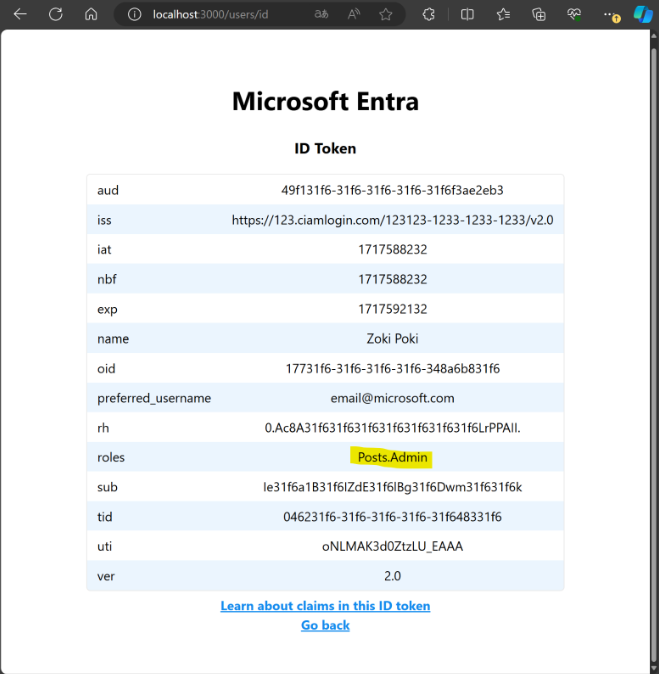
This will allow you to perform the admin user actions described in the “Table 1: Roles and Actions”.
Recap, and what’s coming in part three
In this blog post, we walked you through the process of integrating Microsoft Entra External ID and Cerbos, looked at how External ID can be used to add sign in capabilities to your application, and explored how Cerbos enables applications to define and enforce fine-grained authorization policies.
We hope you enjoyed working through this tutorial. We encourage you to share your insights with the community to help others out. Or ask a question if you ran into any pain points along the way.
In part 3, we are going to dive deeper into the advanced capabilities and features that External ID and Cerbos offer for managing SaaS users.
To learn more or test out other features in the Microsoft Entra portfolio, visit our developer center. Sign up for email updates on the Identity blog for more insights and to keep up with the latest on all things Identity, and follow us on YouTube for video overviews, tutorials, and deep dives.
0 comments