Let’s say you’re building an ASP.NET application in Visual Studio and want to give users the ability to authenticate themselves. As your app grows in complexity, managing user identities can feel like a daunting task. You’re not just concerned about potential security vulnerabilities, but you also have to be mindful of compliance and scalability challenges. Handling all of this on your own can quickly become overwhelming.
Microsoft Entra External ID is a robust identity management solution designed to simplify this critical aspect of application development. Integrating External ID into your ASP.NET applications can bring immense value. It simplifies the often complex and time-consuming task of managing user authentication and security, allowing you to focus on writing the code that drives your application’s core functionality.
By leveraging External ID, you gain robust, out-of-the-box security features that reduce the risk of vulnerabilities and ensure compliance with industry standards. This, in turn, accelerates your development process, promotes scalability, and enhances the user experience by providing seamless, secure access. Ultimately, it empowers you to deliver high-quality, secure applications more efficiently.
In this guide, we walk you through the process of creating an ASP.Net application with External ID using Visual Studio. Whether you’re a seasoned developer or new to integrating identity management solutions, this tutorial will equip you with the knowledge and tools needed to harness the power of External ID in your projects.
Setting up and running your application
Prerequisites
- Install the recommended Visual Studio version (17.11.3), along with ASP.NET and the web development workload.
- An external tenant on Microsoft Entra Admin Center.
- If you don’t have one, you can create one using our 30-day free trial or create an external tenant with an Azure subscription.
- If you have one continue reading.
- Ensure you have the Application Administrator role on Microsoft Entra.
Create your project
- Open Visual Studio and create a new project.
- From the templates, select ‘ASP.NET Core Web App (Razor Pages)’ and click Next.
- Enter Project Name, e.g. ‘ASP-Application’ and Location (where you want to create the project) and click Next.
- In the Framework selection, use ‘.NET 8.0 (Long Term Support)’ and under Authentication Type, select ‘Microsoft identity platform’.
Install components
- Install the required component,
dotnet msidentity tool, and click Next.
Configure External ID and Run the Application
- Sign in to External ID with a user that has permission to create an application registration.
- Select your trial or external tenant from the Tenants drop down.
- Click Create new and give your application a name, like “visual-studio-asp-app”. This will create an application in Microsoft Entra External ID including a linked user flow, fully defining the sign-in and sign-up experience for your users.
- Select your “visual-studio-asp-app” and click Next.
- Review the Summary of changes and click Finish.
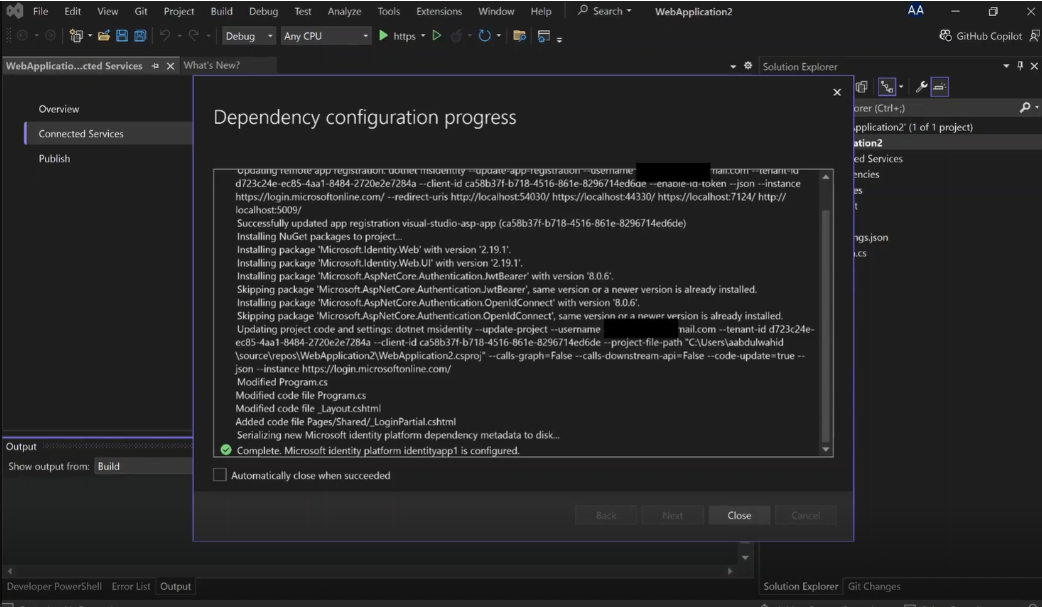
- The dependency configuration process will be ongoing, as shown below. Once done, click Close.

- Navigate to Debug > Start Without Debugging.
- This will start building your application, as shown below:

- Once your build is complete, a new browser window will open at https://localhost:7124.
- Complete the sign-up and sign-in process on the screen shown below:

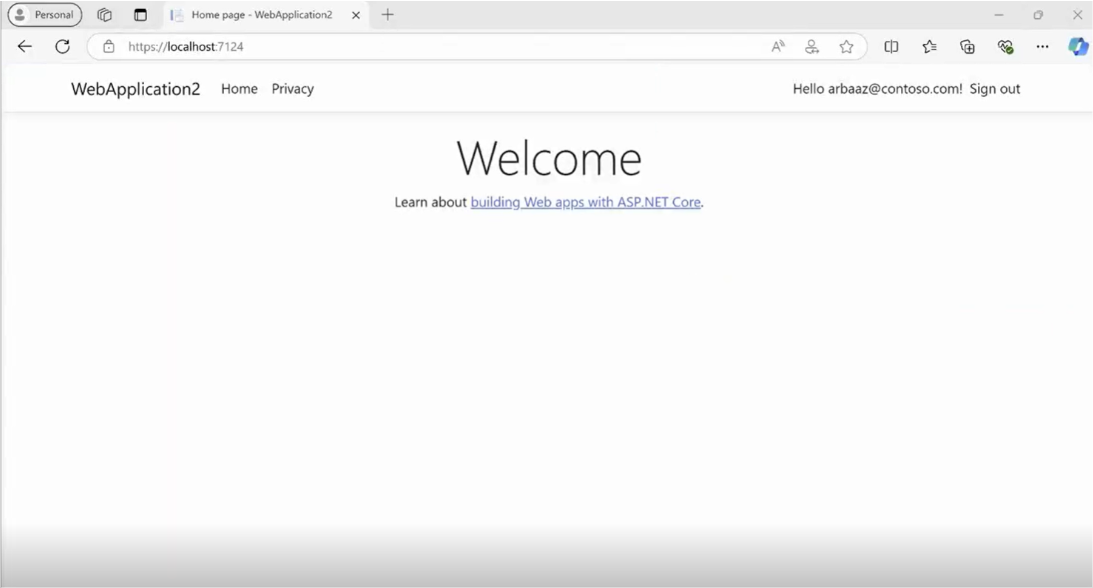
- On successful sign in, you will be able to see the demo page, as shown below:

Let’s recap
You have now successfully set up your first ASP.NET core Web App and signed in your first user.
In this blog post, you have learned how to:
- Create an ASP.NET application using a built-in Visual Studio template.
- Configure External ID with your ASP.NET application directly inside Visual Studio.
- Run your application.
- Sign in an External ID user with email and password on your application.
Stay connected
To learn more or test out features in the Microsoft Entra portfolio, visit our developer center. Make sure you subscribe to the Identity developer blog for more insights and to keep up with the latest on all things Identity. And, follow us on YouTube for video overviews, tutorials, and deep dives.
We encourage you share your feedback and tell us what you think, or suggest new features to make the External ID extension even better. Also, please join our research panel to receive occasional invites to participate in customer research.


This didn’t work when I tried it.
You get the “Need admin approval” message.
You need to add the delegated permission “User.Read” and grant admin approval to that as well.
Also, what is the name of the user flow it creates?
I couldn’t find a user flow that matched the app. registration?
This is probably due to selecting Microsoft Graph permissions on the additional settings screen.
Currently Visual Studio does not create a user flow, but you can still access the sign-up page with neutral branding applied to it.