Microsoft recently released the Windows Azure Tools for Microsoft Visual Studio 2010 1.4 (August 2011) update which includes a new ASP.NET MVC 3 Web Role project template which makes it easier to deploy an MVC 3 application to Azure.
Let’s walk through this process end-to-end.
Step 1 – Install the tools
-
Install the Windows Azure Tools via WebPI. This will also install any dependencies that are missing.
Step 2 – Create and run the application (locally)
- Launch Visual Studio as an administrator. The Azure storage emulator requires administrator privileges.
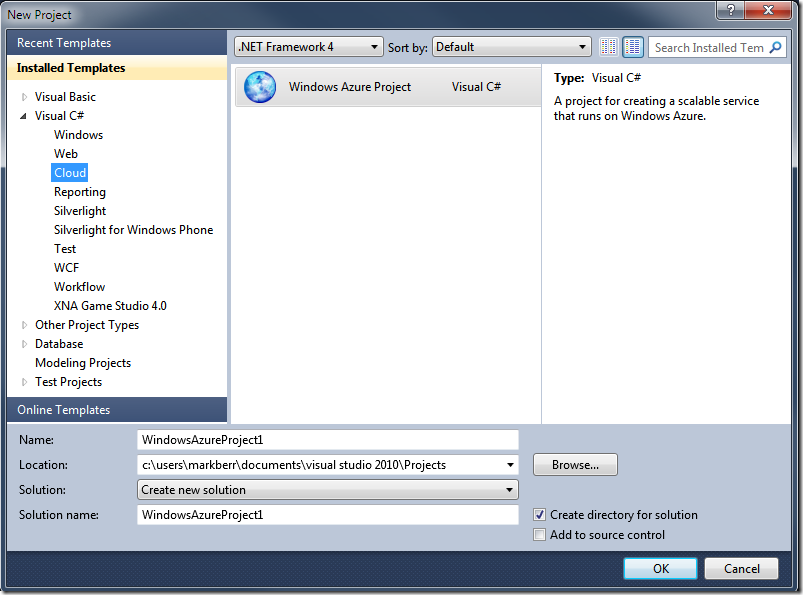
Create a new Windows Azure Project (look under Cloud templates).
- In the next dialog, we see the new ASP.NET MVC 3 Web Role project type. Double click on it to add it to the Windows Azure solution.
- Click OK.
- Next, choose the Internet project template.
- Now take a look at the application’s Web.config file. Notice that the default providers (e.g., Membership, Roles, etc.) are configured to be the new Universal Providers which work with SQL Azure. These providers are pre-installed in the project template via a NuGet package.
- Run the application. Notice that the Azure Emulator for Compute and Storage spins up. There’s a task tray icon for this.
Step 3 – Create an Azure Hosted Service
- If you don’t already have an Azure account, sign-up for one.
- Once the account is set up, log in to the Azure Management Portal. The screenshots that follow use the Silverlight based UI for the portal. If Silverlight is not installed on your machine, you’ll be prompted to install it.
- Create a new Hosted Service.
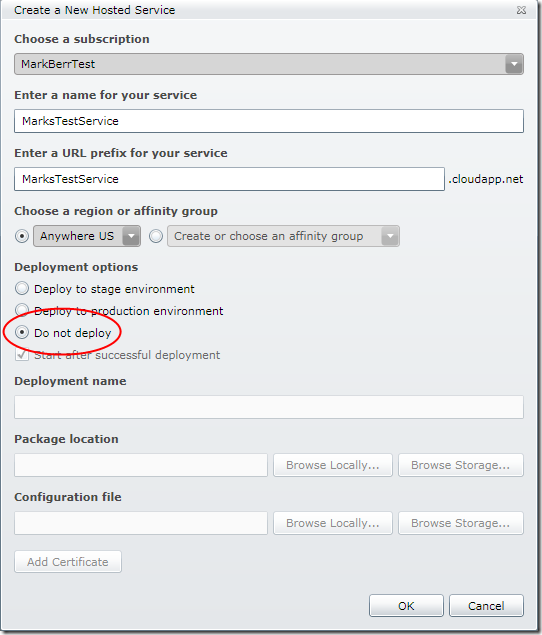
- Give the new hosted service a name, a URL prefix and pick a “region” for the Hosted Service.
In “Deployment options”, choose “Do not deploy” since we don’t have an Azure package for our MVC application ready to deploy yet.

- Click OK and Azure will now create a new Hosted Service.
Step 4 – Create a SQL Azure database
- The database connection string used in the MVC application currently targets SQL Express. Since SQL Express is not supported by Azure, we need to create a SQL Azure database to target.
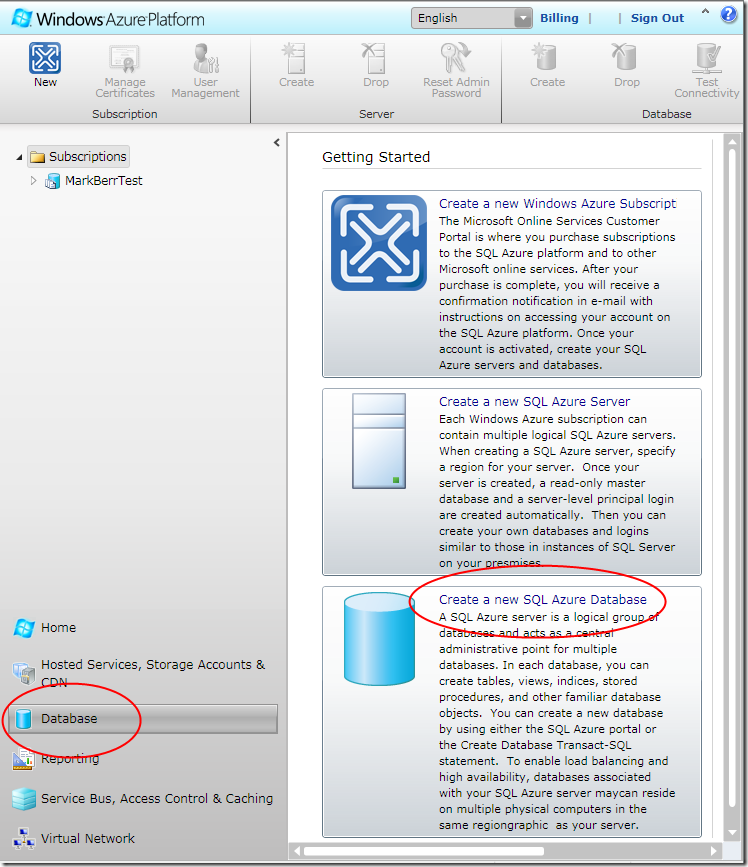
- In the Azure Management Portal, select “Database” in the lower left hand corner of the screen, and then “Create a new SQL Azure Database”.
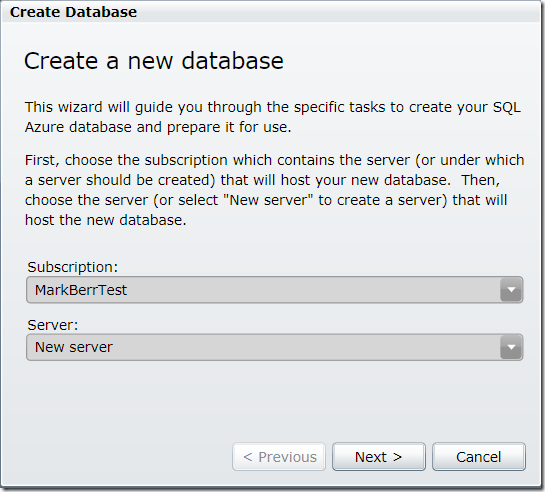
- In the next dialog, select your “Subscription” and set the “Server” to be “New server”. Click “Next”.
- Then, pick a “Region” to host the SQL Azure Server.
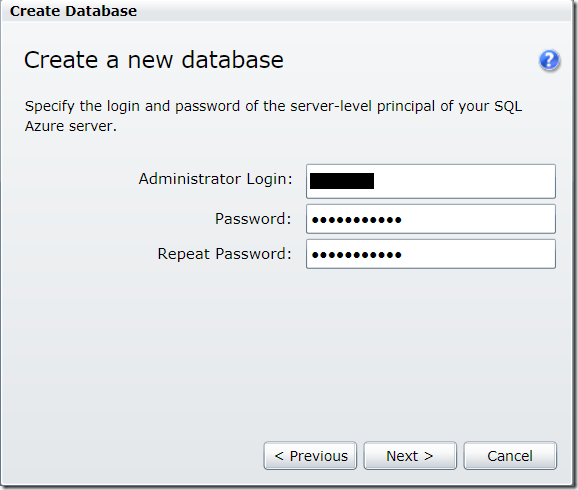
- Configure the SQL Azure server admin credentials.
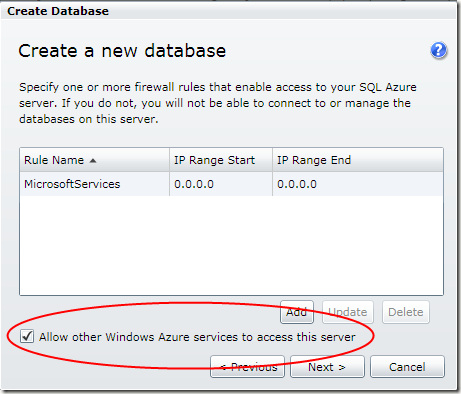
- In the next dialog, we configure firewall rules. Select the option to allow other Azure services to access this server. This will allow the MVC application to connect to this SQL server by adding a firewall rule.
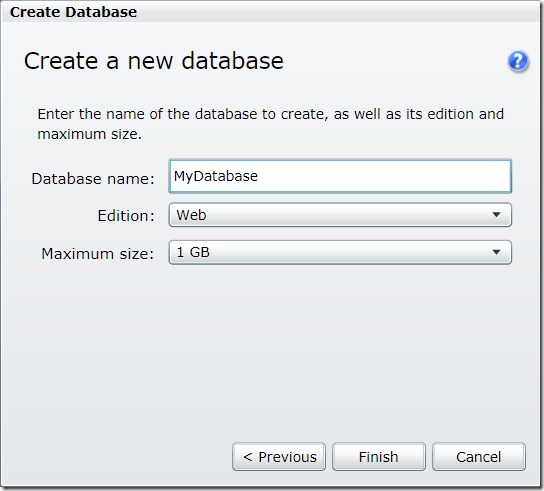
If we wanted to connect to this SQL Azure database from our local machine, an additional firewall rule for the local machine’s IP address could be added as well. - Next, enter the “Database name”. The default “Edition” and “Maximum size” values are fine for this walkthrough.
- Click Finish.
- We now have an SQL Azure database. Now we the connection string.
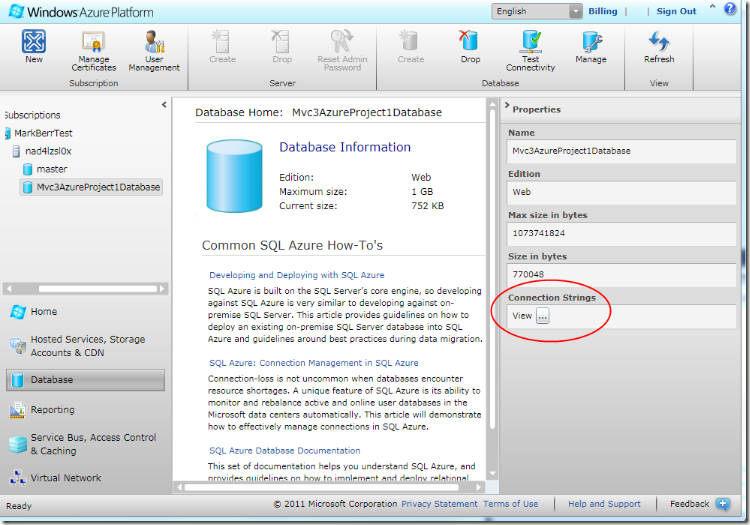
Click on the database name and then the “View …” button under “Connection Strings” on the right hand side of the screen.
Note – I’ve seen the “Properties” pane on the right hand side of the screen disappear at times. Usually it happens when I toggle back and forth between the “Host Services” view and the “Database” view. One way to get it back is to log out of the portal and then log back in.
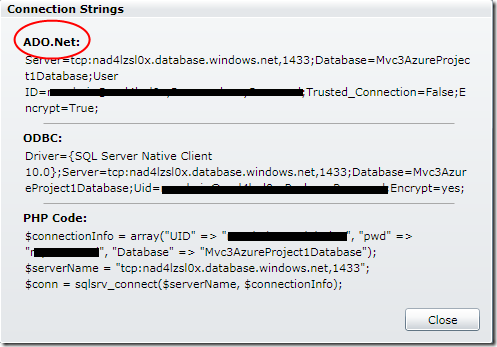
- This will display a dialog with a collection of different connection strings for the database. Make a copy of the ADO.Net connection string. We’ll need this in the next step.
Step 5 – Package the application for Azure deployment
- Before we package the MVC application for Azure deployment, we need to update the database connection string to target our SQL Azure database.
Open the Web.config file and set the connection string appropriately and make two following changes:
- Set the password for the database login which was configured previously.
- Add “MultipleActiveResultSets=True” to the connection string. This setting is required by the Universal Providers used in the MVC 3 application.
*** WARNING – Storing your connection string in your Web.config file in plaintext is not recommended for security reasons. I’ve only done this here to keep this walkthrough simple. Please take the appropriate measures to ensure your connection string information is safely stored. ***
- Now we’re ready to package our application for Azure deployment.
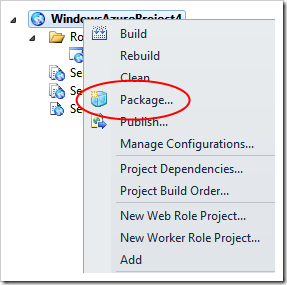
Right click on the Azure project in Solution Explorer. There are two ways to get our application published to Azure. There’s a direct “Publish” option and another “Package” option. For this walkthrough we’ll go with the simpler “Package” option as it doesn’t require configuring Visual Studio with additional Azure login credentials.
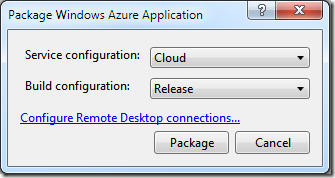
- In the package dialog, select “Cloud” as the service configuration and “Release” as the build configuration.
If we had build specific configuration files (e.g., Web.config transform files), we could choose the appropriate build configuration to package here.

- Click Package.
The Azure service package and Cloud configuration files will be created and a Windows Explorer window will open up to the folder where the files have been created. Make a note of this directory location. We’ll need it later to find the package to deploy to Azure.
Step 6 – Deploy the package on Azure
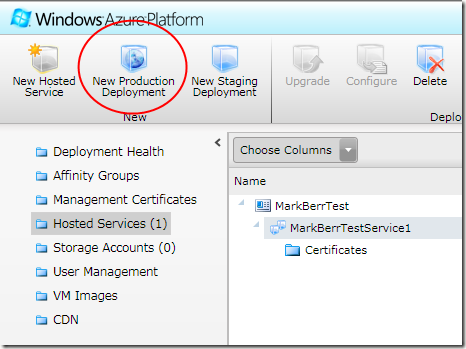
- Return to the Azure Management Portal, select the Hosted Service previously created and then select “New Production Deployment”.
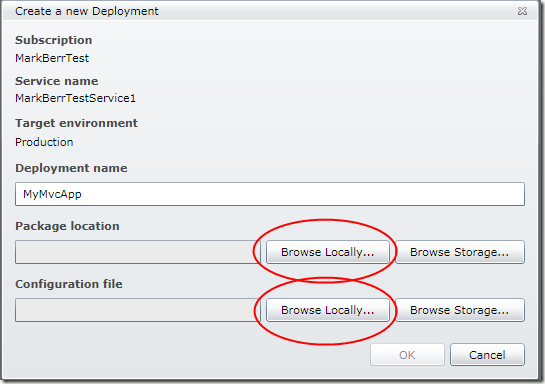
- In the next dialog, name the deployment and then browse locally and select the Azure service package and the Cloud configuration file previously created.
- Click OK.
A warning dialog will pop up stating there’s only one instance configured for this deployment. Ignore this for now. For real world application deployment, we would likely want multiple instances to ensure high availability for the site.
- Now wait (ranges between 5 – 15 minutes based on my experience) while the Azure Web Role machine is created. If all has gone well, we’ll see a new “instance” of the application with a status of “Ready”.
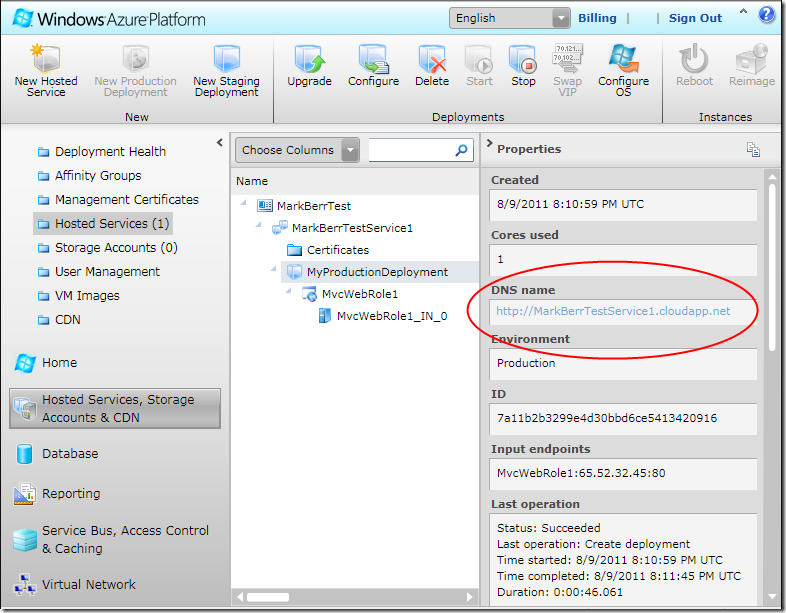
To find the URL of the site, click on the deployment in the tree and find “DNS name” in the “Properties” pane on the right hand side of the screen.
- Click on the “DNS name” to browse to the site.
- That’s it. We’re now up and running on Azure!
Hope this helps.





0 comments