Roslyn analyzers inspect your code for style, quality, maintainability, design and other issues. Because they are powered by the .NET Compiler Platform, they can produce warnings in your code as you type even before you’ve finished the line. In other words, you don’t have to build your code to find out that you made a mistake. Analyzers can also surface an automatic code fix through the Visual Studio light bulb prompt that allows you to clean up your code immediately. With live, project-based code analyzers in Visual Studio, API authors can ship domain-specific code analysis as part of their NuGet packages.
You don’t have to be a professional API author to write an analyzer. In this post, I’ll show you how to write your very first analyzer.
Getting started
In order to create a Roslyn Analyzer project, you need to install the .NET Compiler Platform SDK via the Visual Studio Installer. There are two different ways to find the .NET Compiler Platform SDK in the Visual Studio Installer:
Install using the Visual Studio Installer – Workloads view:
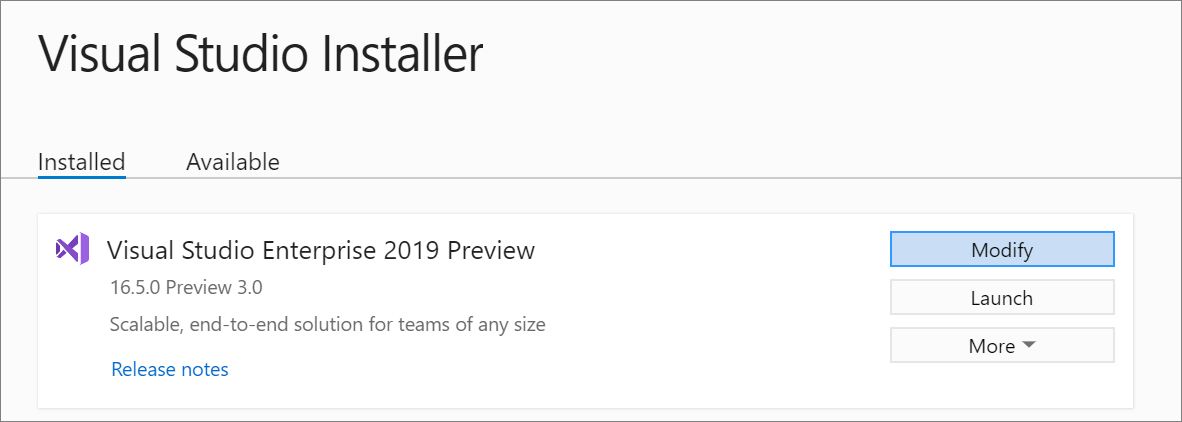
- Run the Visual Studio Installer and select Modify.

- Check the Visual Studio extension development workload.

Install using the Visual Studio Installer – Individual components tab:
- Run the Visual Studio Installer and select Modify.
- Select the Individual components tab.
- Check the box for .NET Compiler Platform SDK.

Writing an analyzer
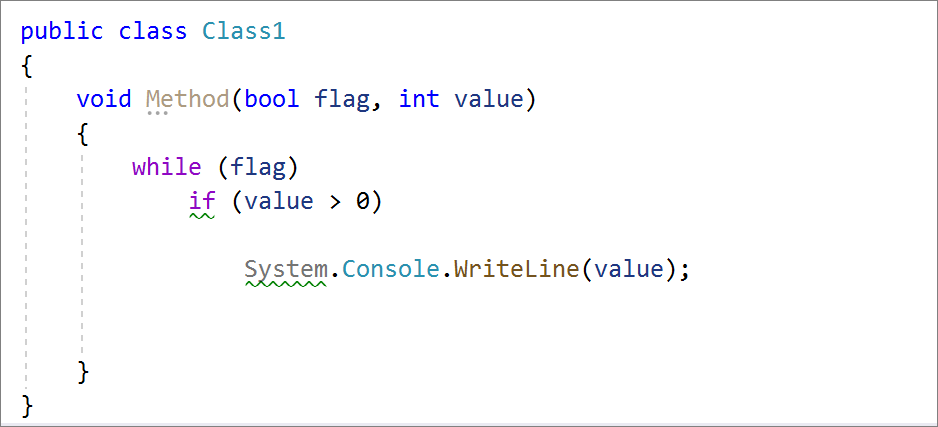
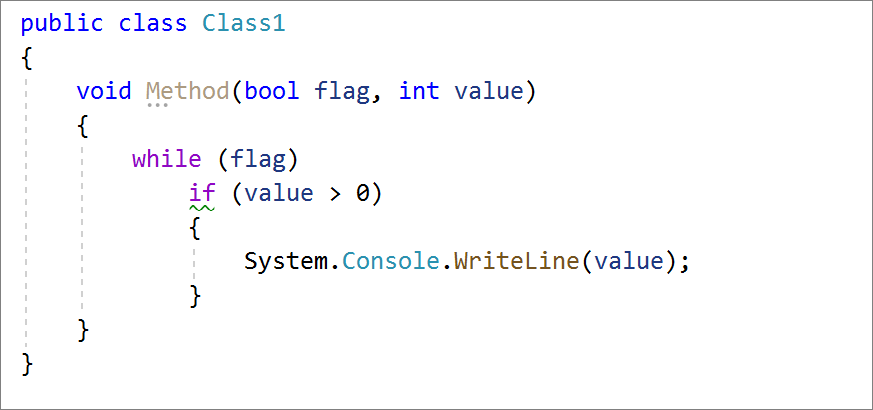
Let’s begin by creating a syntax tree analyzer. This analyzer generates a syntax warning for any statement that is not enclosed in a block that has curly braces { and }. For example, the following code generates a warning for both the if-statement and the System.Console.WriteLine invocation statement, but the while statement is not flagged:
- Open Visual Studio.
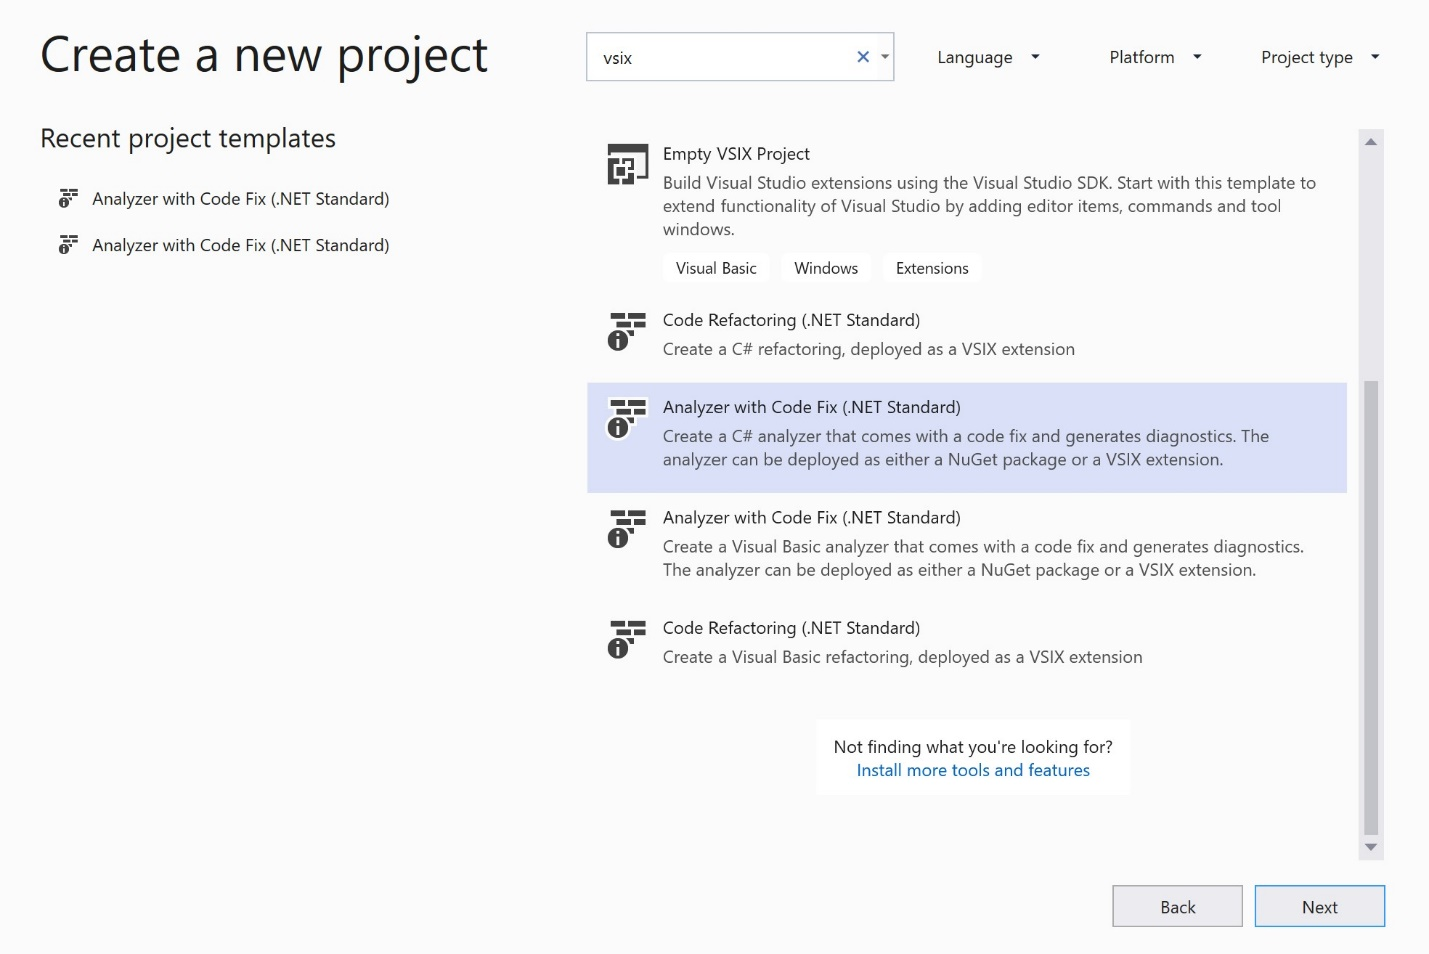
- On the Create a new project dialog search VSIX and select Analyzer with Code Fix (.NET Standard) in C# and click Next.

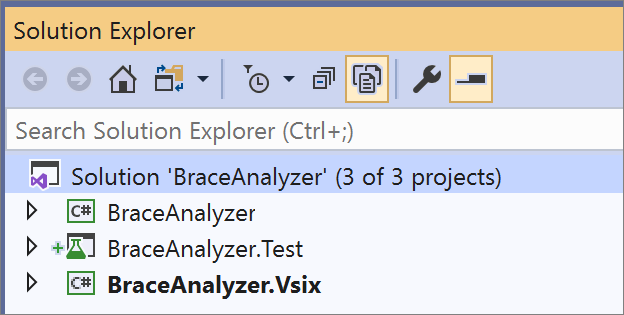
- Name your project BraceAnalyzer and click OK. The solution should contain 3 projects: BraceAnalyzer, BraceAnalyzer.Test, BraceAnalyzer.Vsix.

- BraceAnalyzer: This is the core analyzer project that contains the default analyzer implementation that reports a diagnostic for all type names that contain any lowercase letter.
- BraceAnalyzer.Test: This is a unit test project that lets you make sure your analyzer is producing the right diagnostics and fixes.
- BraceAnalyzer. Vsix: The VSIX project bundles the analyzer into an extension package (.vsix file). This is the startup project in the solution.
- In the Solution Explorer, open Resources.resx in the BraceAnalyzer project. This displays the resource editor.
- Replace the existing resource string values for AnalyzerDescription, AnalyzerMessageFormat, and AnalyzerTitle with the following strings:
- Change AnalyzerDescription to
Enclose statement with curly braces. - Change AnalyzerMessageFormat to
`{` brace expected. - Change AnalyzerTitle to
Enclose statement with curly braces.

- Change AnalyzerDescription to
- Within the BraceAnalyzerAnalyzer.cs file, replace the Initialize method implementation with the following code:
- Check your progress by pressing F5 to run your analyzer. Make sure that the BraceAnalyzer.Vsix project is the startup project before pressing F5. Running the VSIX project loads an experimental instance of Visual Studio, which lets Visual Studio keep track of a separate set of Visual Studio extensions.
- In the Visual Studio instance, create a new C# class library with the following code to verify that the analyzer diagnostic is neither reported for the method block nor the
whilestatement, but is reported for theifstatement andSystem.Console.WriteLineinvocation statement:
- Now, add curly braces around the
System.Console.WriteLineinvocation statement and verify that the only single warning is now reported for theifstatement:
public override void Initialize(AnalysisContext context)
{
    context.RegisterSyntaxTreeAction(syntaxTreeContext =>
    {
        // Iterate through all statements in the tree
        var root = syntaxTreeContext.Tree.GetRoot(syntaxTreeContext.CancellationToken);
        foreach (var statement in root.DescendantNodes().OfType<StatementSyntax>())
        {
            // Skip analyzing block statements
            if (statement is BlockSyntax)
            {
                continue;
            }

            // Report issues for all statements that are nested within a statement
            // but not a block statement
            if (statement.Parent is StatementSyntax && !(statement.Parent is BlockSyntax))
            {
                var diagnostic = Diagnostic.Create(Rule, statement.GetFirstToken().GetLocation());
                syntaxTreeContext.ReportDiagnostic(diagnostic);
            }
        }
    });
}
Writing a code fix
An analyzer can provide one or more code fixes. A code fix defines an edit that addresses the reported issue. For the analyzer that you created, you can provide a code fix that encloses a statement with a curly brace.
- Open the BraceAnalyzerCodeFixProvider.cs file. This code fix is already wired up to the Diagnostic ID produced by your diagnostic analyzer, but it doesn’t yet implement the right code transform.
- Change the title string to “Add brace”:
- Change the following line to register a code fix. Your fix will create a new document that results from adding braces.
- You’ll notice red squiggles in the code you just added on the
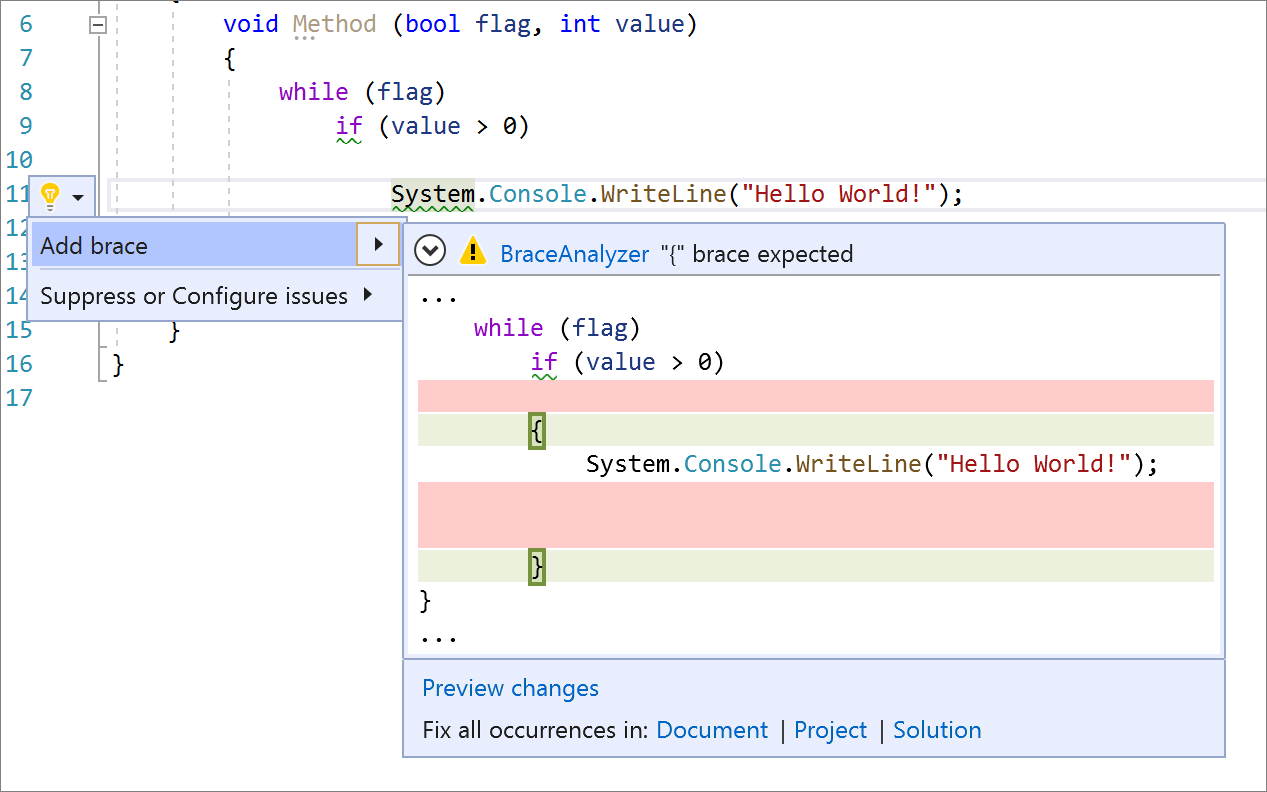
AddBracesAsyncsymbol. Add a declaration forAddBracesAsyncby replacing theMakeUpperCaseAsyncmethod with the following code: - Press F5 to run the analyzer project in a second instance of Visual Studio. Place your cursor on the diagnostic and press (Ctrl+.) to trigger the Quick Actions and Refactorings menu. Notice your code fix to add a brace!

private const string title = "Add brace";
context.RegisterCodeFix(
        CodeAction.Create(
            title: title,
            createChangedDocument: c => AddBracesAsync(context.Document, diagnostic, root),
            equivalenceKey: title),
        diagnostic);
Task<Document>AddBracesAsync(Document document, Diagnostic diagnostic, SyntaxNode root) { var statement = root.FindNode(diagnostic.Location.SourceSpan).FirstAncestorOrSelf<StatementSyntax>(); var newRoot = root.ReplaceNode(statement, SyntaxFactory.Block(statement)); return Task.FromResult(document.WithSyntaxRoot(newRoot)); }
Conclusion
Congratulations! You’ve created your first Roslyn analyzer that performs on-the-fly code analysis to detect an issue and provides a code fix to correct it. Now that you’re familiar with the .NET Compiler Platform SDK (Roslyn APIs), writing your next analyzer will be a breeze.





Great intro to analyzers. It makes it a lot easier when writing the first one. Thanks for sharing.
I wrote a post on an alternative way to manage the test data when unit testing the analyzers and code fixers. It may be useful to others: https://medium.com/@antao.almada/unit-testing-a-roslyn-analyzer-b3da666f0252
Great content!!
Great article. Thank you. I’m excited to add this skill to my toolbox.
Nice introduction to writing Roslyn analyzers 🙂
If you want to go further, I’ve written some helpful posts based on my experiences:
– https://www.meziantou.net/writing-a-roslyn-analyzer.htm
– https://www.meziantou.net/writing-a-language-agnostic-roslyn-analyzer-using-ioperation.htm
– https://www.meziantou.net/working-with-types-in-a-roslyn-analyzer.htm
This is awesome!!
Any recommendations for the property values in DiagnosticDescriptor?
Id: How to avoid conflicts with other analyzers and tools? (dotnet/roslyn#4376 talks about what syntax is allowed.)
Category: Should a custom analyzer use entirely custom categories, or is there a list of recommended category names and their distinctive meanings? (Like there is a list of PowerShell verbs.)
MessageFormat: Is it OK to have two DiagnosticDescriptor instances for the same issue in different contexts (e.g. in a property accessor and in a method), with a different MessageFormat for each but the same Id?