For up to date instructions on how to get started with Blazor, please go to https://blazor.net.
Today we released our first public preview of Blazor, a new experimental .NET web framework using C#/Razor and HTML that runs in the browser with WebAssembly. Blazor enables full stack web development with the stability, consistency, and productivity of .NET. While this release is alpha quality and should not be used in production, the code for this release was written from the ground up with an eye towards building a production quality web UI framework.
In this release we’ve laid the ground work for the Blazor component model and added other foundational features, like routing, dependency injection, and JavaScript interop. We’ve also been working on the tooling experience so that you get great IntelliSense and completions in the Razor editor. Other features that have been demonstrated previously in prototype form, like live reload, debugging, and prerendering, have not been implemented yet, but are planned for future preview updates. Even so, there is plenty in this release for folks to start kicking the tires and giving feedback on the current direction. For additional details on what’s included in this release and known issue please see the release notes.
Let’s get started!
Help & feedback
Your feedback is especially important to us during this experimental phase for Blazor. If you run into issues or have questions while trying out Blazor please let us know!
- File issues on GitHub for any problems you run into or to make suggestions for improvements.
- Chat with us and the Blazor community on Gitter if you get stuck or to share how blazor is working for you.
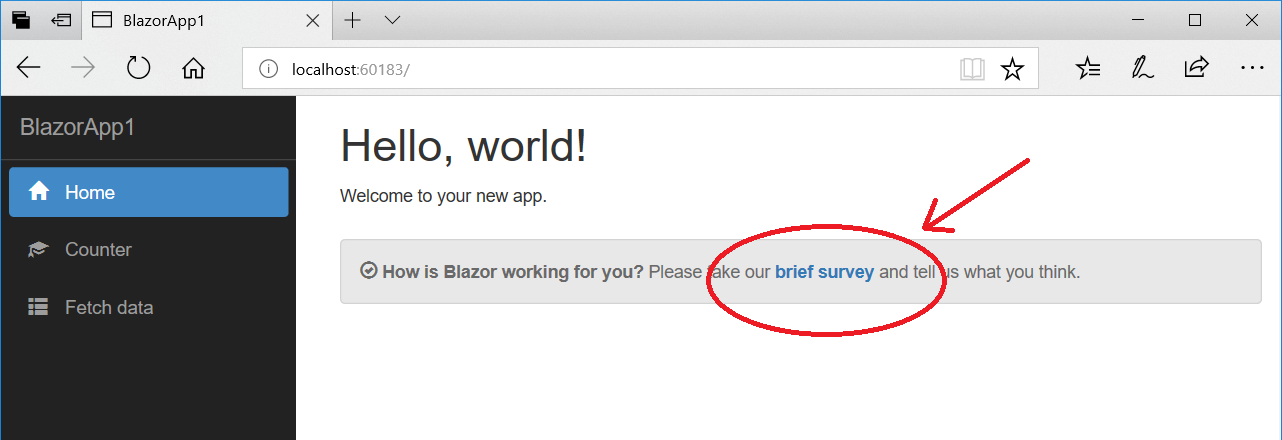
Also, after you’ve tried out Blazor for a while please let us know what you think by taking our in-product survey. Just click the survey link shown on the app home page when running one of the Blazor project templates:
Get started
To get setup with Blazor:
- Install the .NET Core 2.1 Preview 1 SDK.
- Install the latest preview of Visual Studio 2017 (15.7) with the ASP.NET and web development workload.
- Note: You can install Visual Studio previews side-by-side with an existing Visual Studio installation without impacting your existing development environment.
- Install the ASP.NET Core Blazor Language Services extension from the Visual Studio Marketplace.
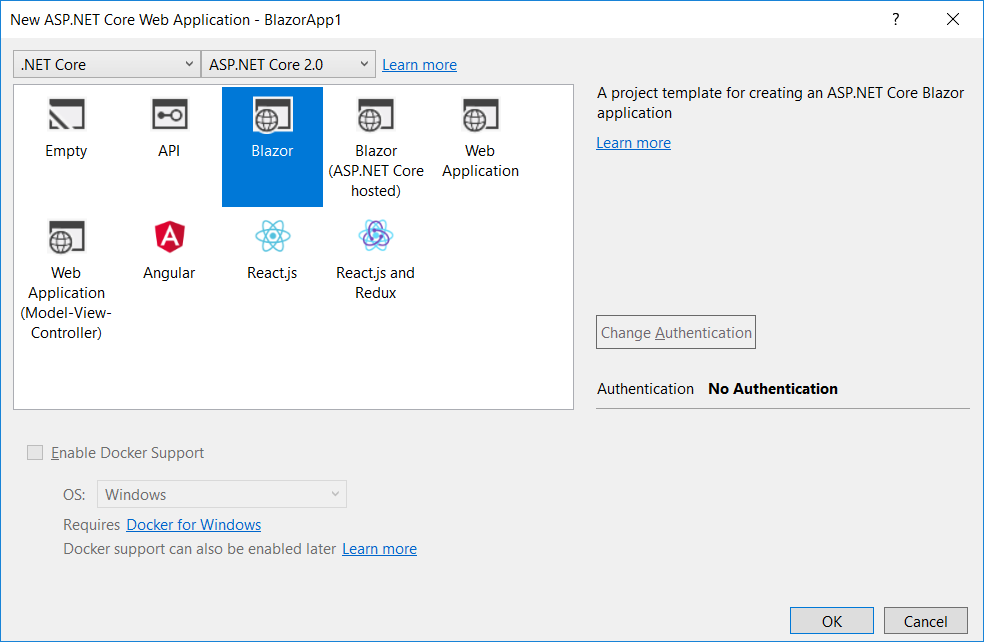
To create your first project from Visual Studio:
- Select File -> New Project -> Web -> ASP.NET Core Web Application
- Make sure .NET Core and ASP.NET Core 2.0 are selected at the top.
-
Pick the Blazor template
-
Press Ctrl-F5 to run the app without the debugger. Running with the debugger (F5) is not supported at this time.
If you’re not using Visual Studio you can install the Blazor templates from the command-line:
dotnet new -<span class="hljs-selector-tag">i</span> Microsoft<span class="hljs-selector-class">.AspNetCore</span><span class="hljs-selector-class">.Blazor</span><span class="hljs-selector-class">.Templates</span>
dotnet new blazor -o BlazorApp1
cd BlazorApp1
dotnet run
Congrats! You just ran your first Blazor app!
Building components
When you browse to the app, you’ll see that it has three prebuilt pages: a home page, a counter page, and a fetch data page:
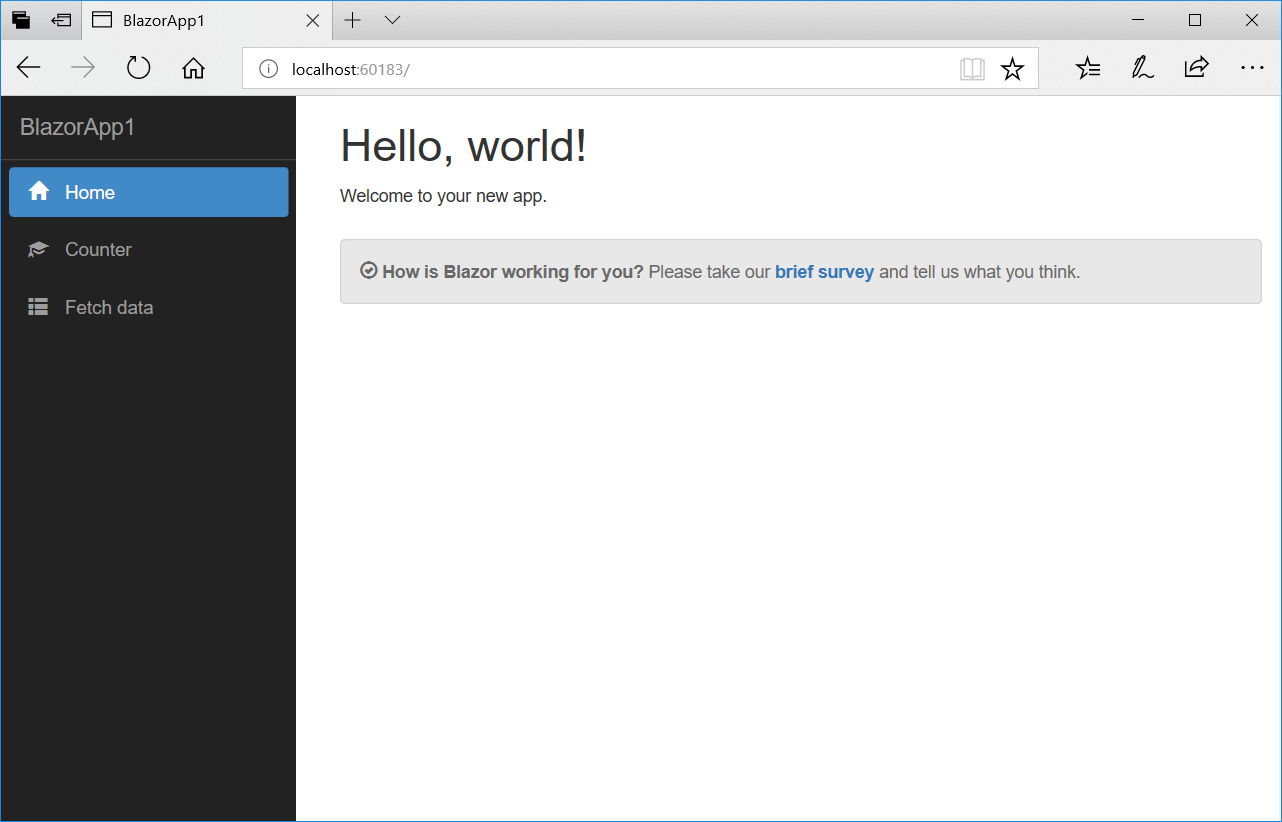
These three pages are implemented by the three Razor files in the Pages folder: Index.cshtml, Counter.cshtml, FetchData.cshtml. Each of these files implements a Blazor component. The home page only contains static markup, but the counter and fetch data pages contain C# logic that will get compiled and executed client-side in the browser.
The counter page has a button that increments a count each time you press it without a page refresh.
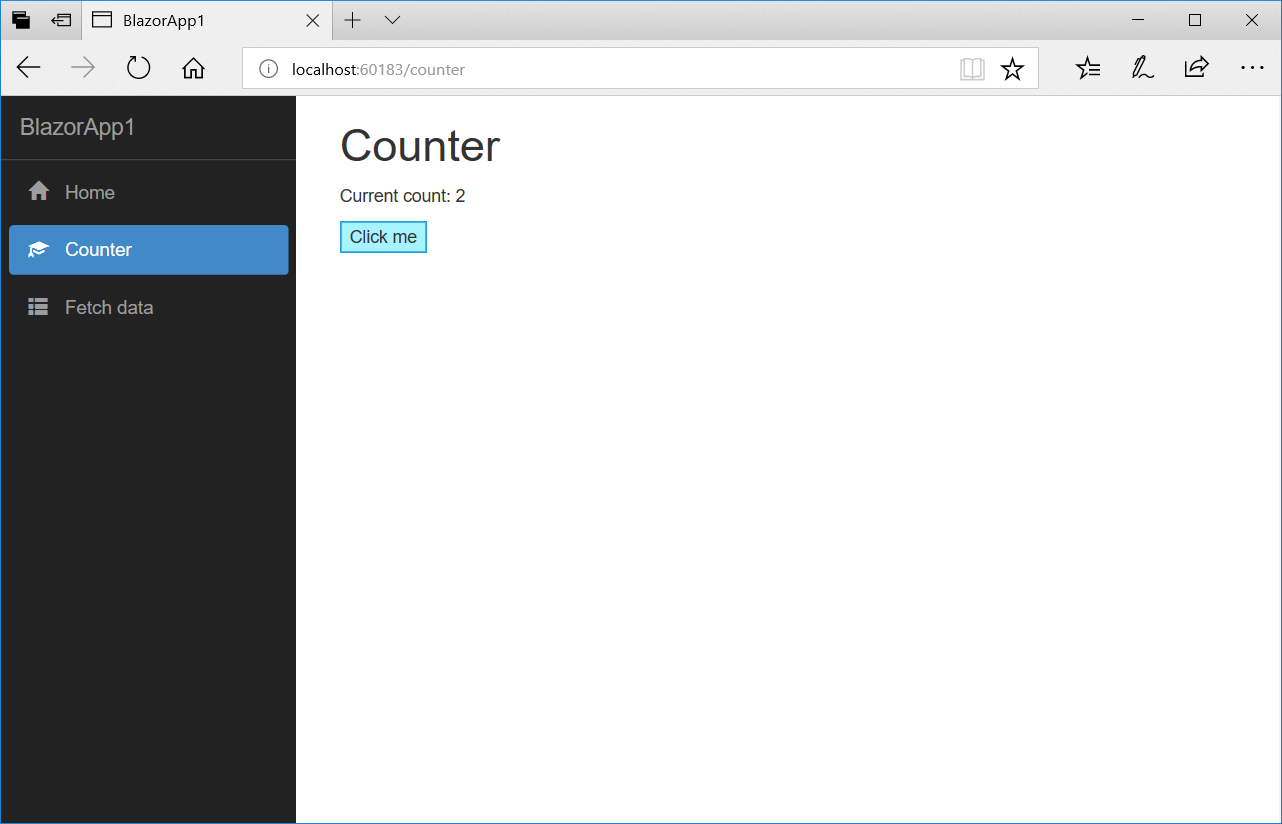
Normally this kind of client-side behavior would be handled in JavaScript, but here it’s implemented in C# and .NET by the Counter component. Take a look at the implementation of the Counter component in the Counter.cshtml file:
<span class="hljs-meta">@page</span> <span class="hljs-string">"/counter"</span>
<span class="hljs-variable"><h1></span>Counter<span class="hljs-variable"></h1></span>

<span class="hljs-variable"><p></span>Current count: <span class="hljs-meta">@currentCount</p></span>

<span class="hljs-variable"><button @onclick(IncrementCount)></span>Click me<span class="hljs-variable"></button></span>

<span class="hljs-meta">@functions</span> {
    int currentCount = 0;

    void IncrementCount()
    {
        currentCount++;
    }
}
Each Razor (.cshtml) file defines a Blazor component. A Blazor component is a .NET class that defines a reusable piece of web UI. The UI for the Counter component is defined using normal HTML. Dynamic rendering logic (loops, conditionals, expressions, etc.) can be added using Razor syntax. The HTML markup and rendering logic are converted into a component class at build time. The name of the generated .NET class matches the name of the file.
Members of the component class are defined in a @functions block. In the @functions block you can specify component state (properties, fields) as well as methods for event handling or for defining other component logic. These members can then be used as part of the component’s rendering logic and for handling events.
Note: Defining components in a single Razor file is typical, but in a future update you will also be able to define component logic in a code behind file.
Each time an event occurs on a component (like the onclick event in the Counter component), that component regenerates its render tree. Blazor will then compare the new render tree against the previous one and apply any modifications to the browser DOM.
Routing to components
The @page directive at the top of the Counter.cshtml file specifies that this component is a page to which requests can be routed. Specifically, the Counter component will handle requests sent to /counter. Without the @page directive the component would not handle any routed request, but it could still be used by other components.
Routing requests to specific components is handled by the Router component, which is used by the root App component in App.cshtml:
<span class="hljs-comment"><!--
    Configuring this here is temporary. Later we'll move the app config
    into Program.cs, and it won't be necessary to specify AppAssembly.
--></span>
<span class="hljs-tag"><<span class="hljs-name">Router</span> <span class="hljs-attr">AppAssembly</span>=<span class="hljs-string">typeof(Program).Assembly</span> /></span>
Using components
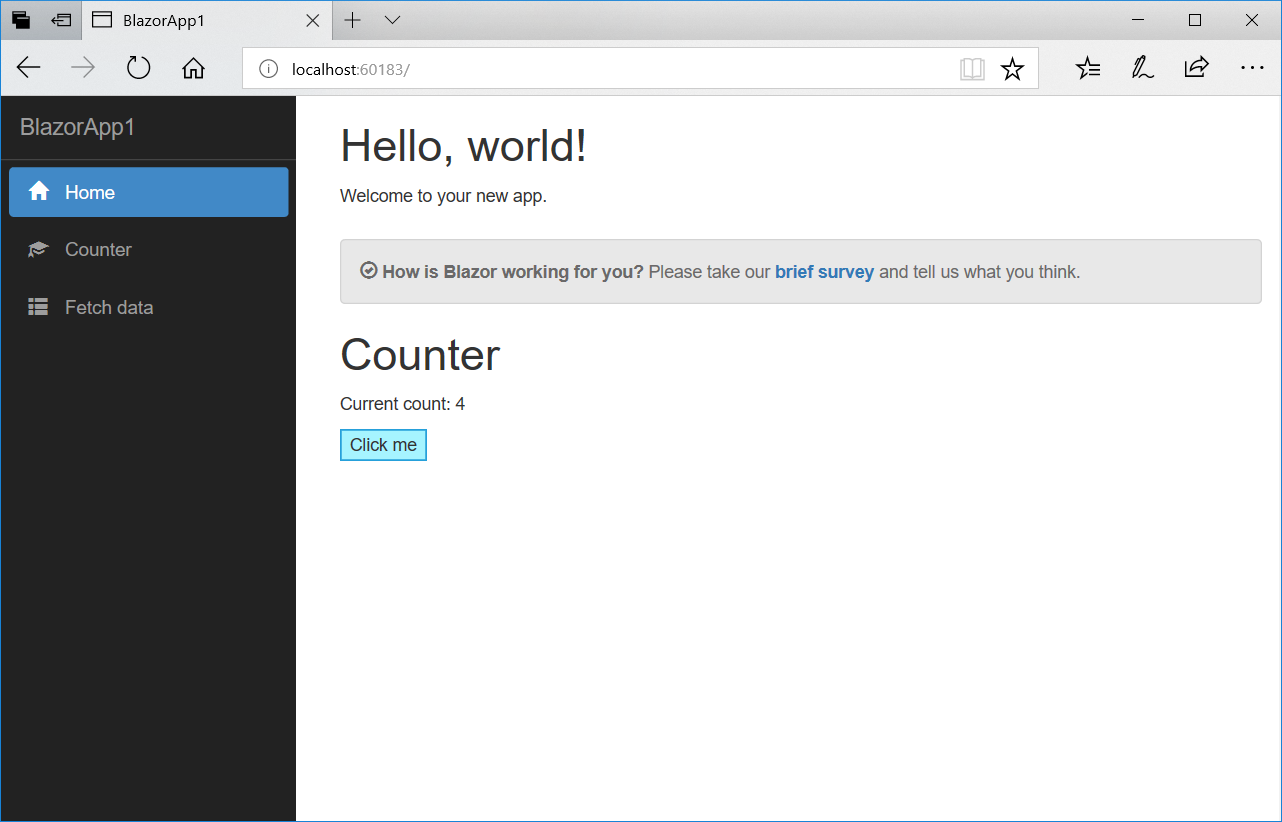
Once you define a component it can be used to implement other components. For example, we can add a Counter component to the home page of the app, like this:
<span class="hljs-meta">@page</span> <span class="hljs-string">"/"</span>

<span class="hljs-variable"><h1></span>Hello, world!<span class="hljs-variable"></h1></span>

Welcome to your new app.

<span class="hljs-variable"><SurveyPrompt Title="How is Blazor working for you?" /></span>

<span class="hljs-variable"><Counter /></span>
If you build and run the app again (live reload coming soon!) you should now see a separate instance of the Counter component on the home page.
Component parameters
Components can also have parameters, which you define using public properties on the component class. Let’s update the Counter component to have an IncrementAmount property that defaults to 1, but that we can change to something different.
<span class="hljs-meta">@page</span> <span class="hljs-string">"/counter"</span>
<h1>Counter</h1>

<p>Current count: <span class="hljs-meta">@currentCount</span></p>

<button <span class="hljs-meta">@onclick</span>(IncrementCount)>Click me</button>

<span class="hljs-meta">@functions</span> {
    <span class="hljs-built_in">int</span> currentCount = <span class="hljs-number">0</span>;

    public <span class="hljs-built_in">int</span> IncrementAmount { <span class="hljs-keyword">get</span>; <span class="hljs-keyword">set</span>; } = <span class="hljs-number">1</span>;

    <span class="hljs-keyword">void</span> IncrementCount()
    {
        currentCount += IncrementAmount;
    }
}
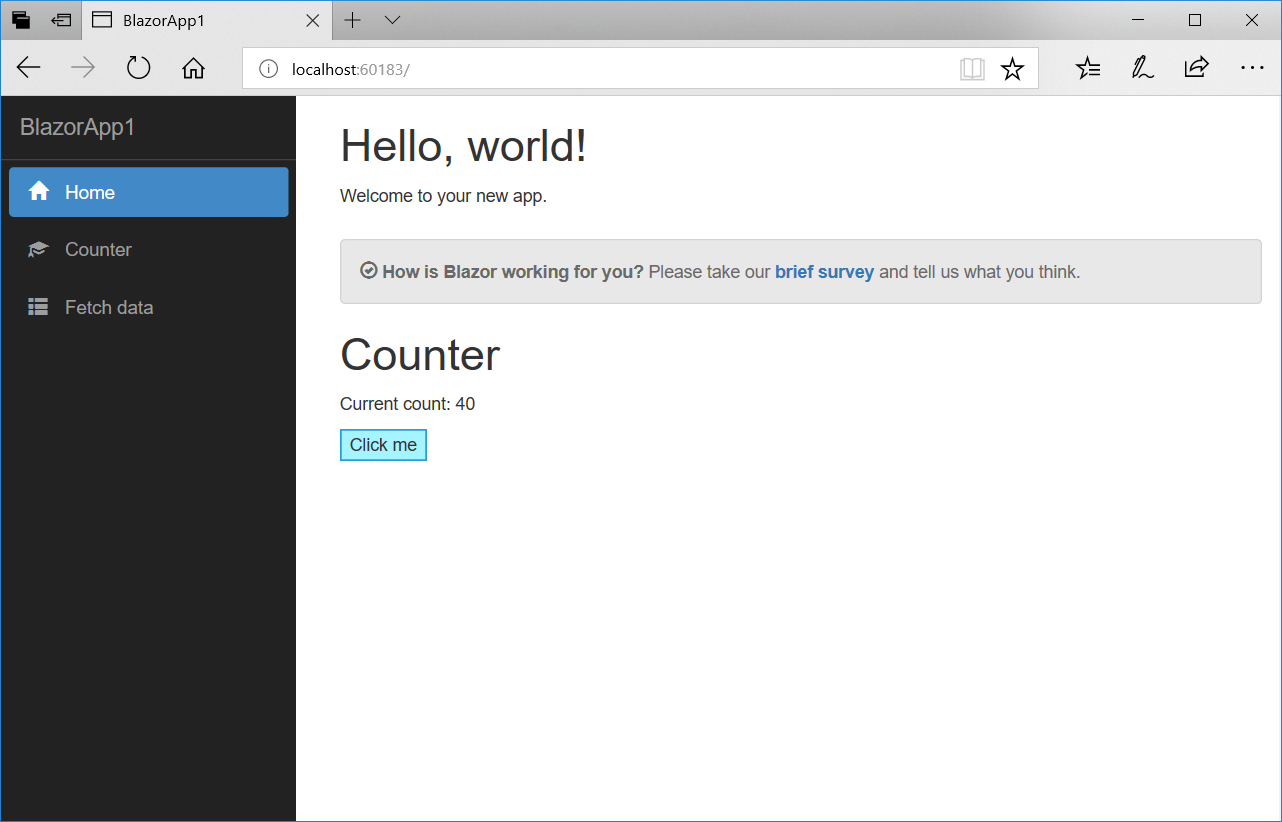
The component parameters can be set as attributes on the component tag. In the home page change the increment amount for the counter to 10.
<span class="hljs-meta">@page</span> <span class="hljs-string">"/"</span>

<span class="hljs-variable"><h1></span>Hello, world!<span class="hljs-variable"></h1></span>

Welcome to your new app.

<span class="hljs-variable"><Counter IncrementAmount="10" /></span>
When you build and run the app the counter on the home page now increments by 10, while the counter page still increments by 1.
Layouts
The layout for the app is specified using the @layout directive in _ViewImports.cshtml in the Pages folder.
<span class="hljs-meta">@layout</span> MainLayout
Layouts in Blazor are also also built as components. In our app the MainLayout component in Shared/MainLayout.cshtml defines the app layout.
<span class="hljs-variable">@implements</span> ILayoutComponent

<div class=<span class="hljs-string">'container-fluid'</span>>
    <div class=<span class="hljs-string">'row'</span>>
        <div class=<span class="hljs-string">'col-sm-3'</span>>
            <NavMenu />
        </div>
        <div class=<span class="hljs-string">'col-sm-9'</span>>
            <span class="hljs-variable">@Body</span>
        </div>
    </div>
</div>

<span class="hljs-variable">@functions</span> {
    <span class="hljs-selector-tag">public</span> <span class="hljs-selector-tag">RenderFragment</span> <span class="hljs-selector-tag">Body</span> { <span class="hljs-selector-tag">get</span>; <span class="hljs-selector-tag">set</span>; }
}
Layout components implement ILayoutComponent. In Razor syntax interfaces can be implemented using the @implements directive. The Body property on the ILayoutComponent interface is used by the layout component to specify where the body content should be rendered. In our app the MainLayout component adds a NavMenu component and then renders the body in the main section of the page.
The NavMenu component is implemented in Shared/NavMenu.cshtml and creates a Bootstrap nav bar. The nav links are generated using the built-in NavLink component, which generates an anchor tag with an active CSS class if the current page matches the specified href.
The root component
The root component for the app is specified in the app’s Program.Main entry point defined in Program.cs. This is also where you configure services with the service provider for the app.
<span class="hljs-keyword">class</span> <span class="hljs-title">Program</span>
{
    <span class="hljs-function"><span class="hljs-keyword">static</span> <span class="hljs-keyword">void</span> <span class="hljs-title">Main</span>(<span class="hljs-params"><span class="hljs-keyword">string</span>[] args</span>)
    </span>{
        <span class="hljs-keyword">var</span> serviceProvider = <span class="hljs-keyword">new</span> BrowserServiceProvider(configure =>
        {
            <span class="hljs-comment">// Add any custom services here</span>
        });

        <span class="hljs-keyword">new</span> BrowserRenderer(serviceProvider).AddComponent<App>(<span class="hljs-string">"app"</span>);
    }
}
The DOM element selector argument determines where the root component will get rendered. In our case, the app element in index.html is used.
<span class="hljs-meta"><!DOCTYPE html></span>
<span class="hljs-tag"><<span class="hljs-name">html</span>></span>
<span class="hljs-tag"><<span class="hljs-name">head</span>></span>
    <span class="hljs-tag"><<span class="hljs-name">meta</span> <span class="hljs-attr">charset</span>=<span class="hljs-string">"utf-8"</span> /></span>
    <span class="hljs-tag"><<span class="hljs-name">title</span>></span>BlazorApp1<span class="hljs-tag"></<span class="hljs-name">title</span>></span>
    <span class="hljs-tag"><<span class="hljs-name">base</span> <span class="hljs-attr">href</span>=<span class="hljs-string">"/"</span> /></span>
    <span class="hljs-tag"><<span class="hljs-name">link</span> <span class="hljs-attr">href</span>=<span class="hljs-string">"css/bootstrap/bootstrap.min.css"</span> <span class="hljs-attr">rel</span>=<span class="hljs-string">"stylesheet"</span> /></span>
    <span class="hljs-tag"><<span class="hljs-name">link</span> <span class="hljs-attr">href</span>=<span class="hljs-string">"css/site.css"</span> <span class="hljs-attr">rel</span>=<span class="hljs-string">"stylesheet"</span> /></span>
<span class="hljs-tag"></<span class="hljs-name">head</span>></span>
<span class="hljs-tag"><<span class="hljs-name">body</span>></span>
    <span class="hljs-tag"><<span class="hljs-name">app</span>></span>Loading...<span class="hljs-tag"></<span class="hljs-name">app</span>></span> <span class="hljs-comment"><!--Root component goes here--></span>

    <span class="hljs-tag"><<span class="hljs-name">script</span> <span class="hljs-attr">src</span>=<span class="hljs-string">"css/bootstrap/bootstrap-native.min.js"</span>></span><span class="undefined"></span><span class="hljs-tag"></<span class="hljs-name">script</span>></span>
    <span class="hljs-tag"><<span class="hljs-name">script</span> <span class="hljs-attr">type</span>=<span class="hljs-string">"blazor-boot"</span>></span><span class="undefined"></span><span class="hljs-tag"></<span class="hljs-name">script</span>></span>
<span class="hljs-tag"></<span class="hljs-name">body</span>></span>
<span class="hljs-tag"></<span class="hljs-name">html</span>></span>
Bootstrapping the runtime
At build-time the blazor-boot script tag is replaced with a bootstrapping script that handles starting the .NET runtime and executing the app’s entry point. You can see the updated script tag using the browser developer tools.
<span class="hljs-tag"><<span class="hljs-name">script</span> <span class="hljs-attr">src</span>=<span class="hljs-string">"_framework/blazor.js"</span> <span class="hljs-attr">main</span>=<span class="hljs-string">"BlazorApp1.dll"</span> <span class="hljs-attr">entrypoint</span>=<span class="hljs-string">"BlazorApp1.Program::Main"</span> <span class="hljs-attr">references</span>=<span class="hljs-string">"Microsoft.AspNetCore.Blazor.dll,netstandard.dll,..."</span>></span><span class="undefined"></span><span class="hljs-tag"></<span class="hljs-name">script</span>></span>
As part of the build Blazor will analyze which code paths are being used from the referenced assemblies and then remove unused assemblies and code.
Dependency injection
Services registered with the app’s service provider are available to components via dependency injection. You can inject services into a component using constructor injection or using the @inject directive. The latter is how an HttpClient is injected into the FetchData component.
<span class="hljs-keyword">@page</span> <span class="hljs-string">"/fetchdata"</span>
<span class="hljs-variable">@inject</span> HttpClient Http
The FetchData component uses the injected HttpClient to retrieve some JSON from the server when the component is initialized.
@functions {
    WeatherForecast[] forecasts;

    <span class="hljs-function"><span class="hljs-keyword">protected</span> <span class="hljs-keyword">override</span> <span class="hljs-keyword">async</span> Task <span class="hljs-title">OnInitAsync</span>(<span class="hljs-params"></span>)
    </span>{
        forecasts = <span class="hljs-keyword">await</span> Http.GetJsonAsync<WeatherForecast[]>(<span class="hljs-string">"/sample-data/weather.json"</span>);
    }

    <span class="hljs-keyword">class</span> <span class="hljs-title">WeatherForecast</span>
    {
        <span class="hljs-keyword">public</span> DateTime Date { <span class="hljs-keyword">get</span>; <span class="hljs-keyword">set</span>; }
        <span class="hljs-keyword">public</span> <span class="hljs-keyword">int</span> TemperatureC { <span class="hljs-keyword">get</span>; <span class="hljs-keyword">set</span>; }
        <span class="hljs-keyword">public</span> <span class="hljs-keyword">int</span> TemperatureF { <span class="hljs-keyword">get</span>; <span class="hljs-keyword">set</span>; }
        <span class="hljs-keyword">public</span> <span class="hljs-keyword">string</span> Summary { <span class="hljs-keyword">get</span>; <span class="hljs-keyword">set</span>; }
    }
}
The data is deserialized into the forecasts C# variable as an array of WeatherForecast objects and then used to render the weather table.
<span class="hljs-tag"><<span class="hljs-name">table</span> <span class="hljs-attr">class</span>=<span class="hljs-string">'table'</span>></span>
    <span class="hljs-tag"><<span class="hljs-name">thead</span>></span>
        <span class="hljs-tag"><<span class="hljs-name">tr</span>></span>
            <span class="hljs-tag"><<span class="hljs-name">th</span>></span>Date<span class="hljs-tag"></<span class="hljs-name">th</span>></span>
            <span class="hljs-tag"><<span class="hljs-name">th</span>></span>Temp. (C)<span class="hljs-tag"></<span class="hljs-name">th</span>></span>
            <span class="hljs-tag"><<span class="hljs-name">th</span>></span>Temp. (F)<span class="hljs-tag"></<span class="hljs-name">th</span>></span>
            <span class="hljs-tag"><<span class="hljs-name">th</span>></span>Summary<span class="hljs-tag"></<span class="hljs-name">th</span>></span>
        <span class="hljs-tag"></<span class="hljs-name">tr</span>></span>
    <span class="hljs-tag"></<span class="hljs-name">thead</span>></span>
    <span class="hljs-tag"><<span class="hljs-name">tbody</span>></span>
        @foreach (var forecast in forecasts)
        {
            <span class="hljs-tag"><<span class="hljs-name">tr</span>></span>
                <span class="hljs-tag"><<span class="hljs-name">td</span>></span>@forecast.Date.ToShortDateString()<span class="hljs-tag"></<span class="hljs-name">td</span>></span>
                <span class="hljs-tag"><<span class="hljs-name">td</span>></span>@forecast.TemperatureC<span class="hljs-tag"></<span class="hljs-name">td</span>></span>
                <span class="hljs-tag"><<span class="hljs-name">td</span>></span>@forecast.TemperatureF<span class="hljs-tag"></<span class="hljs-name">td</span>></span>
                <span class="hljs-tag"><<span class="hljs-name">td</span>></span>@forecast.Summary<span class="hljs-tag"></<span class="hljs-name">td</span>></span>
            <span class="hljs-tag"></<span class="hljs-name">tr</span>></span>
        }
    <span class="hljs-tag"></<span class="hljs-name">tbody</span>></span>
<span class="hljs-tag"></<span class="hljs-name">table</span>></span>
Hosting with ASP.NET Core
The Blazor template creates a client-side web application that can be used with any back end, but by hosting your Blazor application with ASP.NET Core you can do full stack web development with .NET.
The “Blazor (ASP.NET Core Hosted)” project template creates a solution with three projects for you: 1. a Blazor client project, 2. an ASP.NET Core server project, and 3. a shared .NET Standard class library project.
To host the Blazor app in ASP.NET Core the server project has a reference to the client project. Blazor-specific middleware makes the Blazor client app available to browsers.
public void Configure(IApplicationBuilder <span class="hljs-keyword">app</span>, IHostingEnvironment env)
{
    <span class="hljs-keyword">app</span>.UseResponseCompression();

    <span class="hljs-keyword">if</span> (env.IsDevelopment())
    {
        <span class="hljs-keyword">app</span>.UseDeveloperExceptionPage();
    }

    <span class="hljs-keyword">app</span>.UseMvc(routes =>
    {
        routes.MapRoute(name: <span class="hljs-string">"default"</span>, template: <span class="hljs-string">"{controller}/{action}/{id?}"</span>);
    });

    <span class="hljs-keyword">app</span>.UseBlazor<Client.<span class="hljs-keyword">Program</span>>();
}
In the standalone Blazor app the weather forecast data was a static JSON file, but in the hosted project the SampleDataController provides the weather data Using ASP.NET Core.
The shared class library project is referenced by both the Blazor client project and the ASP.NET Core server project, so that code can be shared between the two projects. This is a great place to put your domain types. For example, the WeatherForecast class is used by the Web API in the ASP.NET Core project for serialization and in the Blazor project for deserialization.
Build a todo list
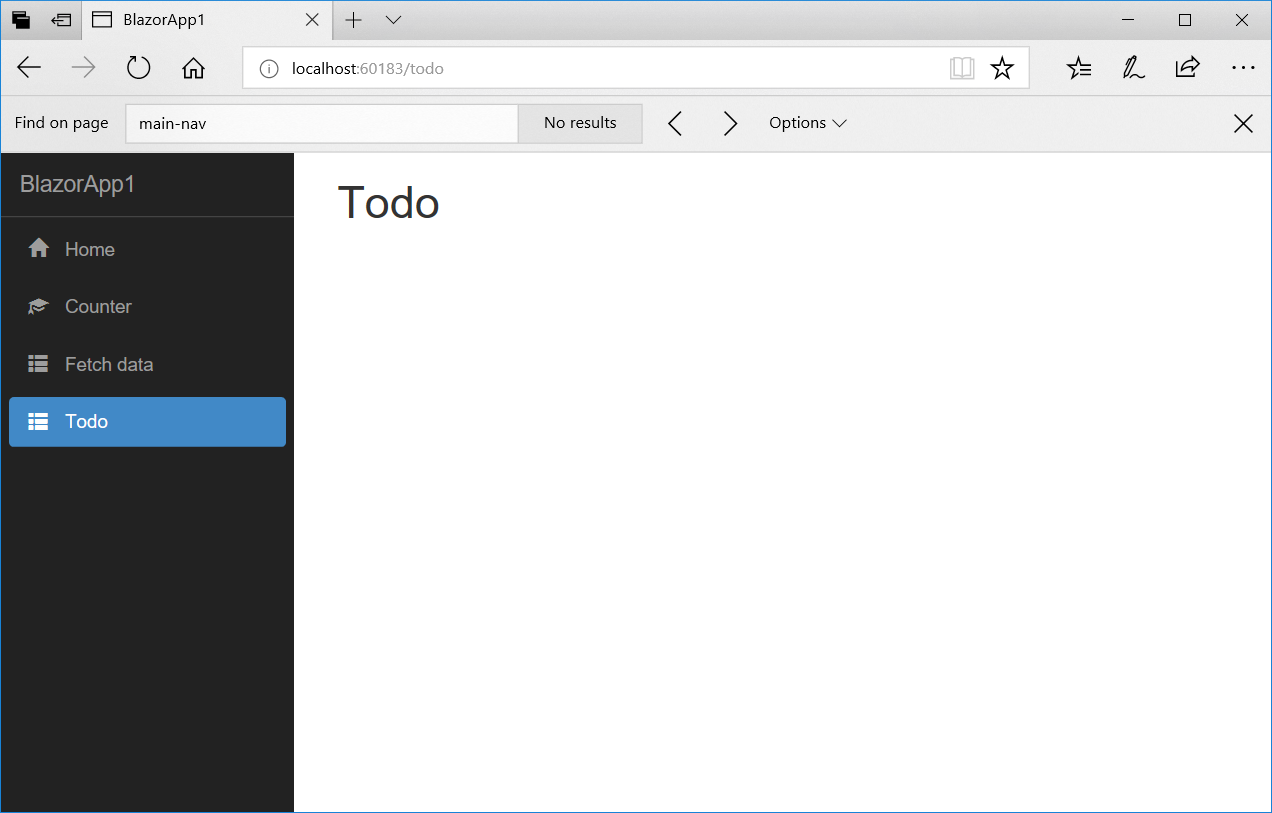
Let’s add a new page to our app that implements a simple todo list. Add a Pages/Todo.cshtml file to the project. We don’t have a Blazor component item template in Visual Studio quite yet, but you can use the Razor View item template as a substitute. Replace the content of the file with some initial markup:
<span class="hljs-meta">@page</span> <span class="hljs-string">"/todo"</span>

<span class="hljs-variable"><h1></span>Todo<span class="hljs-variable"></h1></span>
Now add the todo list page to the nav bar. Update Shared/Navbar.cshtml to add a nav link for the todo list.
<span class="hljs-tag"><<span class="hljs-name">li</span>></span>
    <span class="hljs-tag"><<span class="hljs-name">NavLink</span> <span class="hljs-attr">href</span>=<span class="hljs-string">"/todo"</span>></span>
        <span class="hljs-tag"><<span class="hljs-name">span</span> <span class="hljs-attr">class</span>=<span class="hljs-string">'glyphicon glyphicon-th-list'</span>></span><span class="hljs-tag"></<span class="hljs-name">span</span>></span> Todo
    <span class="hljs-tag"></<span class="hljs-name">NavLink</span>></span>
<span class="hljs-tag"></<span class="hljs-name">li</span>></span>
Build and run the app. You should now see the new todo page.
Add a class to represent your todo items.
<span class="hljs-keyword">public</span> <span class="hljs-keyword">class</span> <span class="hljs-title">TodoItem</span>
{
    <span class="hljs-keyword">public</span> <span class="hljs-keyword">string</span> Title { <span class="hljs-keyword">get</span>; <span class="hljs-keyword">set</span>; }
    <span class="hljs-keyword">public</span> <span class="hljs-keyword">bool</span> IsDone { <span class="hljs-keyword">get</span>; <span class="hljs-keyword">set</span>; }
}
The Todo component will maintain the state of the todo list. In the Todo component add a field for the todos in a @functions block and a foreach loop to render them.
<span class="hljs-meta">@page</span> <span class="hljs-string">"/todo"</span>

<span class="hljs-variable"><h1></span>Todo<span class="hljs-variable"></h1></span>

<span class="hljs-variable"><ul></span>
    <span class="hljs-meta">@foreach</span> (var todo in todos)
    {
        <span class="hljs-variable"><li></span><span class="hljs-meta">@todo.Title</li></span>
    }
<span class="hljs-variable"></ul></span>

<span class="hljs-meta">@functions</span> {
    IList<span class="hljs-variable"><TodoItem></span> todos = new List<span class="hljs-variable"><TodoItem></span>();
}
Now we need some UI for adding todos to the list. Add a text input and a button at the bottom of the list.
<span class="hljs-meta">@page</span> <span class="hljs-string">"/todo"</span>

<span class="hljs-variable"><h1></span>Todo<span class="hljs-variable"></h1></span>

<span class="hljs-variable"><ul></span>
    <span class="hljs-meta">@foreach</span> (var todo in todos)
    {
        <span class="hljs-variable"><li></span><span class="hljs-meta">@todo.Title</li></span>
    }
<span class="hljs-variable"></ul></span>

<span class="hljs-variable"><input placeholder="Something todo" /></span>
<span class="hljs-variable"><button></span>Add todo<span class="hljs-variable"></button></span>

<span class="hljs-meta">@functions</span> {
    IList<span class="hljs-variable"><TodoItem></span> todos = new List<span class="hljs-variable"><TodoItem></span>();
}
Nothing happens yet when we click the “Add todo” button, because we haven’t wired up an event handler. Add an AddTodo method to the Todo component and register it for button click using the @onclick attribute.
@page <span class="hljs-string">"/todo"</span>

<span class="hljs-params"><h1></span>Todo<span class="hljs-params"></h1></span>

<span class="hljs-params"><ul></span>
    @foreach (var todo in todos)
    {
        <span class="hljs-params"><li></span>@todo.Title<span class="hljs-params"></li></span>
    }
<span class="hljs-params"></ul></span>

<span class="hljs-params"><input placeholder="Something todo" /></span>
<span class="hljs-params"><button @onclick(AddTodo)></span>Add todo<span class="hljs-params"></button></span>

@<span class="hljs-class">functions </span>{
    IList<span class="hljs-params"><TodoItem></span> todos = new List<span class="hljs-params"><TodoItem></span>();

    void AddTodo()
    {
        <span class="hljs-comment">// <span class="hljs-doctag">Todo:</span> Add the todo</span>
    }
}
The AddTodo method will now get called every time the button is clicked. To get the title of the new todo item add a newTodo string field and bind it to the value of the text input using the @bind attribute. This sets up a two-way bind. We can now update the AddTodo method to add the TodoItem with the specified title to the list. Don’t forget to clear the value of the text input by setting newTodo to an empty string.
<span class="hljs-meta">@page</span> <span class="hljs-string">"/todo"</span>

<h1>Todo</h1>

<ul>
    <span class="hljs-meta">@foreach</span> (<span class="hljs-keyword">var</span> todo <span class="hljs-keyword">in</span> todos)
    {
        <li><span class="hljs-meta">@todo</span>.Title</li>
    }
</ul>

<input placeholder=<span class="hljs-string">"Something todo"</span> <span class="hljs-meta">@bind</span>(newTodo) />
<button <span class="hljs-meta">@onclick</span>(AddTodo)>Add todo</button>

<span class="hljs-meta">@functions</span> {
    IList<TodoItem> todos = <span class="hljs-keyword">new</span> <span class="hljs-built_in">List</span><TodoItem>();
    string newTodo;

    <span class="hljs-keyword">void</span> AddTodo()
    {
        <span class="hljs-keyword">if</span> (!<span class="hljs-built_in">String</span>.IsNullOrWhiteSpace(newTodo))
        {
            todos.Add(<span class="hljs-keyword">new</span> TodoItem { Title = newTodo });
            newTodo = <span class="hljs-string">""</span>;
        }
    }
}
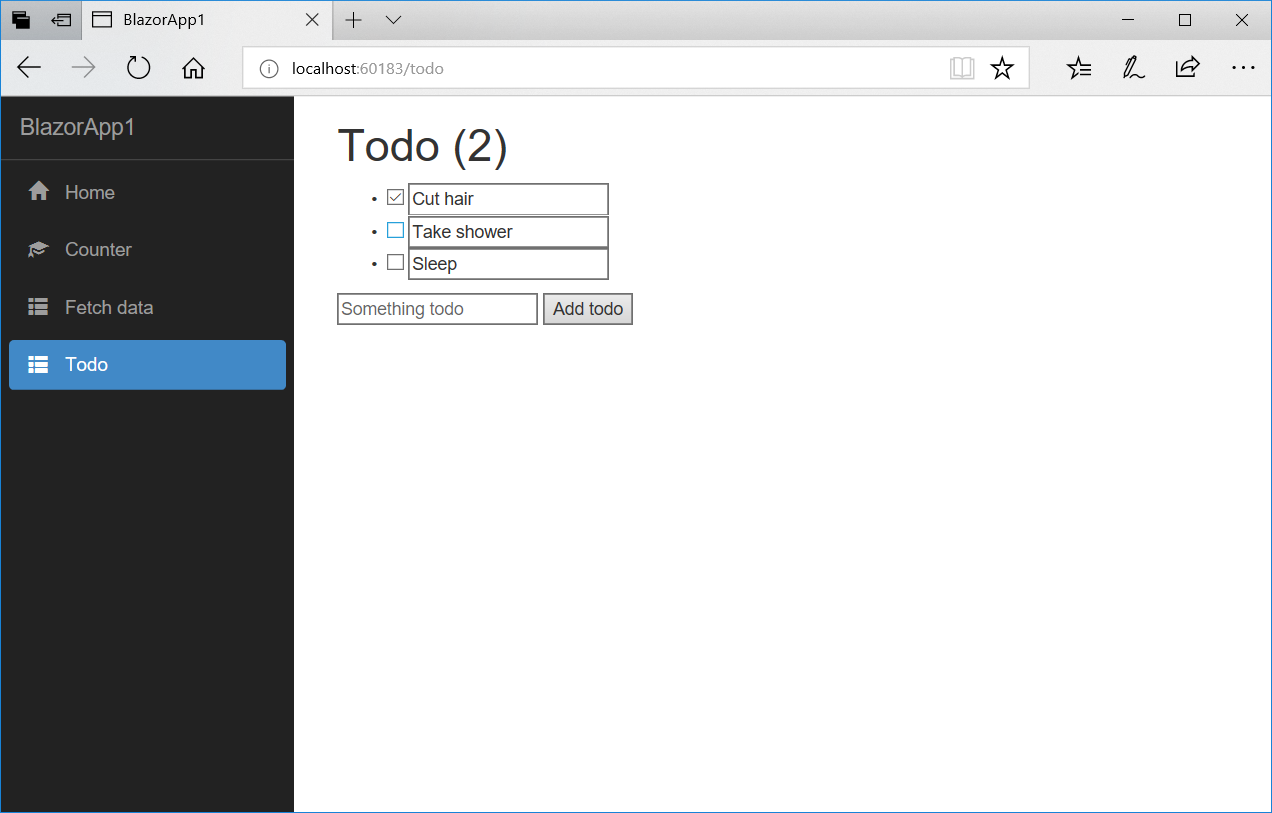
Lastly, what’s a todo list without check boxes? And while we’re at it we can make the title text for each todo item editable as well. Add a checkbox input and text input for each todo item and bind their values to the Title and IsDone properties respectively. To verify that these values are being bound, add a count in the header that shows the number of todo items that are not yet done.
<span class="hljs-meta">@page</span> <span class="hljs-string">"/todo"</span>

<h1>Todo (<span class="hljs-meta">@todos</span>.Where(todo => !todo.IsDone).Count())</h1>

<ul>
    <span class="hljs-meta">@foreach</span> (<span class="hljs-keyword">var</span> todo <span class="hljs-keyword">in</span> todos)
    {
        <li>
            <input type=<span class="hljs-string">"checkbox"</span> <span class="hljs-meta">@bind</span>(todo.IsDone) />
            <input <span class="hljs-meta">@bind</span>(todo.Title) />
        </li>
    }
</ul>

<input placeholder=<span class="hljs-string">"Something todo"</span> <span class="hljs-meta">@bind</span>(newTodo) />
<button <span class="hljs-meta">@onclick</span>(AddTodo)>Add todo</button>

<span class="hljs-meta">@functions</span> {
    IList<TodoItem> todos = <span class="hljs-keyword">new</span> <span class="hljs-built_in">List</span><TodoItem>();
    string newTodo;

    <span class="hljs-keyword">void</span> AddTodo()
    {
        <span class="hljs-keyword">if</span> (!<span class="hljs-built_in">String</span>.IsNullOrWhiteSpace(newTodo))
        {
            todos.Add(<span class="hljs-keyword">new</span> TodoItem { Title = newTodo });
            newTodo = <span class="hljs-string">""</span>;
        }
    }
}
Build and run the app and try adding some todo items.
Publishing and deployment
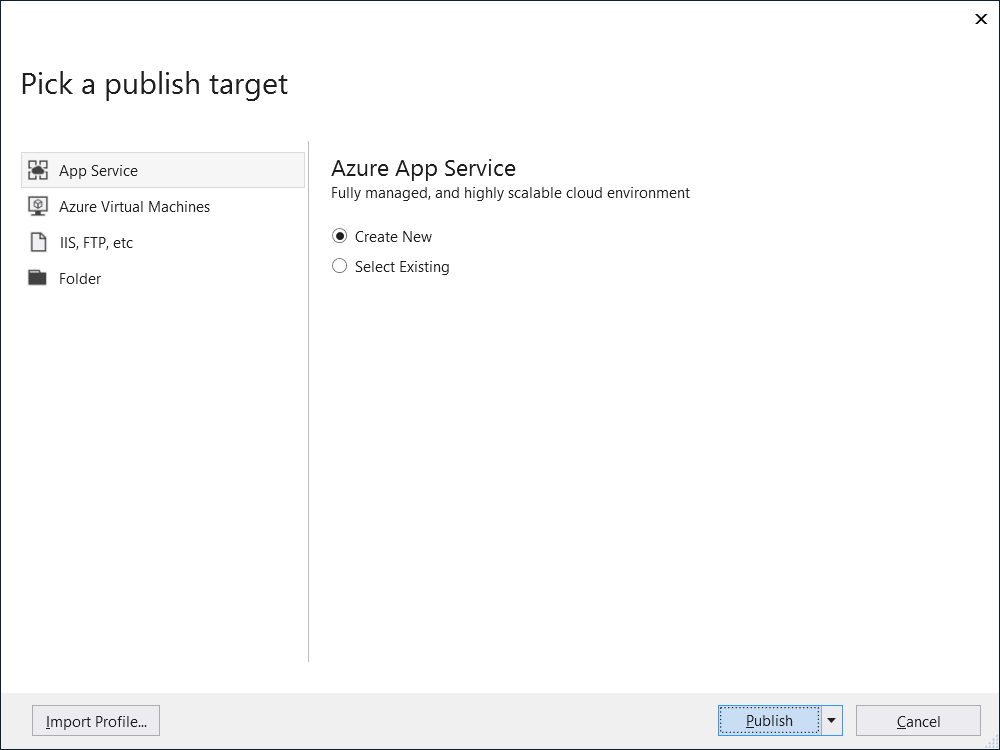
Now let’s publish our Blazor app to Azure. Right click on the project and select Publish (if you’re using the ASP.NET Core hosted template make sure you publish the server project). In the “Pick a publish target” dialog select “App Service” and “Create New”.
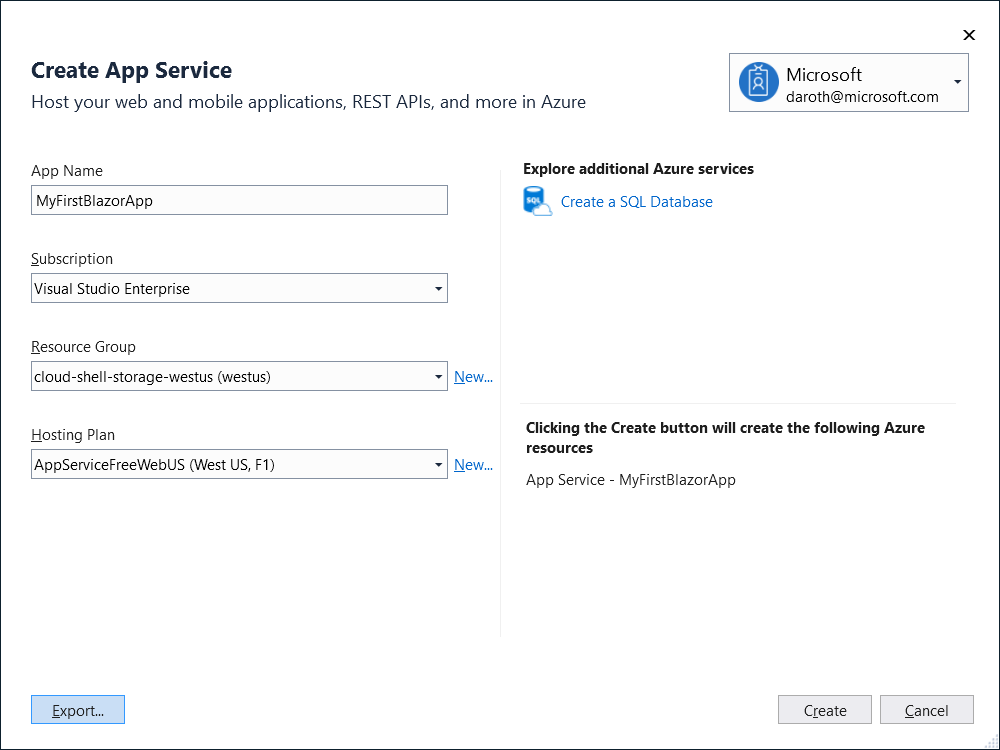
In the “Create App Service” dialog pick a name for the application and select the subscription, resource group, and hosting plan that you want to use. Tap “Create” to create the app service and publish the app.
Your app should now be running in Azure.
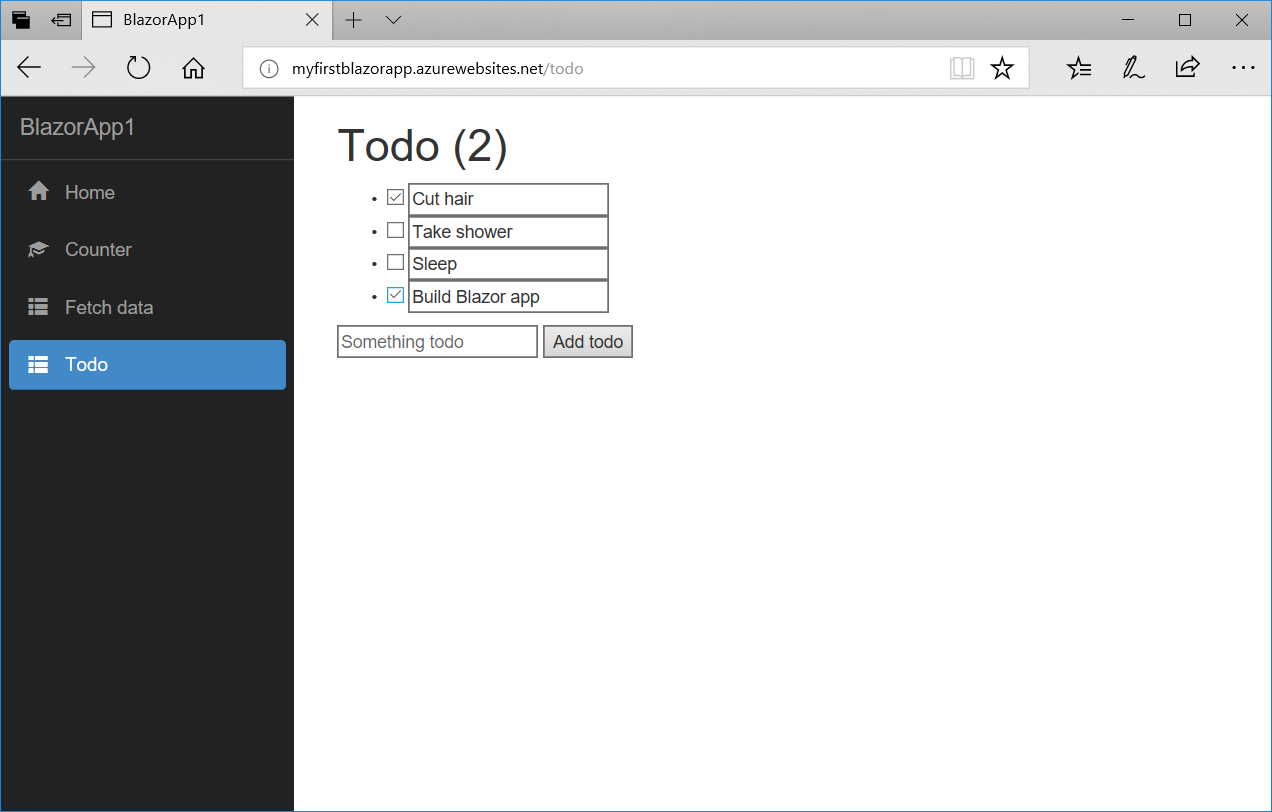
You can mark that todo item to build your first Blazor app as done! Nice job!
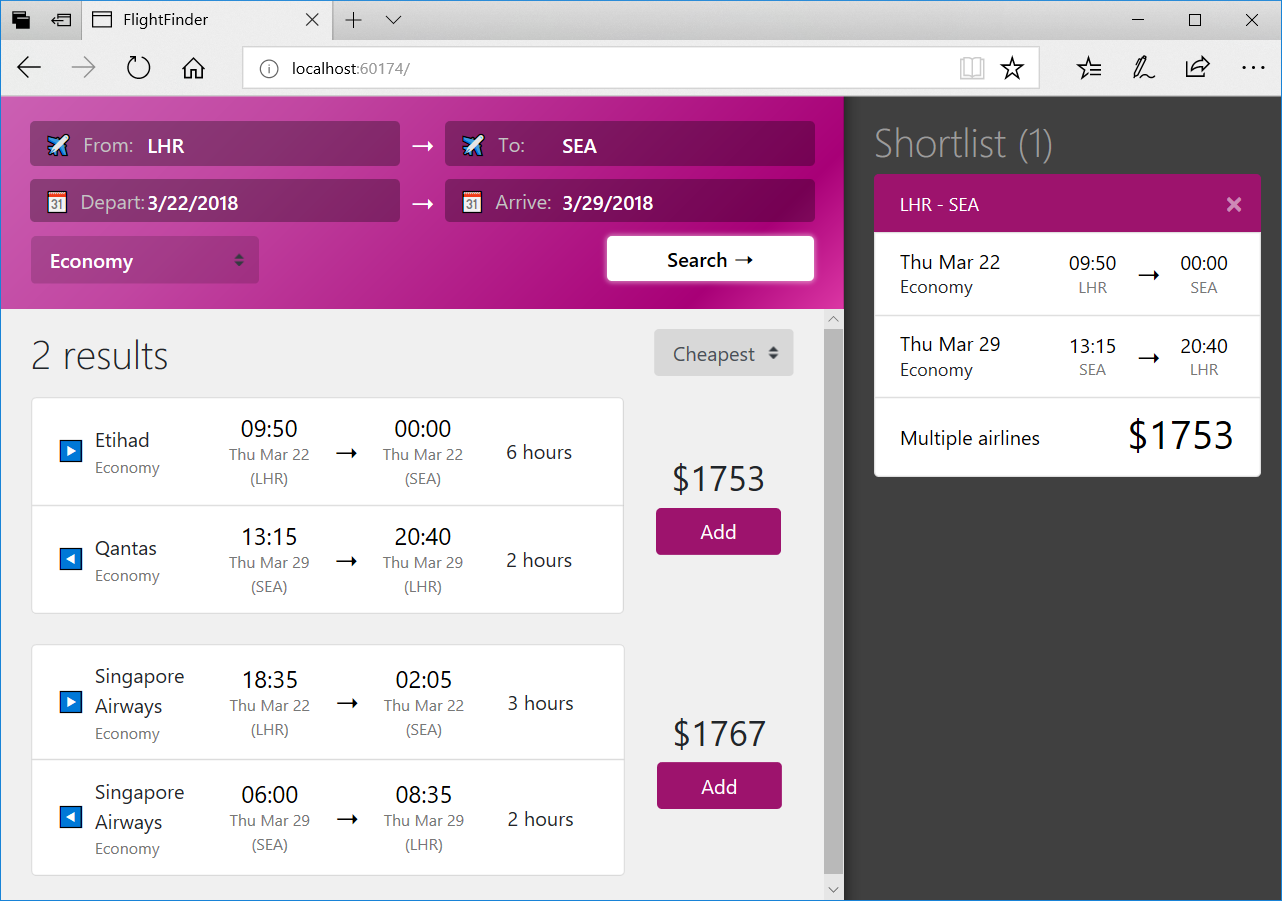
For a more involved Blazor sample app check out the Flight Finder sample on GitHub.
Summary
This is the first preview release of Blazor. Already you can get started building component-based web apps that run in the browser with .NET. We invite you to try out Blazor today and let us know what you think about the experience so far. You can file issues on Github, take our in-product survey, and chat with us on Gitter. But this is just the beginning! We have many new features and improvements planned for future updates. We hope you enjoy trying out this initial release and we look forward to sharing new improvements with you in the near future.

Very good article and very useful information with complete steps.
Although as others said in the discussion chain, still not able to add ".razor" file from VS 2019 latest community addition.Additionally, I have installed .NET Core 2.2, 3.0 preview 5 and preview 6 all but 1. Unfortunately shows error "cannot find IList<>..... are you missing a using directive..)" error on the Todo.razor page. On the same page here "@functions{...}" is used while on the official documentation website its changed to "@code{...}" and there also demonstrating same example but neither works! 2. Second problem it shows is "cannot resolve symbol 'onclick'".Any...
Hi Sandipkumar. Thanks for trying out Blazor! As you’ve noticed, the instructions in this blog post are now out of date. For updated instructions please go to https://blazor.net. Also, please make sure you are using the latest Visual Studio Preview from https://visualstudio.com/preview. For additional assistance please open an issue at https://github.com/aspnet/aspnetcore/issues and we’ll do our best to help you out.
Great! Thanks a lot for your valuable information. I’m using VS 2019 Core 3 Preview 4, I have created a Blazor Project, first of all it gave me .razor file extensions and not .cshtml including index.razor, I ran the project it gave me Loading … and stops here, it ran the file index.htm and didn’t redirect me to index.razor file, could you please help. Thanks
Things have evolved quite a bit with Blazor since this blog post was written. You can find the latest documentation on Blazor at https://blazor.net/docs. Blazor still uses Razor syntax, but the component files now use the .razor extension instead of .cshtml because the compilation model is different.
I’m sorry to hear that you’re having issues getting your app running! Please file an issue on https://github.com/aspnet/aspnetcore/issues with details on your machine setup and steps to reproduce the issue you’re seeing and we’ll take a look.