ASP.NET Web API Help Pages is a new preview feature that automatically generates help page style content for your Web API endpoints. You can read more about it at Introducing the ASP.NET Web API Help Page and in further posts on Yao’s blog. I won’t revisit the basics of the feature here. Instead, what I want to focus on is bringing this new feature to an existing ASP.NET Web Forms application.
Why is this worth a blog post? Well, if you look at the design of the Help Pages feature, you’ll see it uses MVC.
<Breaks squealing…>
Uh oh. You’ve got a Web Forms app and this feature depends on MVC. Time to build a hybrid app! Don’t fear, Web Forms and MVC work just fine together.
Assuming you’re starting with a Web Forms application which already has ASP.NET Web API added, here’s all you need to do:
Step 1:
Use NuGet to install the Microsoft.AspNet.WebApi.HelpPage package. Since it’s still prerelease, make sure you set "Include Prerelease" in the NuGet package manager otherwise you won’t find it. Installing the package will also bring in MVC and Razor so no need to install those separately.
Step 2:
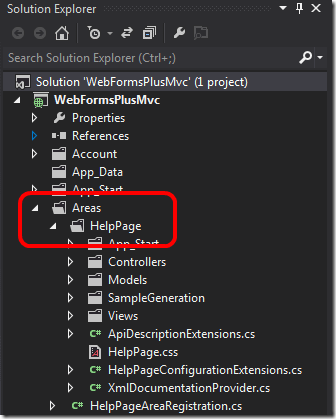
The Help Pages feature is configured as an MVC area, and you’ll see it under the special "Areas" folder of your app.
Since we didn’t start from an MVC application, we’re missing the registration code to wire-up MVC areas though.
In "global.asax.cs", you’ll need to add:
AreaRegistration.RegisterAllAreas();
You’ll also likely need to add the using statement for the "System.Web.Mvc" namespace.
Step 3:
At this point, we’re almost done. A stylesheet reference will be missing, because we didn’t start from an MVC application but you can add that manually if you like.
In "Areas/HelpPage/Views/Share/_Layout.cshtml", add:
<link href="~/Content/Site.css" rel="stylesheet" />
Step 4:
That’s it. You’re done!
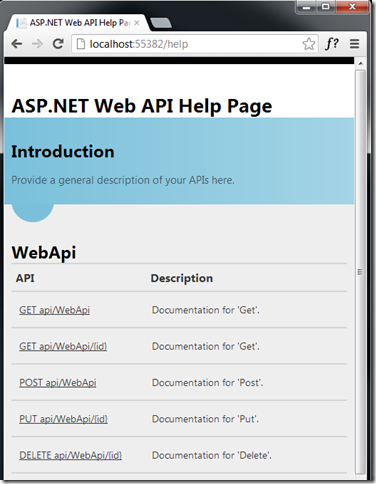
Requesting the "Help" controller, we now see:
So there you have it. The MVC based Web API Help Pages feature is now running in your Web Forms application.
Hope this helps,
Mark


0 comments