In this blog post I will explain how to get and install the Microsoft Web Deployment Tool, so you can share created packages with others and how to setup a Windows 2008 Server to allow packages to be deployed from Visual Studio 2010 Beta 1. Visual Studio 2010 Beta 1 ships with and installs Microsoft’s Web Deployment Tool as part of the Visual Web Developer. In order to set up a server for publishing or allowing machines to deploy packages created in VS 2010 you will need to download and install the Web Deployment Tool RC1 from the IIS Download Center. Note that newer versions of the Web Deployment Tool may not be compatible with VS 2010 Beta 1. If needed, VS 2010 Beta 1 has the Web Deployment Tool MSIs located in the WCU\MSDeploy directory of the DVD.
Setup for Package Installation:
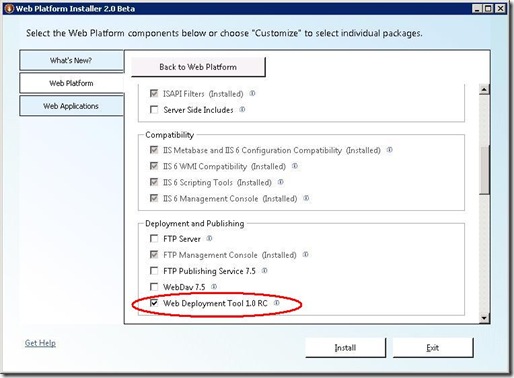
To consume packages created by Visual Studio Beta 1 or the Web Deployment Tool, you will need to install Microsoft’s Web Deployment Tool. Below are two different options for installing the Web Deployment Tool:
- Microsoft Web Platform Installer
- Install from MSI
- Launch the x86 or x64 Web Deployment Tool’s MSI (information for MSI located above.)
- Read and accept EULA. Click Next.
- Select Typical.
- Select Install.
Microsoft Web Deployment should now be installed and useable by the command file generated from VS 2010 for deploying.
Setting up the Web Deployment Tool’s Web Management Service (WMSvc) for administrator publishing on Windows 2008 Server:
Installing the Web Management Service allows users to publish Web Applications from Visual Studio 2010 Beta 1 directly to the server, cutting down on time and steps required to publish applications. Some of the features the Web Deployment Tool helps with are creating applications during deployment and performing incremental publishing. With administrator publishing on IIS 7, users can publish IIS Setting, change the web application’s physical path, and transport Application Pool configurations.
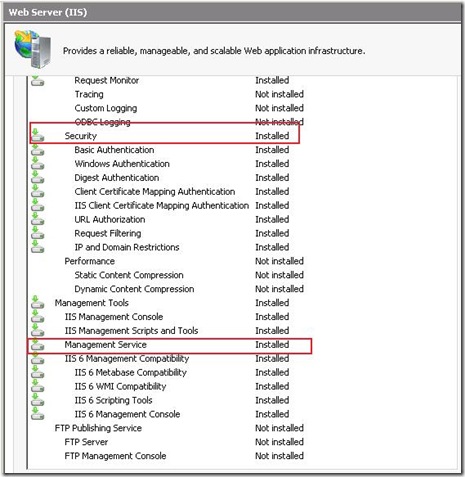
- Make sure the Web Server (IIS) role is added to the Server.
- In the Role Service section, make sure that the Security node and under Management Tools the Management Service is installed.

- Launch the x86 or x64 Web Deployment Tool’s MSI.
- Read and accept EULA. Click Next.
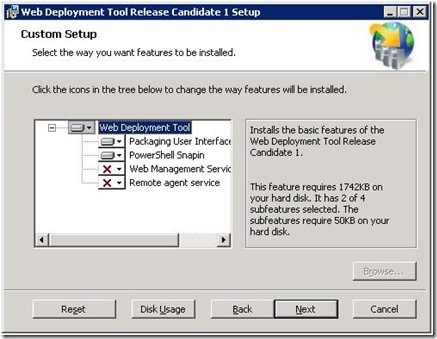
- Select the “Custom” option on the “Choose Setup Type” dialog.
- You should now be presented with following options:

- Select the “Web Management Service” to install the WMSvc handler used by One-Click Publishing.
- “Packaging User Interface” will allow you to install packages created in VS 2010 through Internet Information Services Manager (inetmgr.exe).
- “PowerShell Snapin” adds Power Shell functionality.
- “Web Management Service” is used by One-Click Publish.
- “Remote agent service” is another option for publishing, but is not used by One-Click Publish.
- Finish Web Deployment Tool setup.
- Go back to the Server Manager window and expand the “Configuration” section.
- Under the “Services” node. If present make sure the “Web Deployment Agent Service” and “Web Management Service” are Started and have a Startup type of “Automatic”.
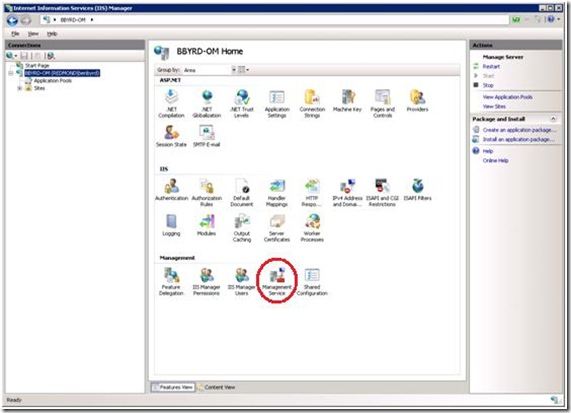
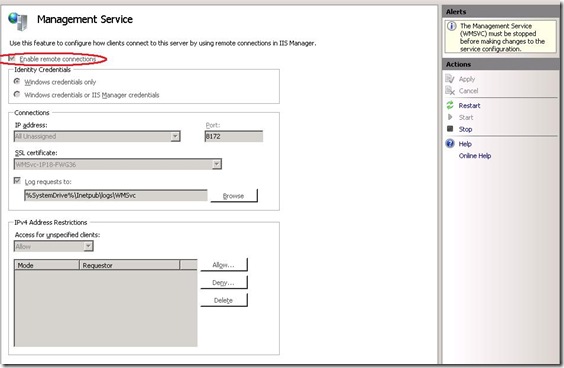
- Run inetmgr.exe.
- Under the root IIS node select the Management Service.

- Stop the service.
- Select “Enable remote connections”
- Select “Apply” and “Start”.

The above steps will allow administrator accounts to publish to this server. If you are testing .NET 4.0 Beta 1 Web Applications you will need to install the framework on the machine you are publishing to or un-packaging on.
Ben Byrd | SDET | Visual Studio Web Developer

0 comments