Just a few weeks ago we announced the first preview release of an experimental web UI framework called Blazor. Blazor enables full-stack web development using C# and WebAssembly. So far thousands of web developers have taken on the challenge to try out Blazor and done some pretty remarkable things:
- Started using Blazor to build RealWorld web apps
- Used Blazor to control a Christmas tree from a Raspberry Pi
- Built a Blazor app for looking up lyrics to vocaloid music
- Integrated Blazor with the Redux DevTools to do time-traveling debugging
The feedback and support from the community has been tremendous. Thank you for your support!
Today we are happy to announce the release of Blazor 0.2.0. Blazor 0.2.0 includes a whole bunch of improvements and new goodies to play with.
New features in this release include:
- Build your own reusable component libraries
- Improved syntax for event handling and data binding
- Build on save in Visual Studio
- Conditional attributes
- HttpClient improvements
A full list of the changes in this release can be found in the Blazor 0.2.0 release notes.
Many of these improvements were contributed by our friends in the community, for which, again, we thank you!
You can find getting started instructions, docs, and tutorials for this release on our new documentation site at http://blazor.net.
Get Blazor 0.2.0
To get setup with Blazor 0.2.0:
- Install the .NET Core 2.1 Preview 2 SDK.
- If you've installed the .NET Core 2.1 Preview 2 SDK previously, make sure the version is 2.1.300-preview2-008533 by running
dotnet --version. If not, then you need to install it again to get the updated build.
- If you've installed the .NET Core 2.1 Preview 2 SDK previously, make sure the version is 2.1.300-preview2-008533 by running
- Install the latest preview of Visual Studio 2017 (15.7) with the ASP.NET and web development workload.
- You can install Visual Studio previews side-by-side with an existing Visual Studio installation without impacting your existing development environment.
- Install the ASP.NET Core Blazor Language Services extension from the Visual Studio Marketplace.
To install the Blazor templates on the command-line:
dotnet new -i Microsoft.AspNetCore.Blazor.Templates
Upgrade a Blazor project
To upgrade an existing Blazor project from 0.1.0 to 0.2.0:
- Install all of the required bits listed above
- Update your Blazor package and .NET CLI tool references to 0.2.0
- Update the package reference for
Microsoft.AspNetCore.Razor.Designto 2.1.0-preview2-final. - Update the SDK version in
global.jsonto2.1.300-preview2-008533 - For Blazor client app projects, update the
Projectelement in the project file to<Project Sdk="Microsoft.NET.Sdk.Web"> - Update to the new bind and event handling syntax
Your upgraded Blazor project file should look like this:
<Project Sdk="Microsoft.NET.Sdk.Web">

  <PropertyGroup>
    <TargetFramework>netstandard2.0</TargetFramework>
    <RunCommand>dotnet</RunCommand>
    <RunArguments>blazor serve</RunArguments>
  </PropertyGroup>

  <ItemGroup>
    <PackageReference Include="Microsoft.AspNetCore.Razor.Design" Version="2.1.0-preview2-final" PrivateAssets="all" />
    <PackageReference Include="Microsoft.AspNetCore.Blazor.Browser" Version="0.2.0" />
    <PackageReference Include="Microsoft.AspNetCore.Blazor.Build" Version="0.2.0" />
    <DotNetCliToolReference Include="Microsoft.AspNetCore.Blazor.Cli" Version="0.2.0" />
  </ItemGroup>

</Project>
Build reusable component libraries
Blazor components are reusable pieces of web UI that can maintain state and handle events. In this release we've made it easy to build reusable component libraries that you can package and share.
To create a new Blazor component library:
-
Install the Blazor templates on the command-line if you haven't already
dotnet new -i Microsoft.AspNetCore.Blazor.Templates -
Create a new Blazor library project
dotnet new blazorlib -o BlazorLib1 -
Create a new Blazor app so we can try out our component.
dotnet new blazor -o BlazorApp1 -
Add a reference from the Blazor app to the Blazor library.
dotnet add BlazorApp1 reference BlazorLib1 -
Edit the home page of the Blazor app (
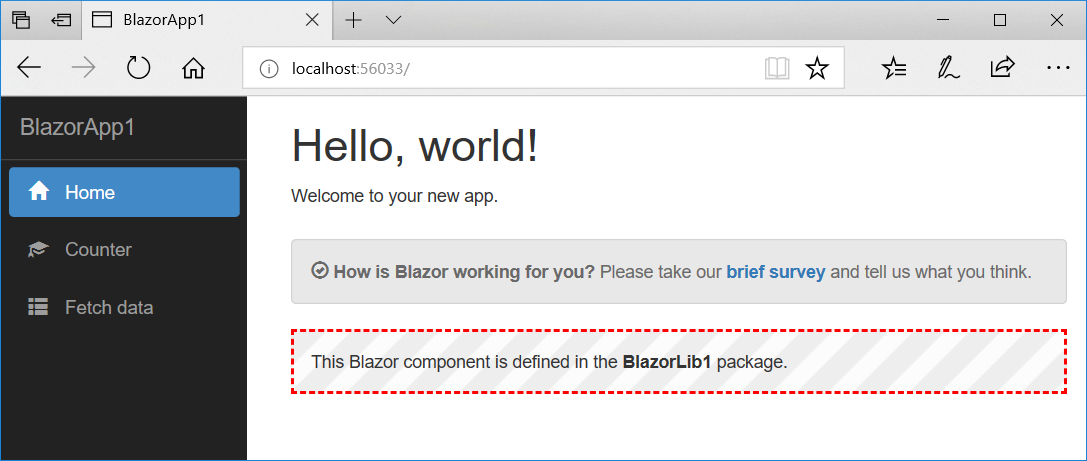
/Pages/Index.cshtml) to use the component from the component library.@addTagHelper *, BlazorLib1 @using BlazorLib1 @page "/" <h1>Hello, world!</h1> Welcome to your new app. <SurveyPrompt Title="How is Blazor working for you?" /> <Component1 /> -
Build and run the app to see the updated home page
 cd BlazorApp1
 dotnet run
JavaScript interop
Blazor apps can call browser APIs or JavaScript libraries through JavaScript interop. Library authors can create .NET wrappers for browser APIs or JavaScript libraries and share them as reusable class libraries.
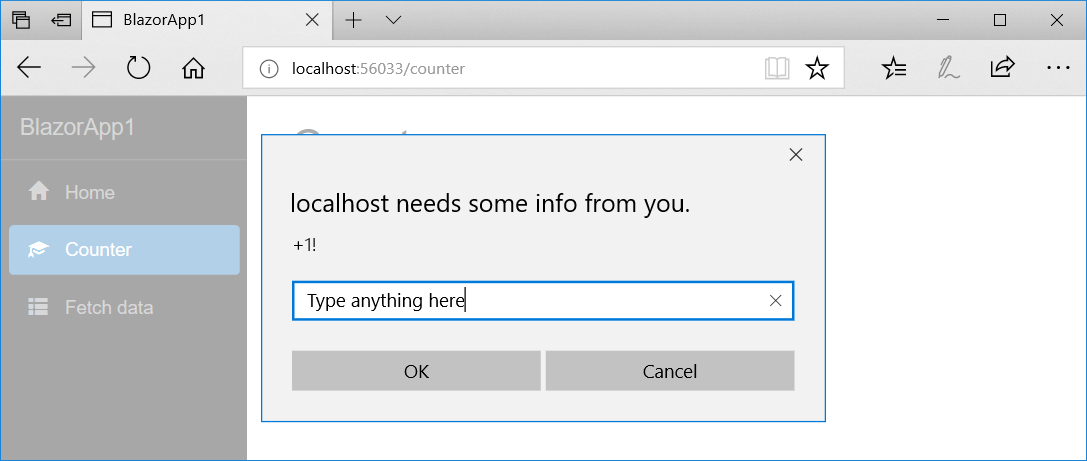
To call a JavaScript function from Blazor the function must first be registered by calling Blazor.registerFunction. In the Blazor library we just created exampleJsInterop.js registers a function to display a prompt.
Blazor.registerFunction('BlazorLib1.ExampleJsInterop.Prompt', function (message) {
    return prompt(message, 'Type anything here');
});
To call a registered function from C# use the RegisteredFunction.Invoke method as shown in ExampleJsInterop.cs
public class ExampleJsInterop
{
    public static string Prompt(string message)
    {
        return RegisteredFunction.Invoke<string>(
            "BlazorLib1.ExampleJsInterop.Prompt",
            message);
    }
}
In the Blazor app we can now update the Counter component in /Pages/Counter.cshtml to display a prompt whenever the button is clicked.
@using BlazorLib1
@page "/counter"

<h1>Counter</h1>

<p>Current count: @currentCount</p>

<button onclick="@IncrementCount">Click me</button>

@functions {
    int currentCount = 0;

    void IncrementCount()
    {
        currentCount++;
        ExampleJsInterop.Prompt("+1!");
    }
}
Build and run the app and click the counter button to see the prompt.

We can now package our Blazor library as a NuGet package and share it with the world!
cd ../BlazorLib1
dotnet pack
Improved event handling
To handle events Blazor components can register C# delegates that should be called when UI events occur. In the previous release of Blazor components could register delegates using a specialized syntax (ex <button @onclick(Foo)> or <button onclick=@{ Foo(); }>) that only worked for specific cases and for specific types. In Blazor 0.2.0 we've replaced the old syntax with a new syntax that is much more powerful and flexible.
To register an event handler add an attribute of the form on[event] where [event] is the name of the event you wish to handle. The value of the attribute should be the delegate you wish to register preceded by an @ sign. For example:
<button onclick="@OnClick" />
@functions {
    void OnClick(UIMouseEventArgs e)
    {
        Console.WriteLine("hello, world");
    }
}
or using a lambda:
<button onclick="@(e => Console.WriteLine("hello, world"))"
If you don't need access to the UIEventArgs in the delegate you can just leave it out.
<button onclick="@OnClick" />
@functions {
    void OnClick()
    {
        Console.WriteLine("hello, world");
    }
}
With the new syntax you can register a handler for any event, including custom ones. The new syntax also enables better support for tool tips and completions for specific event types.
The new syntax also allows for normal HTML style event handling attributes. If the value of the attribute is a string without a leading @ character then the attribute is treated as normal HTML.
For some events we define event specific event argument types (ex UIMouseEventArgs as shown above). We only have a limited set of these right now, but we expect to have the majority of events covered in the future.
Improved data binding
Data binding allows you to populate the DOM using some component state and then also update the component state based on DOM events. In this release we are replacing the previous @bind(...) syntax with something more first class and that works better with tooling.

To create setup a data binding you use the bind attribute.
<input bind="@CurrentValue" />
@functions {
    public string CurrentValue { get; set; }
}
The C# expression provided to bind should be something that can be assigned (i.e. an LValue).
Using the bind attribute is essentially equivalent to the following:
<input value="@CurrentValue" onchange="@((UIValueEventArgs __e) => CurrentValue = __e.Value)/>
@functions {
    public string CurrentValue { get; set; }
}
When the component is rendered the value of the input element will come from the CurrentValue property. When the user types in the text box the onchange is fired and the CurrentValue property is set to the changed value. In reality the code generation is a little more complex because bind deals with a few cases of type conversions. But, in principle, bind will associate the current value of an expression with a value attribute, and will handle changes using the registered handler.
Data binding is frequently used with input elements of various types. For example, binding to a checkbox looks like this:
<input type="checkbox" bind="@IsSelected" />
@functions {
    public bool IsSelected { get; set; }
}
Blazor has a set of mappings between the structure of input tags and the attributes that need to be set on the generated DOM elements. Right now this set is pretty minimal, but we plan to provide a complete set of mappings in the future.
There is also limited support for type conversions (string, int, DataTime) and error handling is limited right now. This is another area that we plan to improve in the future.
Binding format strings
You can use the format-... attribute to provide a format string to specify how .NET values should be bound to attribute values.
<input bind="@StartDate" format-value="MM/dd/yyyy" />
@functions {
    public DateTime StartDate { get; set; }
}
Currently you can define a format string for any type you want … as long as it's a DateTime ;). Adding better support for formating and conversions is another area we plan to address in the future.
Binding to components
You can use bind-... to bind to component parameters that follow a specific pattern:
@* in Counter.cshtml *@
<div>...html omitted for brevity...</div>
@functions {
    public int Value { get; set; } = 1;
    public Action<int> ValueChanged { get; set; }
}

@* in another file *@
<Counter bind-Value="@CurrentValue" />
@functions {
    public int CurrentValue { get; set; }
}
The Value parameter is bindable because it has a companion ValueChanged event that matches the type of the Value parameter.
Build on save
The typical development workflow for many web developers is to edit the code, save it, and then refresh the browser. This workflow is made possible by the interpreted nature of JavaScript, HTML, and CSS. Blazor is a bit different because it is based on compiling C# and Razor code to .NET assemblies.
To enable the standard web development workflow with Blazor, Visual Studio will now watch for file changes in your Blazor project and rebuild and restart your app as things are changed. You can then refresh the browser to see the changes without having to manually rebuild.
Conditional attributes
Blazor will now handle conditionally rendering attributes based on the .NET value they are bound to. If the value you're binding to is false or null, then Blazor won't render the attribute. If the value is true, then the attribute is rendered minimized.
For example:
<input type="checkbox" checked="@IsCompleted" />
@functions {
    public bool IsCompleted { get; set; }
}

@* if IsCompleted is true, render as: *@
<input type="checkbox" checked />

@* if IsCompleted is false, render as: *@
<input type="checkbox" />
HttpClient improvements
Thanks to a number of contributions from the community, there are a number of improvements in using HttpClient in Blazor apps:
- Support deserialization of structs from JSON
- Support specifying arbitrary fetch API arguments using the HttpRequestMessage property bag.
- Including cookies by default for same-origin requests
Summary
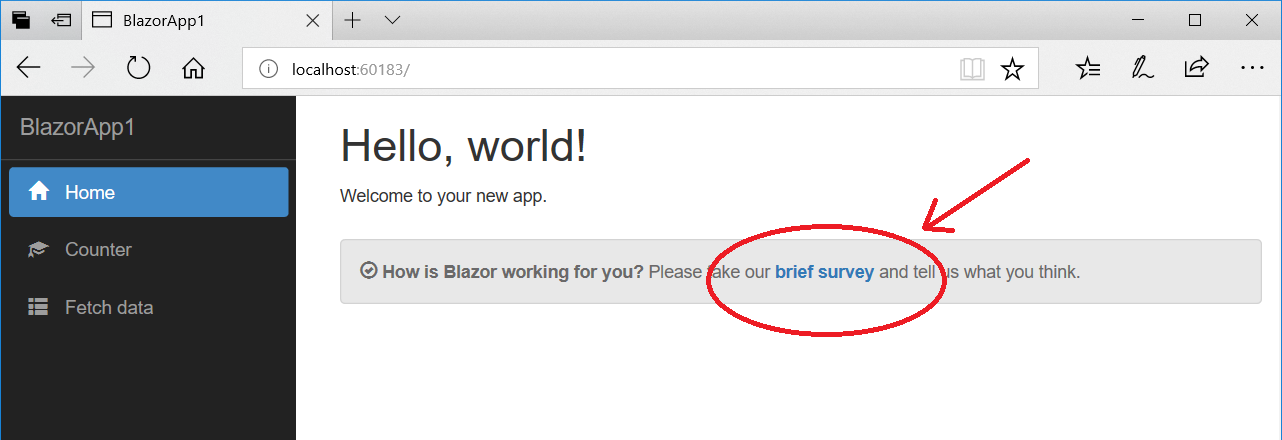
We hope you enjoy this updated preview of Blazor. Your feedback is especially important to us during this experimental phase for Blazor. If you run into issues or have questions while trying out Blazor please file issues on GitHub. You can also chat with us and the Blazor community on Gitter if you get stuck or to share how Blazor is working for you. After you've tried out Blazor for a while please also let us know what you think by taking our in-product survey. Just click the survey link shown on the app home page when running one of the Blazor project templates:

Have fun!

0 comments