I had earlier blogged about how we use Release Management to run our test automation in the RM team. Since then, the RM service or Release Management Online (RMO) has added support for parallel environments (with the Sprint 94 payload (also called M94)), and we have tweaked our automation pipeline to leverage this feature.
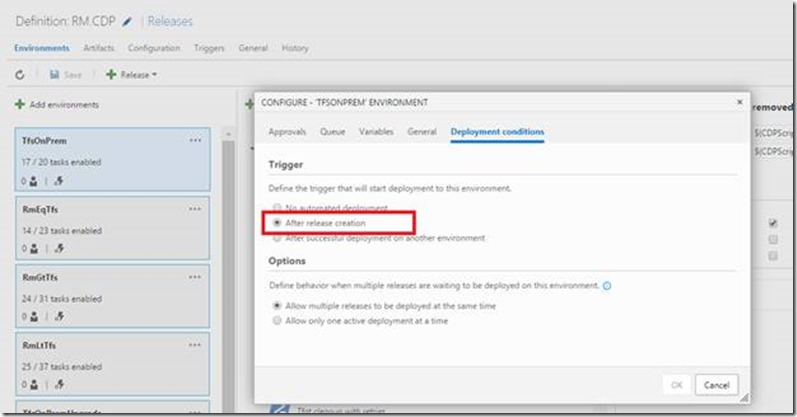
We now have all our test environments in a single Release Definition (RD), and the deployment condition for all of them is “After release creation”. Note that you can bring up the deployment conditions by clicking “…” on the Environment –> Deployment conditions.
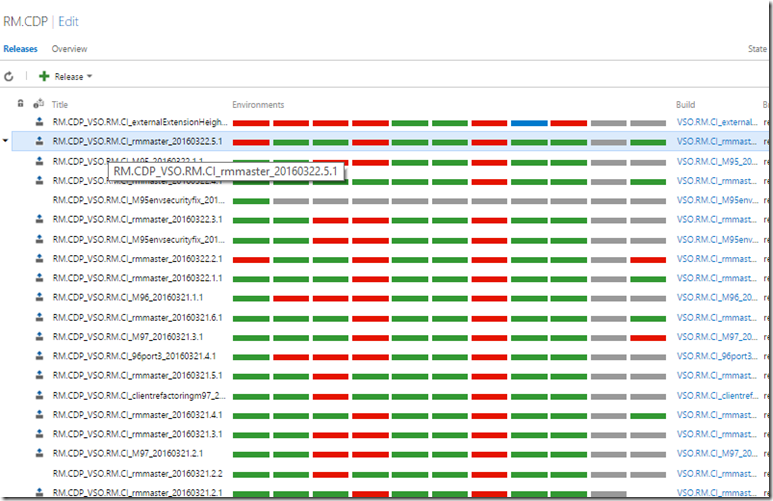
This gives us much nicer view for monitoring how stable the builds have been over time.
In addition, we also use release promotion to test our AtDtMismatch scenario. Specifically, the AtDtMismatch environment tests the scenario of the Application Tier (AT) being at a different version from the Data Tier (DT) e.g. AT could be at Sprint 97 (M97) and DT could be at M96.
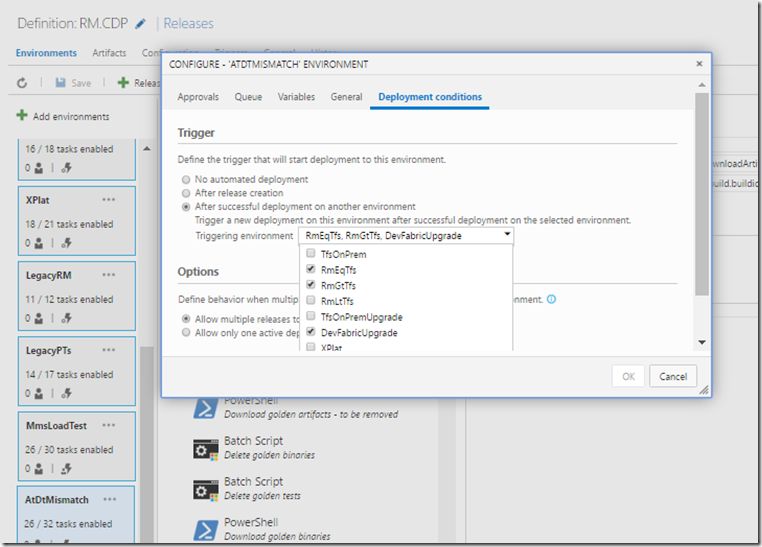
In the AtDtMismatch environment, we install SPS, TFS and RMO from the previous sprint e.g. M96, run the RmEqTfs test suite, then upgrade the RMO AT only to M97, run the RmGtTfs test suite, and finally upgrade the RMO DT to M97, and again run the RmGtTfs test suite. It therefore makes sense to promote a release to the AtDtMismatch environment only if the basic RmEqTfs, RmGtTfs and dev-fabric upgrade environments are green. This can now be achieved by clicking “…” on the AtDtMismatch Environment –> Deployment conditions –> After successful deployment on another environment..
Background notes:
(1) RMO has a dependency on the SPS and TFS platform services.
(2) RmEqTfs test suite tests the scenario where the RMO version is EQual to the TFS and SPS version e.g. all of them are at M96.
(3) RmGtTfs test suite tests the scenario where the RMO version is GreaTer than the TFS and SPS version e.g. RMO could be at M97 and TFS and SPS could be at M96
(4) Dev-fabric upgrade test suite tests the scenario of RMO upgrade.
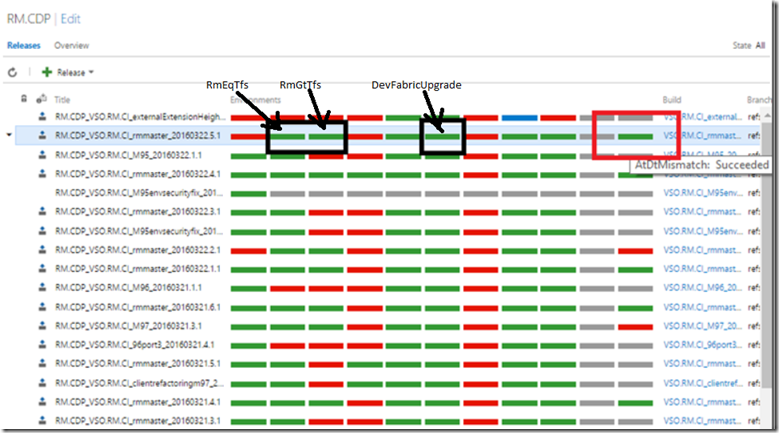
At runtime, the AtDtMismatch environment gets deployed only when RmEqTfs, RmGtTfs and DevFabricUpgrade are green
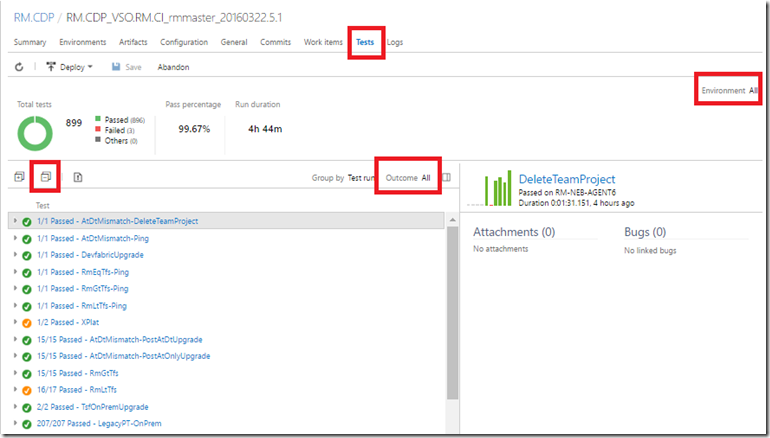
You can get a nice overview of the quality of your build in the Test tab of the Release: Open the Release –> Test –> select “All” in the environment dropdown –> select “All” in the Outcome dropdown –> click ‘-‘ (Collapse All).
You can then drill down into the failed tests to see when they began failing etc.
Converting multiple RDs into a single RD with multiple environments
I had earlier blogged about the various release definitions RM.CDP.* we use for our test automation here, and I thought I should write a bit about the process we used to convert these release definitions into a single release definition (named RM.CDP) with multiple environments. Lets take the example of the erstwhile RM.CDP.TfsOnPrem release definition being converted into an environment in the new RM.CDP release definition. Note that after the conversion, we added 2 more environments – MmsLoadTest and AtDtMismatch – into which we promote the release as required.
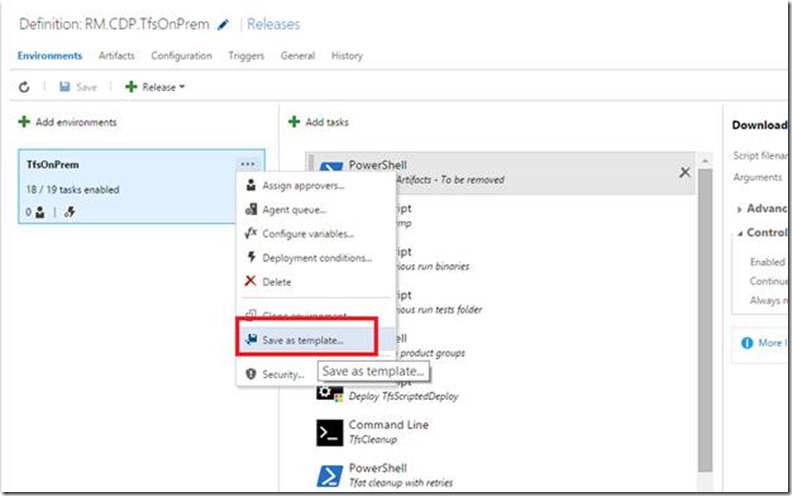
1) In RM.CDP.TfsOnPrem, save the environment as an environment template:
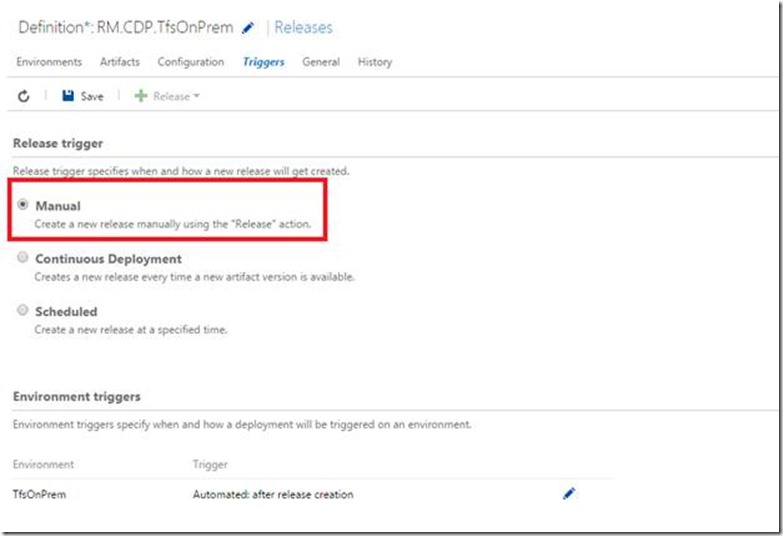
2) Change the trigger from Continuous Deployment to Manual for RM.CDP.TfsOnPrem since we want to effectively deactivate it:
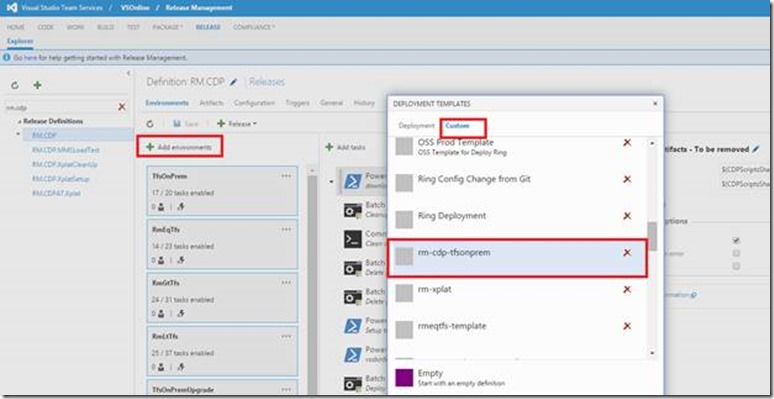
3) Add an environment into RM.CDP based on this template: Edit RM.CDP –> Add Environment –> select “Custom” tab of Deployment Templates –> select the template that you just saved off.
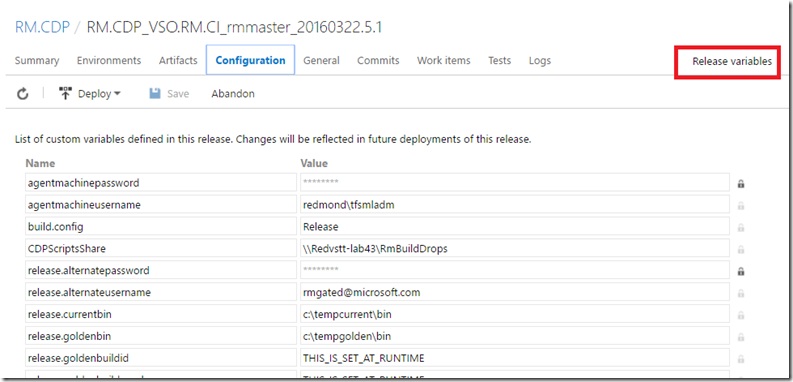
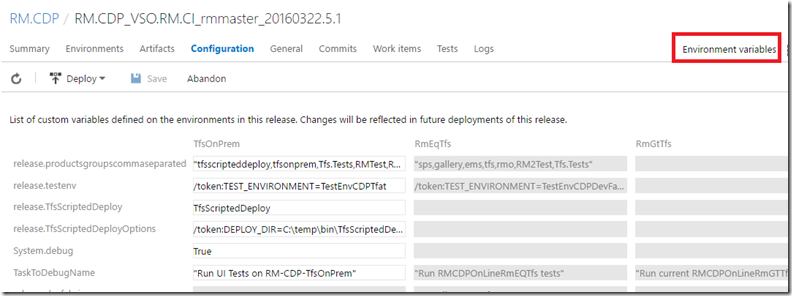
4) So far, so good. Now the painful part: You need to manually ensure that all the variables that were present in RM.CDP.TfsOnPrem are also available in RM.CDP. We just trundled through all the variable of RM.CDP.TfsOnPrem and added them to RM.CDP. Variables that had pretty much the same value across all the test environments ended up Release-level variables, while variables that had different values for each test environment ended up being Environment-level variables.
Here is a view of the Release-level variables of RM.CDP:
Here’s a view of the Environment-level variables of RM.CDP:
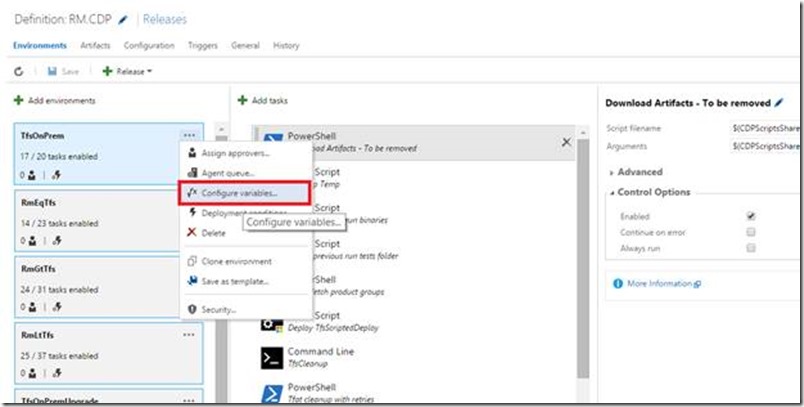
A quick note on how to add Environment-level variables. Its not through the Configuration tab, but rather through the Environment option i.e. Click “…” on the environment –> Configure variables:
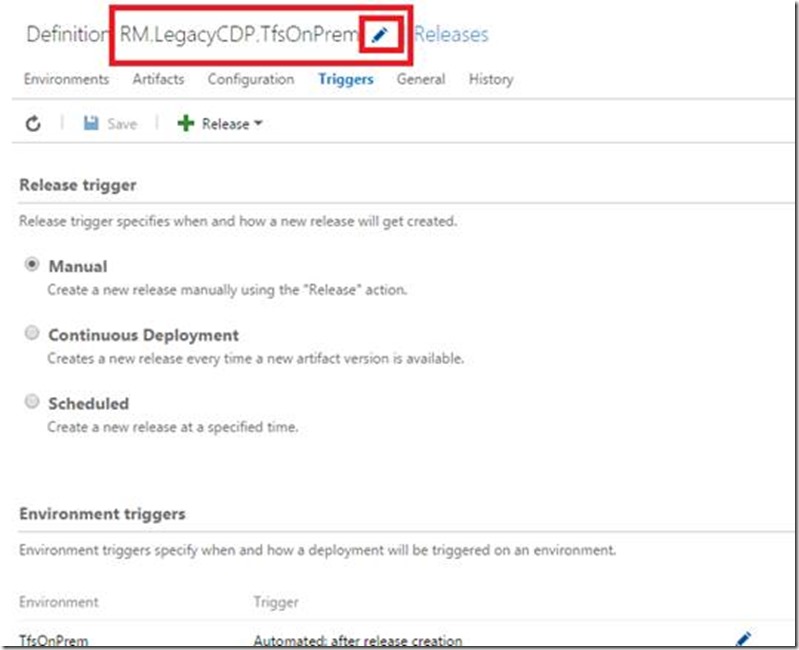
5) Finally, we renamed RM.CDP.TfsOnPrem to RM.LegacyCDP.TfsOnPrem, and we don’t use it any more. After a few months of disuse, we expect to delete it.
Looking forward
The next feature that I am really looking forward to is support for branch filters in RMO, so that we can easily find the quality of a build in a particular branch. To get this right, we need to normalize the branch data that is stored in the DB and then expose it in the UI. Hopefully we will get this feature out in a few sprints, at which time I will blog again on how we use it.

0 comments