<!–
-->
// <!–
Run CI builds in your Git team project
–>
Does your team use continuous integration (CI)? Are you an early adopter of the new Git capabilities in Visual Studio and Team Foundation Service? If so, you’ll be glad to hear that you can define a CI build process that automatically builds and tests the code that your team pushes into your Git team project.
Get set up: Get the free service, and then you can use it with any Git client tools you want, including Visual Studio. To use the Visual Studio client tools you’ll need to install Visual Studio 2012, apply Visual Studio 2012 Update 3 CTP, and finally install Visual Studio Tools for Git.
Create or connect to a team project
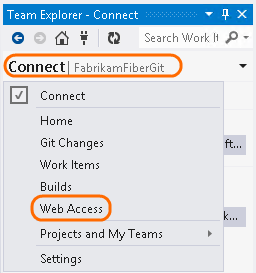
First connect to a Git team project in which you are a team member and a member of the Build Administrators group.
Do you need help getting started? See Create a new code project, which walks you from zero code to a published Git team project. You can find info on alternative ways to get started here: Create, Connect, and Publish using Visual Studio with Git.
Define your build process
Next define your CI build process.
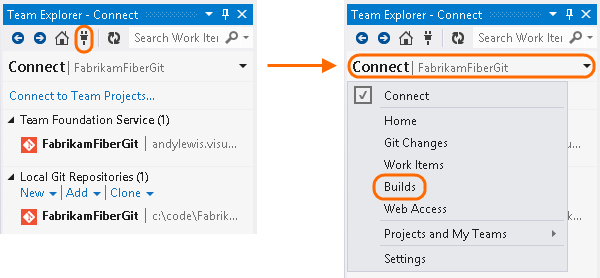
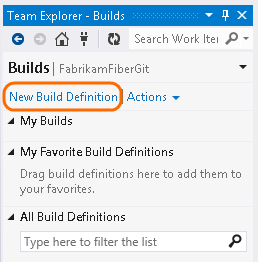
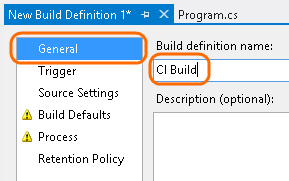
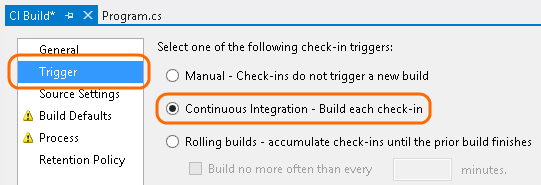
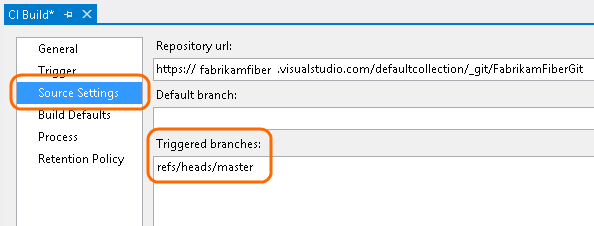
In the Triggered branches list, specify the branches you want to build and test. You must specify the full Git path to each branch. For example, you want to monitor and build the default “master” branch:
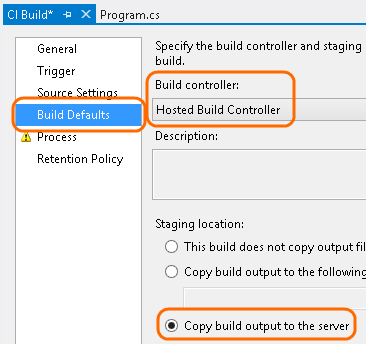
You must use the Hosted Build Controller. If you need the build output or if you want to have the option to get diagnostic logs, select Copy build output to the server.
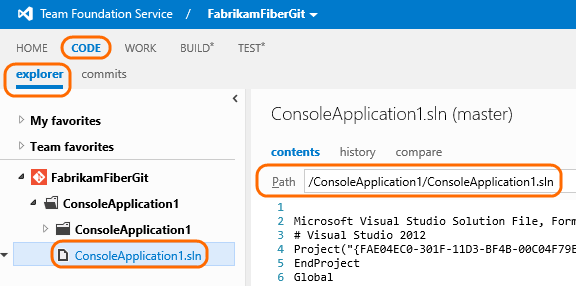
In most cases all you need to do on the Process tab is fill in the path to the solution you want to build.
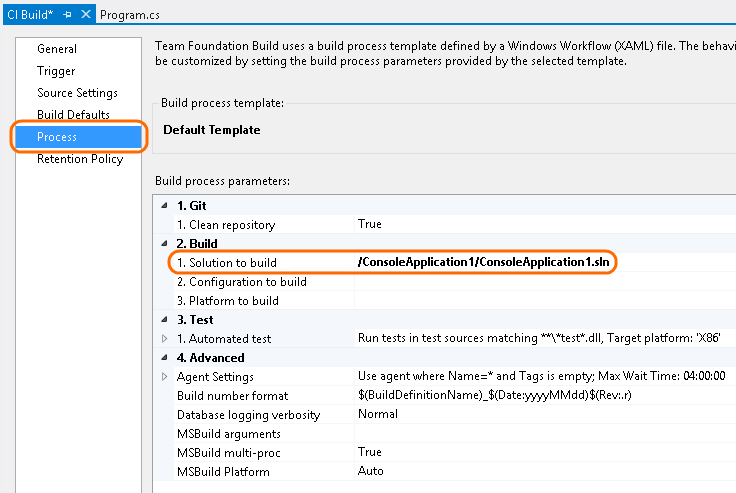
How can I quickly get the path to the solution to build?
Give your new CI build a spin!
With your CI build process in place, you are ready to get busy coding and integrating! Write some code, and when you are ready, commit and push it.
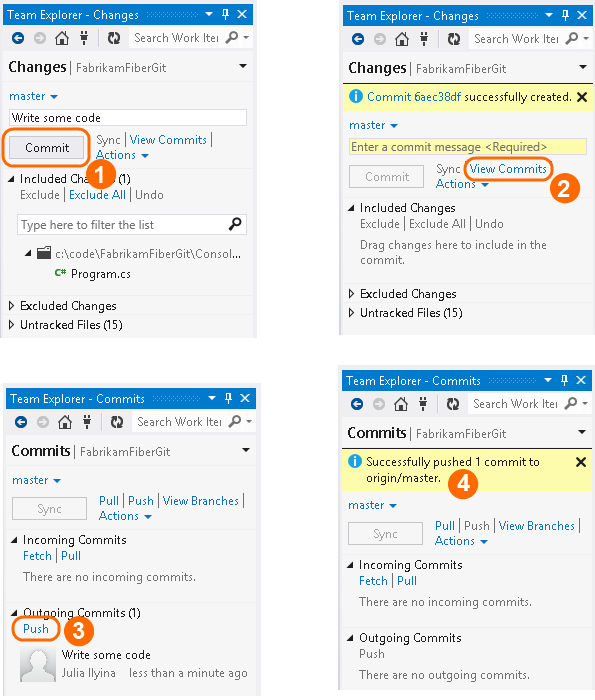
Your build should now be queued or running. Go take a look.
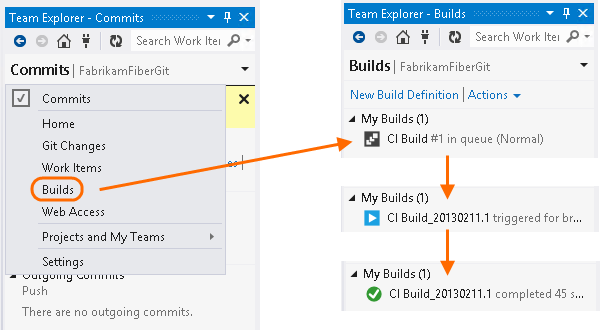
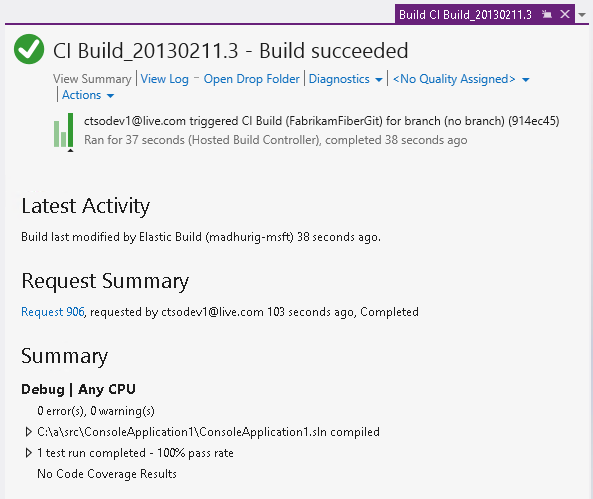
Tip: you can also get notifications about your builds from your Windows taskbar or via email. See Receive Build Notifications.
Questions and answers
If you are an experienced user of Team Foundation Build, some of the following questions might be on your mind.
Can I create more than one test run?
In a Git team project, not yet. We’re working on it.
Can I customize the build process template?
In a Git team project, we store the build process template in a special place, outside of version control.

This template cannot be customized. We will enable a path to customization in the future.
What happens if I don’t specify any triggered branches?
You should always specify at least one triggered branch on the Trigger tab. If you don’t, then the CI build will build and test the “master” branch every time a push is made to any branch. This is probably not what you want.
Seems like a CI Build that monitors multiple branches could trigger multiple builds, right?
Yup. For example, if you push commits to BranchA, BranchB, and BranchC, three separate builds will run against each of these branches.
So how does this affect retention policies?
The retention policy applies to every build kicked off by the build process. The default is to keep 10 builds:

So if you typically build a lot of branches at once, you may need to set the number higher.
What is the default branch for?
The branch you specify in the Default branch field is built when you manually queue a build. If you don’t specify it, we build the “master” branch.
Note: For this release, due to a known bug, in the Default branch box you must specify the branch in abbreviated form. In other words, you must specify “master” instead of “refs/heads/master”.
Why doesn’t my work item association show up in the build results?
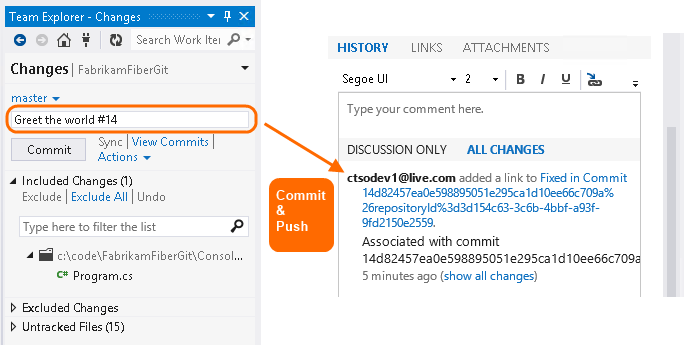
Although you can associate your commit with work items by specifying the work item id in the comment, the build process does not yet associate builds with these artifacts. We’re working on it.
What about scheduled builds?
Stay tuned.

0 comments