
We’re back with episode 5 in our On Prem To the Cloud journey where we’ll take a deeper look at getting our Infrastructure as Code setup in a Continuous Integration/Continuous Delivery(CI/CD) pipeline – but first, let’s take a quick look at how we got to this point.
First, Jay showed Abel how to migrate the application environment into Azure, next Abel and Damian showed us how to build a CI/CD pipeline for the application and database, and finally Steven took all of our infrastructure requirements and turned them into infrastructure as code templates and scripts. With this code, we now can reliably and repeatably stand up our entire environment with all necessary requirements and configurations within a matter of minutes. So, what’s next?
Now that we’ve got everything that’s needed to build our entire infrastructure on Azure programmatically, it’s time to get it setup in an Azure DevOps Pipeline. This will allow us to leverage automation we build into our workflow to do everything required for deploying our application. Our workflow will cover everything from building infrastructure and configuring servers to deploying the application for us.
Infrastructure as Code is Beautiful
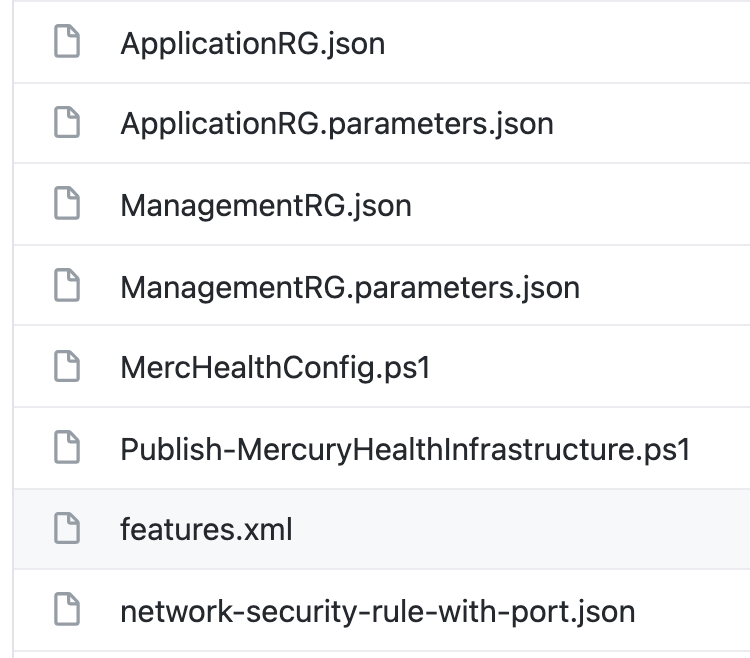
We’ve got all this great code from Steven that stands everything up for us – he’s given us Azure Resource Manager Templates, parameter files that split out variables for us, and awesome PowerShell scripts that will do all the work from start to finish for us. We can run that from the command line, and it works perfectly.
Thinking forward, how can we get these templates and scripts into our workflow? They work great for manual execution, but we know we’re working within a GitHub repository and we know we’ll be collaborating on our infrastructure and application moving forward. Wouldn’t it be cool if we could take this code and set it up in such a way that when we request changes within our repository, a workflow would automatically trigger the code to run? Let’s look at doing just that.
What is an Azure DevOps Pipeline?
We’ve decided to use an Azure DevOps Pipeline for our workflow automation within our repository. An Azure DevOps Pipeline is a custom CI/CD workflow that you define based on the needs of your application. It allows you to automatically build, test, deliver, and deploy your projects based on your own custom configurations.
The beauty of building your own custom pipeline is you choose exactly how it’s configured and exactly how much work it’s doing. Do you want your pipeline to only kick off tests? You can do that. Do you want it to test your application and build a package? It can do that as well. Do you want it to do everything including deploy your application to a live environment? Yep, it can do that, too!
Getting Things Ready
Ok, so we know what direction we’re heading. Let’s make sure we have everything accounted for and that we have a plan on how to execute the configuration of this pipeline.
Prerequisites
We’ve got a few things we are starting off with. They are:
- An Azure Subscription
- An Azure DevOps Organization and Project
- A GitHub repository that holds our Infrastructure as Code and Application
- A desire to automate 🙂
The code Steven gave us does a few things:
- Sets up an Azure Policy that our resources need to abide by (policy as code)
- Builds a Desired State Configuration (DSC) for our servers (configuration as code)
- Stands up a Management Resource Group to store our Desired State Configuration (infrastructure as code)
- Stands up our Application’s Resource Group and servers (infrastructure as code)
- The main example PowerShell script also deploys the application!
It’s a good idea to take a step back before a project like this to make sure you’ve got an idea of where you are and where you’re headed. One step at a time is the best way to tackle workflow creation.
What We Aren’t Using
After a good collaborative discussion with the team (discussions and collaboration are key for the DevOps workflow!), we decided there were a couple things included in the code that Steven wrote that we won’t be using in this pipeline – the management resource group template and the policy configuration script.
Management Resource Group
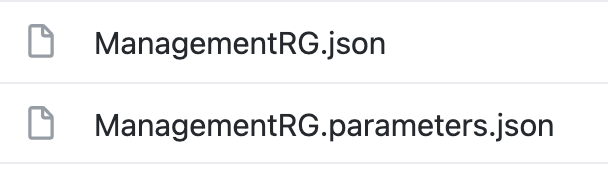
The management resource group will hold things that will manage our entire organization. We’ve decided to keep this separate from the actual application’s resources being it’s strictly for management; however, we do rely on the management resource group to store the Desired State Configuration (DSC) we’re building. As such, the management resource group deployment needs to happen before we run the automation that builds the Desired State Configuration or deploy the application. As such, this resource group automation will be moved outside of this workflow.
Azure Policy
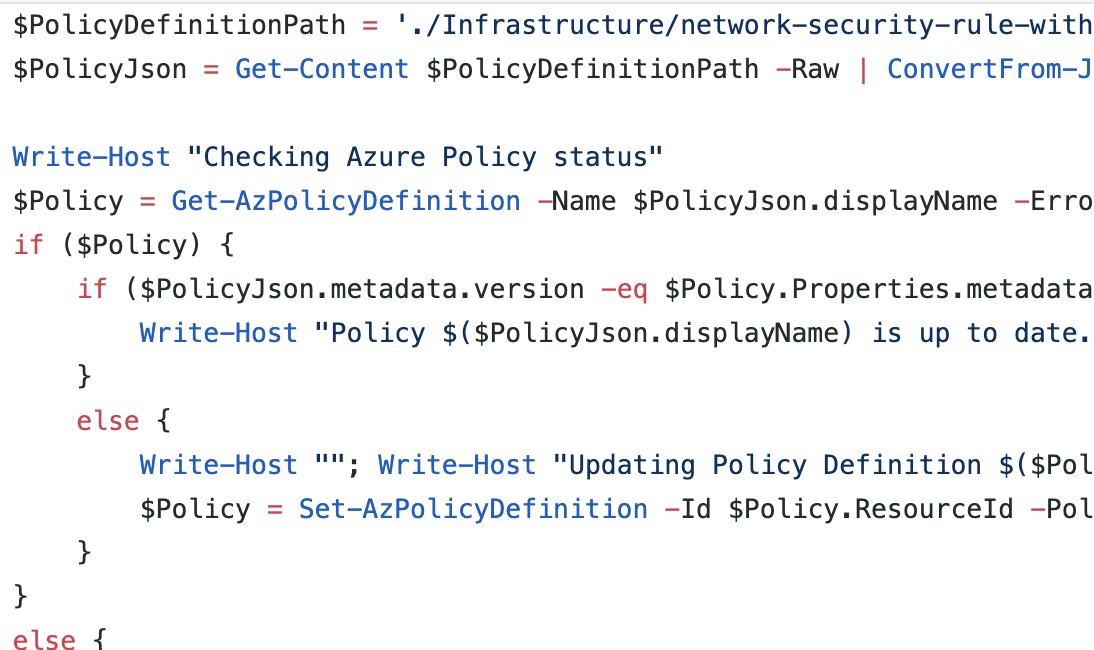
We have code that will set up a policy to block us from opening our secure RDP port (3389) on our servers. This policy is majorly important for security reasons, but we’re leaving it out of the infrastructure pipeline – and here’s why.
Our Azure Policy sets guardrail for our infrastructure and application. If we attempt to build or configure anything in our pipeline that falls outside of this policy, the policy should disallow it from happening to keep us on track. As such, the workflow we’re creating to stand up the infrastructure and build the application needs to happen outside of and after the policy configuration.
Our pipeline should not be creating and managing policy that covers a broader scope than the policy resources. This policy is subscription-wide. You can have more focused policies that may make sense to deploy as part of the application/infrastructure deployment.
Parts of an Azure DevOps Pipeline
So, we know what we have and where we’re going, now it’s time to look at all the pieces of an Azure DevOps Pipeline we’ll need to put together to build out our custom workflow.
Pipeline Variables

In our infrastructure as code, Steven made sure to parameterize as much as possible so the variables that may change based on environment would not be hardcoded. This saved a bunch of time in determining what needed to be set to get going with the pipeline. In an Azure DevOps Pipeline, you can set variables that are essentially key/value pairs that are specific to that pipeline. Once those variables are set, you can have them override specific parameters and variables within your pipeline configuration as well as in the scripts your pipeline will be running.
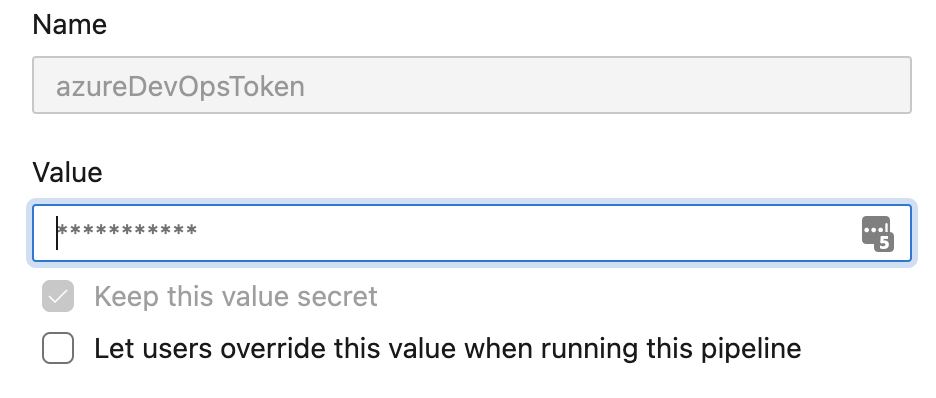
One super powerful feature of Azure DevOps Pipeline Variables is the ability to set a secret variable. These are variables that can be set and used in the pipeline that can no longer be viewed or edited after creation. This allows you to set variables for sensitive things (like personal access tokens, for example) that need to be consumed by your pipeline while simultaneously protecting the actual data of that variable. As a best practice, you should never hardcode any passwords or tokens into your application, you should never send them to other coworkers in plain text for use, and you should never push them into a repository. The secret variables in our pipeline help us avoid all those things.
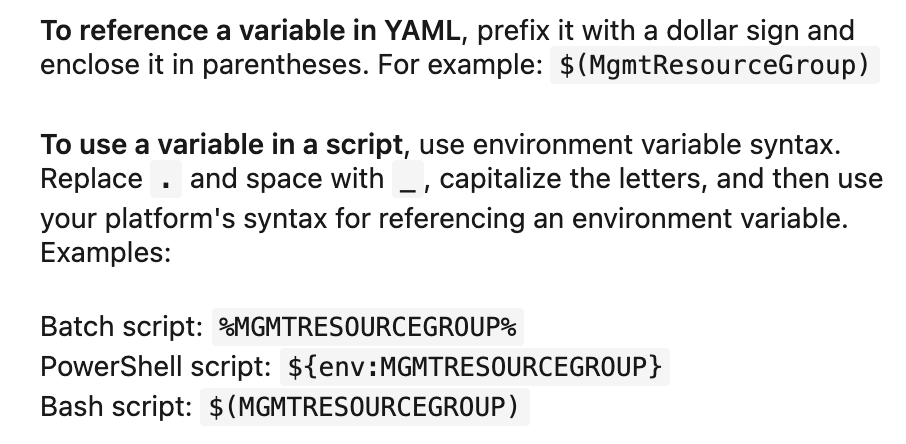
Pipeline variables also have a handy reference that show exactly how you can refer to them within your code. This can save you some time figuring out the right syntax!
It’s important to note the variable expression syntax will also indicate when in the pipeline lifecycle the variable will be evaluated. Depending on what you want to happen, this can impact the value provided.
Triggers
Triggers are what we can setup to run a pipeline workflow automatically. We can define triggers that watch for things like changes to a branch, comments, or pull requests being made that will affect a specific branch.
Jobs, Tasks, and Stages
With Azure DevOps Pipelines, you organize your workflow into different stages, jobs, and tasks. How you organize your pipeline is completely up to you and your own personal workflow, but to summarize what each of these is:
-
Jobs – every pipeline has at least one job, and a job is just a series of steps that run sequentially as one unit.
-
Tasks – packaged scripts or procedures that have been abstracted with a set of inputs. You can have tasks that run scripts or perform specific actions that you define. There are a number of tasks that are already built-in on Azure DevOps as well.
-
Stages – these are the dividers for different steps in a pipeline – things like “run some tests”, “build some code”, “deploy some servers”. They exist as logical boundaries and allow you to do things like pause your pipeline to add checks and things of that nature.
Environments
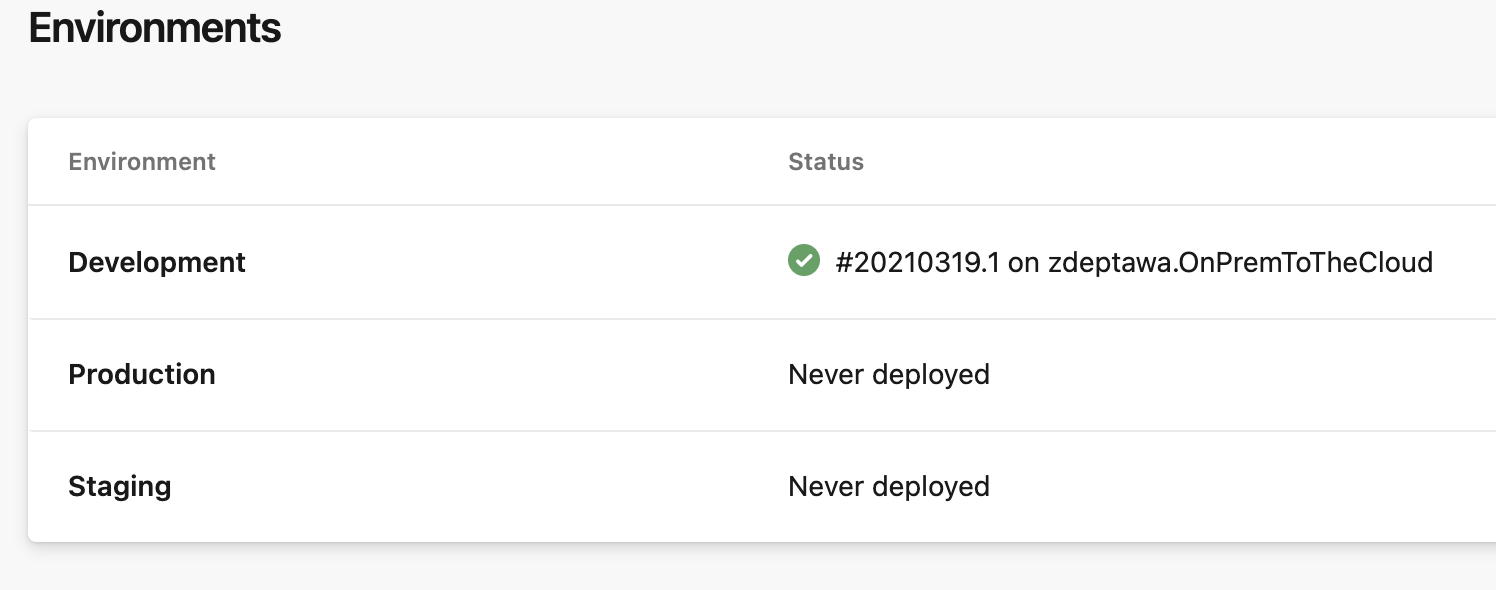
You might be thinking, “so we can stand up infrastructure, get it configured, build the app, and have it all ready to deploy… but how do we target the infrastructure we just created to execute that deployment?” Well, one option is to use environments in Azure DevOps. An Azure DevOps Environment is simply a collection of resources (like Kubernetes clusters and virtual machines) that is defined in your pipeline. Think about your typical infrastructure. You most likely have seen ‘Development’ (or dev), ‘Staging’ (or stage), and ‘Production’ (or prod) environments for applications. This is the same way you can use environments – and in fact, that’s the way Mercury Health has decided to set up this pipeline workflow.
So Much More!
These elements just scrape the surface of what an Azure DevOps Pipeline can use and how it all works, but it’s plenty for our purposes in getting started. For full documentation on Azure DevOps Pipelines, check out this landing page in Microsoft Docs!
Building the Pipeline
Ok, we know what we’re going to build and what we can use to build it… now what!? Well, we have a few more things we need to think through before we can get started.
Where Should Our Code Reside?
The Mercury Health team has been working out of a GitHub repository so far. The team discussed where the code should reside, and we decided to keep the code in GitHub while having our pipeline run in Azure DevOps. What this buys us is really the best of both worlds. We can take advantage of cool GitHub automation features like GitHub Actions and cool GitHub security features like CodeQL while allowing our actual build and deploy pipeline to exist and run in Azure where our infrastructure will ultimately be stood up.
Making the Connection Between Azure DevOps and GitHub
To make this interaction between Azure DevOps and GitHub work, we must create a Service Connection between Azure DevOps and GitHub. Don’t fret though, this is a super easy task.
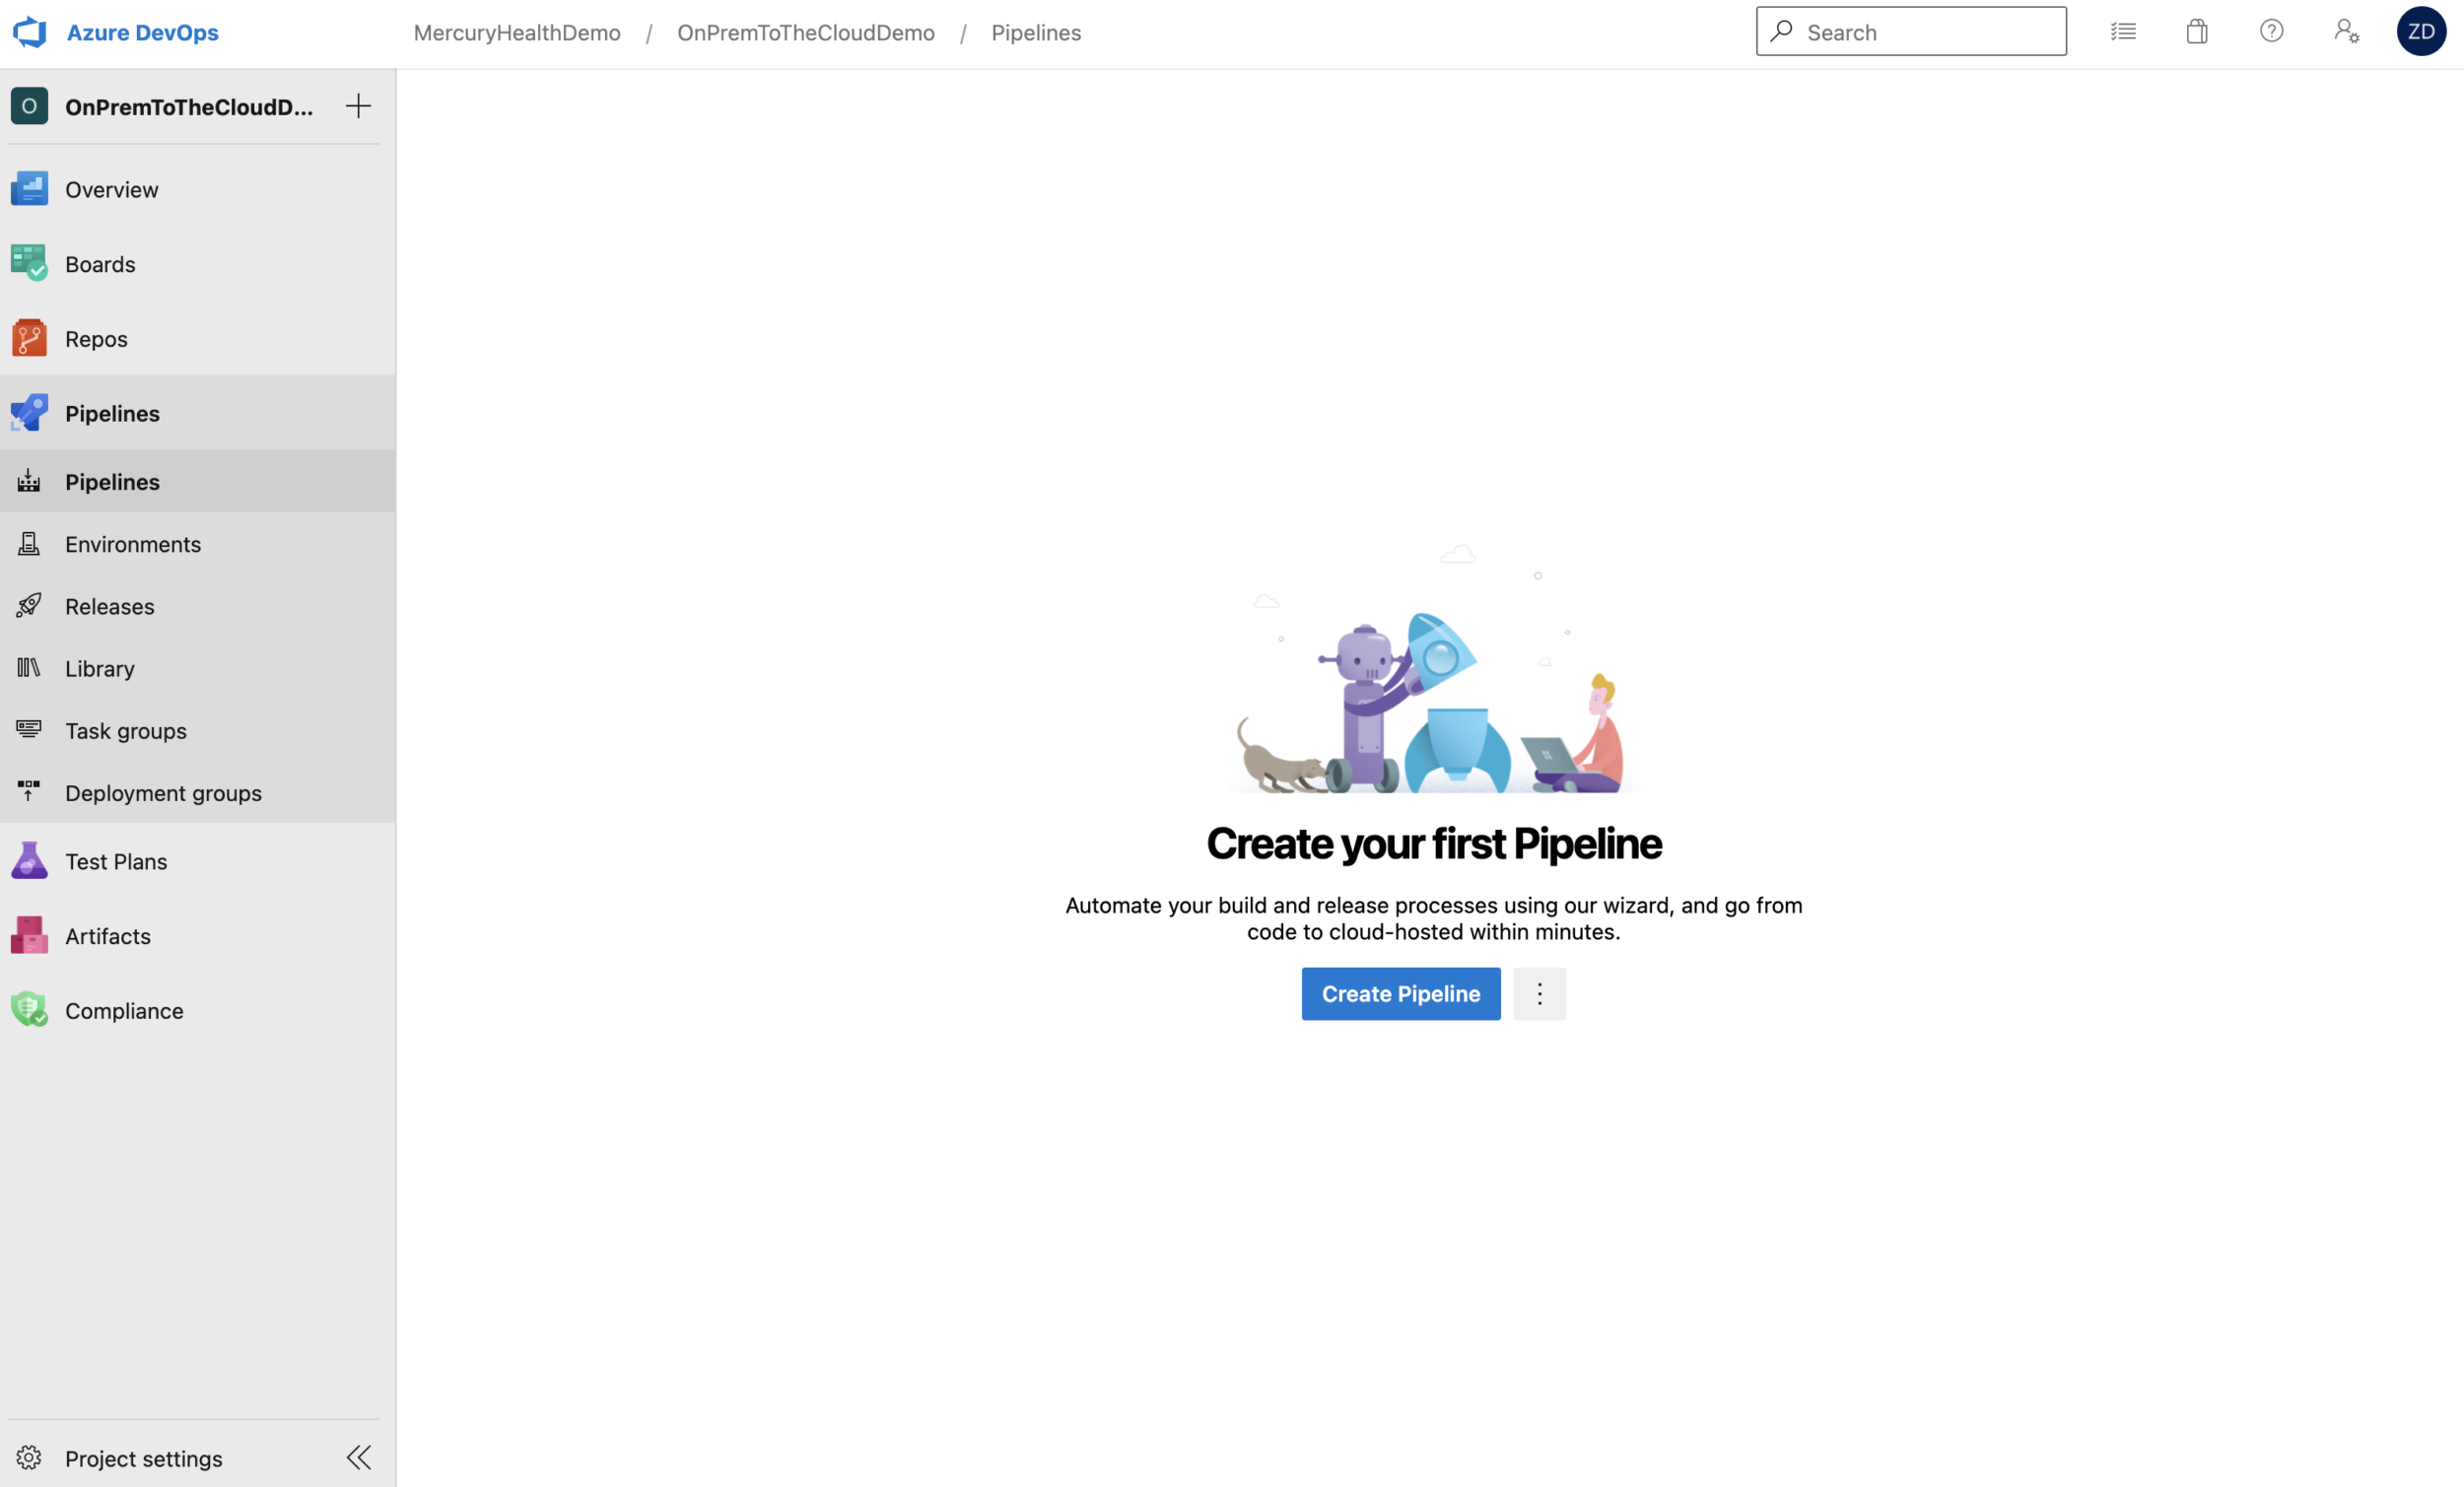
When we’re starting with an empty project and we select to create a new pipeline, it’s going to ask us where our code resides. As you can see, we have the option to choose GitHub for that location.

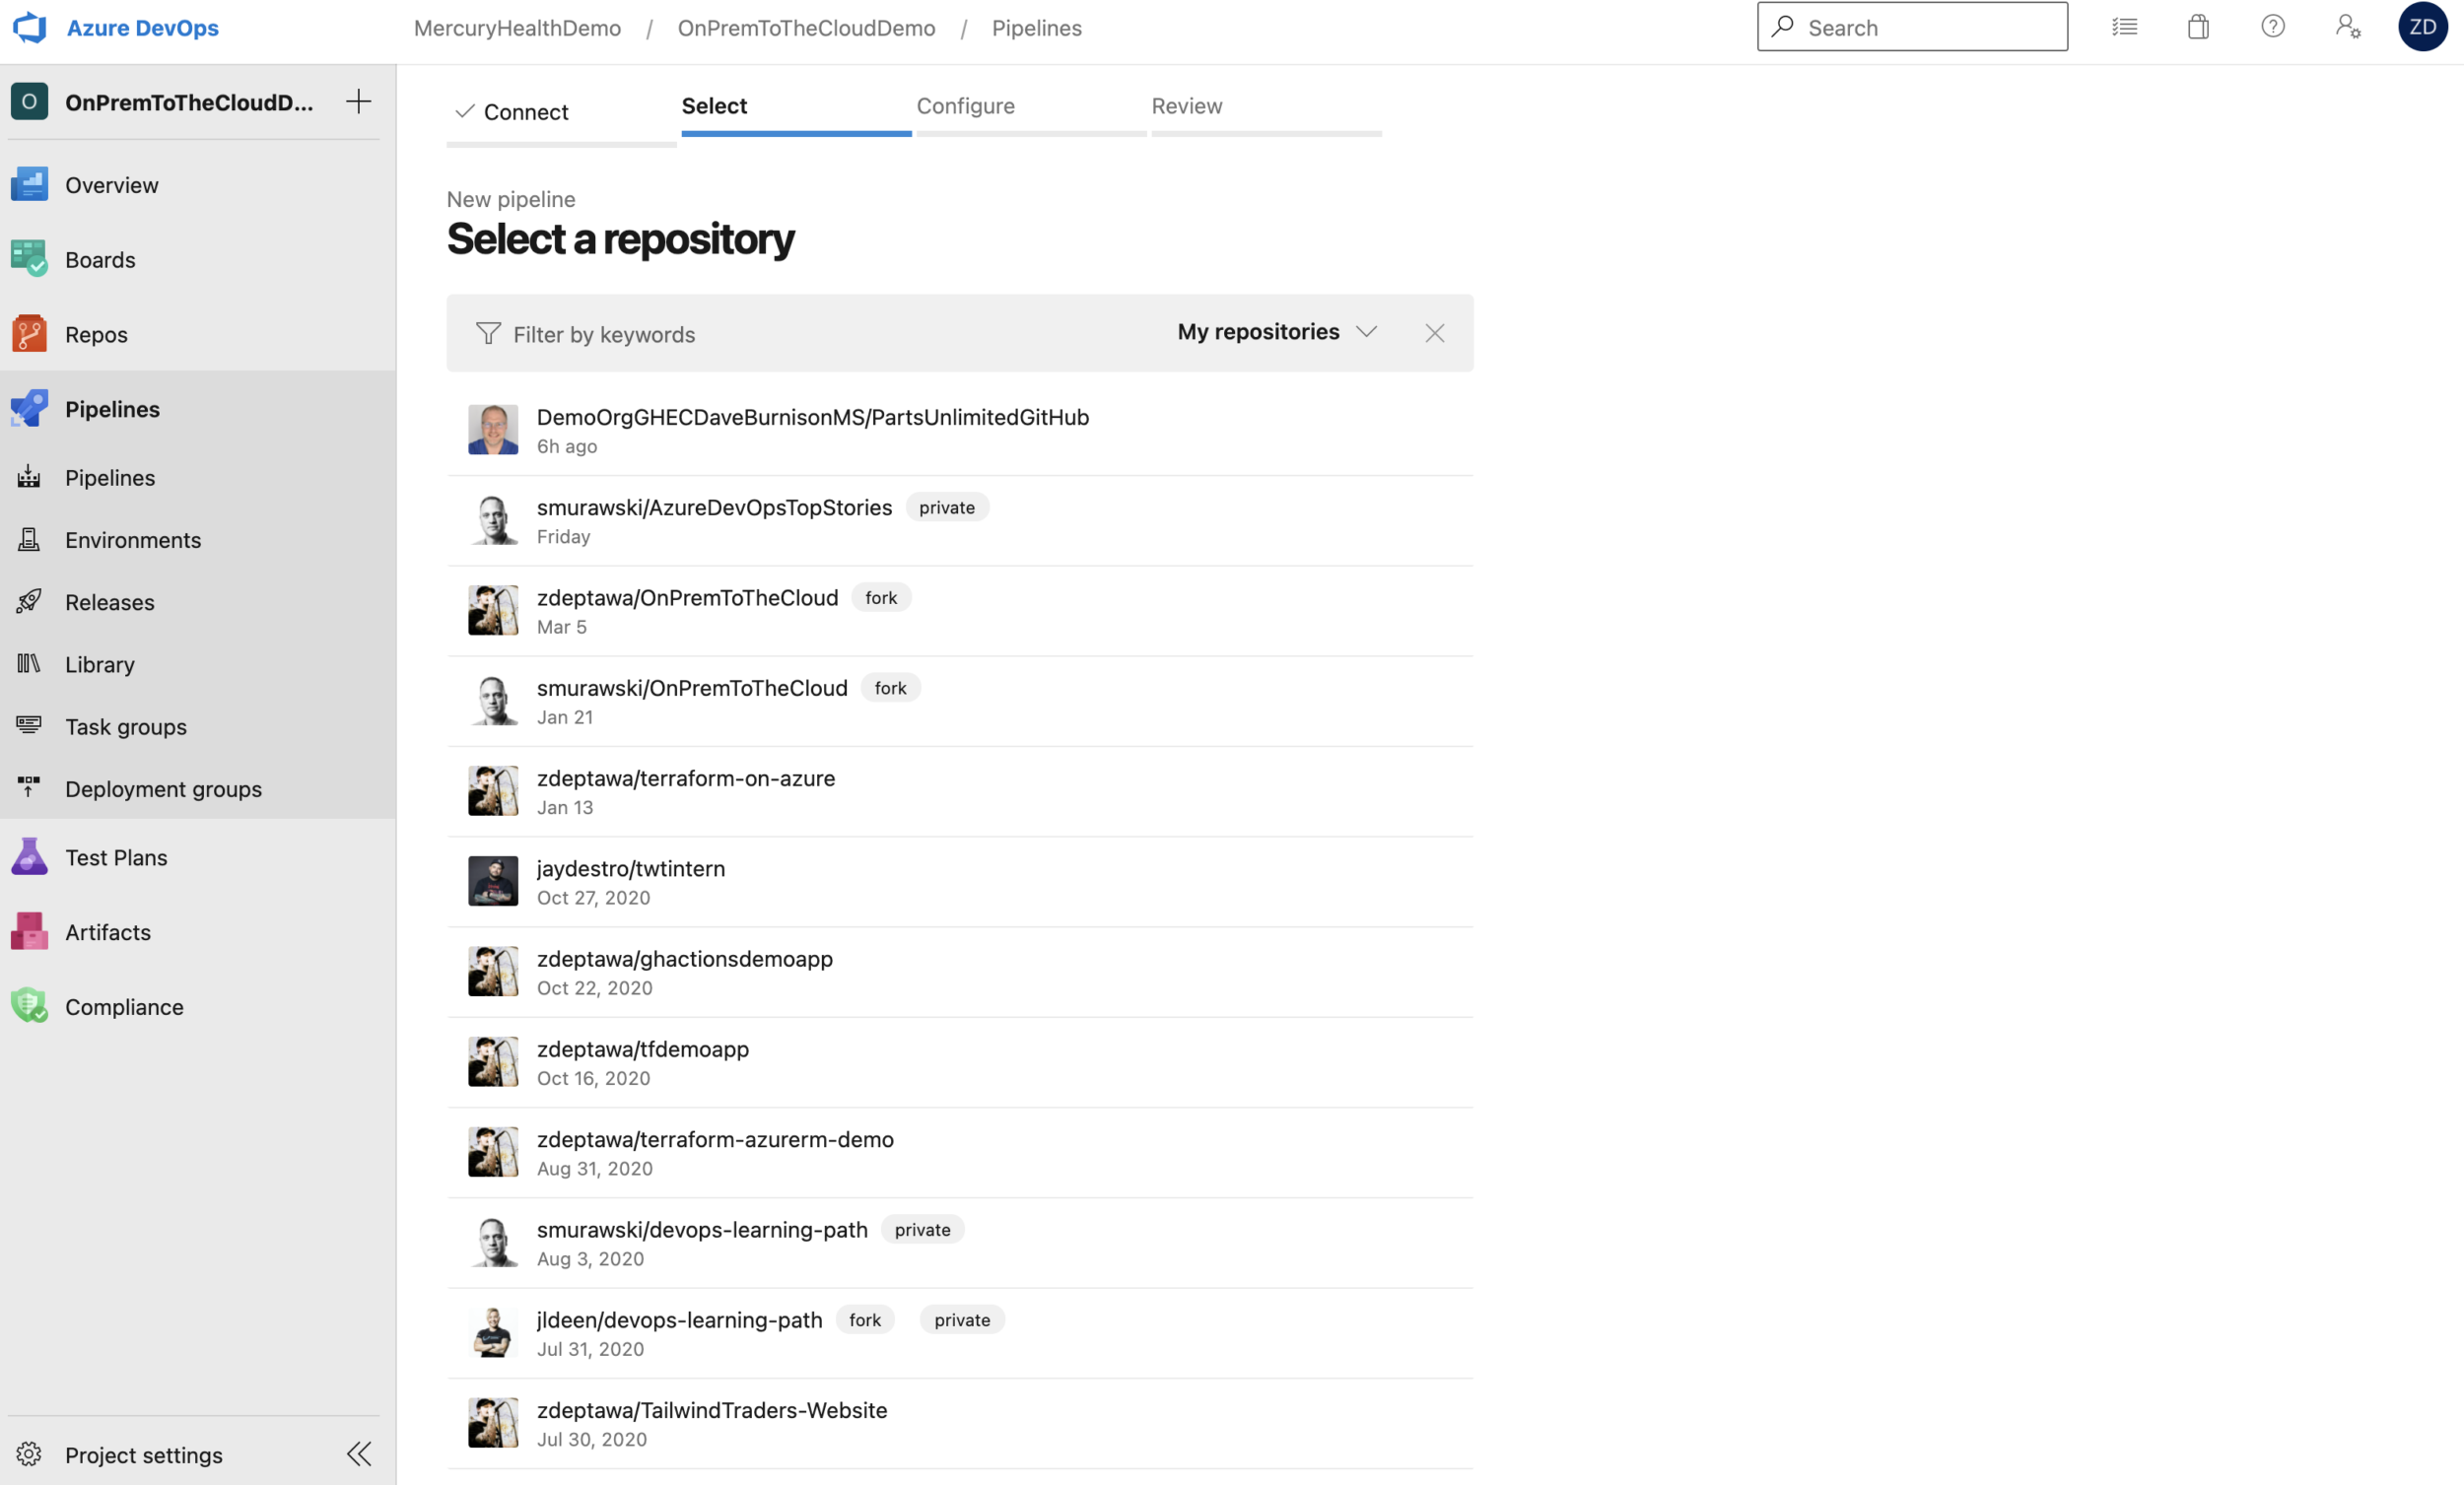
Once we choose GitHub, it’s going to make the Service Connection for us via interactive authentication. We could alternatively set up a GitHub Personal Access Token if we didn’t want to rely on user account authentication here, but for the purposes of this initial process, we’ll go with user authentication to create the Service Connection. When that’s done, you’ll be presented with a list of repositories that you have access to as seen below.
When you select the appropriate repository, it’s going to ask you what kind of pipeline you’d like to setup.
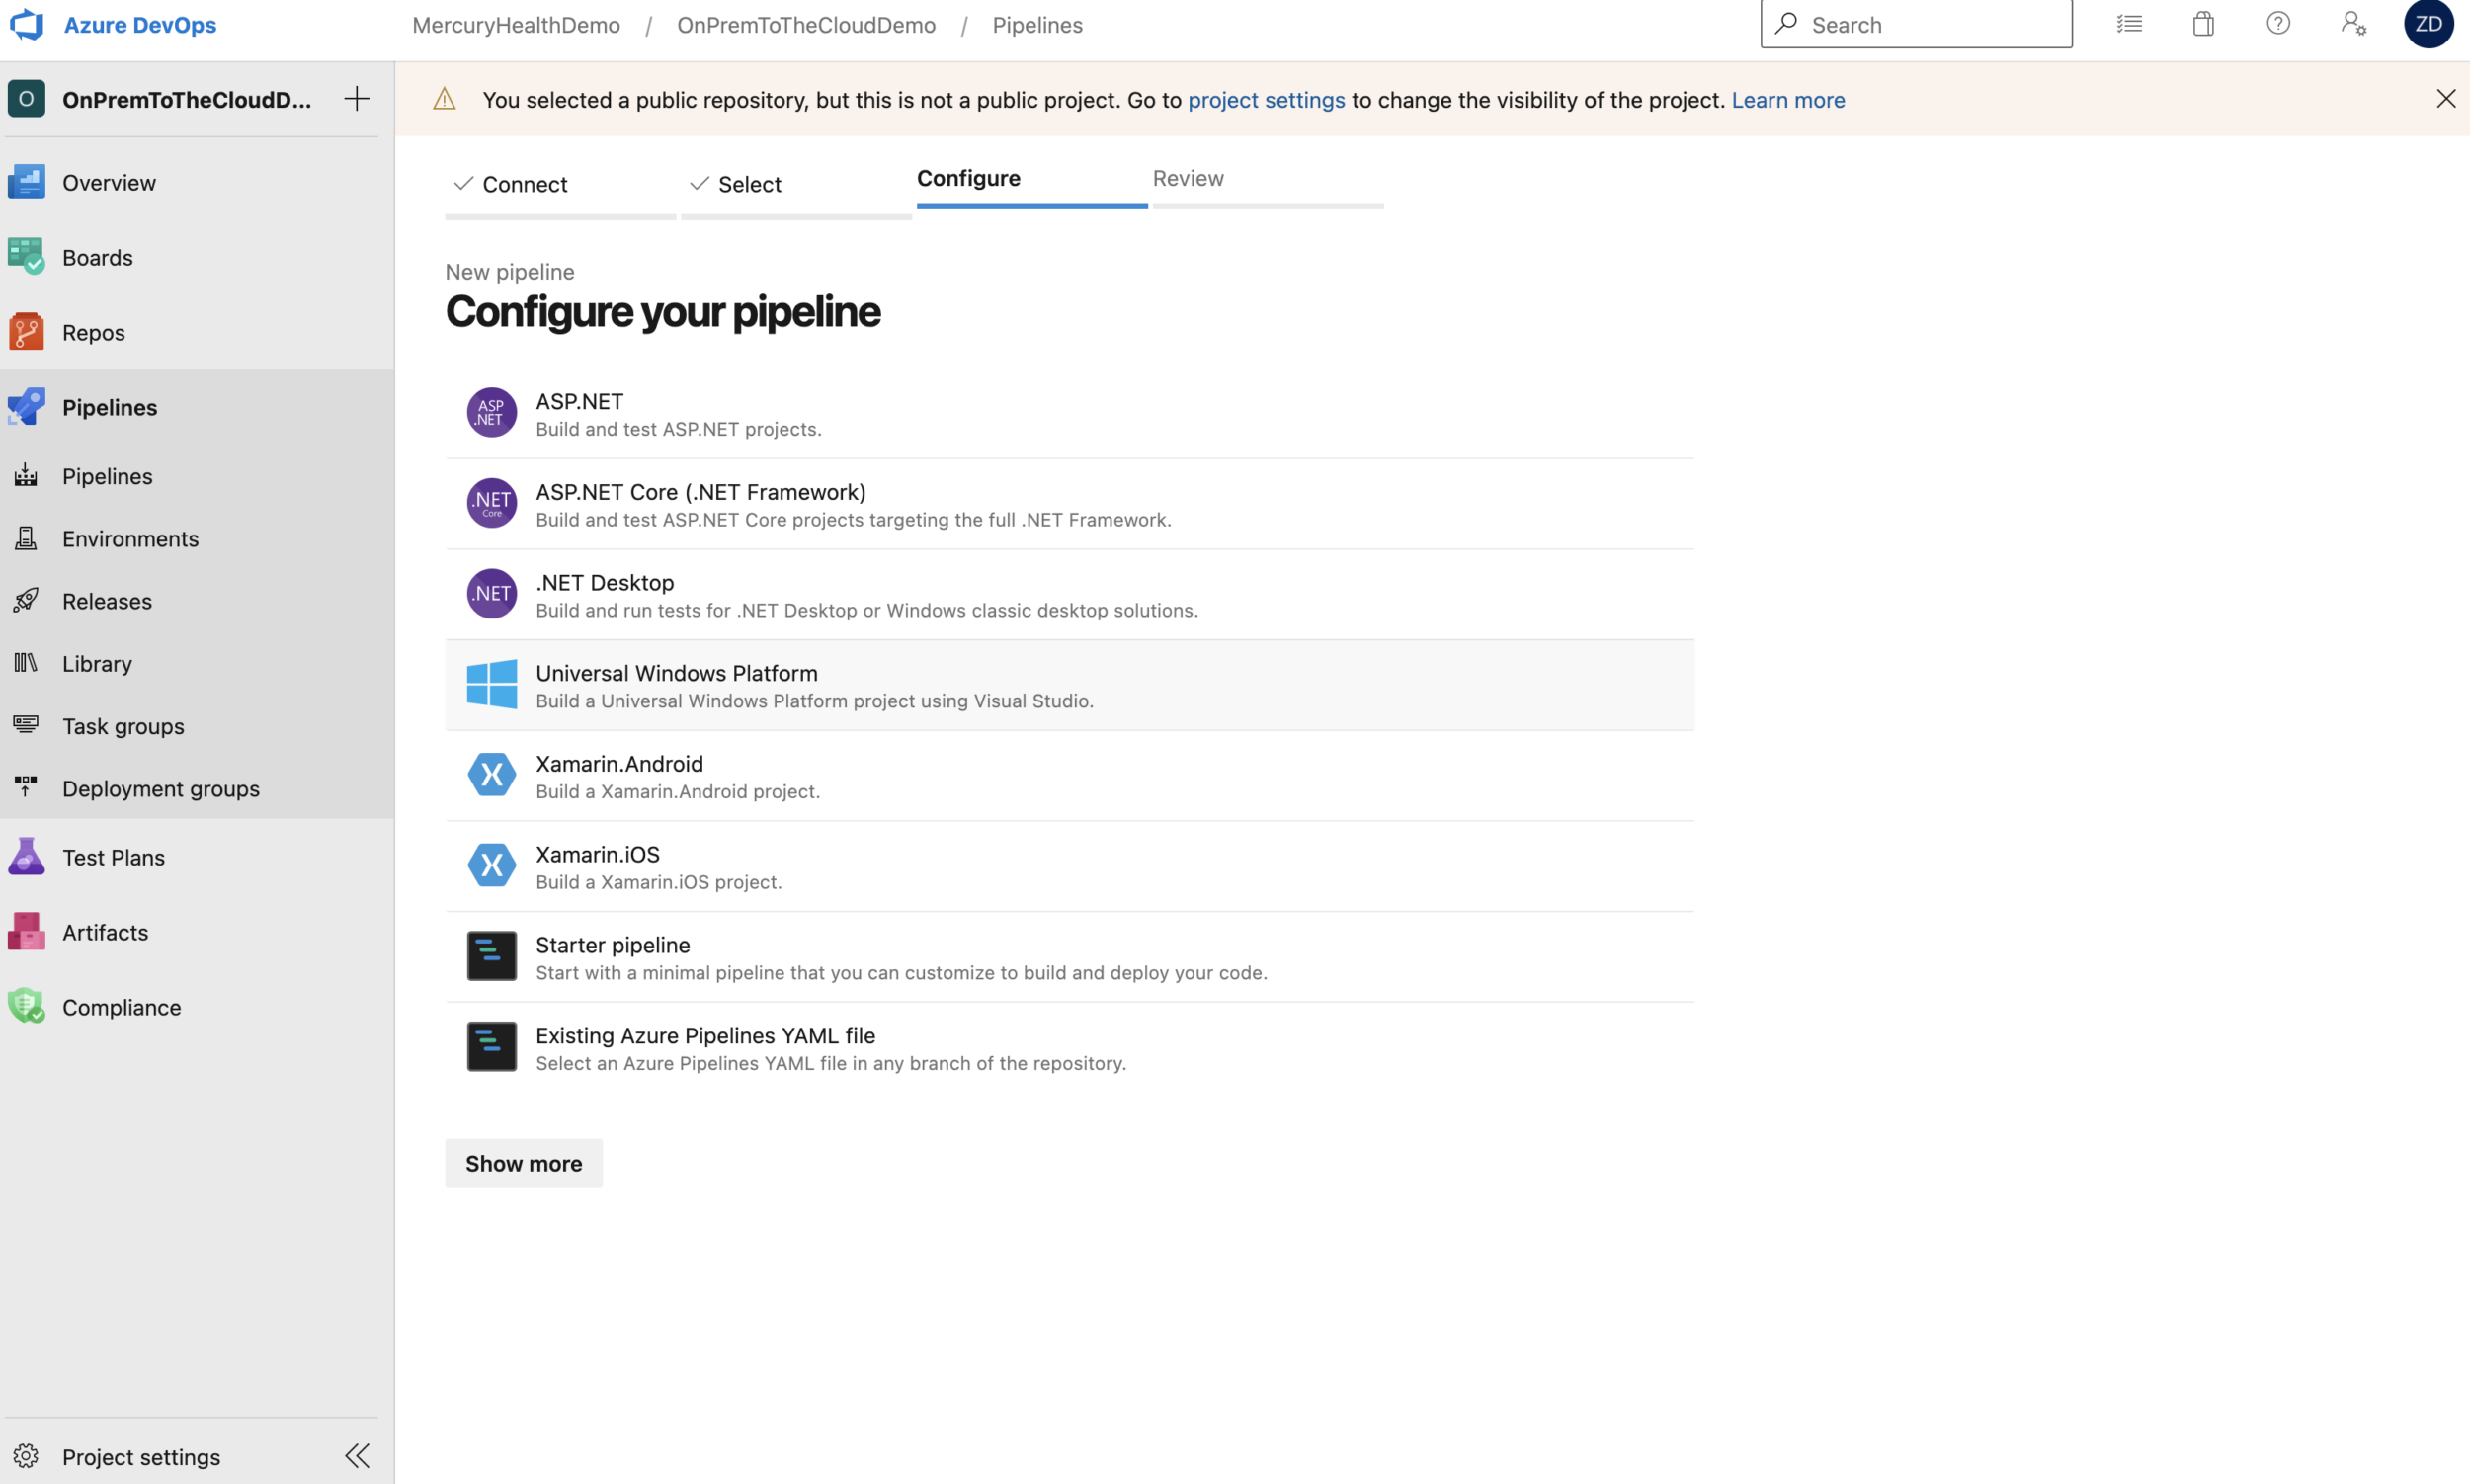
We’re going to begin with a starter pipeline so we can look at the formatting and get an idea of how this pipeline works.

As you can see at the top of the web editor, this file will save to our repository as azure-pipelines.yml.

This is the code from our starter pipeline:
# Starter pipeline
# Start with a minimal pipeline that you can customize to build and deploy your code.
# Add steps that build, run tests, deploy, and more:
# https://aka.ms/yaml

trigger:
- master

pool:
  vmImage: ubuntu-latest

steps:
- script: echo Hello, world!
  displayName: 'Run a one-line script'

- script: |
    echo Add other tasks to build, test, and deploy your project.
    echo See https://aka.ms/yaml
  displayName: 'Run a multi-line script'
As you can see, we’ve got a default trigger set to our master branch. This means any changes noticed in that branch will kick off this pipeline. The pool section tells our pipeline to use an ubuntu-latest host to run these tasks. We’ll change this later, but for now this is fine being our steps are only running echo commands. You can also see this starter pipeline is running script tasks.
We can save and run this pipeline if we’d like – all it’s doing is echoing some output for us. When we save this, we’ll have a pipeline that is running when changes occur in our master branch. We obviously won’t keep this pipeline like this, but this is a quick way to get a pipeline setup to start iterating on. That’s all there is to it to get our pipeline file into our repository and setup for changes!
Making the Connection Between Azure DevOps and Our Azure Subscription
This pipeline is going to be interacting with our subscription in a couple ways. It’s going to be pushing a file into a management resource group that is owned by our subscription, and it’s also going to be standing up a new resource group with resources in it. As such, we need to make sure Azure DevOps has the rights to do that or this will all fail. Let’s set up a Service Connection from Azure DevOps to our Azure Subscription!

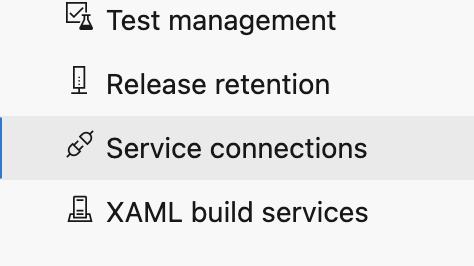
Inside our Project Settings under Service Connection, we can see the GitHub connection we just created in the last step. To set one up for our Azure Subscription, we simply need to click on New service connection at the top right.
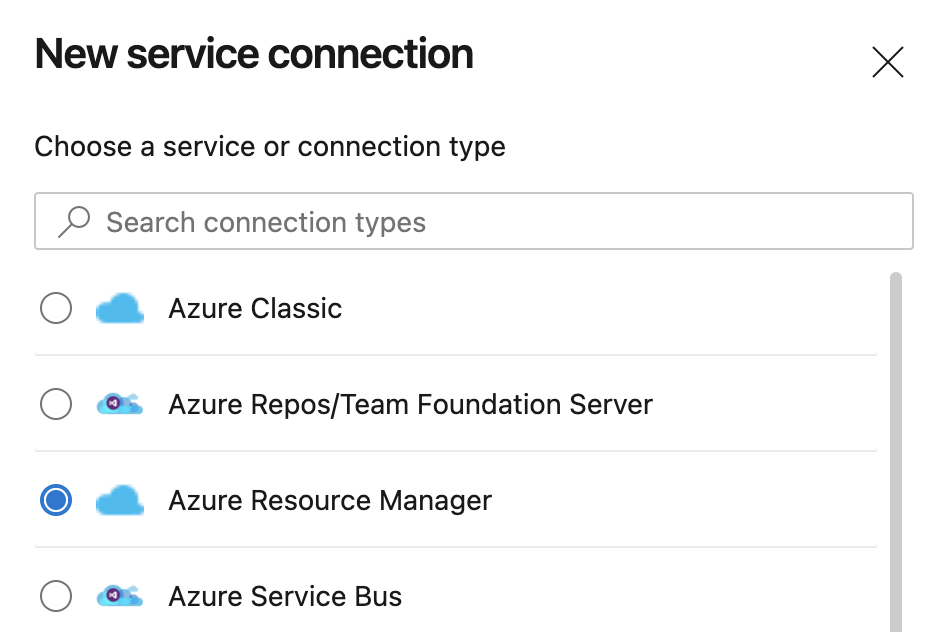
Now we can select the Service Connection type we want. In this case, we’re going to select Azure Resource Manager and click Next.

We’ll leave the default here of Service principal (automatic) and click Next.
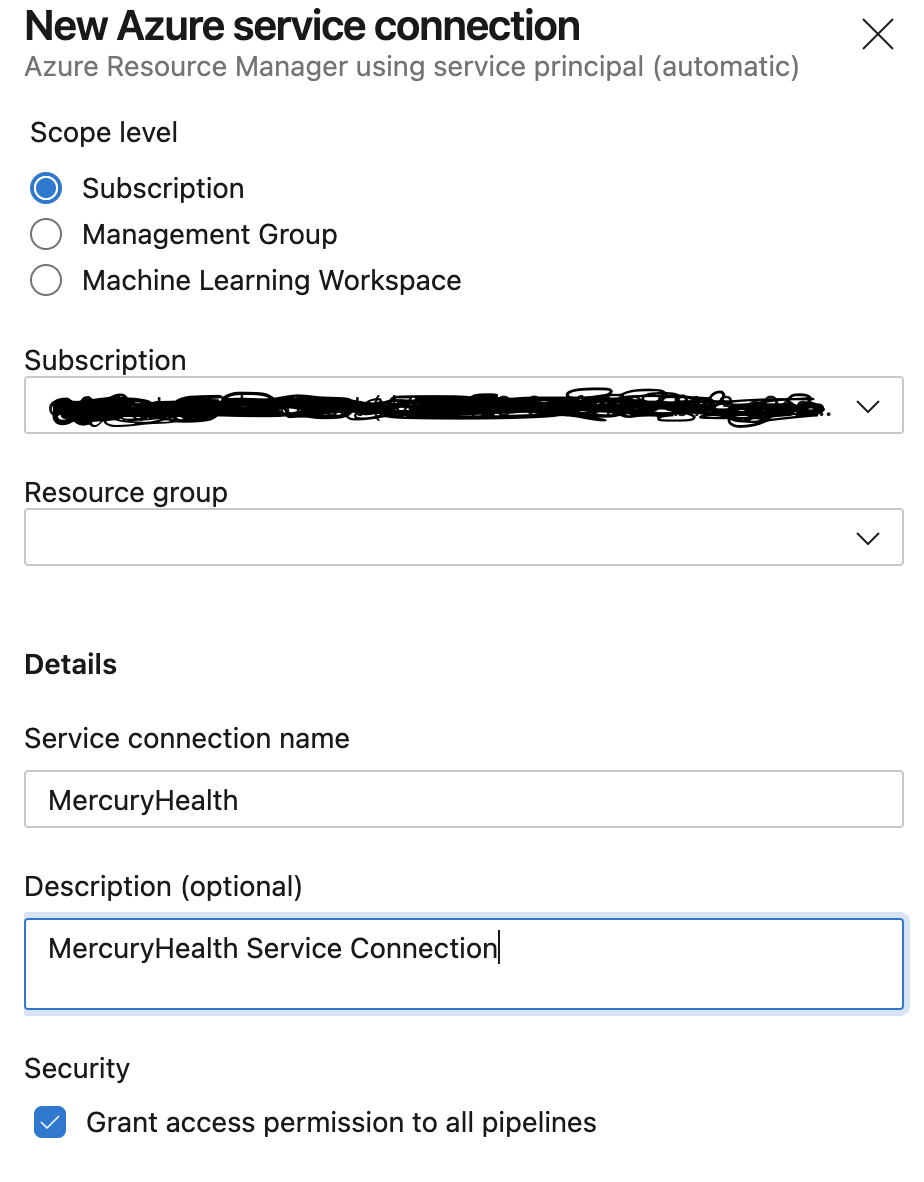
We’ll leave the Scope level set to Subscription, we’ll select the appropriate subscription from the drop down, we’ll name the connection name, and we can give it a description if we’d like to. Then we’ll click Save.
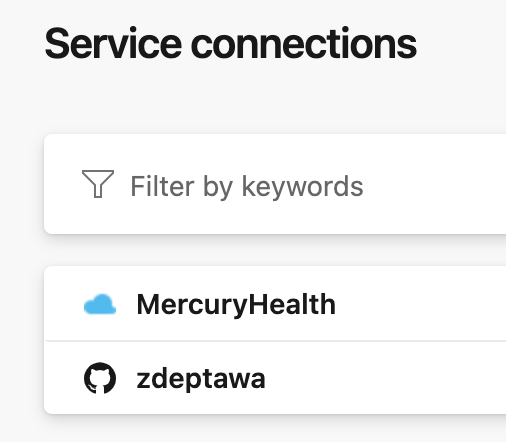
Azure DevOps will setup our Service Connection for us via a Service Principal that will be created in Azure. Pretty easy, right?
Planning the Stages, Tasks, and Jobs
Now we’ve got a pipeline running in our repository as a placeholder, but it’s not doing anything meaningful regarding building our infrastructure. We need to think about what we need to accomplish with our pipeline and what our first pipeline should look like.
There are many things we want and could add to this pipeline, but we need to focus on getting the pipeline up and going with the least number of requirements – otherwise we might never launch it. Once the pipeline is up and running, we can always iterate on future versions and add more features and tasks.
First Iteration of the Pipeline
Let’s think back to what the code does that Steven gave us. We won’t be dealing with the policy or management resource group in this pipeline, but the bits we will be dealing with do the following:
- Stands up a resource group and infrastructure for our application.
- Builds a Desired State Configuration for our servers.
- Builds the application.
So, we’re going to need tasks to do these things for us as well as a task to deploy the application to our environment. Speaking of environment, let’s get one of those stood up!
Building the Environment in Azure DevOps
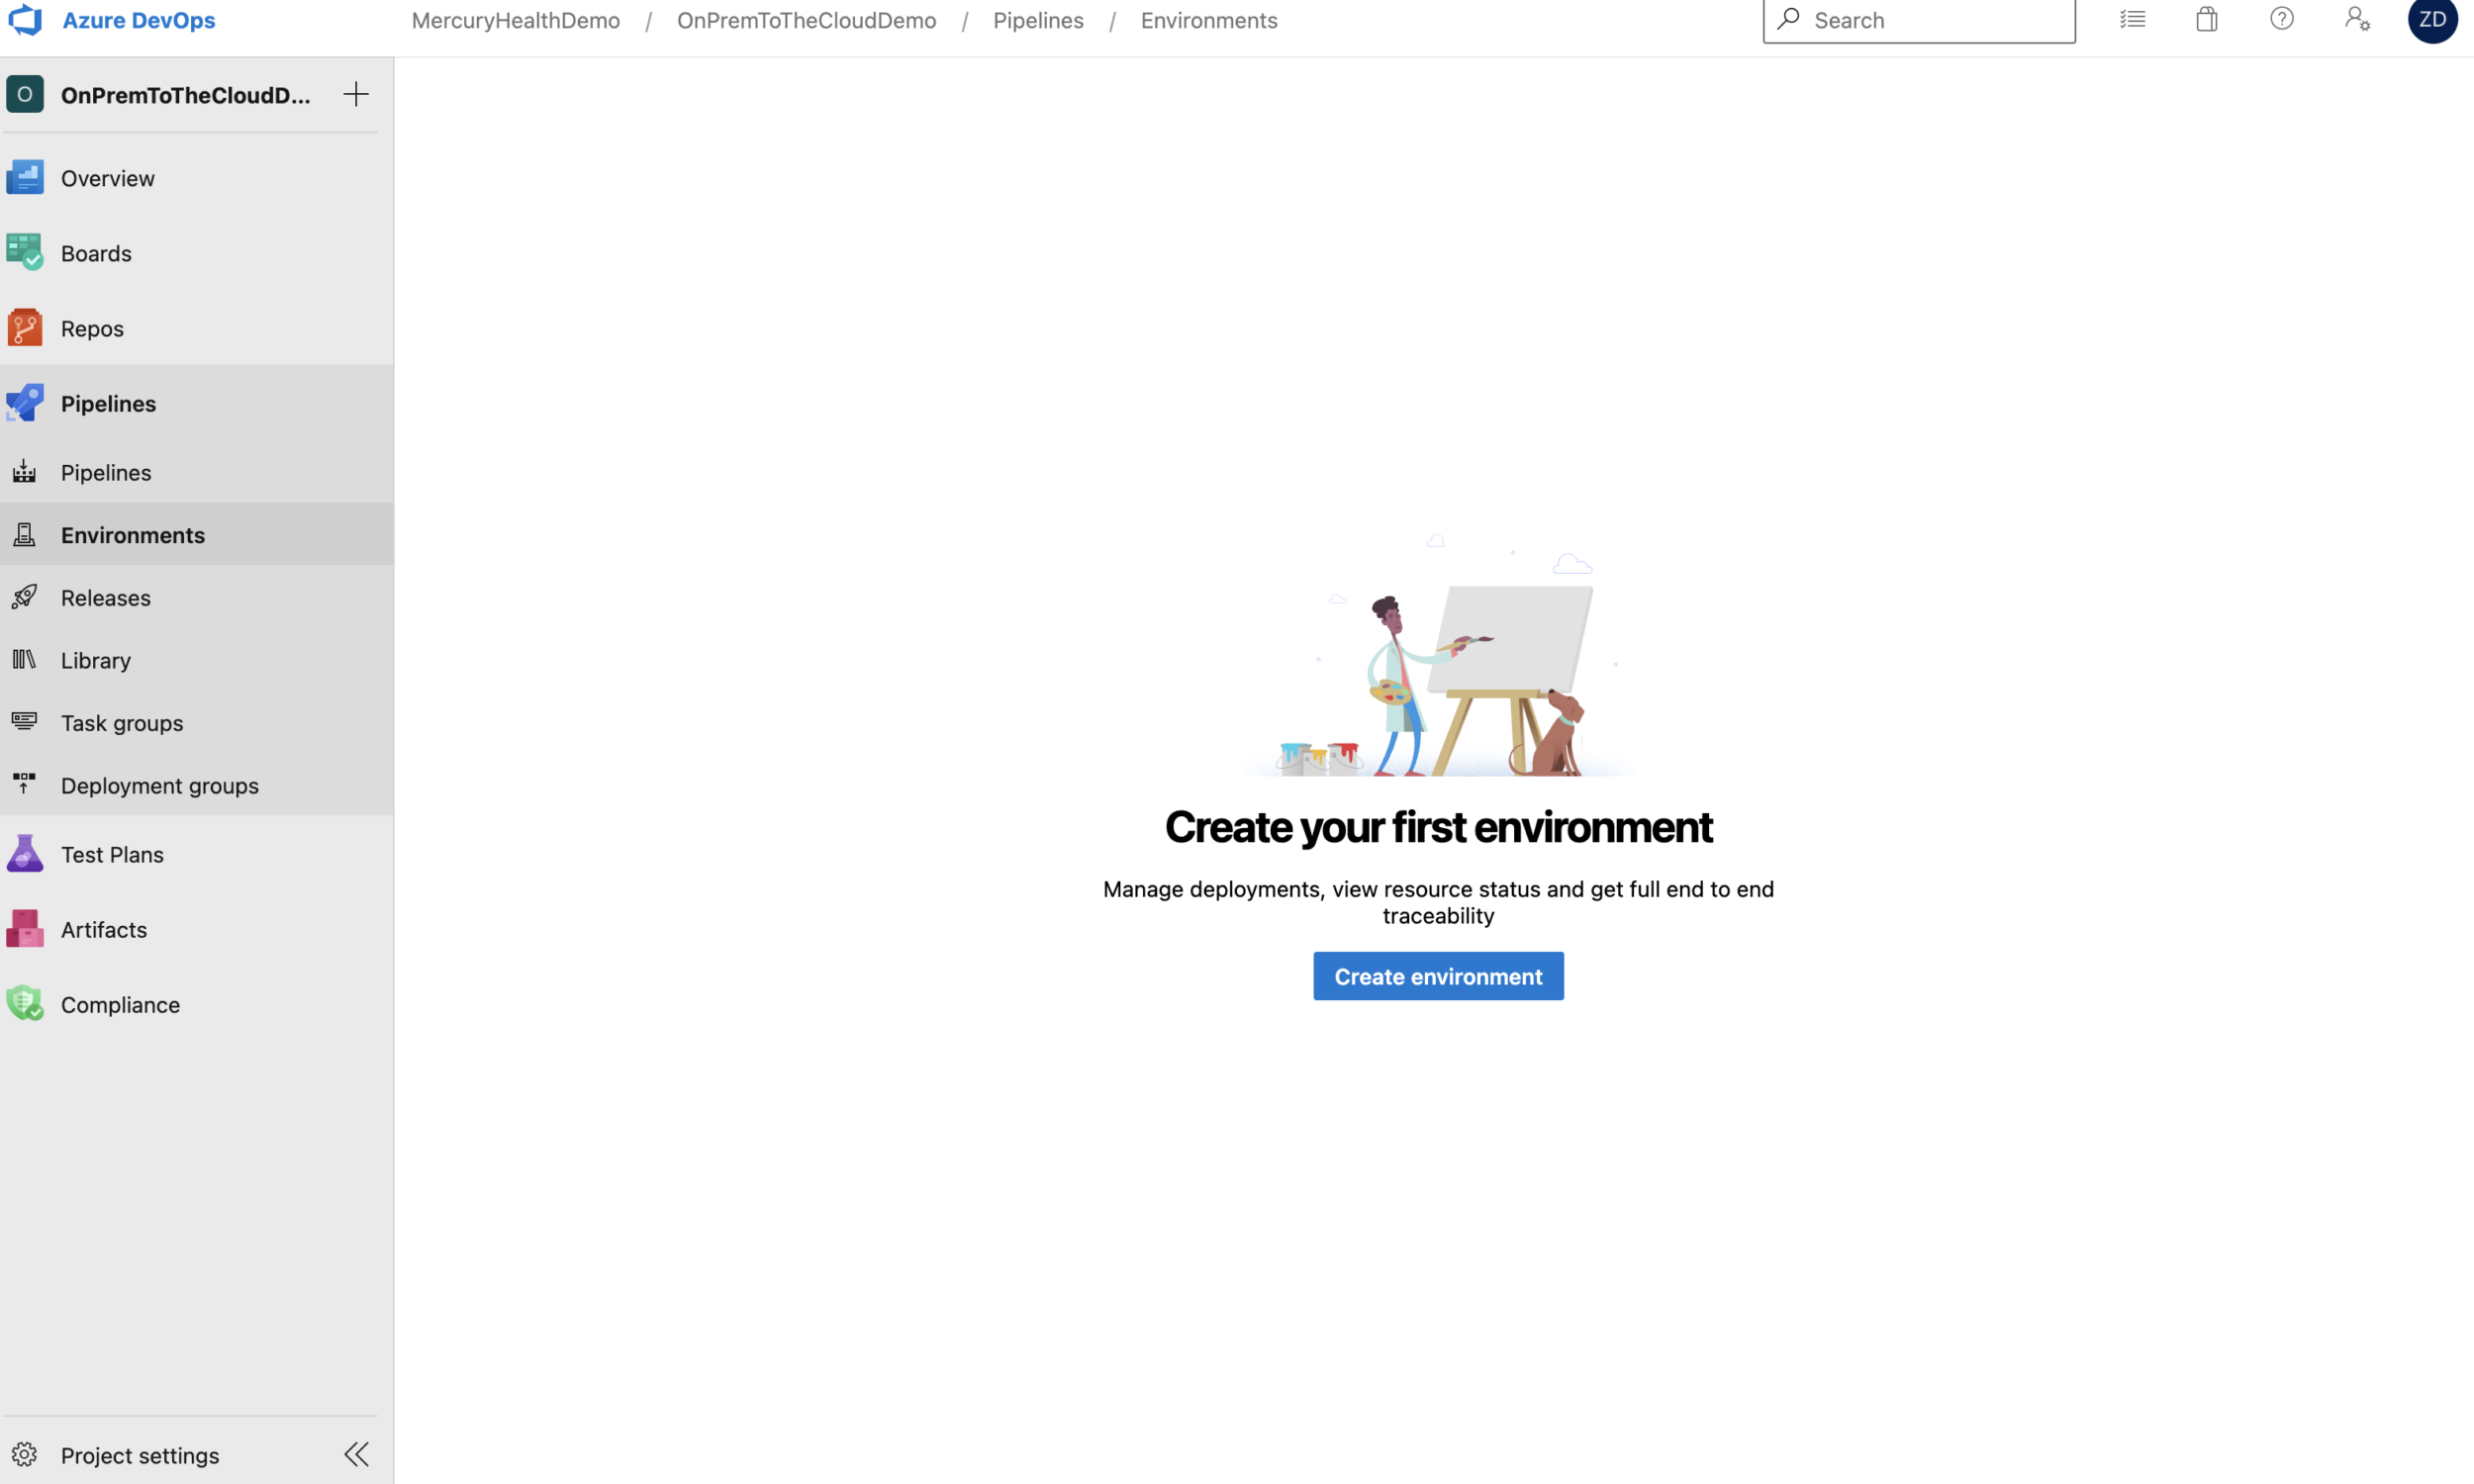
Creating an Azure DevOps Pipeline Environment is super easy.
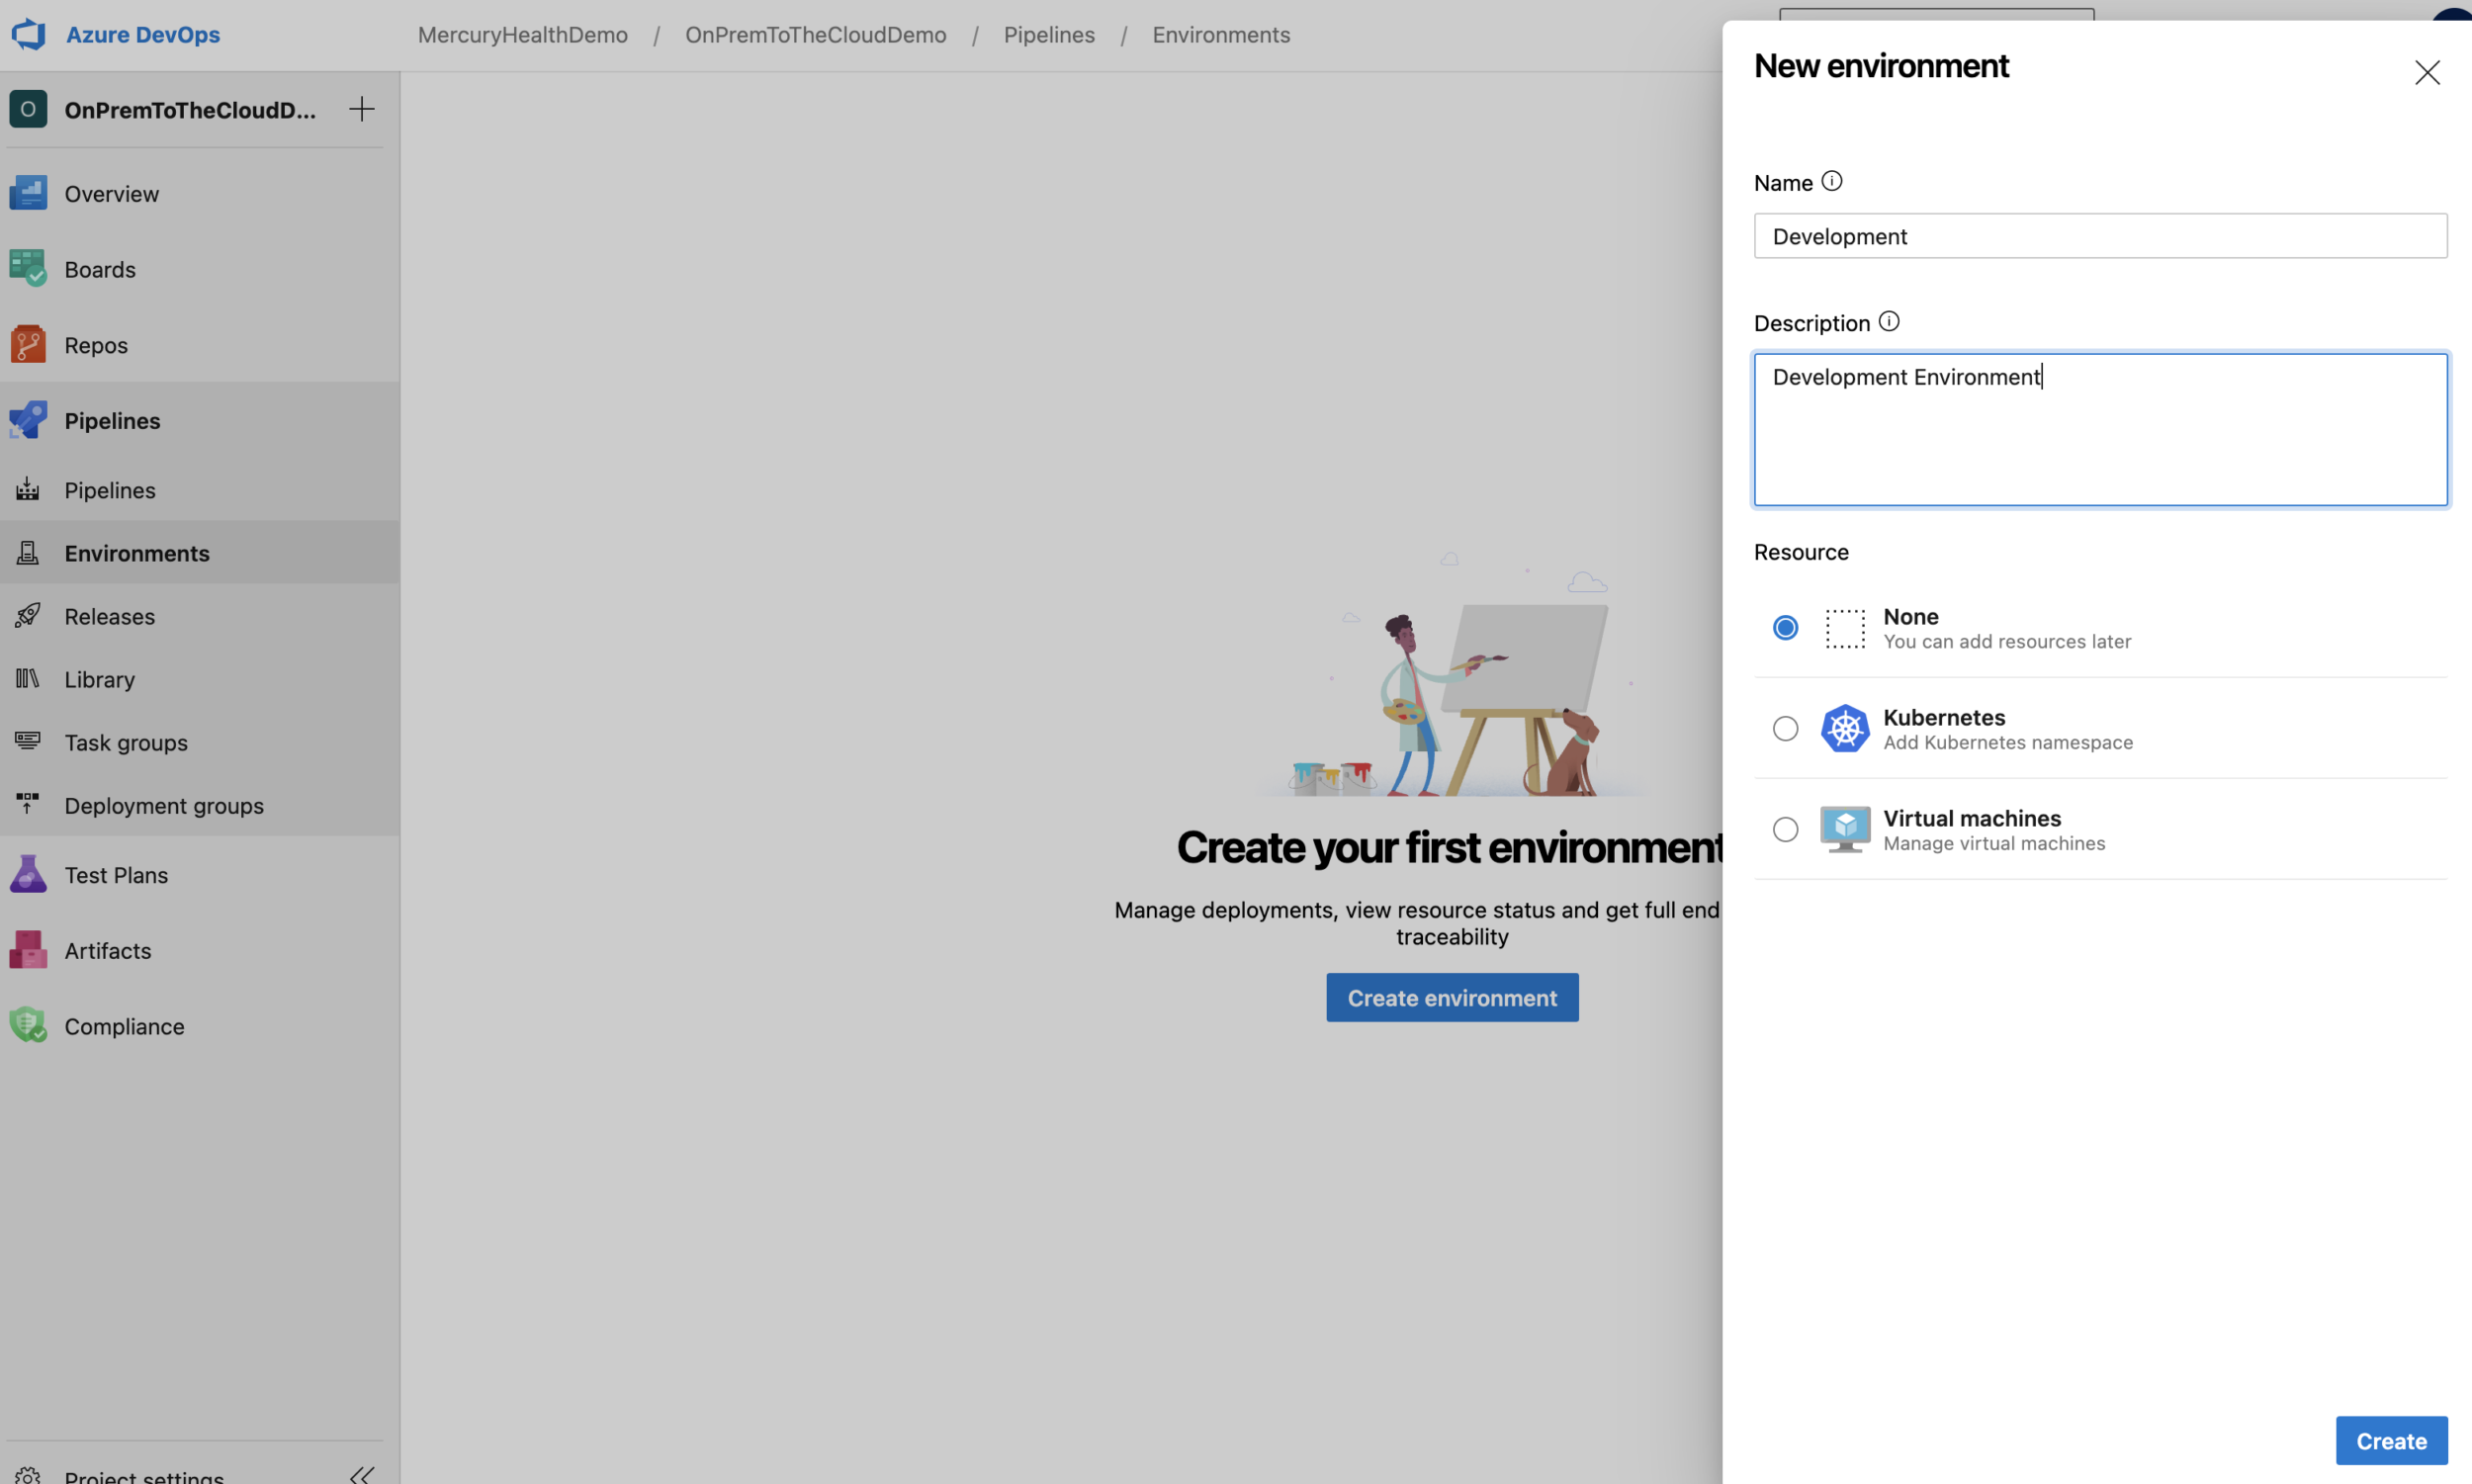
Nothing is required except the name and a description. We could assign resources to this environment ourselves, but luckily the Desired State Configuration Steven gave us will assign them for us based on the name we choose using an Azure DevOps Personal Access Token – so we’ll just leave our Resource set to None for now.
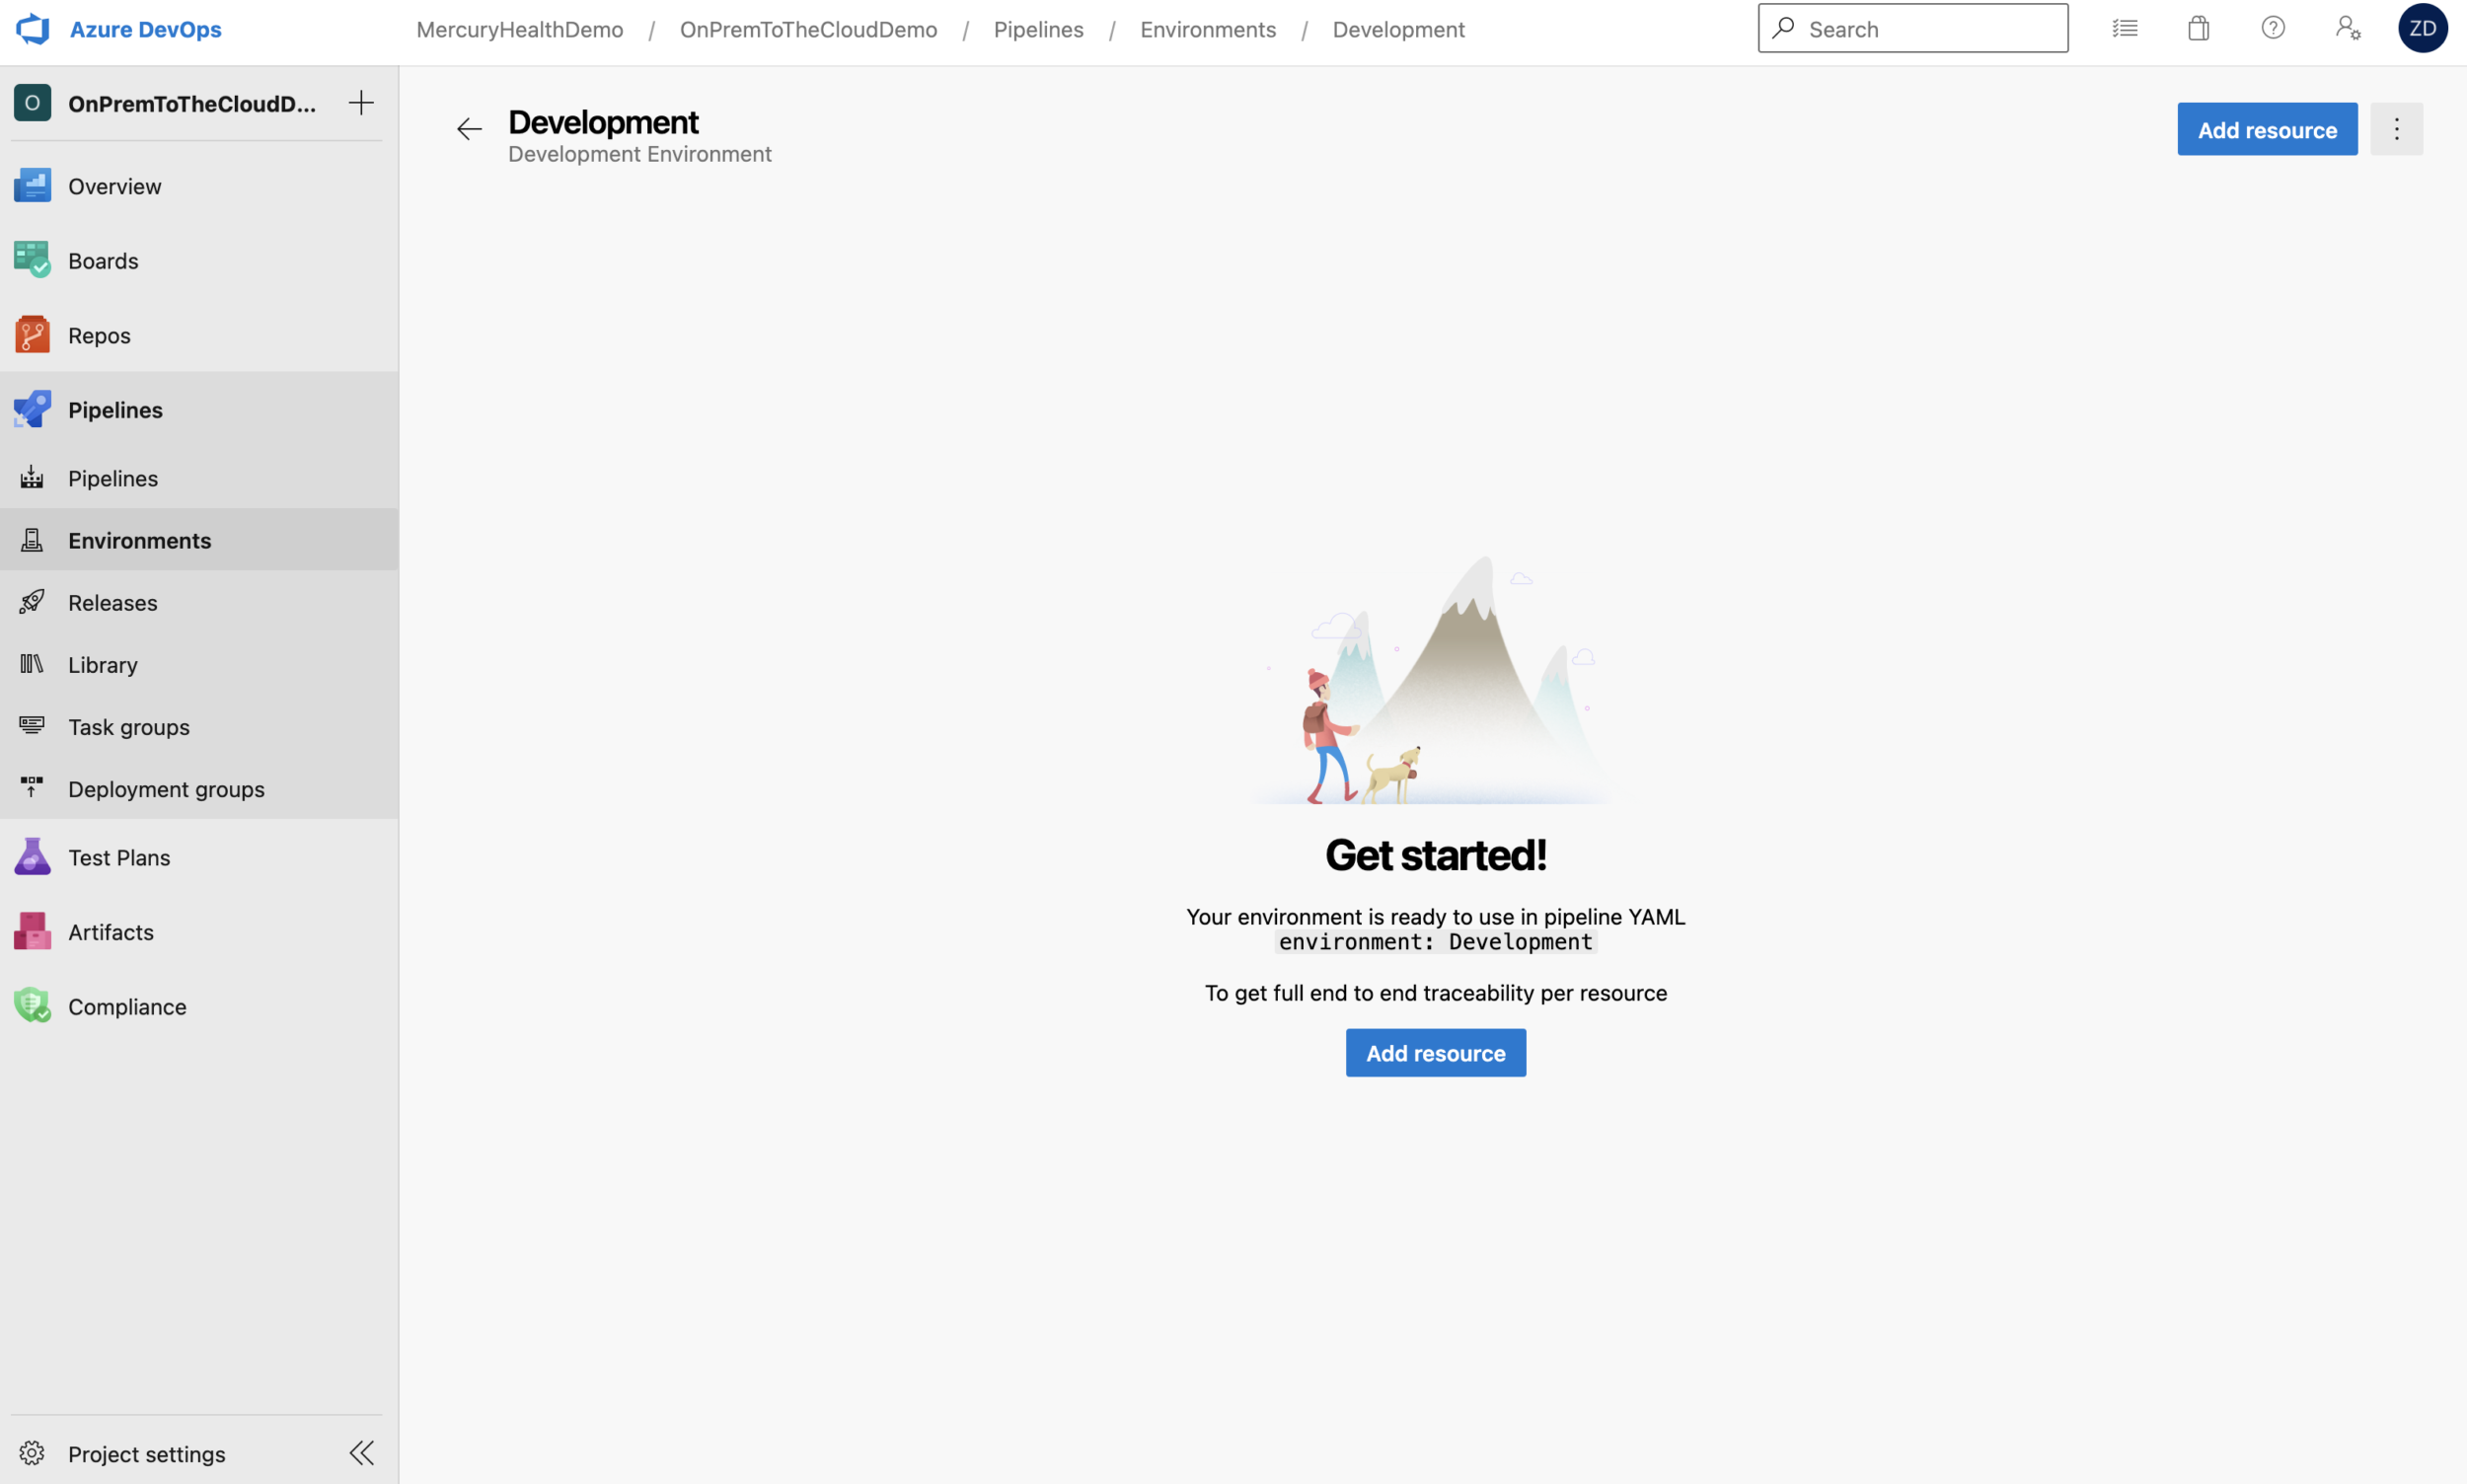
Our First Changes to the Pipeline
Ok, we know where our code lives (GitHub), we have a connection there from Azure DevOps, and we have a starter pipeline with an environment that we can configure. Let’s start editing the pipeline!
We’re using a standard Pull Request workflow and are working out of branches in our GitHub repository, so let’s change our trigger to kick off for the branch I’m currently working in called episode_5. Let’s also add a path to exclude so our pipeline will ignore any changes we make to our .github folder.
# Trigger build only on the appropriate branch.
trigger:
  branches:
    include:
      - episode_5
  paths:
    exclude:
      - .github
That looks good. Now, let’s change the host pool that we’re using to reflect a Windows host being we’re going to be working with PowerShell. This isn’t technically necessary, but let’s change it anyway – it won’t hurt anything for our pipeline!
# Setting the pool to run our build on a Windows host.
pool:
  vmImage: 'windows-latest'
Awesome! Now our pipeline will use a Windows host instead of an Ubuntu host. It’s time to look at adding our first real stage!
Stage One: Building the Application
It’s time – let’s setup our first stage! You might be thinking we should stand up the infrastructure first, but we’re going to work on building the application. If you think about it, we really have four things we need to accomplish – we need to build the Desired State Configuration, stand up the infrastructure, build the application, and deploy the application onto our infrastructure.
Building the Desired State Configuration has to happen before we stand up the infrastructure as that Desired State Configuration will be required to configure the servers, and building the application has to happen before we can deploy the application to the environment – but what if we setup the pipeline in this order and something is amiss with the application build? That means we’ll have to wait for the Desired State Configuration build to run and for the infrastructure task to run before we find out the application failed to build… and if the application fails to build, then we’ve just wasted time waiting for it. Let’s build the application first to make sure it’s good to go before we spend the time standing up and configuring the infrastructure!
stages:
  # Build and prepare the application
  # Do this first - if the app doesn't build, we should fail immediately.
  - stage: PrepareDevApplication
    jobs:
    - job: BuildAndPublishApp
      steps:
      - task: NuGetToolInstaller@1
      - task: NuGetCommand@2
        inputs:
          restoreSolution: '**/*.sln'
      - task: VSBuild@1
        inputs:
          solution: '**/*.sln'
          msbuildArgs: '/p:DeployOnBuild=true /p:WebPublishMethod=Package /p:PackageAsSingleFile=true /p:SkipInvalidConfigurations=true /p:PackageLocation="$(build.artifactStagingDirectory)"'
          platform: 'Any CPU'
          configuration: 'Release'
      - task: CopyFiles@2
        inputs:
          SourceFolder: '$(build.artifactStagingDirectory)'
          Contents: '**/MercuryHealth.Web.zip'
          TargetFolder: '$(build.artifactStagingDirectory)/artifacts'
      - task: CopyFiles@2
        inputs:
          SourceFolder: '$(Build.SourcesDirectory)'
          Contents: '**/*.dacpac'
          flattenFolders: true
          TargetFolder: '$(build.artifactStagingDirectory)/artifacts'
      - task: PublishPipelineArtifact@1
        inputs:
          targetPath: '$(build.artifactStagingDirectory)/artifacts'
          artifact: 'artifacts'
          publishLocation: 'pipeline'
As you can see, our first stage is called PrepareDevApplication. Inside this stage, we have one job called BuildAndPublishApp that has six tasks to perform. These are the tasks necessary to build our application and put it in our $(build.artifactStagingDirectory) under /artifacts where we can consume it later.
Building of these stages takes trial and error – so we’ve had to make changes and run the pipeline a few times until it’s just how we want it. The result is what you see!
Stage Two: Building the Desired State Configuration (DSC)
Alright, we have stage one done. Our pipeline is building our application making it ready for deployment. The next stage will build our Desired State Configuration and push it into a storage account within the management resource group that we talked about so we can consume it later via a URI in our Resource Group template.
  # Build and prepare the Desired State Configuration (DSC)
  # This is the server configuration as code and will ensure our servers are configured as intended.
  - stage: PrepareDesiredStateConfiguration
    dependsOn: PrepareDevApplication
    jobs:
      - job: BuildAndPublishDSC
        steps:
        - task: AzurePowerShell@5
          inputs:
            azureSubscription: 'on-prem-to-the-cloud(a1b23456-9abc-432d-a1b2-a1bc23d45678)'
            ScriptType: 'FilePath'
            ScriptPath: 'Infrastructure/taskBuildDsc.ps1'
            azurePowerShellVersion: 'LatestVersion'
As you can see, this stage is called PrepareDesiredStateConfiguration and it depends on the PrepareDevApplication stage. What this means is this stage will not run unless the stage it depends on finishes. This ensures my stages are running in the order I need them to.
In this stage, I’m using the AzurePowerShell@5 task to run a script that I have stored inside our repository. That script is a snippet I pulled out of the PowerShell script that Steven gave me. Here are the contents of that taskBuildDsc.ps1 file:
$ConfigurationPath = './Infrastructure/MercHealthConfig.ps1'

Write-Host ""; Write-Host 'Getting the xWebAdministration module to package as part of the published DSC configuration.'
if (-not (Get-Module -ListAvailable xWebAdministration)) {
    Install-Module xWebAdministration -RequiredVersion 3.2.0 -Scope CurrentUser -Force
}
Write-Host ""; Write-Host 'Getting the xPSDesiredStateConfiguration module to package as part of the published DSC configuration.'
if (-not (Get-Module -ListAvailable xPSDesiredStateConfiguration)) {
    Install-Module xPSDesiredStateConfiguration -RequiredVersion 9.1.0 -Scope CurrentUser -Force
}
Write-Host ""; Write-Host 'Packaging and publishing the DSC configuration and supporting modules.'
$Parameters = @{
    ResourceGroupName  = ${env:MGMTRESOURCEGROUP}
    ConfigurationPath  = $ConfigurationPath
    StorageAccountName = ${env:STORAGEACCOUNTNAME}
    ContainerName      = ${env:STORAGECONTAINERNAME}
    Force              = $true
}
Publish-AzVMDscConfiguration @Parameters | Out-Null
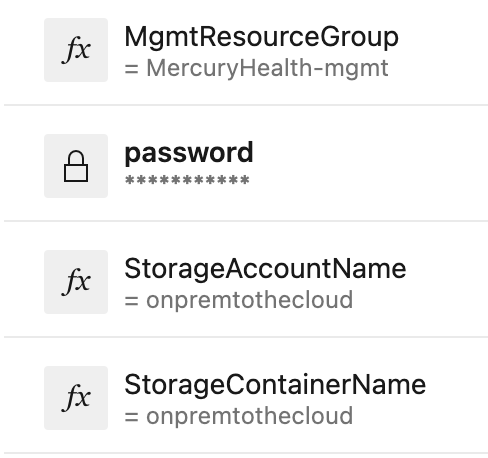
This script is using another file within the repository called MercHealthConfig.ps1 that holds all necessary configuration parameters for our servers to build the Desired State Configuration.
You may also notice that we’re referring to some environment variables in our $Parameters – ${env:MGMTRESOURCEGROUP}, ${env:STORAGEACCOUNTNAME}, and {env:STORAGECONTAINERNAME}. Those were set in our pipeline variables as mentioned earlier as shown here:
Stage Three: Building the Resource Group and Infrastructure
Alright, we’re halfway there! Let’s look at stage three – building the resource group and infrastructure. If you recall from earlier in this post, Steven gave us an Azure Resource Manager template that stands up our Resource Group and everything we need within it for our application. Here is the code I setup in our pipeline to make use of this template:
  # Build and prepare the resource group
  # This is the Azure Resource Group where our infrastructure will be deployed.
  - stage: PrepareDevResourceGroup
    dependsOn: PrepareDesiredStateConfiguration
    jobs:
    - job: BuildResourceGroup
      steps:
      - task: AzureResourceGroupDeployment@2
        inputs:
          azureSubscription: 'on-prem-to-the-cloud(a1b23456-9abc-432d-a1b2-a1bc23d45678)'
          action: 'Create Or Update Resource Group'
          resourceGroupName: 'MercuryHealth-dev'
          location: 'East US 2'
          templateLocation: 'URL of the file'
          csmFileLink: 'https://raw.githubusercontent.com/zdeptawa/OnPremToTheCloud/episode_5/Infrastructure/ApplicationRG.json'
          overrideParameters: '-dscBlobStorageUri $(dscBlobStorageUri) -azureDevOpsToken $(azureDevOpsToken) -domainNameLabel $(domainNameLabel) -vmOsDiskStorageName $(vmOsDiskStorageName) -vmname $(vmname) -username $(username) -password $(password) -azureDevOpsEnvironmentName $(azureDevOpsEnvironmentName) -azureDevOpsProject $(azureDevOpsProject) -azureDevOpsUrl $(azureDevOpsUrl)'
          deploymentMode: 'Complete'
This stage is called PrepareDevResourceGroup and it depends on the stage before it as well. We’re using the AzureResourceGroupDeployment@2 built-in task and setting some inputs. You can see we’re giving the actual URL for the template. We’re also overriding some parameters that Steven setup with some Pipeline Variables we set earlier. That’s happening via overrideParameters. That’s all there is to it for the Resource Group and infrastructure deployment for this application.
Stage Four: Deploying the Application
We’re finally there – the last stage! We’ve got our application code built, we built our Desired State Configuration, we stood up our infrastructure… it’s time to deploy the application! Let’s look at this final stage.
  # Deploy the application
  # This is the final step - deploying the application we built in the first step of this pipeline to our infrastructure.
  - stage: DeployDevApplication
    dependsOn: PrepareDevResourceGroup
    variables:
      - name: websiteName
        value: 'Mercury Health'
      - name: databaseName
        value: MercuryHealthDB
    jobs:
      - deployment: DeployTestApplication
        environment:
          name: Development
          resourceType: VirtualMachine
          tags: mercuryweb
        strategy:
          runOnce:
            deploy:
              steps:
              - template: deploy-template.yml
This stage is named DeployDevApplication and it again depends on the stage before it. You can see we’re setting some variables in-line. We’re also naming the Development deployment environment to deploy into. That’s telling this deployment stage to push this application out using the deploy-template.yml file into our Development environment that we stood up earlier that was configured via Steven’s Desired State Configuration. Awesome how this all ties together, right!?
Looking at the Pipeline Runs
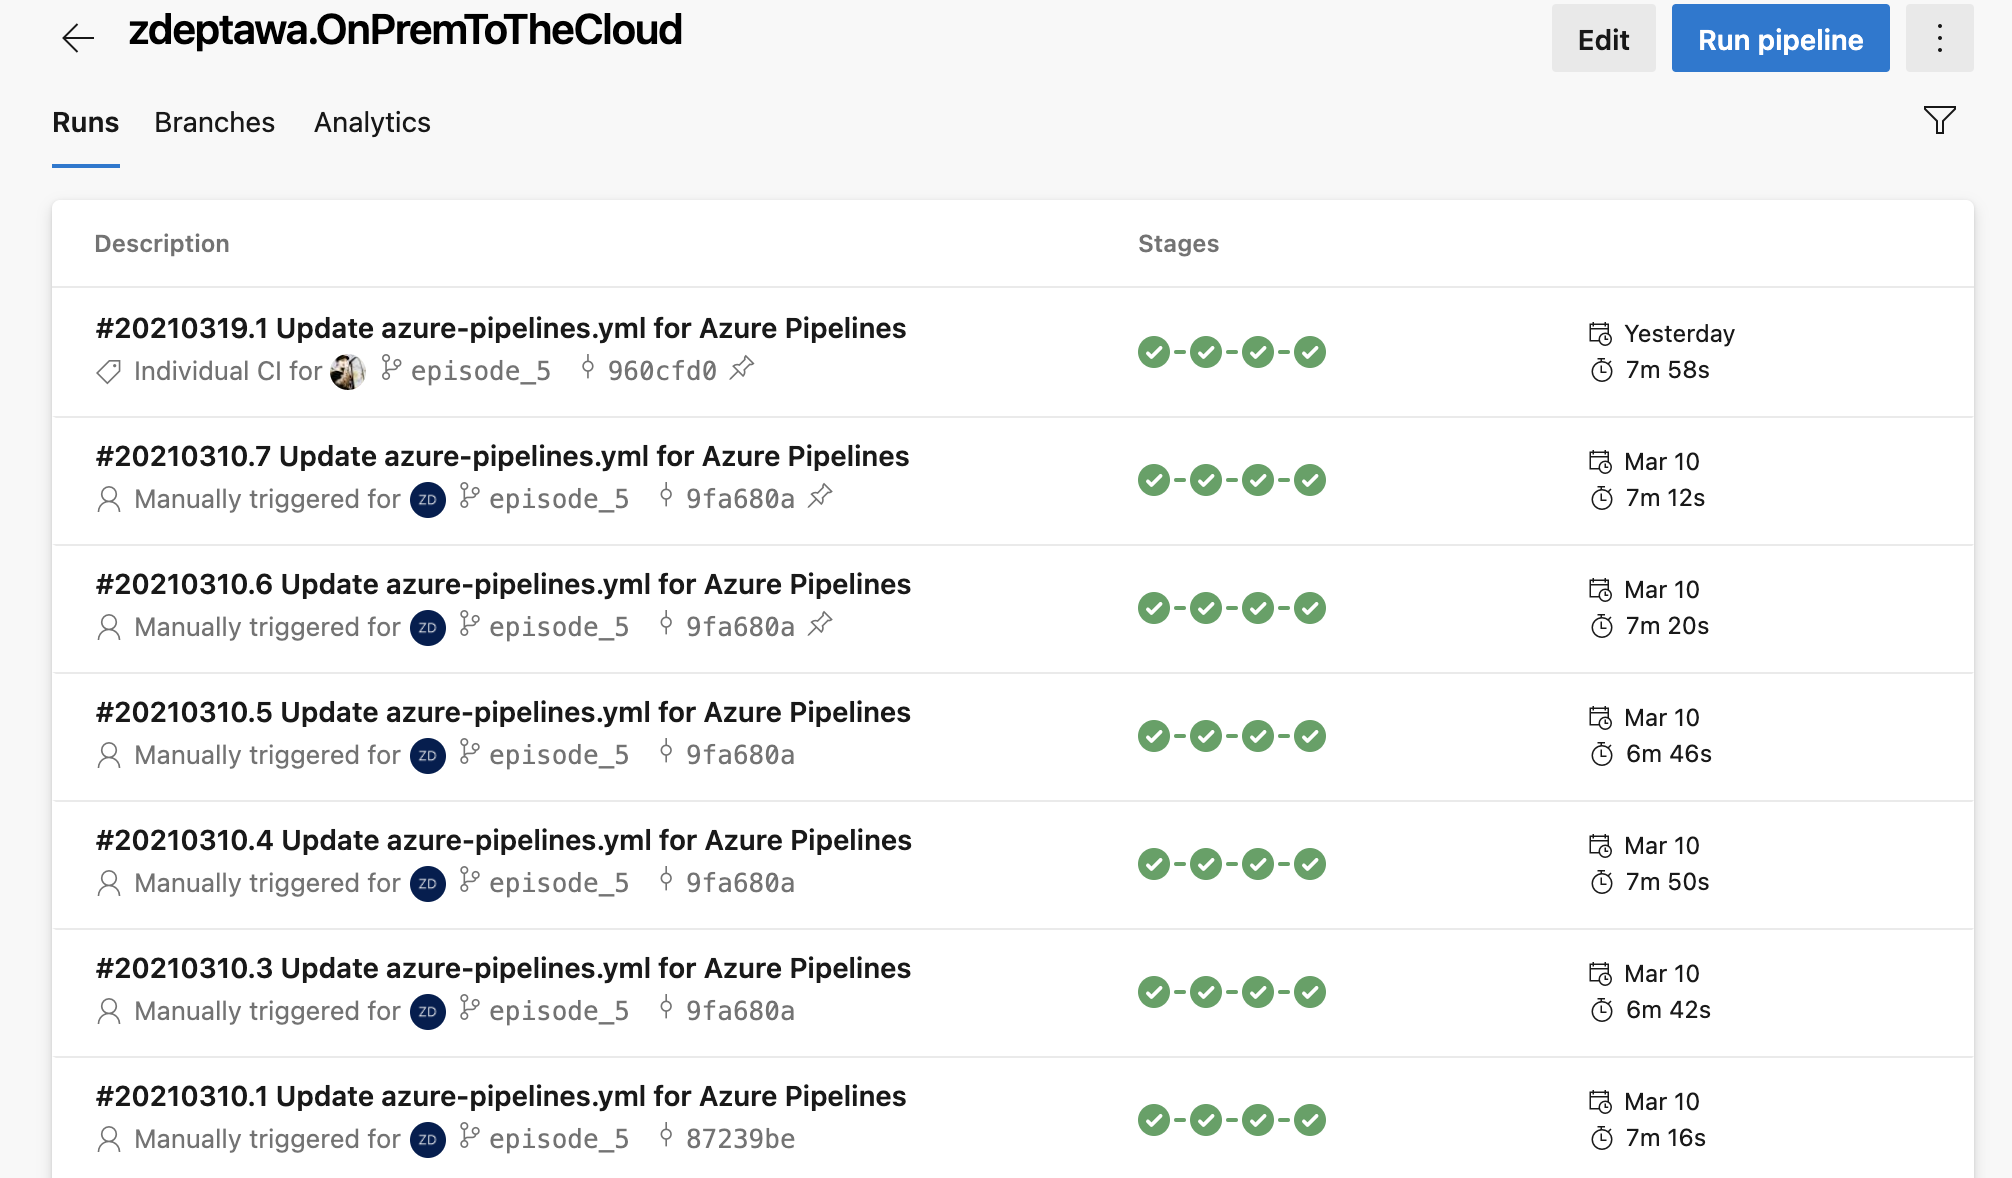
We didn’t go through each run of the pipeline in this blog post as I built it… why? Because there were a lot of them and that would have made this already long blog post way too long. I shrank this screen down to try and capture all the runs, and I still couldn’t grab them all:

The point here is building a pipeline like this takes time. Every pipeline is different. It takes trial and error. You’re going to hit walls that hang you up. You’re going to have to rewrite tasks and jobs. You’ll have to shuffle code. It’s just all part of the process – and you get faster at it every time you do it!
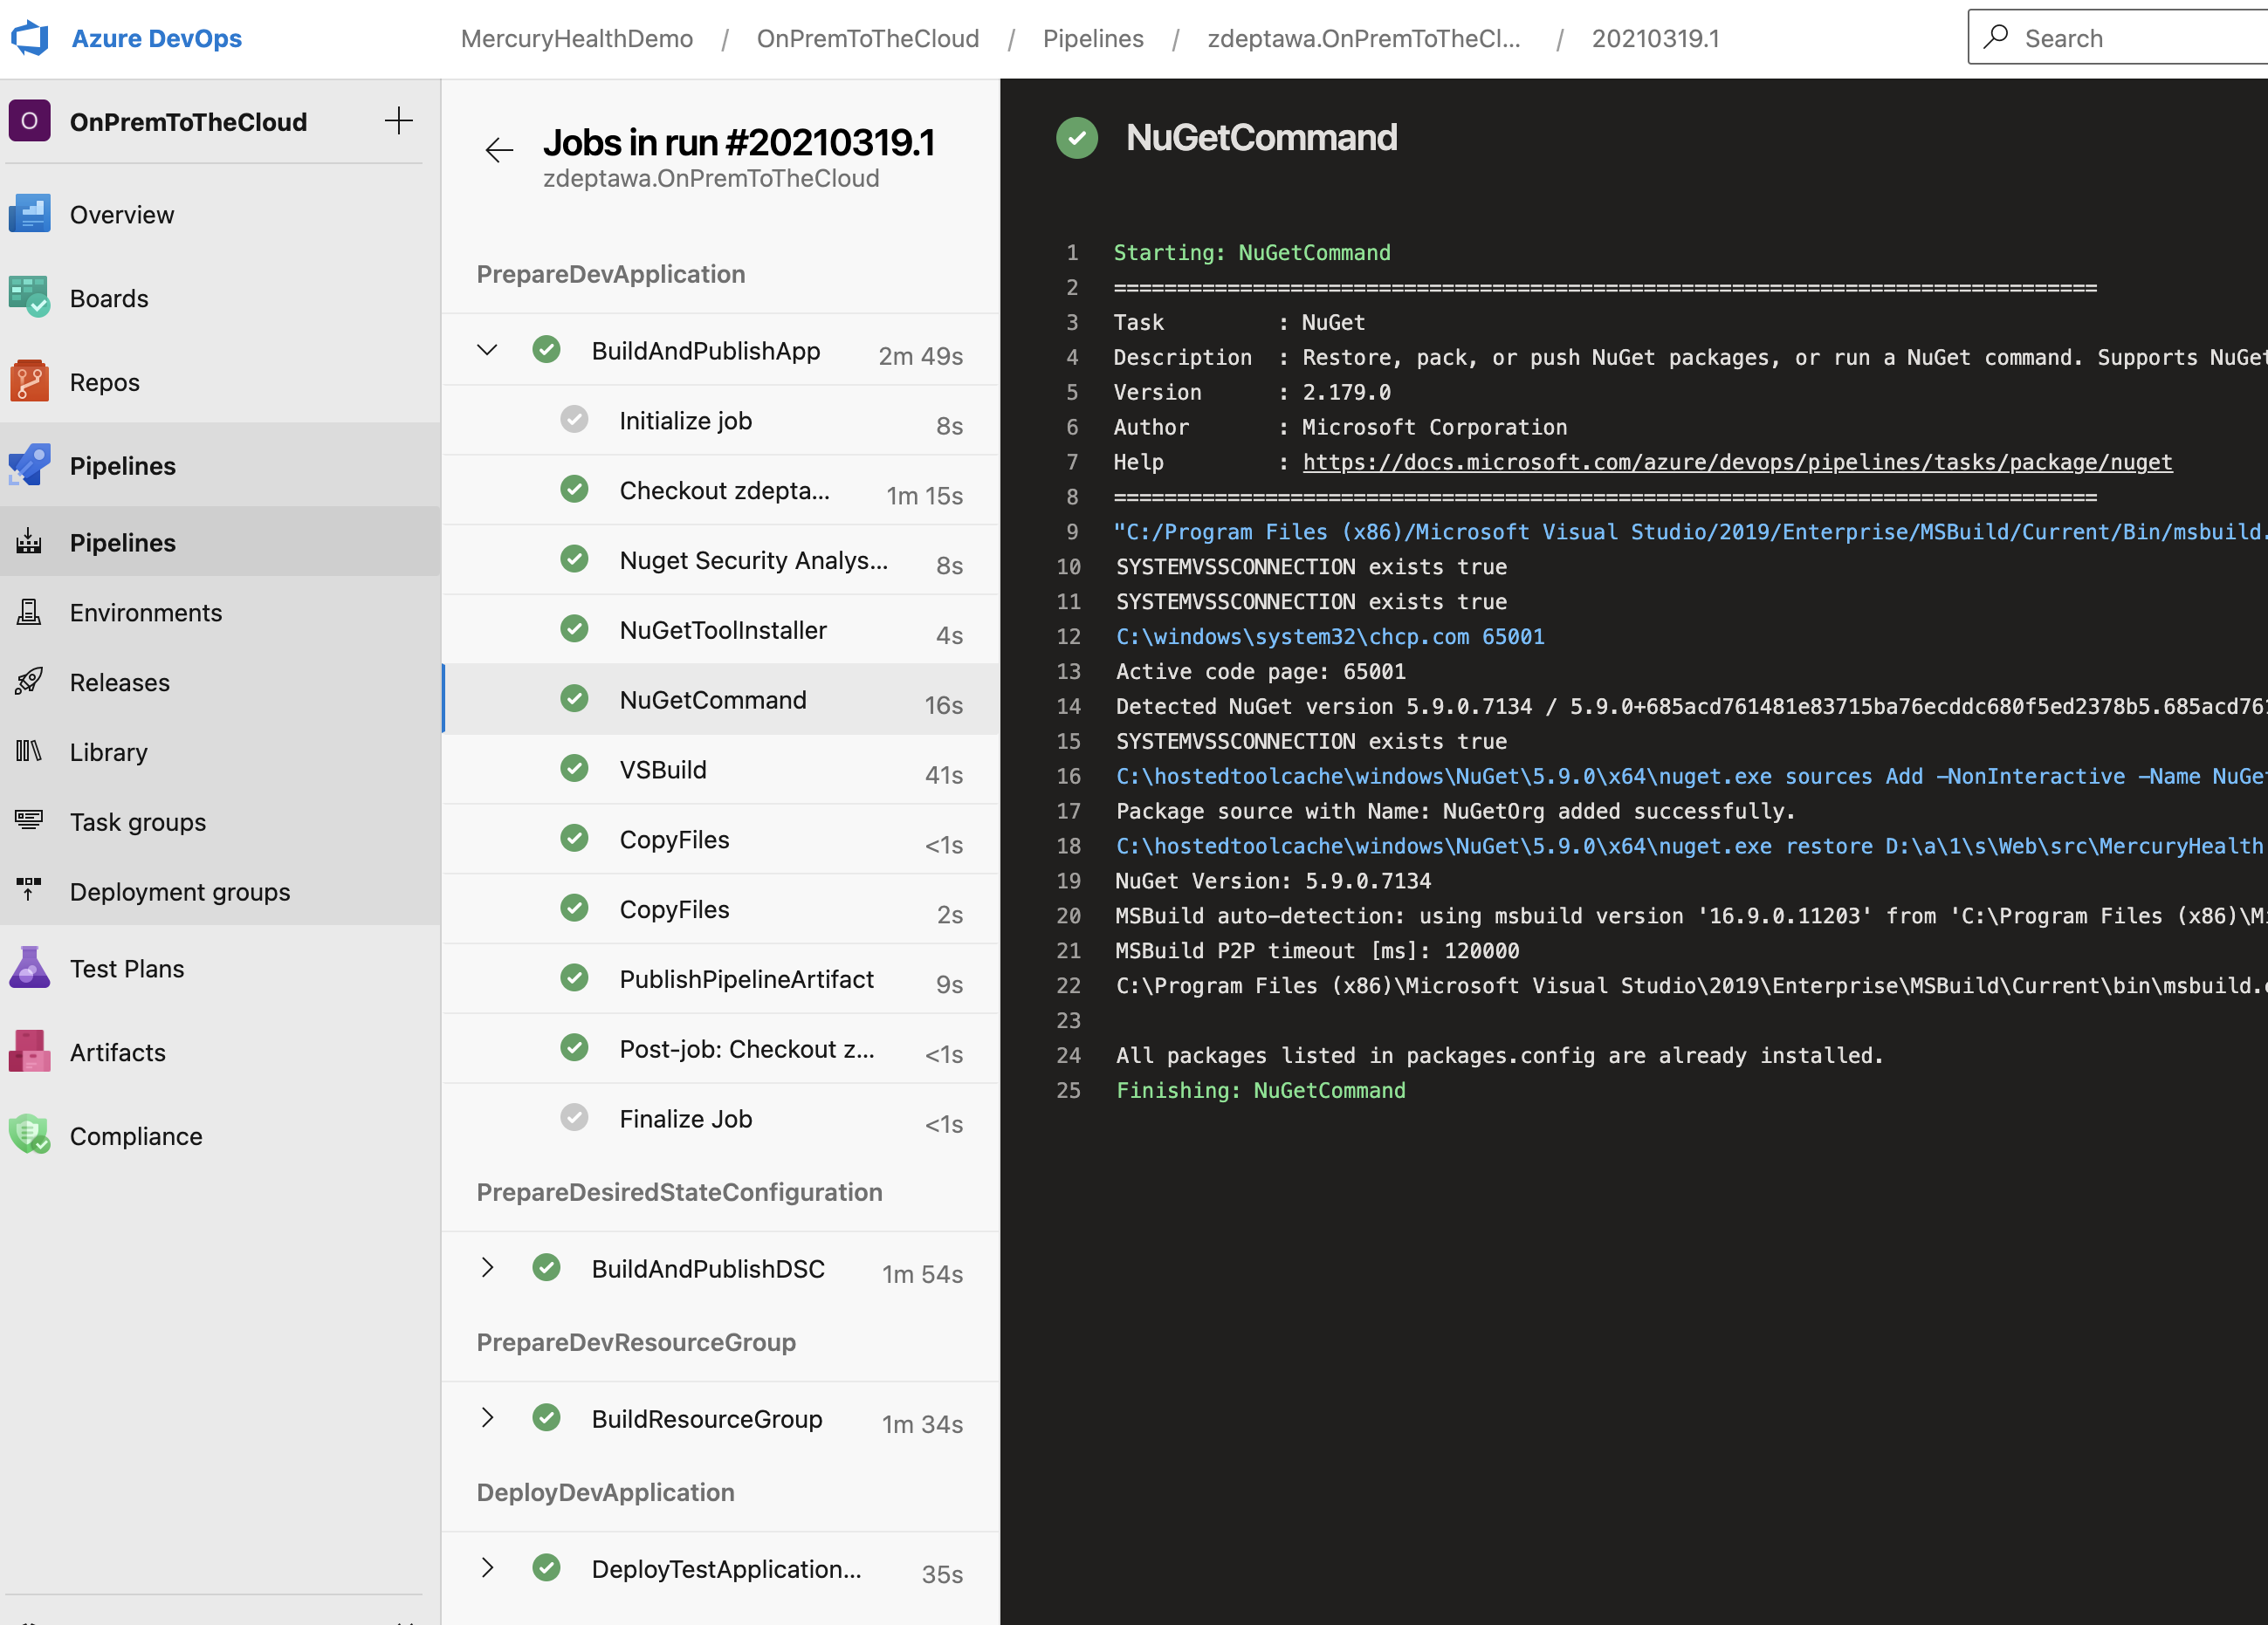
The good news is you can easily drill into each of these runs and watch them happen in real time. If you missed the run, no worries – you can go back and look at all the output from the run to see exactly what happened. This is immensely helpful in debugging what went wrong (or right) in your stages and tasks as you iterate on your pipeline.
In the end, you’ll have a reliable, repeatable, automated process that watches for changes in your repository and fires off a whole host of tasks that you define without you having to think twice about it – and that’s super powerful!
Next Steps for the Pipeline
We started with Infrastructure as code, and we ended with a Development environment and application that is deployed automatically in our Azure Subscription based off a branch trigger in our GitHub repository via an Azure DevOps Pipeline. That’s powerful stuff, but what are some next steps we could look at to make it even more powerful in the short term?
Testing
Testing is extremely important. When you write tests for your application and codebase, you are literally defining success. When changes are made to your codebase, you can kick off unit tests to verify the integrity of your code changes to make sure that your changes didn’t introduce anything that waivers from your definition of success that is built into those tests. Some types of tests – like unit tests – can kick off and run very rapidly. This is super helpful in failing quickly on a build if something is wrong that is noticed by your tests. The faster you fail a bad build, the less you must wait for the pipeline run, and the faster you can course correct!
Adding More Environments
We built our pipeline for our Development environment to start, but what about long term? We’ll want to look at adding some more environments for Staging and Production and any other tiers to our environment as necessary. We can then expand our pipeline to push out to Development, then to Staging, then to Production – all based off the same trigger and pipeline run!
Approvals
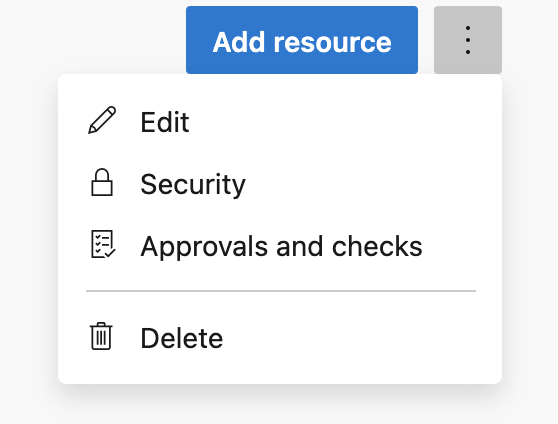
It’s powerful to be able to push your changes out across several environments via one pipeline, but that’s also somewhat dangerous if you don’t add some checks into the pipeline. One of the most common ways to do this is by adding approvals to your Azure DevOps Pipeline Environments.
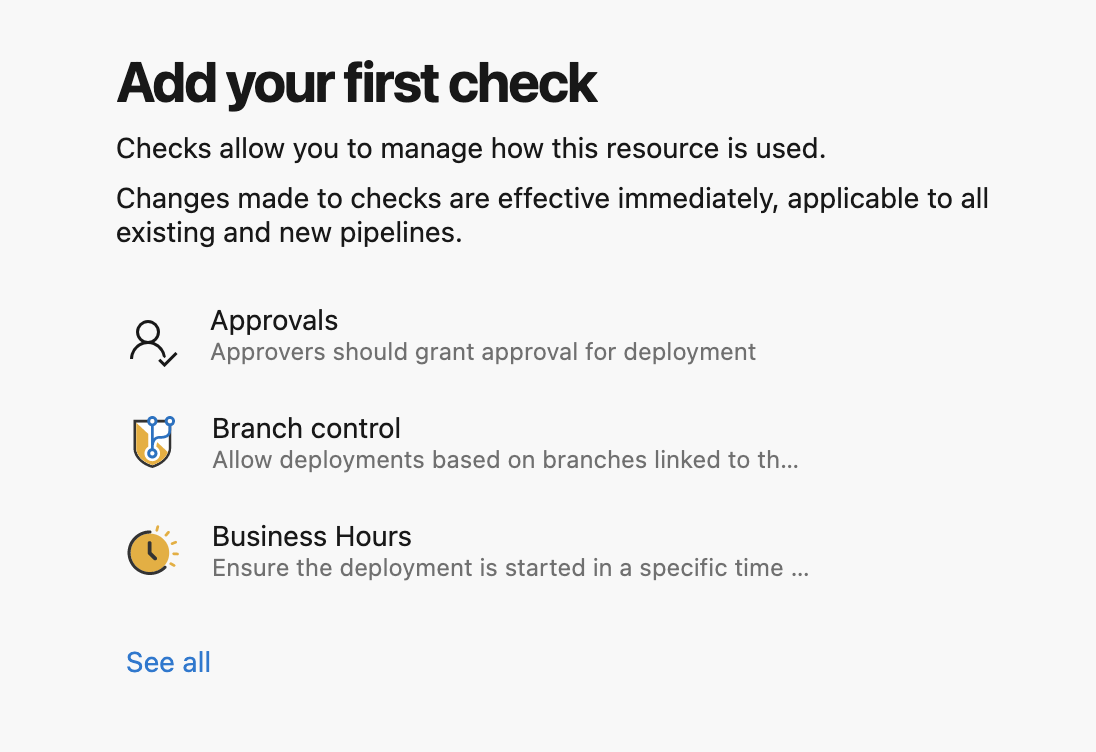
These approvals allow you to halt your pipeline to require checks and approvals before continuing based on environment. This is a powerful feature that’s built right into Azure DevOps Pipelines.
We Did It!
We have a fully working Azure DevOps Pipeline. Now we can look forward to future sprints where we iterate and grow our task list and environments within the pipeline.
0 comments