About a year ago we released the new work item form to Visual Studio Team Services. This was the beginning of our vision for managing work items in a more social and visual way. Over the past year, we focused on realizing this vision through continual improvements and listening to customer feedback.
We added many useful features along the way, such as:
- A discussion control with @mention support to better collaborate on a work item.
- Ability to follow a work item to be notified when it changes.
- A work item extensibility model which lets you extend the form with custom controls, groups and pages.
- A responsive links control to better visualize related work.
- Integrated development control to both track existing code assets and to create new ones.
- An attachment control that supports drag/drop, uploading multiple files and image preview.
- A more visual history control to better review changes.
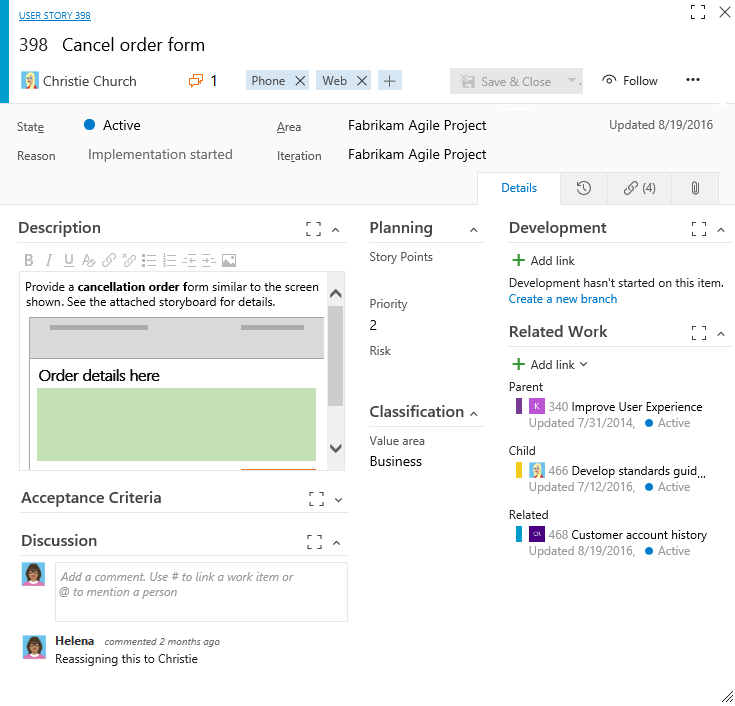
With all these changes, we now have a modern and extensible work item form. And, we’re very excited that you’ll be able to access it with the TFS 2017 release.
Enabling the new form in TFS 2017
After installing TFS 2017, all newly created collections will have the new form enabled by default. However, since we know the new form is a big change we built an opt in experience for existing collections. This lets administrators enable the new work item form in stages and make changes to the layout before deploying it broadly.
Start by enabling the new form in the collection administration page:
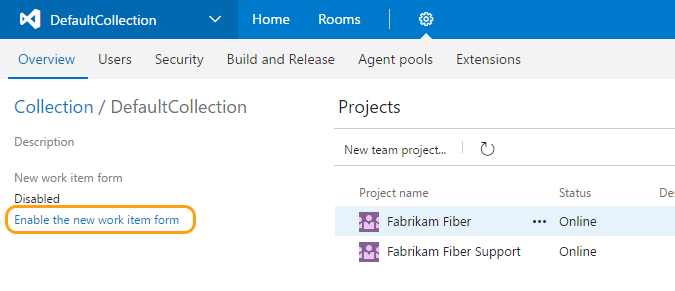
Once enabled you can configure who can see the new form:

We recommend that you start with enabling for Administrators so that you can review and apply changes until you are happy with the layout. When you are ready to share with the rest of your team, enable as opt-in for all users.
When enabled as opt-in, each user will see a link that lets them toggle to the new form and try it out. This gives the opportunity to test out the layout changes and give feedback.
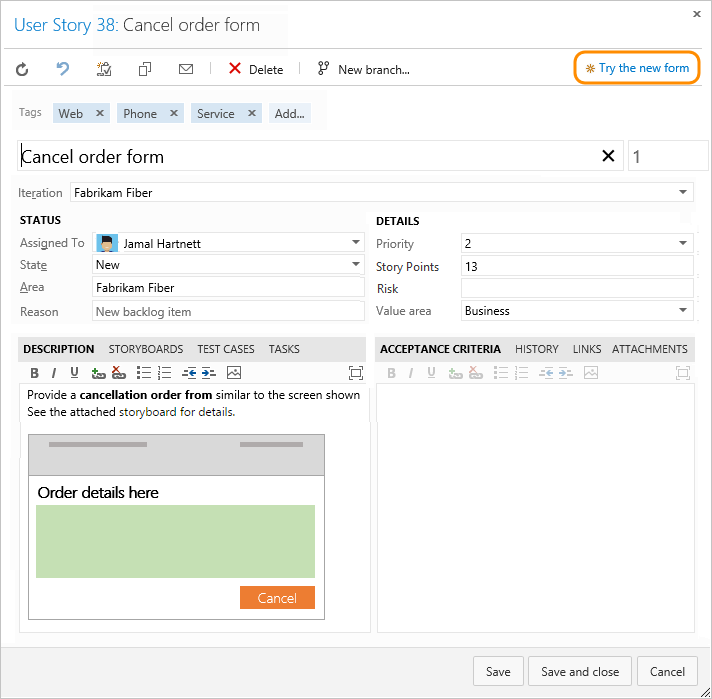
Once you have made any necessary updates to the layout to address feedback, you can migrate everyone to the new form for a consistent management experience.
Anatomy of the new work item form
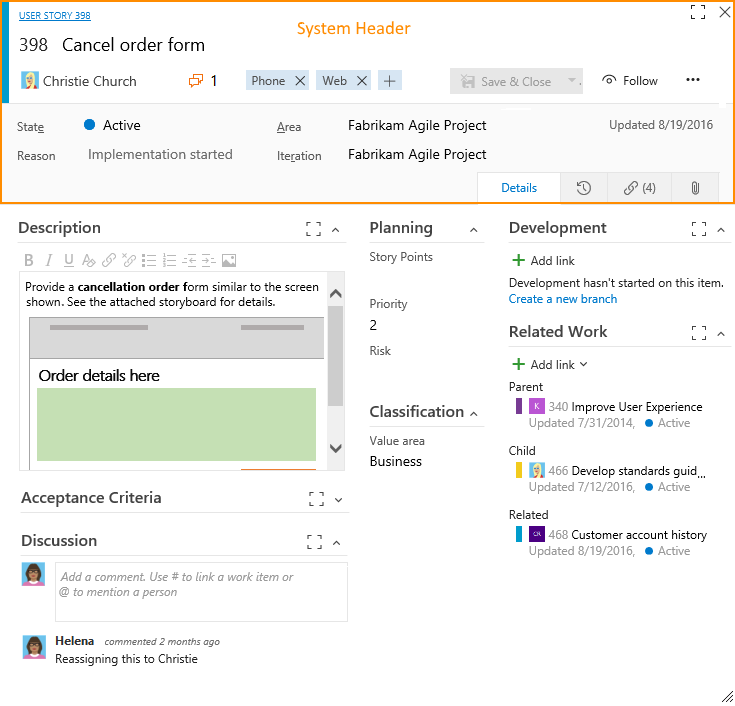
The new form consists of a System Header and Pages.
System header
The system header contains vital parts of the work item – this includes Title, Assigned To, Discussion indicator, Tags, Follow, as well as the History, Links and Attachment pages.

We have become more restrictive with the system header so that we can bring consistency and utility across all work item experiences. Currently, the only customization you can make to the system header is changing the labels. You can still customize the underlying fields through the rules. We are looking for your feedback on these changes, and any additional customization you may need on the system header.
Pages
All the other content of the work item is organized into Pages, represented as tabs on the form.

Each page consists of Sections – the picture below shows a page with 3 sections. The first section is allocated 60% of the page width, the other two sections are allocated 20% each.

Groups
Sections are made up of groups. For example, the second section (colored in blue) has 2 groups – Planning and Classification. You can collapse and expand groups. Also, you can maximize certain groups, such as those containing an HTML or rich-text field control.

Controls
Groups are containers of field or custom controls. For example, the Story Point field control is shown below.

By arranging the contents in sections the new form provides an adaptive experience based on the width of your screen. For wide screens, we give each section its own vertical column. However, for small screens we wrap sections to preserve space and readability.
Customizing the new work item form in TFS 2017
The new work item form has a simplified XML layout which is very easy to modify. The page, section, group and control elements map directly to what you see on the form.
When the new form is enabled you can export your work item type to see the new layout automatically added in the WebLayout node. This new layout is auto-generated by transforming your existing form layout. Below is an example of a simple form xml containing a couple groups and links controls:
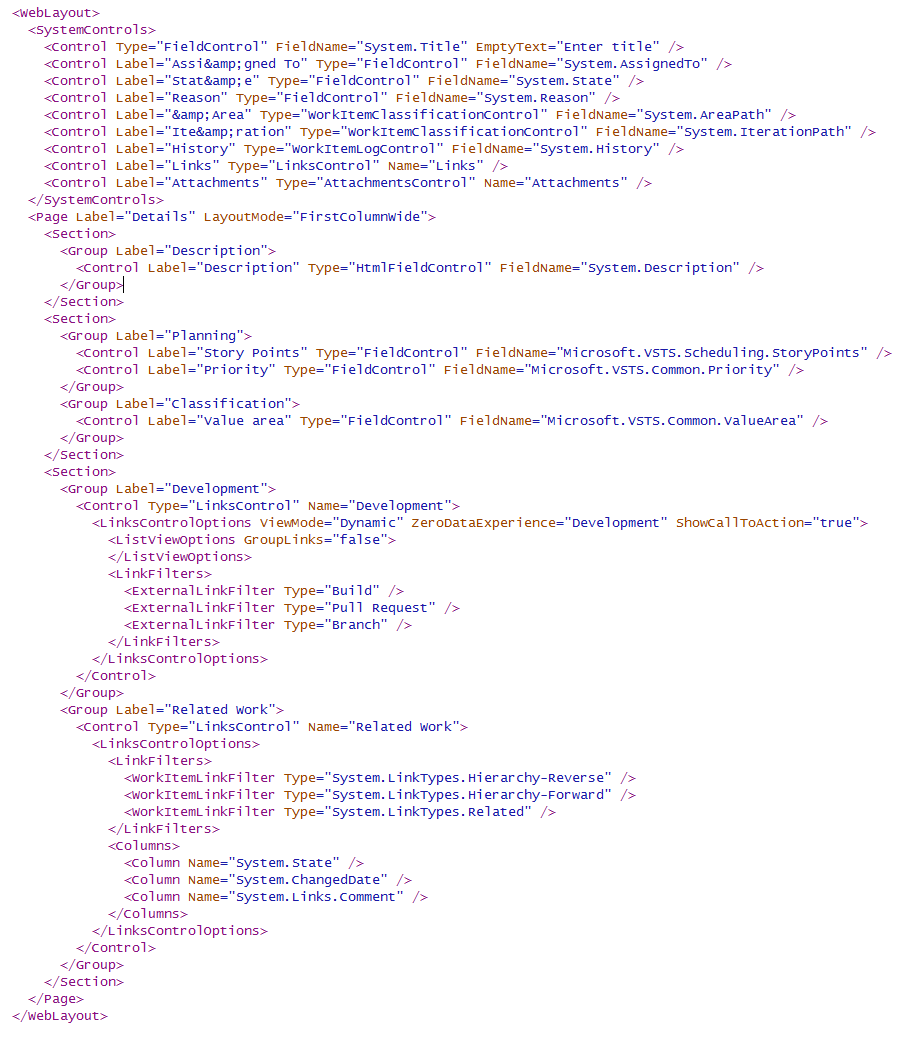
Given that this is auto-generated, not everything may be perfect and to your liking but you can make changes and apply them using the familiar import command (witadmin importwitd).
Extensibility with the new work item form
The new form brings with it a vastly improved extensibility model. You can add your own pages, groups and controls to the form or choose from the marketplace to get ready-made extensions like an updated Multi Value Control. After installing to your collection, you can enable them in your work item type and add them to your form.
The easiest way to do this is to export your work item type after the extension is installed. We inject a comment into the exported layout describing all extensions available targeting the work item form:
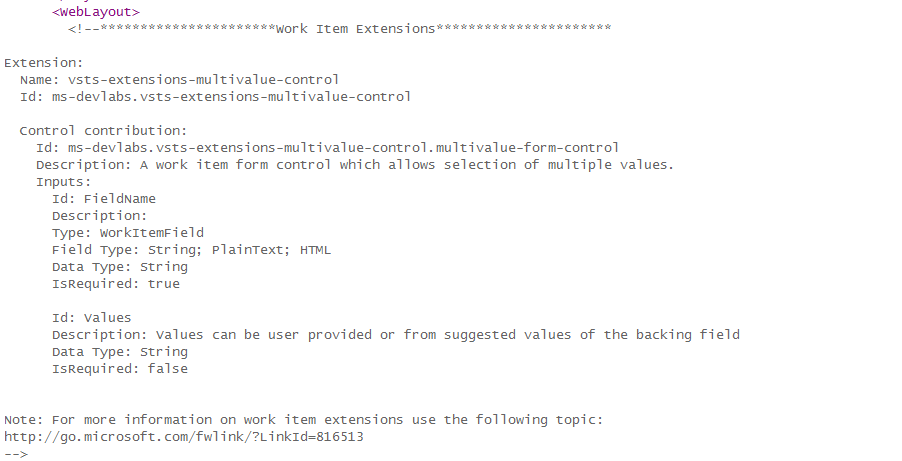
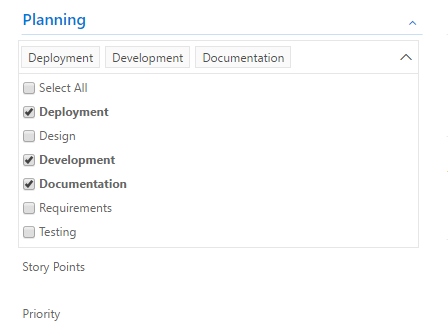
You can use this information to turn on extensions for your work item type and position them. In the example below, we add an Extension node that enables the Multi Value Control extension for the type and then add a ControlContribution node to add the custom control to the planning group. The <Extensions> node must be the first element after the <WebLayout> node.

After importing the work item type the custom control extension will show on the form.
We are planning a future blog post dedicated to work item form extensibility where we’ll go into greater depth about how to build them.
Conclusion
The new form landing in TFS 2017 culminates a lot of work and we are looking forward to receiving your feedback and exploring your ideas for improvements.
Links
- Rolling out the new form
- Customizing the new form layout
- Importing/Exporting a work item type
- Add or modify a custom control for a process and WIT
- Creating Form Extension
- Using Form Extensions
- Reporting Bugs/Issue/Feedback
- Submitting new ideas and enhancements
Thanks,

0 comments