Please note there are now much easier ways of doing this. Please see:
http://blogs.msdn.com/b/visualstudioalm/archive/2015/11/23/scheduling-load-test-execution.aspx
We are gathered this week in a “Hackfest”, defined as a time constrained, joint coding effort that focused on solving a technical challenge based around a specific topic and can involve one or more external partners. Our first challenge was to automate Load Testing, triggered by the hosted build on VSO.
Using post build script was close, but not a work-around for the hosted build
We started by triggering the following post-build script:
“%VS120COMNTOOLS%..IDEmstest.exe” /testcontainer:”%TF_BUILD_SOURCESDIRECTORY%HackathonLoadTestExperimentationWebAndLoadTestProjectHackathonloadtest1.loadtest”
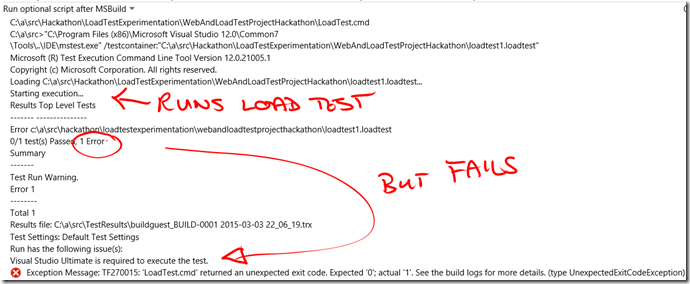
Unfortunately the build agent running with the service account fails to launch the load test as shown:
The work-around, using the post build script and the Rest Api
The statement “there is no way to do that currently” really inspired us to create a work-around, not best practice, with the knowledge that the load testing team is working on a task for build.vNext for running a cloud load test.
Prerequisites:
- Visual Studio Online account.
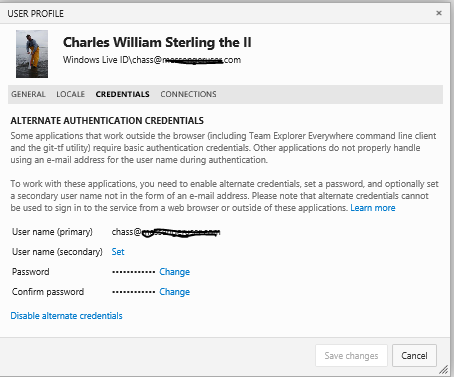
- Enable Alternate credentials in Visual Studio Account
- Visual Studio Ultimate 2013 (you need to be able create a load test)
10 step work-around if you cannot wait for the build.vNext task:
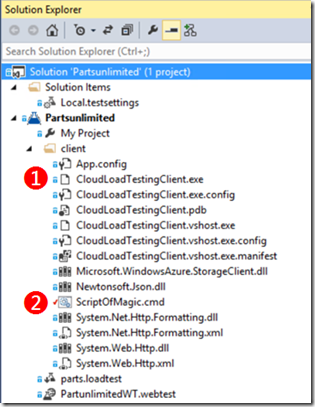
- Download the REST sample https://code.msdn.microsoft.com/windowsdesktop/Cloud-Load-Testing-API-b333e778, which allows you to pass credentials that have permissions to initiate a load test. Package the binaries as part of your solution, ensure you set the property “Build Action” as None and “Copy to Output Directory” as true. Another caveat we discovered of this sample was the fact the /starttestrun **switch took the path and the file name **AS TWO DIFFERENT parameters!!!!!


- Create an empty script file that will launch the rest api sample to launch the load test. Package the script as part of your solution, and again set the “Build Action” and “Copy to Output Directory” as above.
- Create a new build, and define your Working folders.

- Select Hosted Build Controller.

- Select the TfvcTemplate.12.xaml build process template, browse for and select the script you created in step 2, as the Post-build script path.

- Edit the script file and define the sample program to be launched. We use the %TF_BUILD_SOURCESDIRECTORY% variable to point us to the source directory, which correlates to the working folders you configured as part of the build, and specify the /starttestrun argument.
“%TF_BUILD_SOURCESDIRECTORY%PartsunlimitedClientCloudLoadTestingClient.exe” /starttestrun - Append two more **arguments **as mentioned as a caveat in step 1.
- The first defines the folder in which the loadtest configuration file is stored.
“%TF_BUILD_SOURCESDIRECTORY%PartsunlimitedClientCloudLoadTestingClient.exe” /starttestrun “%TF_BUILD_SOURCESDIRECTORY%Partsunlimited” - The second defines the load test config file.
“%TF_BUILD_SOURCESDIRECTORY%PartsunlimitedClientCloudLoadTestingClient.exe” /starttestrun “%TF_BUILD_SOURCESDIRECTORY%Partsunlimited” parts.loadtest
- The first defines the folder in which the loadtest configuration file is stored.
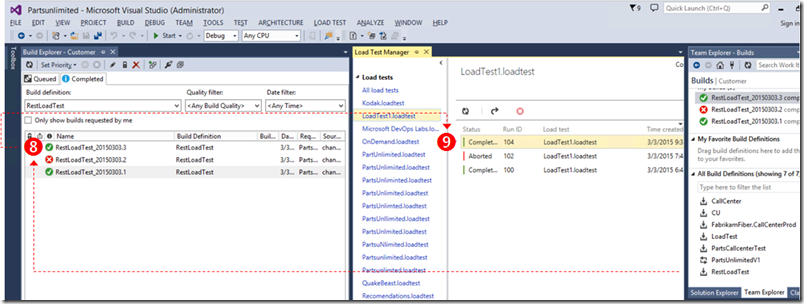
- Save all changes, Queue New Build and monitor the build in the Build Explorer.

- Monitor the load test in the Load Test Explorer.
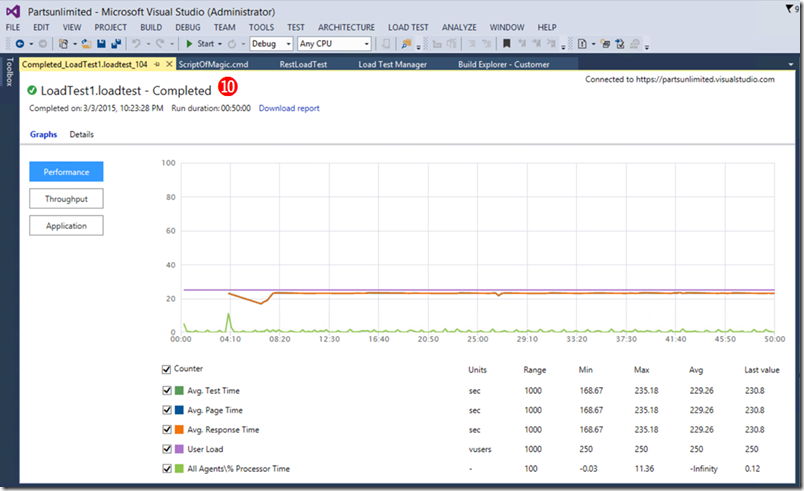
- Open and review the load test when complete.

At this point we all loved Chuck’s response: YEAH we got it working!!!!!!!!!!



0 comments