
Summary
You have downloaded the Release Management for Visual Studio client, and are connected to either your Visual Studio Online account or to an on-premises Release Management Sever.
You have created environments (either imported your Azure environments or created on-premises) to be used in the various stages of your release template.
Now you want to author the deployment sequence for deploying and validating your web application in each stage.
In the current state, you will have to write Powershell scripts on your own to be used in a stage. We’ll be looking to add a number of pre-done actions to help you avoid dealing with powershell scripts.
This article will help you author Powershell scripts and configure the artifacts in release management for performing the tasks on target servers. Specifically, the following questions shall be addressed.
- How to Install the necessary Powershell DSC modules on the target servers using Release Management.
- How to Deploy a website using the latest drop from a TFS build.
- How to Configure access to the deployed website using Release Management.
- How to run automated tests using Release Management and Publish the results to TFS.
The attached zip file contains all the DSC modules as well as the Powershell scripts needed to perform the tasks above. We will use the xWebAdministration DSC module to perform some of the tasks. The zip file contains a version of this module. You can replace that with the latest version of the module from MS Configuration Gallery
Prerequisites
Before we get started, here are some pre-requisites that must be present on your target servers of the environments.
First, you must have WMF 4.0 installed on each of the target servers to get the latest version of Local Configuration Manager to manage desired state.
Second, you must have vstest.console.exe on the target servers in order to run automated tests from a given test binary (we will use vstest runner instead of mstest), and to publish results back to TFS or Visual Studio Online. The easiest way to get this vstest runner is to install Visual Studio Test Agent and Team Explorer SKUs on the target servers.
In a future article, we will cover how to automate installation of test agent, or how to run automated tests that are managed in a test plan.
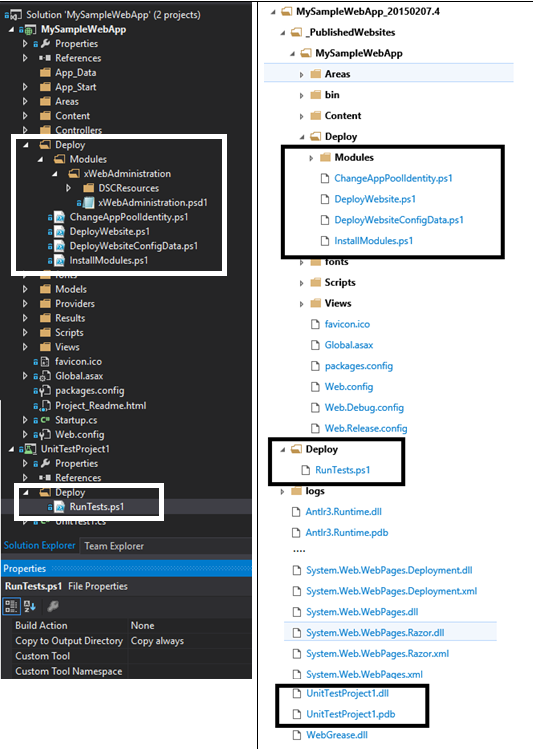
Adding Scripts to your Visual Studio Solution
For release management to orchestrate the deployment, the relevant deployment scripts need to be present in the build drop. Making the following changes to the Visual Studio Solution would help with this.
Assuming you have a web project and a test project, Copy AppDeploy to the web project and testDeploy to the test project. Ensure that the files added are dropped in the build output.
Check-in the changes to your solution.
A sample solution and the associated build drop would look like the following. The changes made are highlighted.
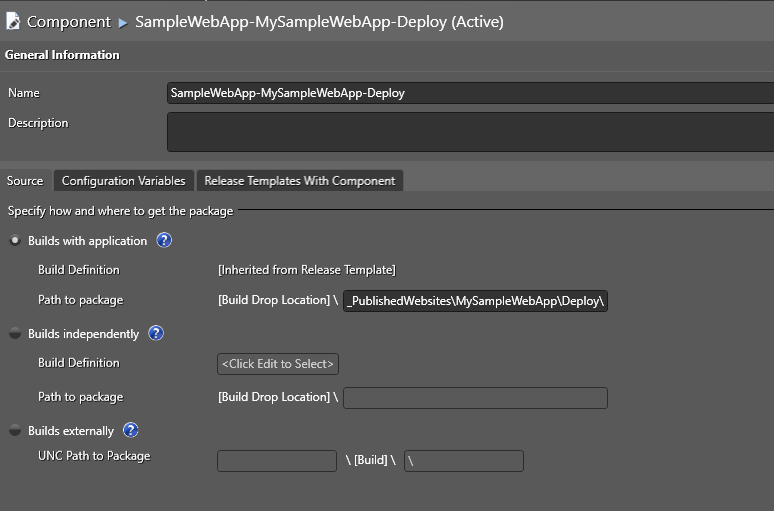
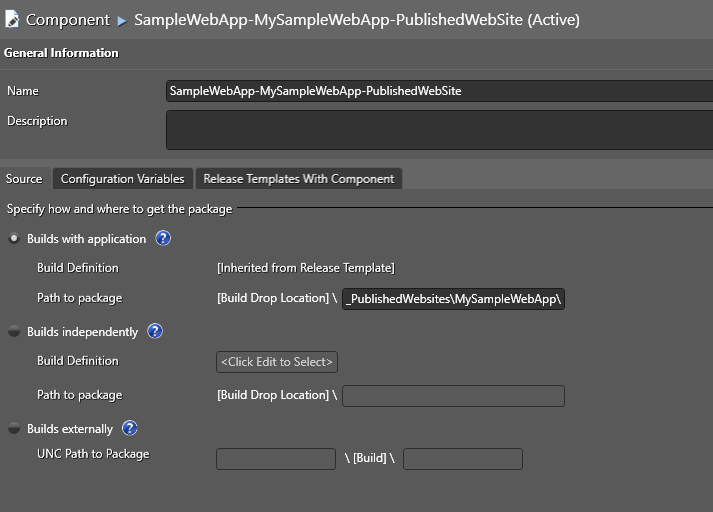
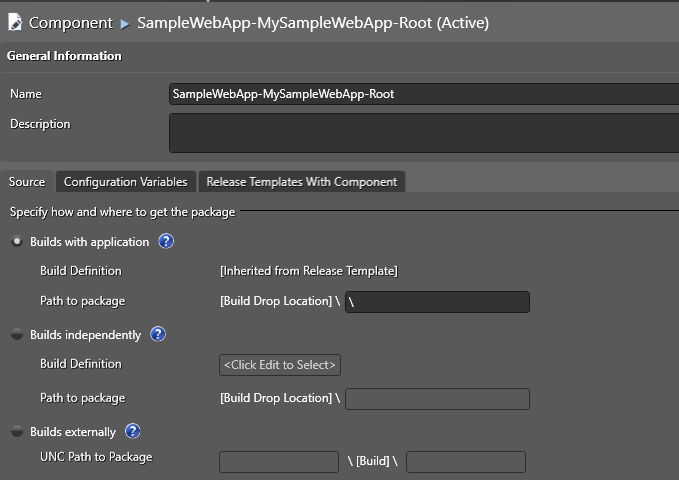
Defining Release Management Components
Using Release Management client, create three components as shown below.
Authoring Deployment Sequence
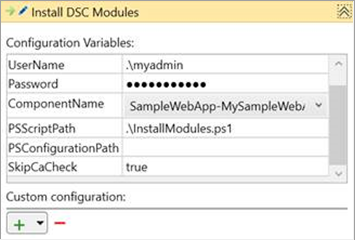
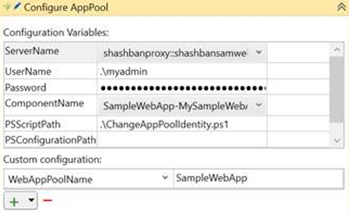
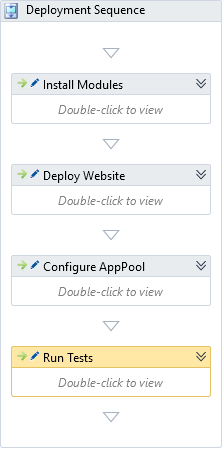
Author the deployment sequence in a stage to have the following sequential actions.
| Action | Renamed As | Properties And Additional Configuration | |
|
Deploy using PS/DSC |
Install DSC Modules |
|
|
|
Deploy using PS/DSC |
Deploy Website |
|

|
|
Deploy using PS/DSC |
Configure App Pool |
|
|
|
Deploy using PS/DSC |
Run Tests |
|

|
The overall deployment sequence would look like –
Triggering Releases
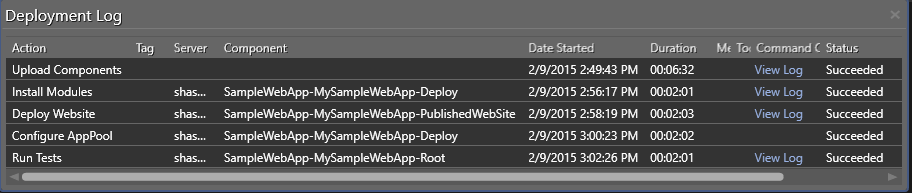
Now, you are ready to trigger a release and verify that all of the actions are run.
Disclaimer
The scripts provided in this blog are provided as-is, and may have to be modified to work with your application and your environment.
0 comments